Hi all!
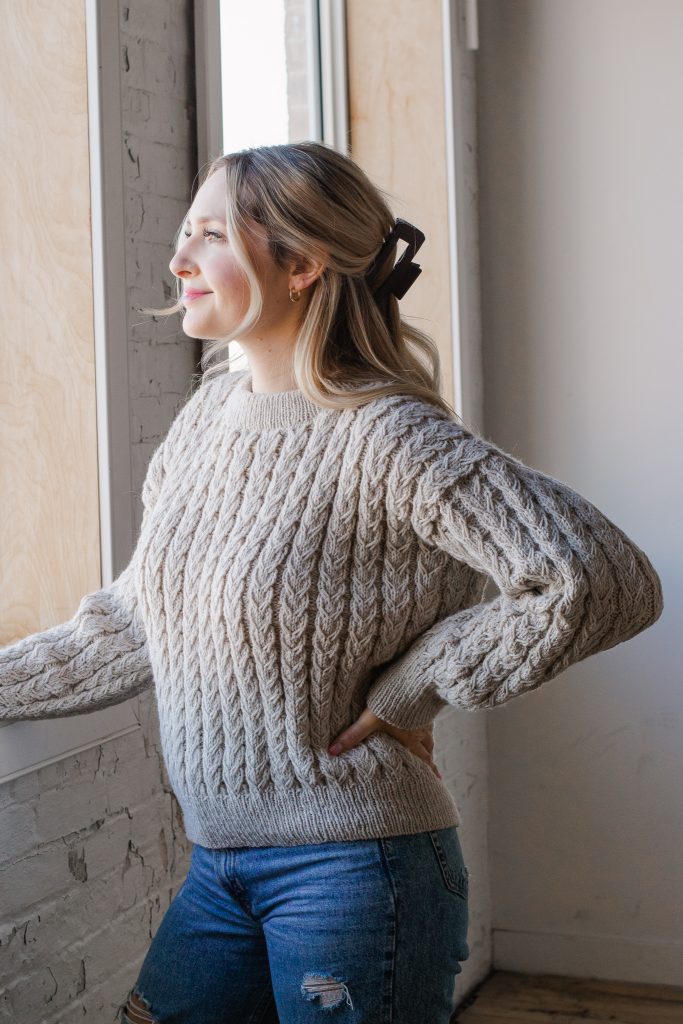
This post includes everything you need to know about the Bridgeland Pullover, a size-inclusive cabled sweater knit with from the top-down with drop shoulders and elegant slip stitch cables that are way easier to knit than they look! The pattern is both written and charted.
Get the Lion Brand Crochet Kit here (in your desired colourway + size)!
Before we begin, here are some quick links for you:
- Find the PDF version on Ravelry, Etsy, and my website.
- Add your finished project to Ravelry here!
- Shop the Bridgeland family of patterns here:
- Shop the recommended yarns, Lion Brand Wool-Ease, here.
- Shop the full Lion Brand crochet kit here (comes with all yarn required + FREE copy of the PDF pattern)!
- For any questions about this pattern, please email knitsnknotswpg@gmail.com and I’ll get back to you asap!
Shop my new book – Modern Crochet Sweaters: 20 Chic Designs for Everyday Wear – here!
If you want to be notified of all new pattern releases (and get exclusive discounts on all new paid patterns), sign up below!
This post contains affiliate links. This means, should you make a purchase, I will receive a small portion of the sale at no extra cost to you. All opinions are my own. View my Privacy + Disclosures Policy here.

About
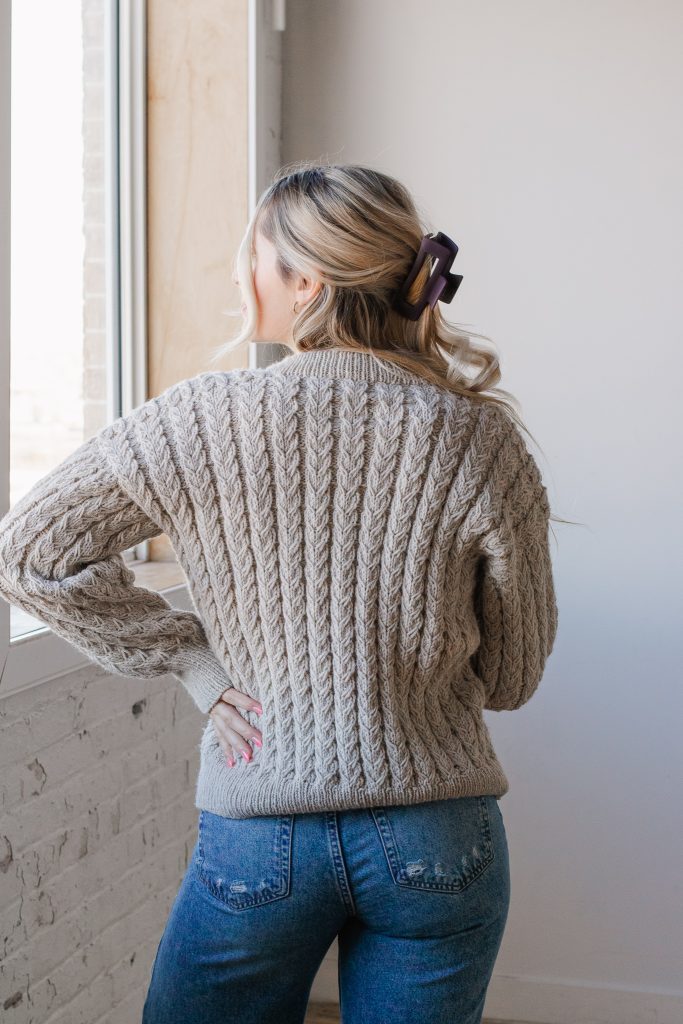
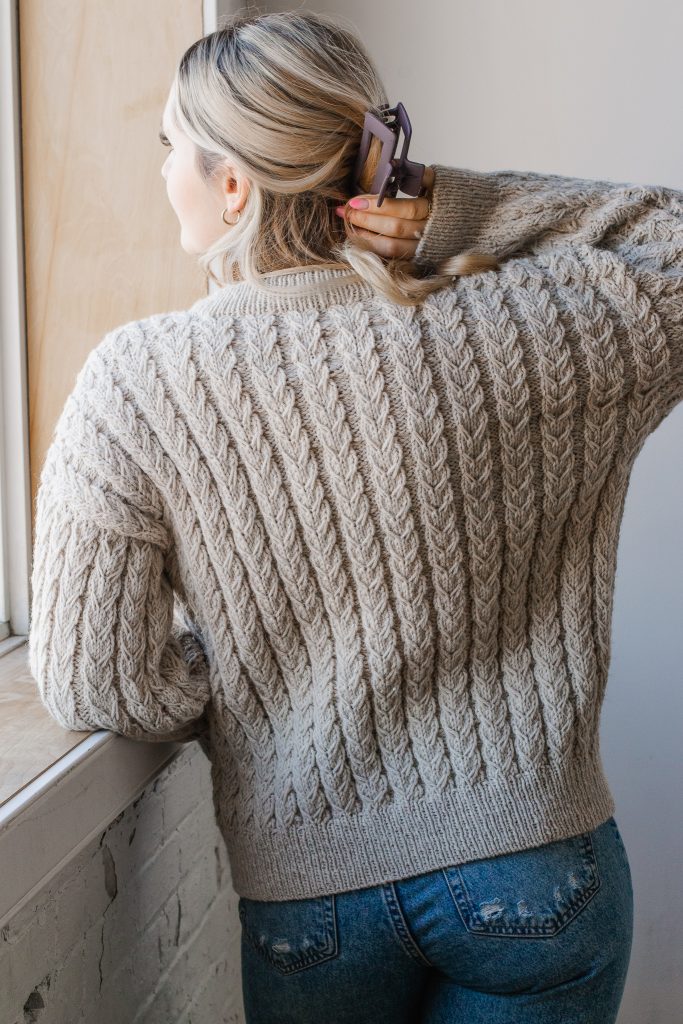
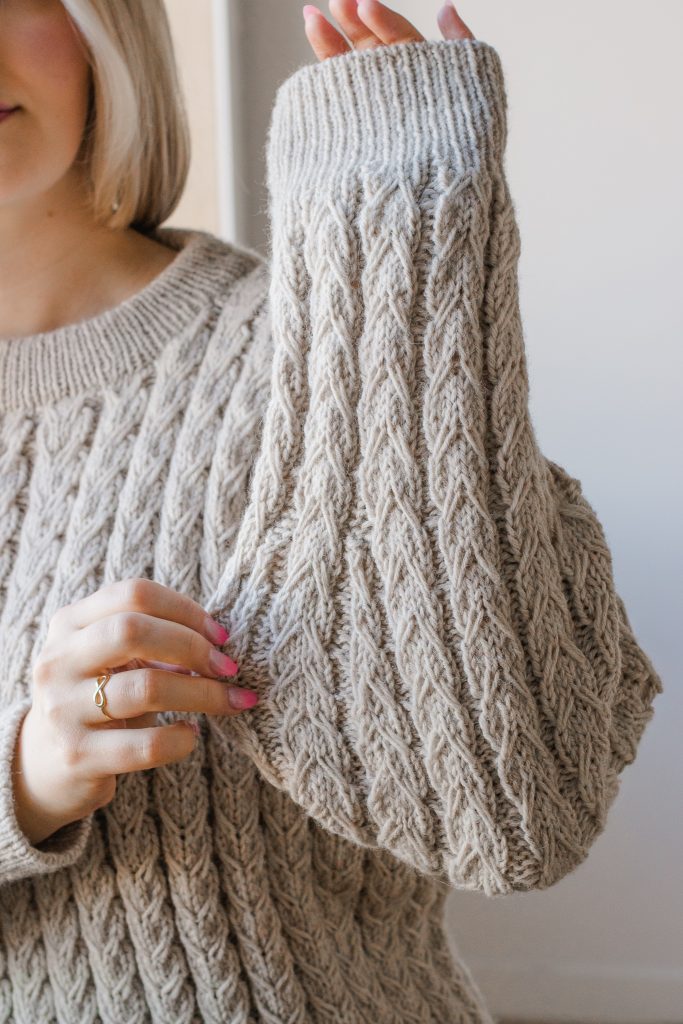
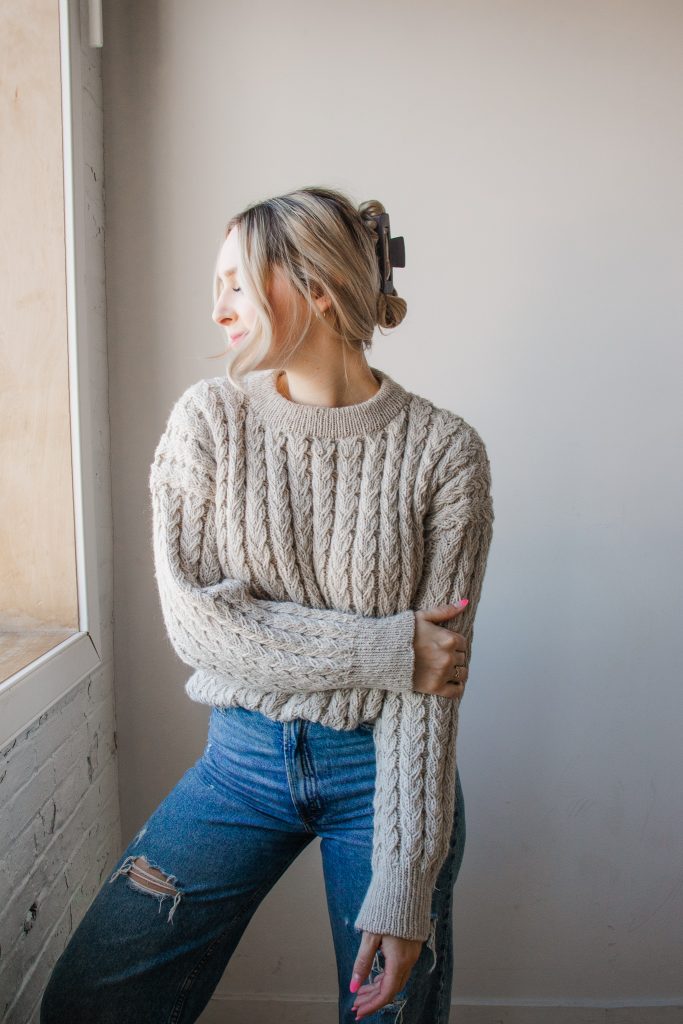
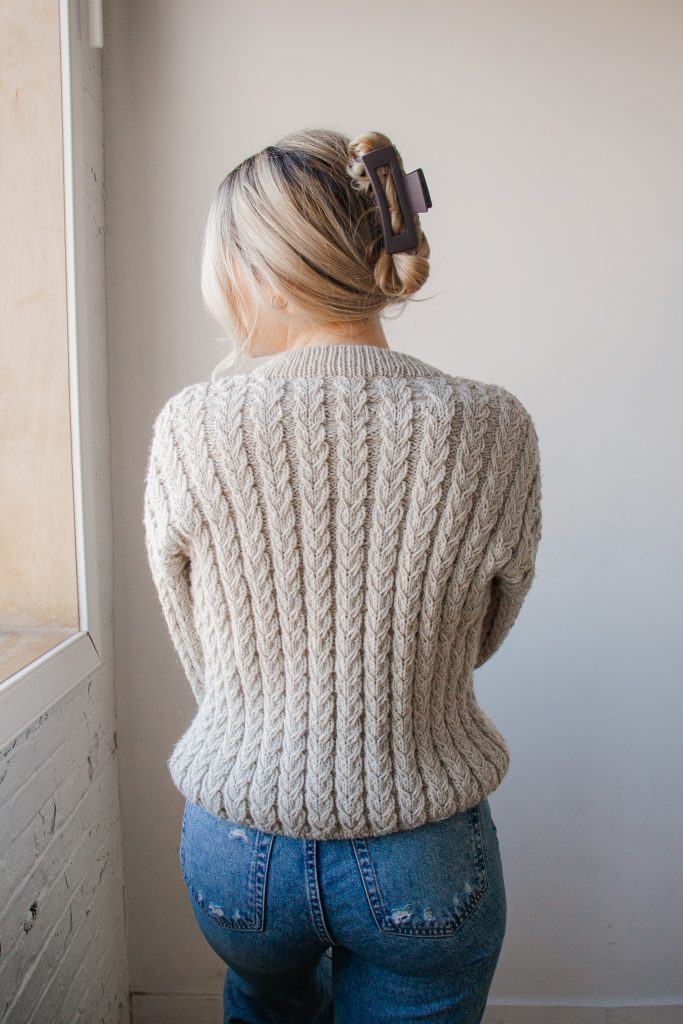
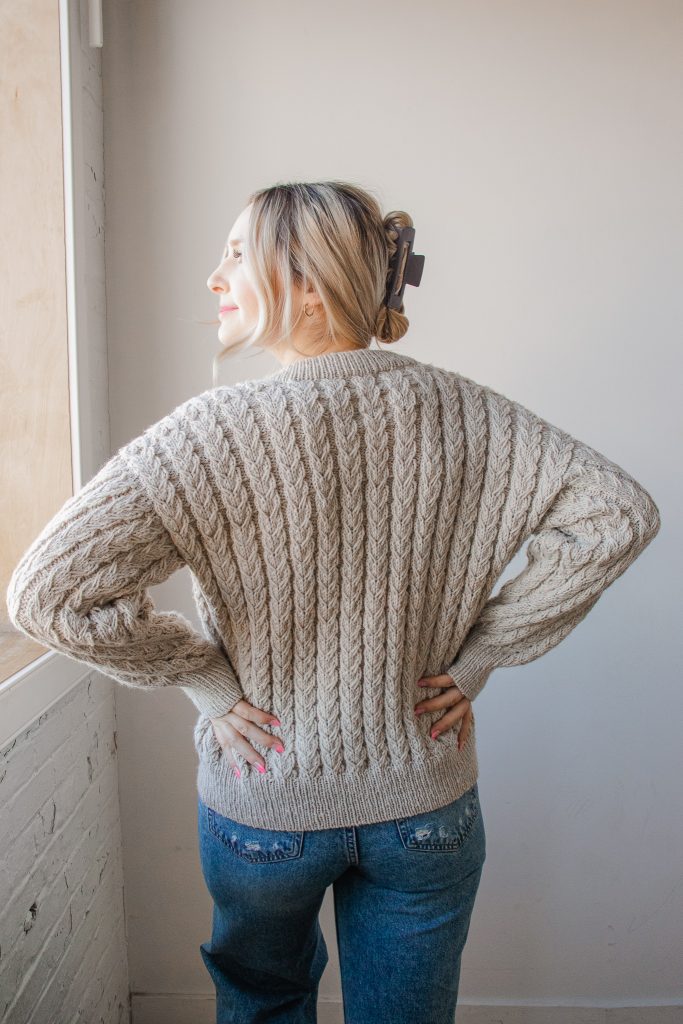
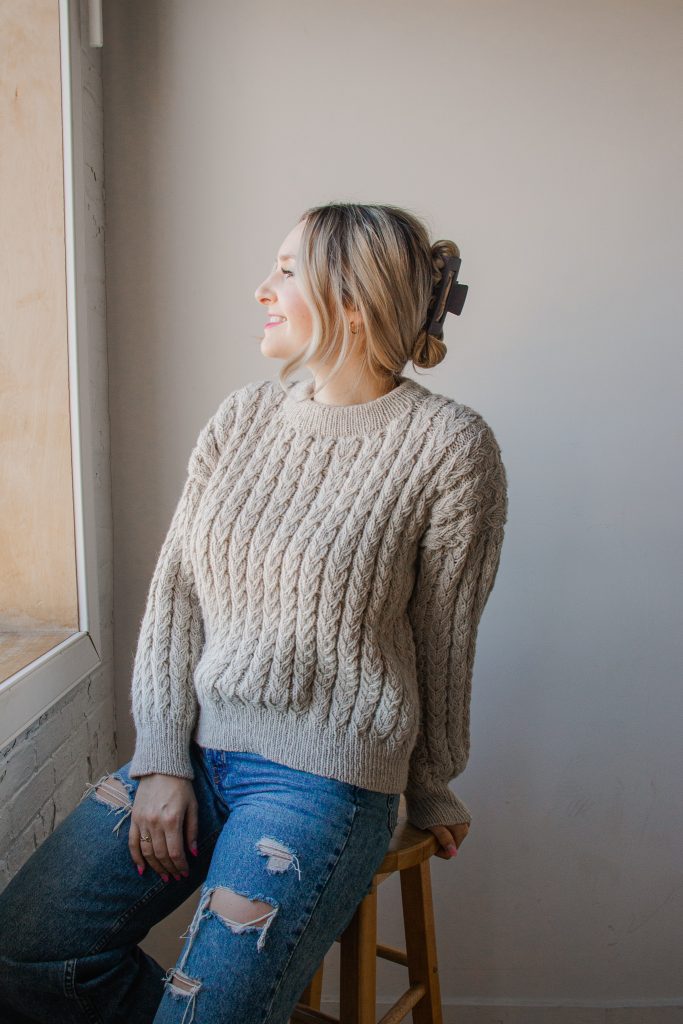
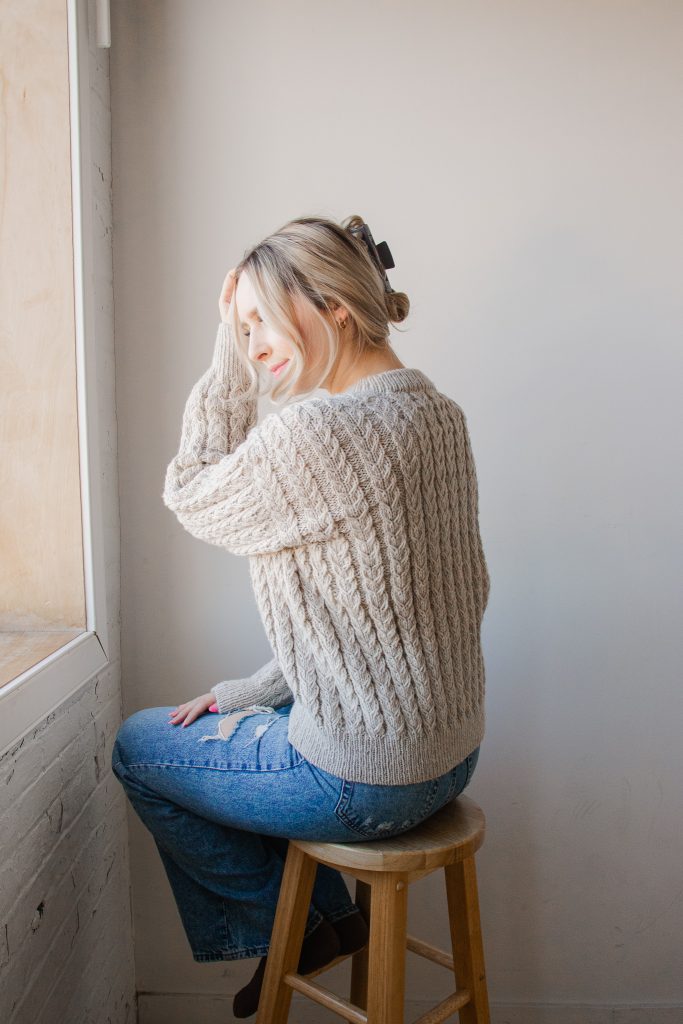
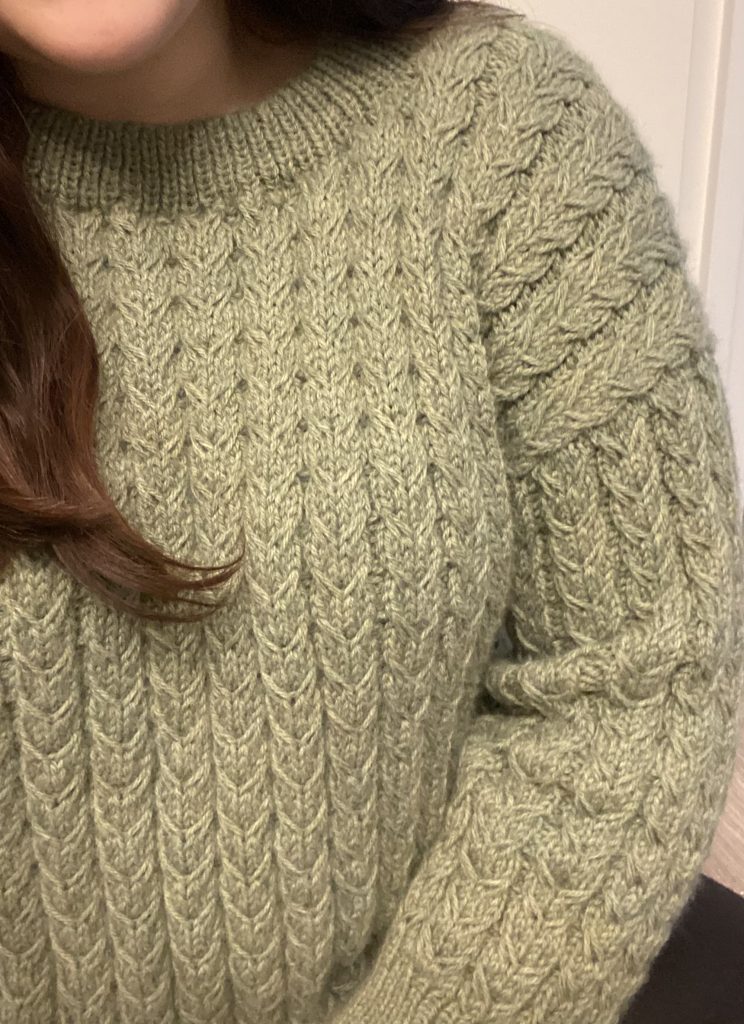
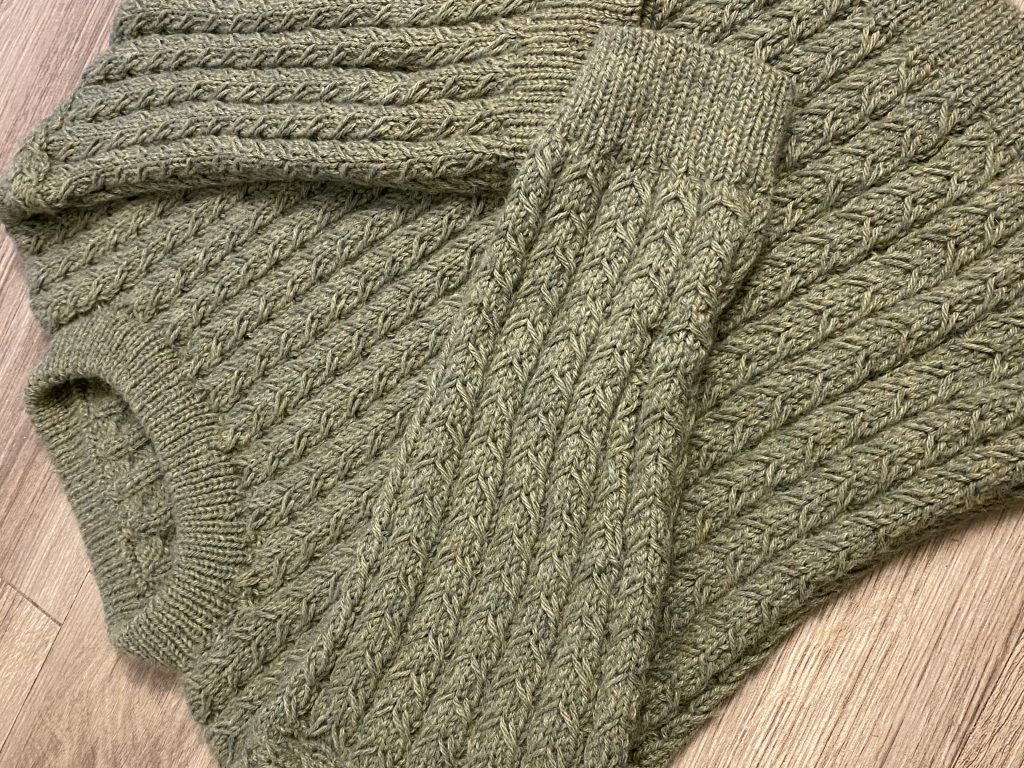
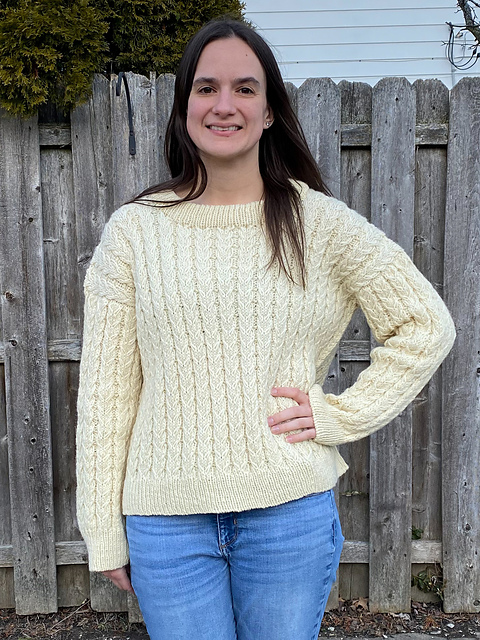
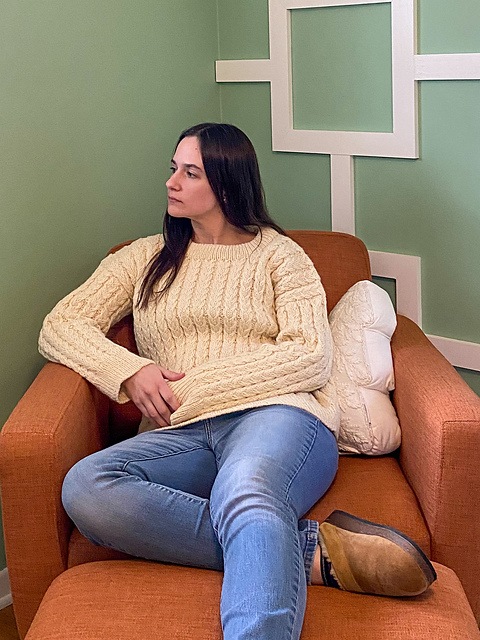
Surround yourself in squishy, slip stitch cables with the Bridgeland Pullover; inspired by the all-over texture of the traditional fisherman sweater. The delicate cabling creates an elegant, textured fabric and can even be knit without a cable needle!
Materials
Yarn: Worsted—Lion Brand Wool-Ease in colorway Linen
- 80% Acrylic, 20% Wool
- 197 yds (180 m) per 3 oz (85 g) skein
- Find this yarn on lionbrand.com or visit yarnsub.com to find comparable substitutes.
Yardage Required: 7 (7, 8, 9, 10) (11, 12, 13, 14) skeins for sizes XS (S, M, L, XL) (2X, 3X, 4X, 5X), or
- 1250 (1350, 1500, 1650, 1825) (2000, 2200, 2400, 2650) yds
- 1143 (1234, 1372, 1508, 1668) (1828, 2011, 2194, 2422) m
If substituting Lion Brand Wool-Ease, choose any similar, category #4, worsted weight yarn that matches gauge. Always swatch before beginning to ensure you are happy with the resulting fabric.
Notions: Tapestry needle, cable needle, 1 fixed stitch marker to mark BOR, 2 removable/locking stitch markers, scrap yarn or stitch wire/holder for placing a large number of stitches on hold.
Main Gauge Needle: Size U.S. 9 (5.5 mm) or size needed to obtain gauge
Ribbing Needle: Size U.S. 6 (4 mm) or size that is 1.5 mm smaller than Main Gauge Needle
with the following suggested cord lengths:
- 12-16” (30-40 cm) cord for parts of the yoke and upper sleeves
- 16-24” (40-61 cm) cord for neckline ribbing
- 32-40” (80-100 cm) cord for yoke and body, or cord long enough to accommodate all body sts for your size
- 8-9” (20-23 cm) circulars, DPNs, or your preferred method of smaller circumference knitting for the lower sleeve and cuffs. You can also use the magic loop method to complete the sleeves using a longer cord length, if preferred.
Gauge
6 x 6″ (15 x 15 cm) = 36 sts (a little over 4 cable repeats) and 36 rows in cable pattern, blocked.
For gauge swatch, cast on 50 sts and work the Bridgeland Cable Repeat (knit flat) shown on page 6. See Chart A on page 11. Block your swatch and let it dry before measuring gauge.
This cable pattern tends to shrink up like ribbing before blocking. You should be able to achieve gauge with a fabric that is lying flat naturally without having to stretch it too much in order to reach the full 6” (15 cm).
It is recommended to also swatch in the round since part of this pattern is knit flat while others are knit in the round. It is common for knitters’ tension to tighten when knitting in the round compared to knitting flat, and you may need to use a different needle size for each.
Pattern Notes
Skill Level: Advanced
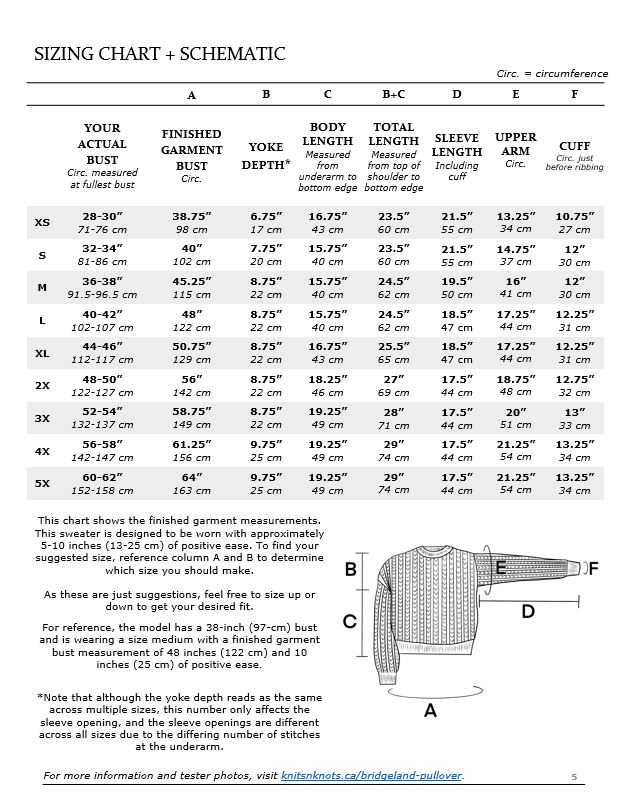
Sizing: This sweater is written in nine sizes as follows: XS (S, M, L, XL) (2X, 3X, 4X, 5X). Make sure to follow the numbers for your size only. The amount of ease decreases as the sizes increase. This is intentional to give all sizes the best fit possible.
Stitch Counts: Stitch counts are listed after each row/rnd in italics. If no stitch count is given, there has been no change since the previous row/rnd.
Stitch Charts: Stitch charts to accompany the written pattern can be found at the end of this document.
Construction: This sweater is worked from the top-down all in one piece. You will begin by casting on stitches for the back panel and knit until you reach your specified yoke depth. Next, you will pick up stitches along the back panel cast-on edge to knit the front right and front left shoulder before joining your two front pieces into one front panel. Stitches are cast on at the underarms and you will join your front and back pieces, then continue working in the round until reaching your desired length. The sleeves are worked next, and the neckband is worked last.
Tip for Counting Rows: When checking your work and counting the number of rows/rnds you have worked, it is easiest to count the number of slipped cable crosses you have completed. Each cable repeat is 6 rows.
Gauge Flat/In the Round: Be sure to read all information in the Gauge section on previous page before beginning.
RS/WS Rows: When working flat, all odd numbered rows are RS rows and all even numbered rows are WS rows.
Helpful Links
Terms + Abbreviations Used
1/1 LC: 1/1 Left Cross – Slip next st onto cable needle and hold at front of work; k1, then k1 from cable needle
1/1 RC: 1/1 Right Cross – Slip next st onto cable needle and hold at back of work; k1, then k1 from cable needle
BOR: beginning of round
C3F: cable 3 forward – Slip 1 st to cable needle and hold in front of work, k2 from left needle, k1 off cable needle
- To do so without a cable needle: Slip the next st off your needle and hold it in front of your work, k2 from your left needle, re-insert your left needle into the dropped st (careful not to twist) and knit this st off.
C3B: cable 3 back – Slip 2 sts to cable needle and hold in back of work, k1 from left needle, k2 off cable needle.
- To do so without a cable needle: Without slipping any sts off your left needle, insert your right needle into the 3rd st on your left needle (as if to knit) and knit this st (this will look like your working yarn is crossing over the first 2 sts), then knit the 1st st on your left needle, then the 2nd, and slip all 3 sts off your left needle.
k: knit
k2tog: knit 2 sts together (right-slanting decrease)
- Insert your right needle into the next 2 sts knitwise, treating them as 1, and knit them together.
mA: marker A
mB: marker B
patt: pattern
p: purl
pm: place marker
rep: repeat
RS: right side
sl1kw: slip 1 stitch knitwise
sl1pw: slip 1 stitch purlwise
smA: slip marker A
smB: slip marker B
SSK: slip, slip, knit (left-slanting single decrease)
Slip 1 st knitwise onto right needle, slip 1 more st knitwise onto right needle (this twists the orientation of 2 sts), then slide them both back to your left needle. Insert right needle through the back loops of both slipped sts (from right to left) and knit them together.
st(s): stitch(es)
WS: wrong side
Sizing Information
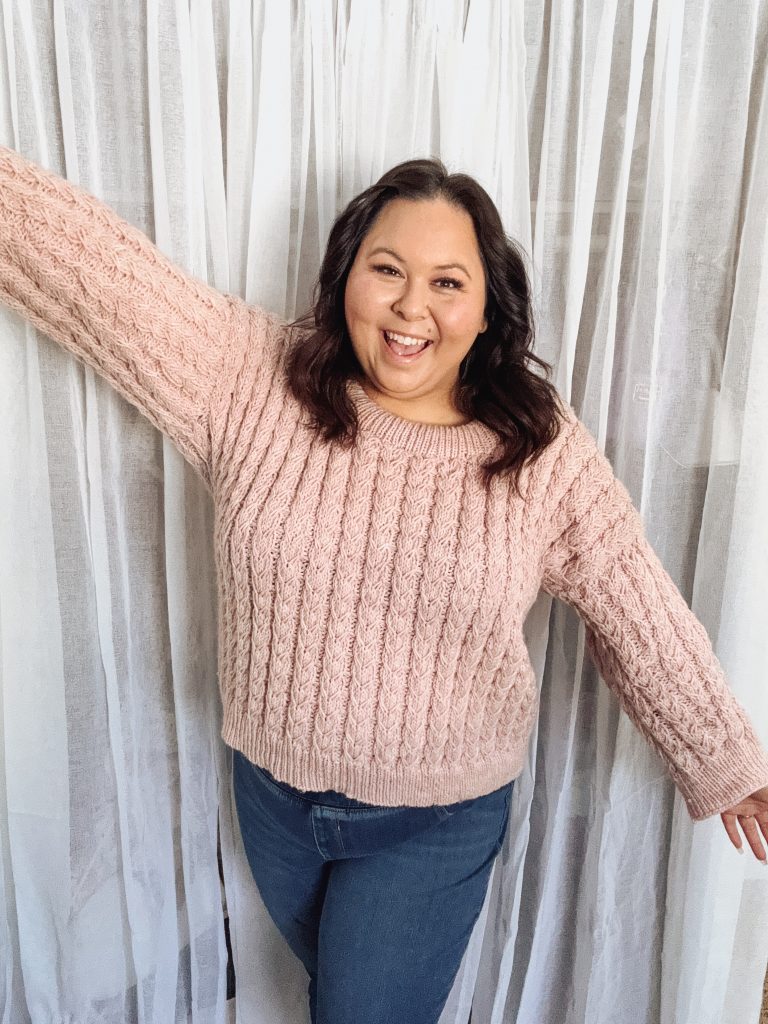
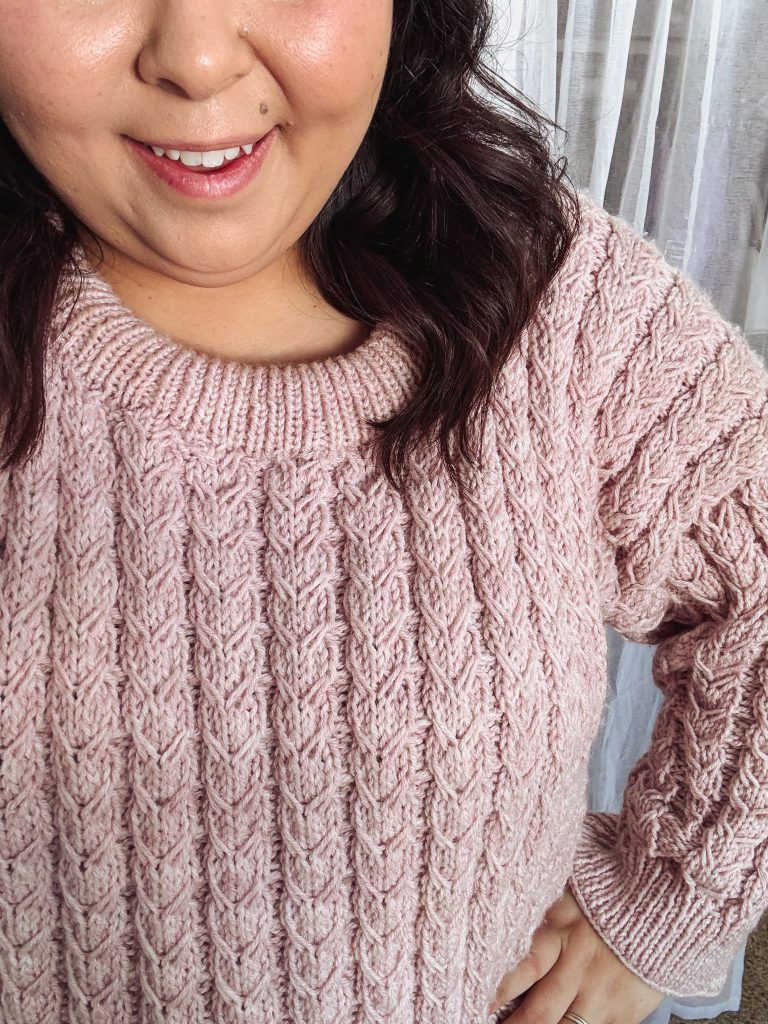
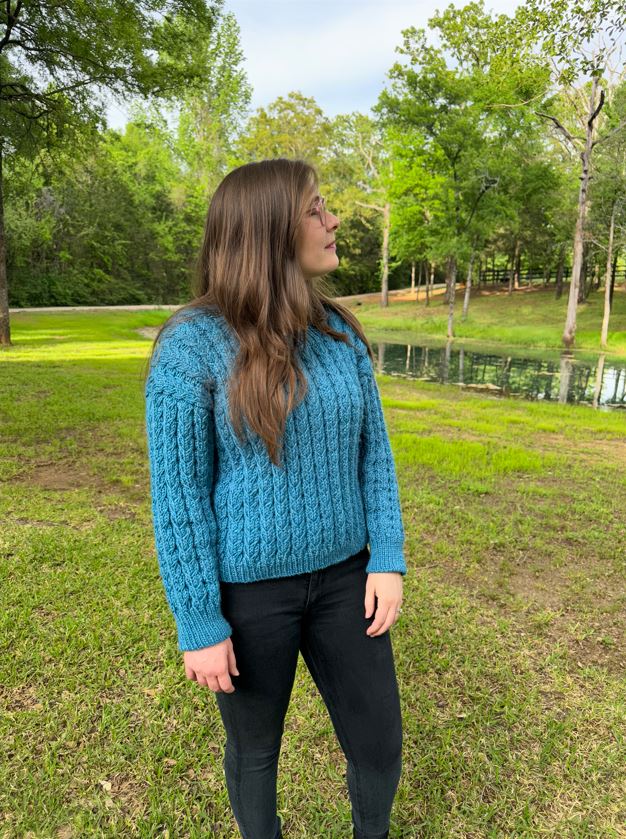
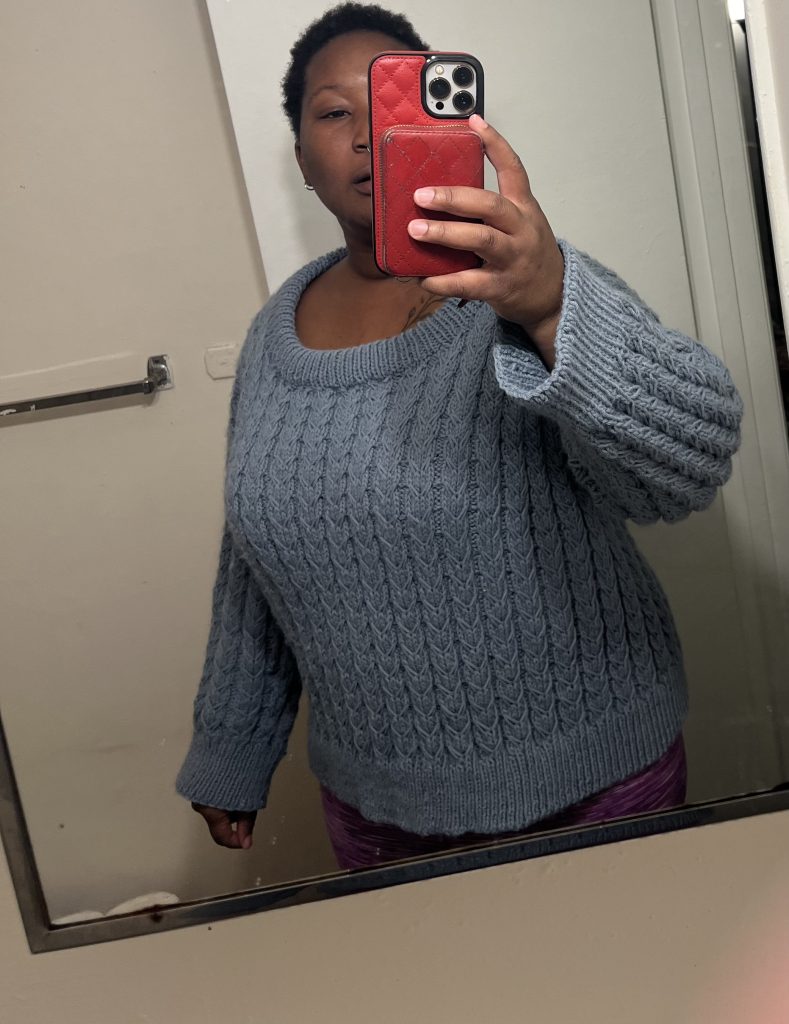
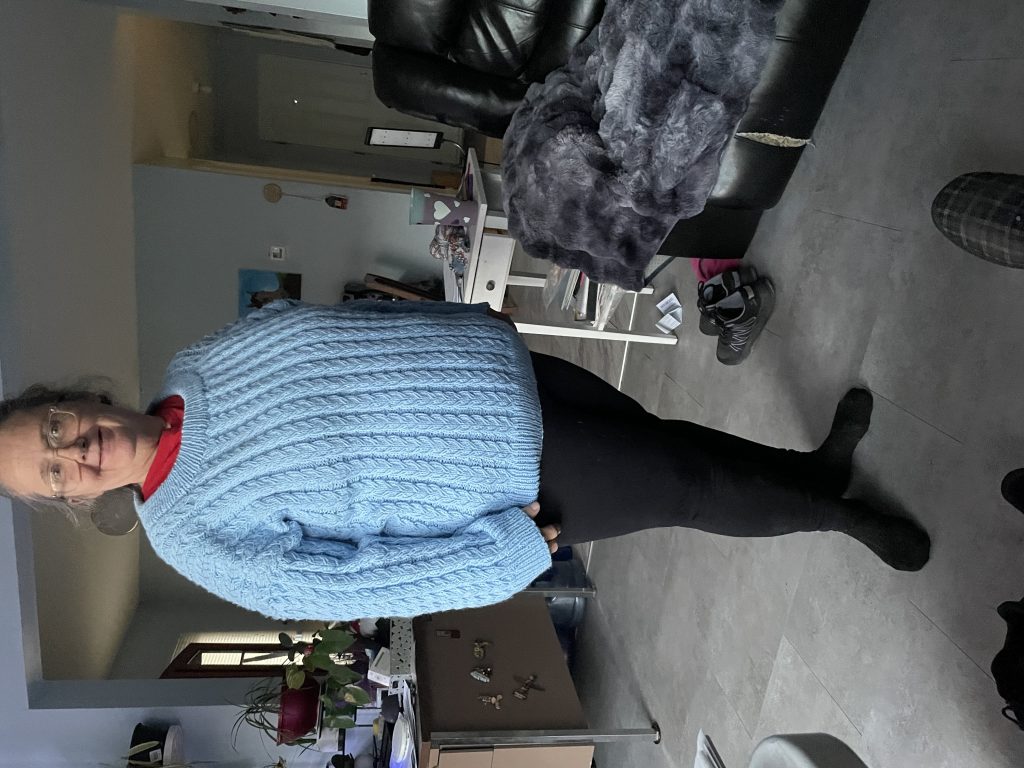
Tester Photos
Each size (except 5X) has been tested to ensure all are satisfied with the pattern and fit! Below you can see photos from the testing process to see how the sweater looks on different bodies with different modifications made using a variety of yarns.
Note that one modification has been made to the final pattern which cinches in the neckline so that it isn’t as wide as shown in the photos below – so please keep that in mind! Thank you so much to all the testers who helped me to make this pattern as clear and easy-to-follow as possible – they all used their own time and resources to knit up a sample sweater for me, and it is much appreciated! xx
Tekiera from @thisbe24 used Lion Brand Pound of Love for her Bridgeland Pullover!
#BridgelandPullover
Thanks so much for reading!
Shop the full Bridgeland Pullover knitting kit here (comes with all yarn required + FREE copy of the PDF pattern)!
Find the pattern in these places:
On Ravelry
On Etsy
On My website
For free in the Bridgeland Pullover knit kit here!
x
Janine
You can find my full print book, Modern Crochet Sweaters: 20 Chic Designs For Everyday Wear on the shelves of all major retailers or see purchasing options here!
For exclusive discounts on all new patterns, join the Knits ‘N Knots newsletter list here!
You May Also Like