Hi all!
This post includes everything you need to know about the Quail Ridge Tee, an elegant knit tee featuring a modest V-neck and honeycomb cables! This is a sister pattern to the Quail Ridge Poncho, which can be found here.
Get the Lion Brand Kit for both Quail Ridge designs here (comes with yarn + free PDF pattern)!
Before we begin, here are some quick links for you:
- Find the PDF version on Ravelry, Etsy, and my website.
- Add your finished project to Ravelry here!
- Shop the recommended yarns, Lion Brand Pima Cotton, here.
- Shop the full Quail Ridge Tee knit kit here (comes with all yarn required + free copy of the PDF pattern)!
- For any questions about this pattern, please email knitsnknotswpg@gmail.com and I’ll get back to you asap!
Shop my new book – Modern Crochet Sweaters: 20 Chic Designs for Everyday Wear – here!
If you want to be notified of all new pattern releases (and get exclusive discounts on all new paid patterns), sign up below!
This post contains affiliate links. This means, should you make a purchase, I will receive a small portion of the sale at no extra cost to you. All opinions are my own. View my Privacy + Disclosures Policy here.

The following information is all included in the PDF of the pattern, but I like to copy all of that information (everything aside from the actual pattern) here in the blog post for those of you looking for more information on the pattern before you commit to purchasing it! This way, you can check the yardage, yarn used, abbreviations and stitches used, etc., so that you can make a more informed decision when choosing to knit this design! I hope the following information is helpful to you. As always, if you have any questions, please don’t hesitate to email me at knitsnknotswpg@gmail.com and I’ll do my best to point you in the right direction!
Happy knitting 🙂
About
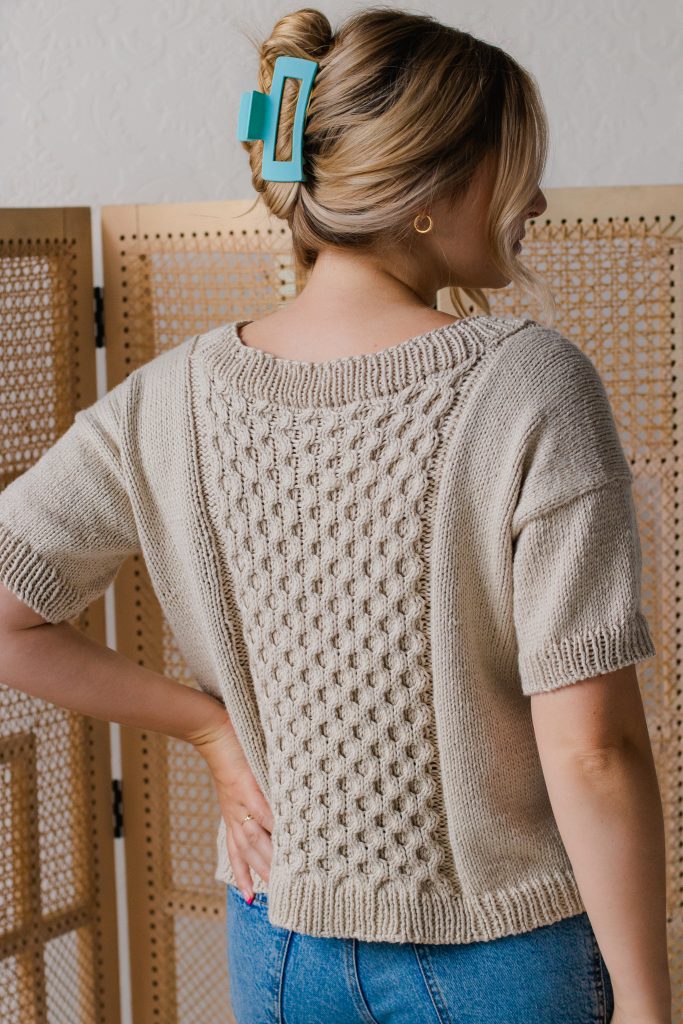
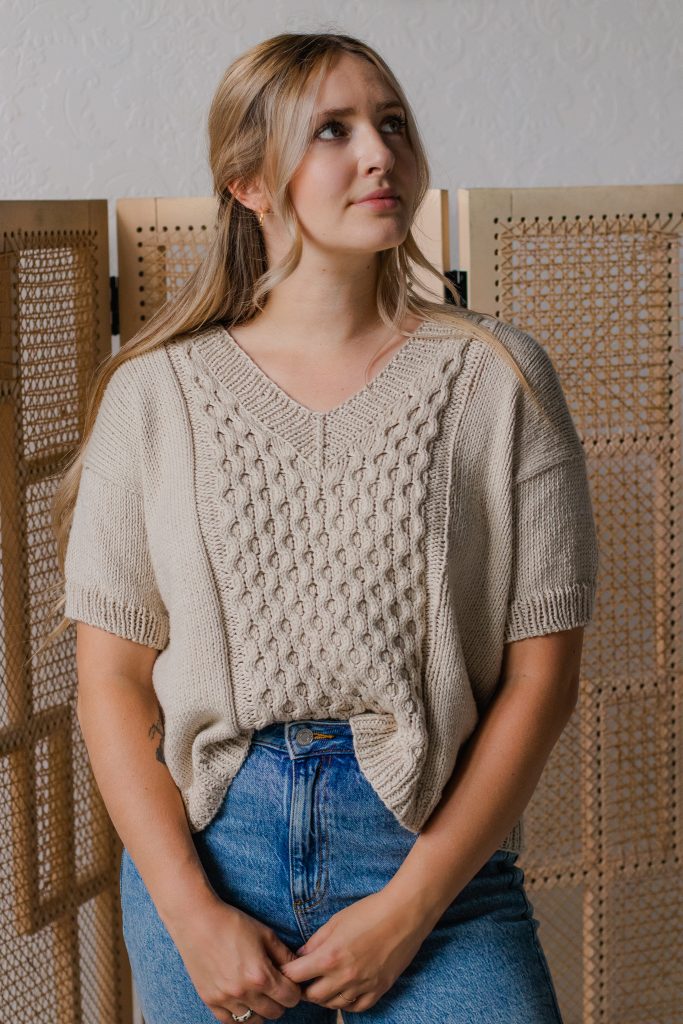
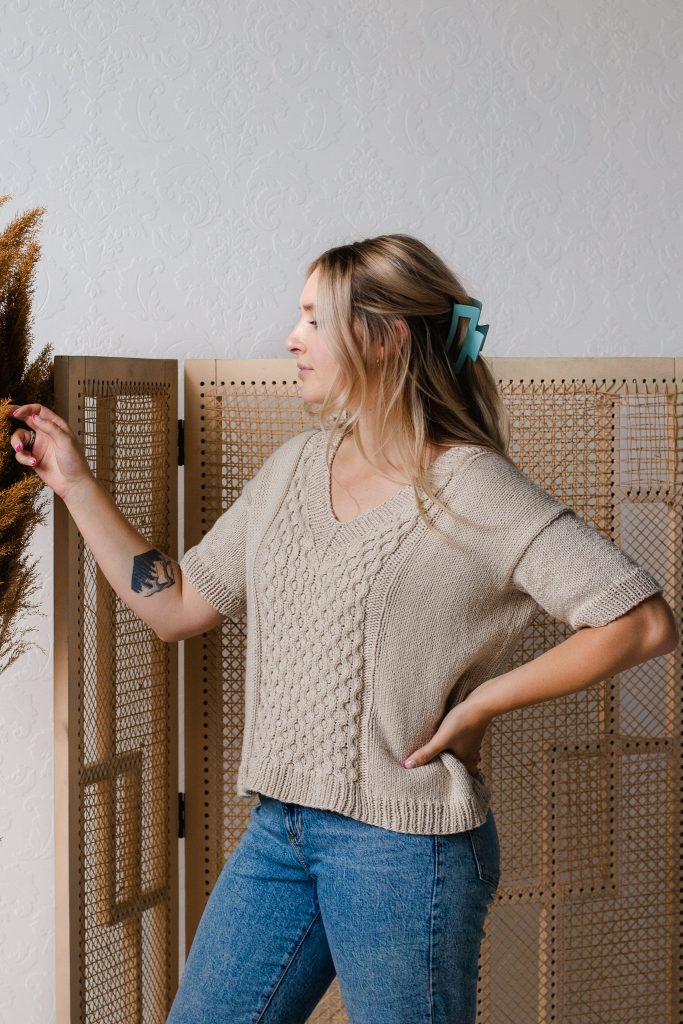
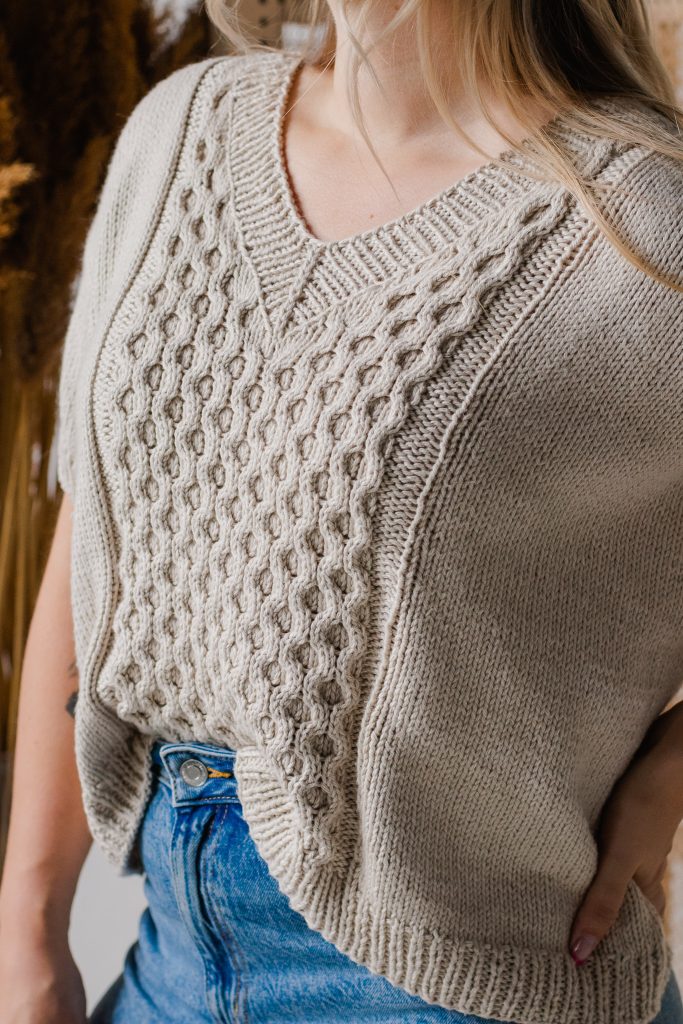
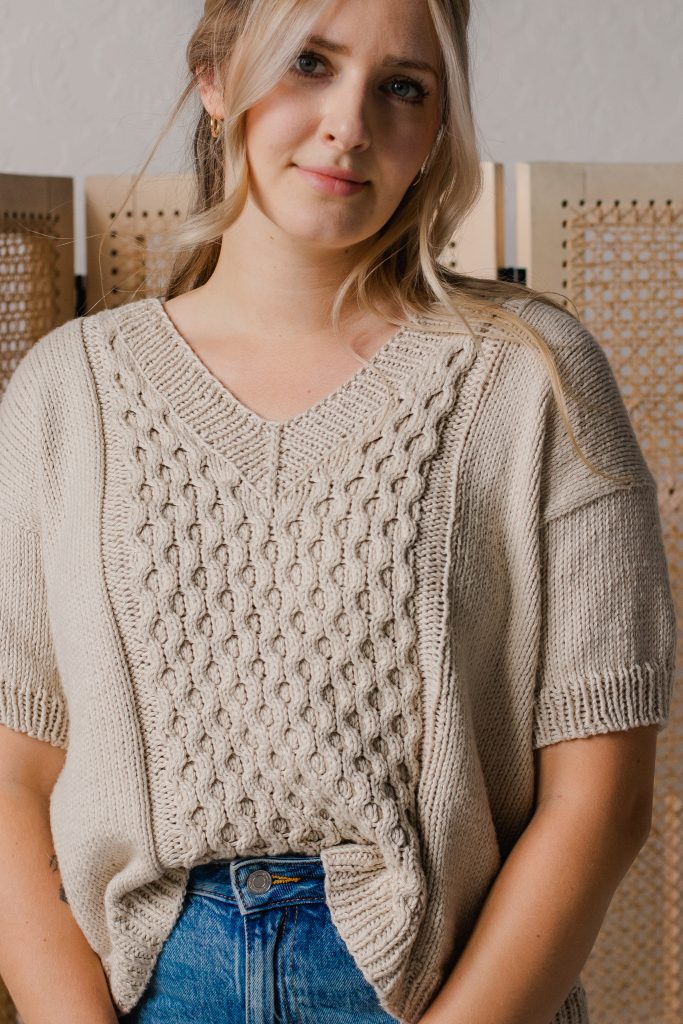
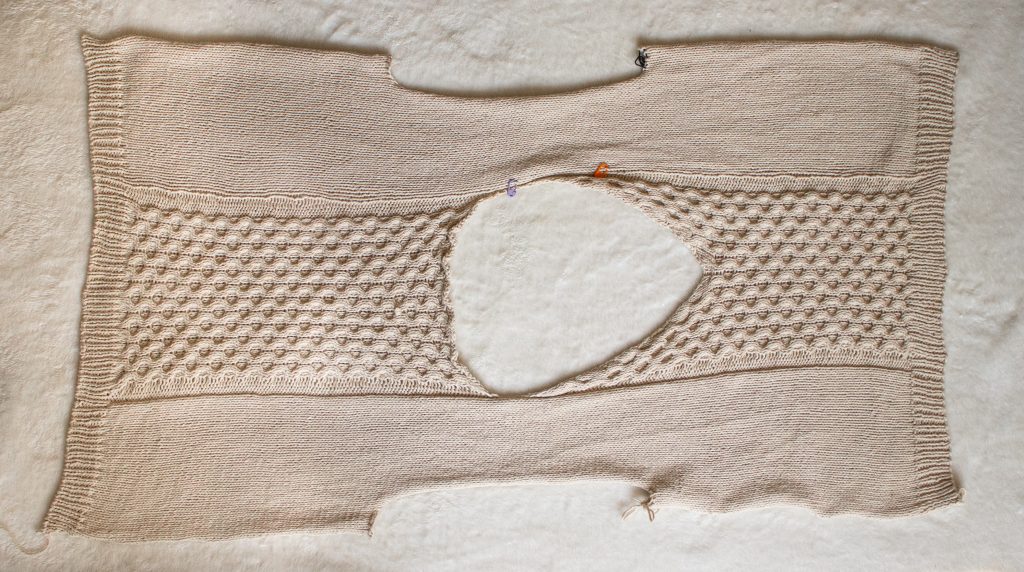
The Quail Ridge Tee is a knit top featuring a clean, mitred V-neck and a center panel of squishy honeycomb cables running lengthwise down the front and back panels. The cables add an elegant touch while the relaxed fit keeps things casual.
After designing the Quail Ridge Poncho, I loved the neckline so much that I knew I had to design another garment using the same neckline details. I even vlogged the whole process on YouTube here!

Materials
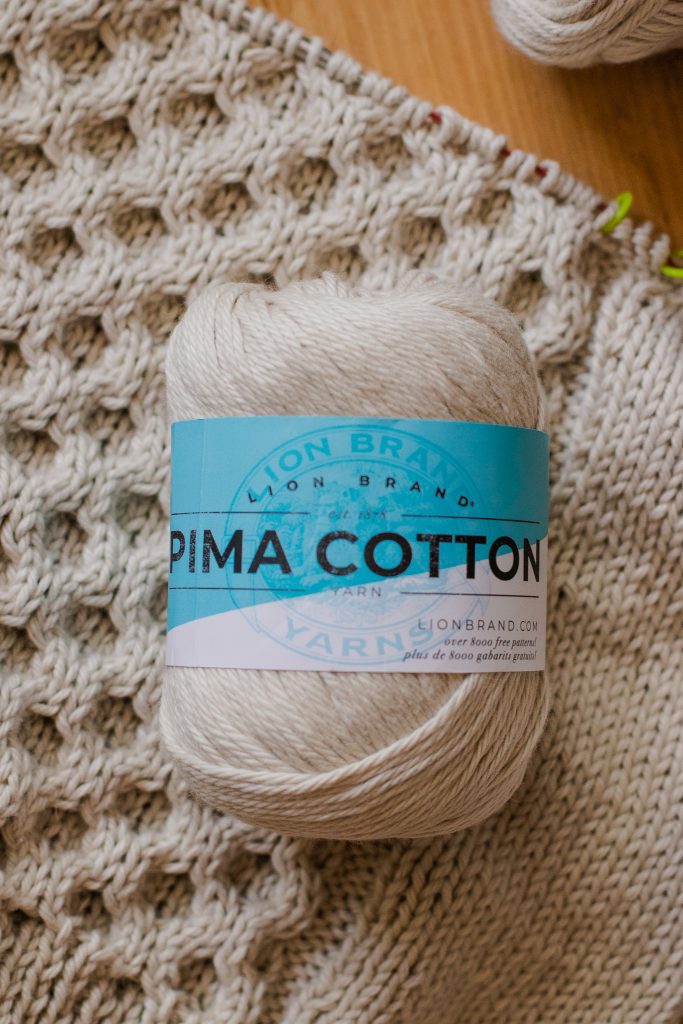
Yarn: Worsted—Lion Brand Pima Cotton in Vintage
- 100% Cotton
- 186 yds (170 m) per 3.5 oz (100 g) skein
- Find this yarn on lionbrand.com or visit yarnsub.com to find comparable substitutes.
Yardage Required: 4 (5, 5, 5, 6) (7, 8, 9, 9) skeins for sizes XS (S, M, L, XL) (2X, 3X, 4X, 5X), or
- 725 (800, 850, 915, 1050) (1200, 1350, 1475, 1650) yds
- 663 (731, 777, 837, 960) (1097, 1234, 1348, 1508) m
If substituting Lion Brand Pima Cotton, choose any similar, category #4, worsted weight yarn that matches gauge. Pima Cotton feels like a light worsted. You may also be able to match gauge with some category #3, DK weight yarns. Always swatch before beginning to ensure you are happy with the resulting fabric.
Notions: Tapestry needle, cable needle, 4 fixed stitch markers, 2 locking stitch markers, scrap yarn or stitch holder for placing stitches on hold
Needles: Size U.S. 8 (5 mm) or size needed to obtain gauge with the following suggested cord lengths:
- 29” (74 cm) cord for most of the project or cord length that will fit all the stitches for your size
- 16-20” (40-50 cm) cord for sleeves

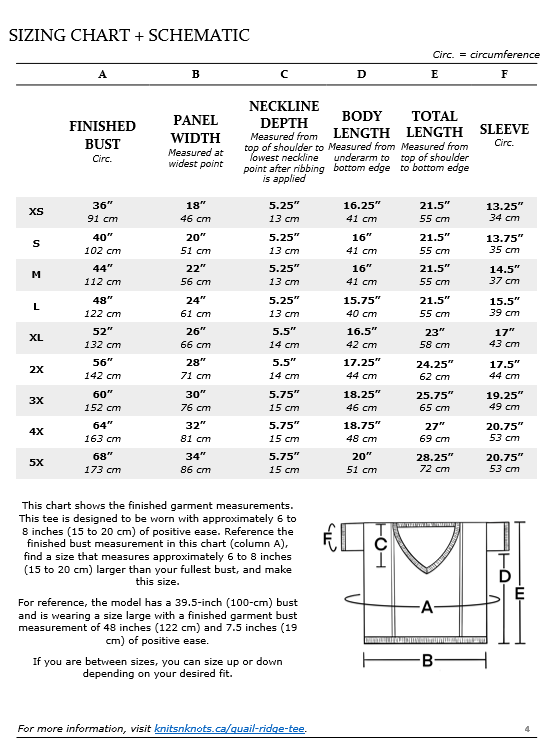
The following chart is straight from the pattern PDF:
Gauge
4 x 4″ (10 x 10 cm) = 17 sts and 26 rows in stockinette
Note: Stitch gauge for cabled section is 22.5 sts per 4” (10 cm). The entire cabled panel measures 8.5” (22 cm) wide, not including the bordering purl columns.
Pattern Notes
Skill Level: Intermediate
Sizing: This top is written in nine sizes as follows: XS (S, M, L, XL) (2X, 3X, 4X, 5X). Make sure to follow the numbers for your size only.
Stitch Counts: Stitch counts are listed after each row/rnd in italics. If no stitch count is given, there has been no change since the previous row/rnd.
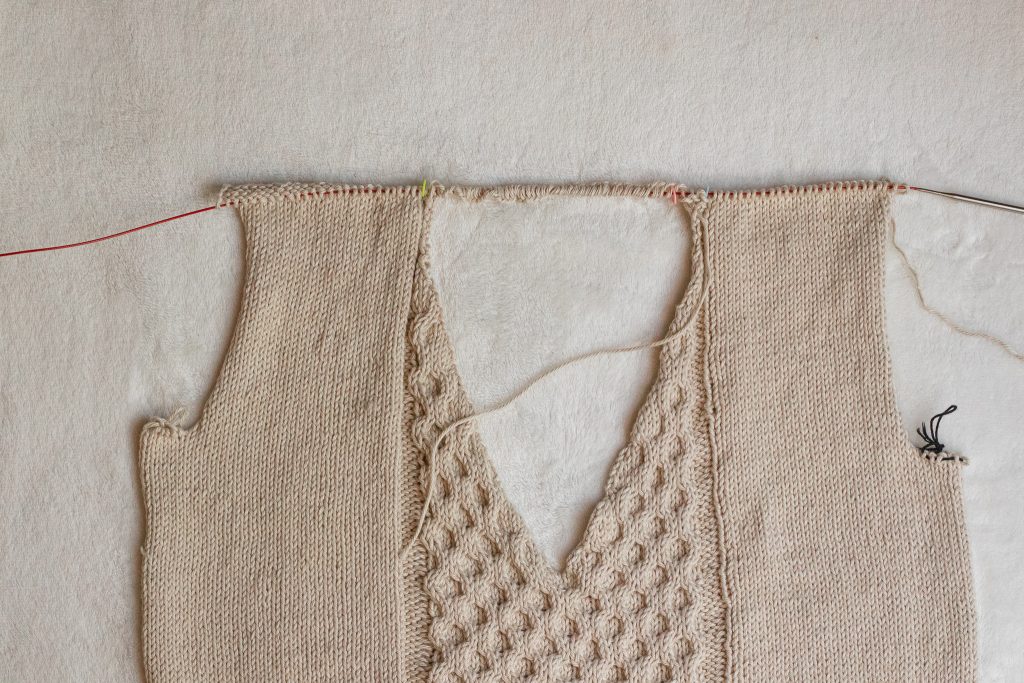
Construction: This top is worked all in one piece. First, you will cast on sts for the bottom front, then you will work an 8-row pattern repeat until reaching the point at which you will split for the V-neck. Next, you will work across the front left side only, decreasing to create the V-neck shaping and placing stitches on hold for the underarm. Then your front left stitches will be placed on hold while you do the same to the front right side. You will rejoin your work by casting on stitches for the back-neck and knit the back panel from the top-down and cast stitches on for the underarm. Next, you will pick up stitches along the neckline to knit the V-neck ribbing. Lastly, the sleeves are knit by picking up stitches around the armholes.
RS/WS Rows: For the entirety of the body of this top, all odd numbered rows are RS rows and all even numbered rows are WS rows.
Helpful Links
Slip Slip Knit (SSK)
Abbreviations
BOR: beginning of round
C4B: cable 4 back – place next 2 sts on cable needle and hold to back of work, knit 2 sts off left needle, then knit 2 sts off cable needle
C4F: cable 4 front – place next 2 sts on cable needle and hold to front of work, knit 2 sts off left needle, then knit 2 sts off cable needle
K: knit
K2tog: knit 2 stitches together (right-slanting decrease)
- Insert your right needle into the next 2 sts knitwise, treating them as 1, and knitting them together
P: purl
P2tog: purl 2 stitches together
patt: pattern
PM: place marker
rem: remaining
rep: repeat
rnd: round
RS: right side
S2KP: slip slip knit pass – slip 2 knitwise together, knit 1, pass slipped stitches over
sm: slip marker
SSK: slip slip knit (left-slanting single decrease)
- Slip 1 st knitwise onto right needle, slip 1 more st knitwise onto right needle (this twists the orientation of two stitches), then slide them both back to your left needle. Insert right needle through the back loops of both slipped sts (from right to left) and knit them together
st(s): stitch(es)
WS: wrong side (the purl side of the stockinette sections)
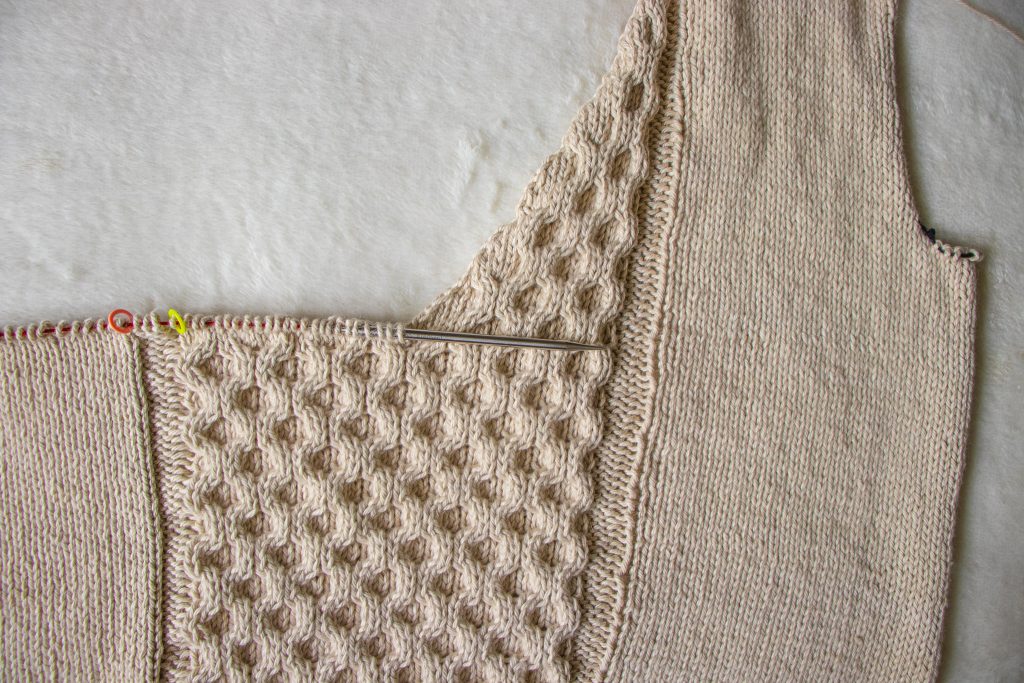
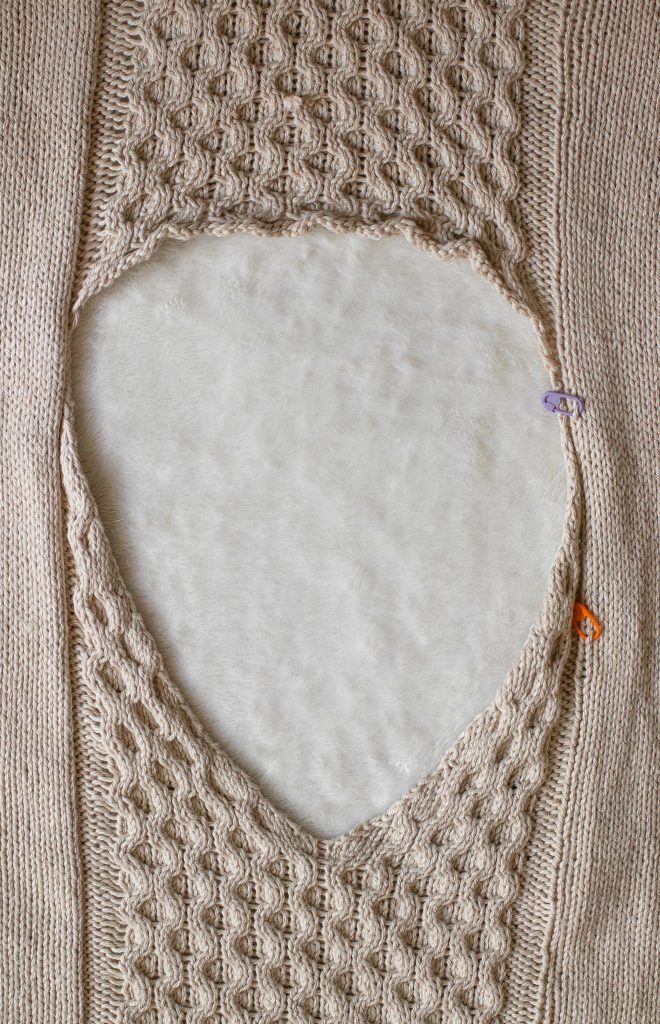
The pattern includes some helpful tutorial photos so that you can be sure you’re on the right track! Here are some of them:
#QuailRidgeTee
Thanks so much for reading!
Shop the full Quail Ridge Tee knit kit here (comes with all yarn required + free copy of the PDF pattern)!
Find the pattern in these places:
On Ravelry
On Etsy
On My website
For free in the Lion Brand kit!
x
Janine
You can find my full print book, Modern Crochet Sweaters: 20 Chic Designs For Everyday Wear on the shelves of all major retailers or see purchasing options here!
For exclusive discounts on all new patterns, join the Knits ‘N Knots newsletter list here!
You May Also Like