
Hi friends!
This post contains affiliate links. This means, should you make a purchase, I will receive a small portion of the sale, at no extra cost to you. All opinions are my own. View my Privacy + Disclosures Policy here.
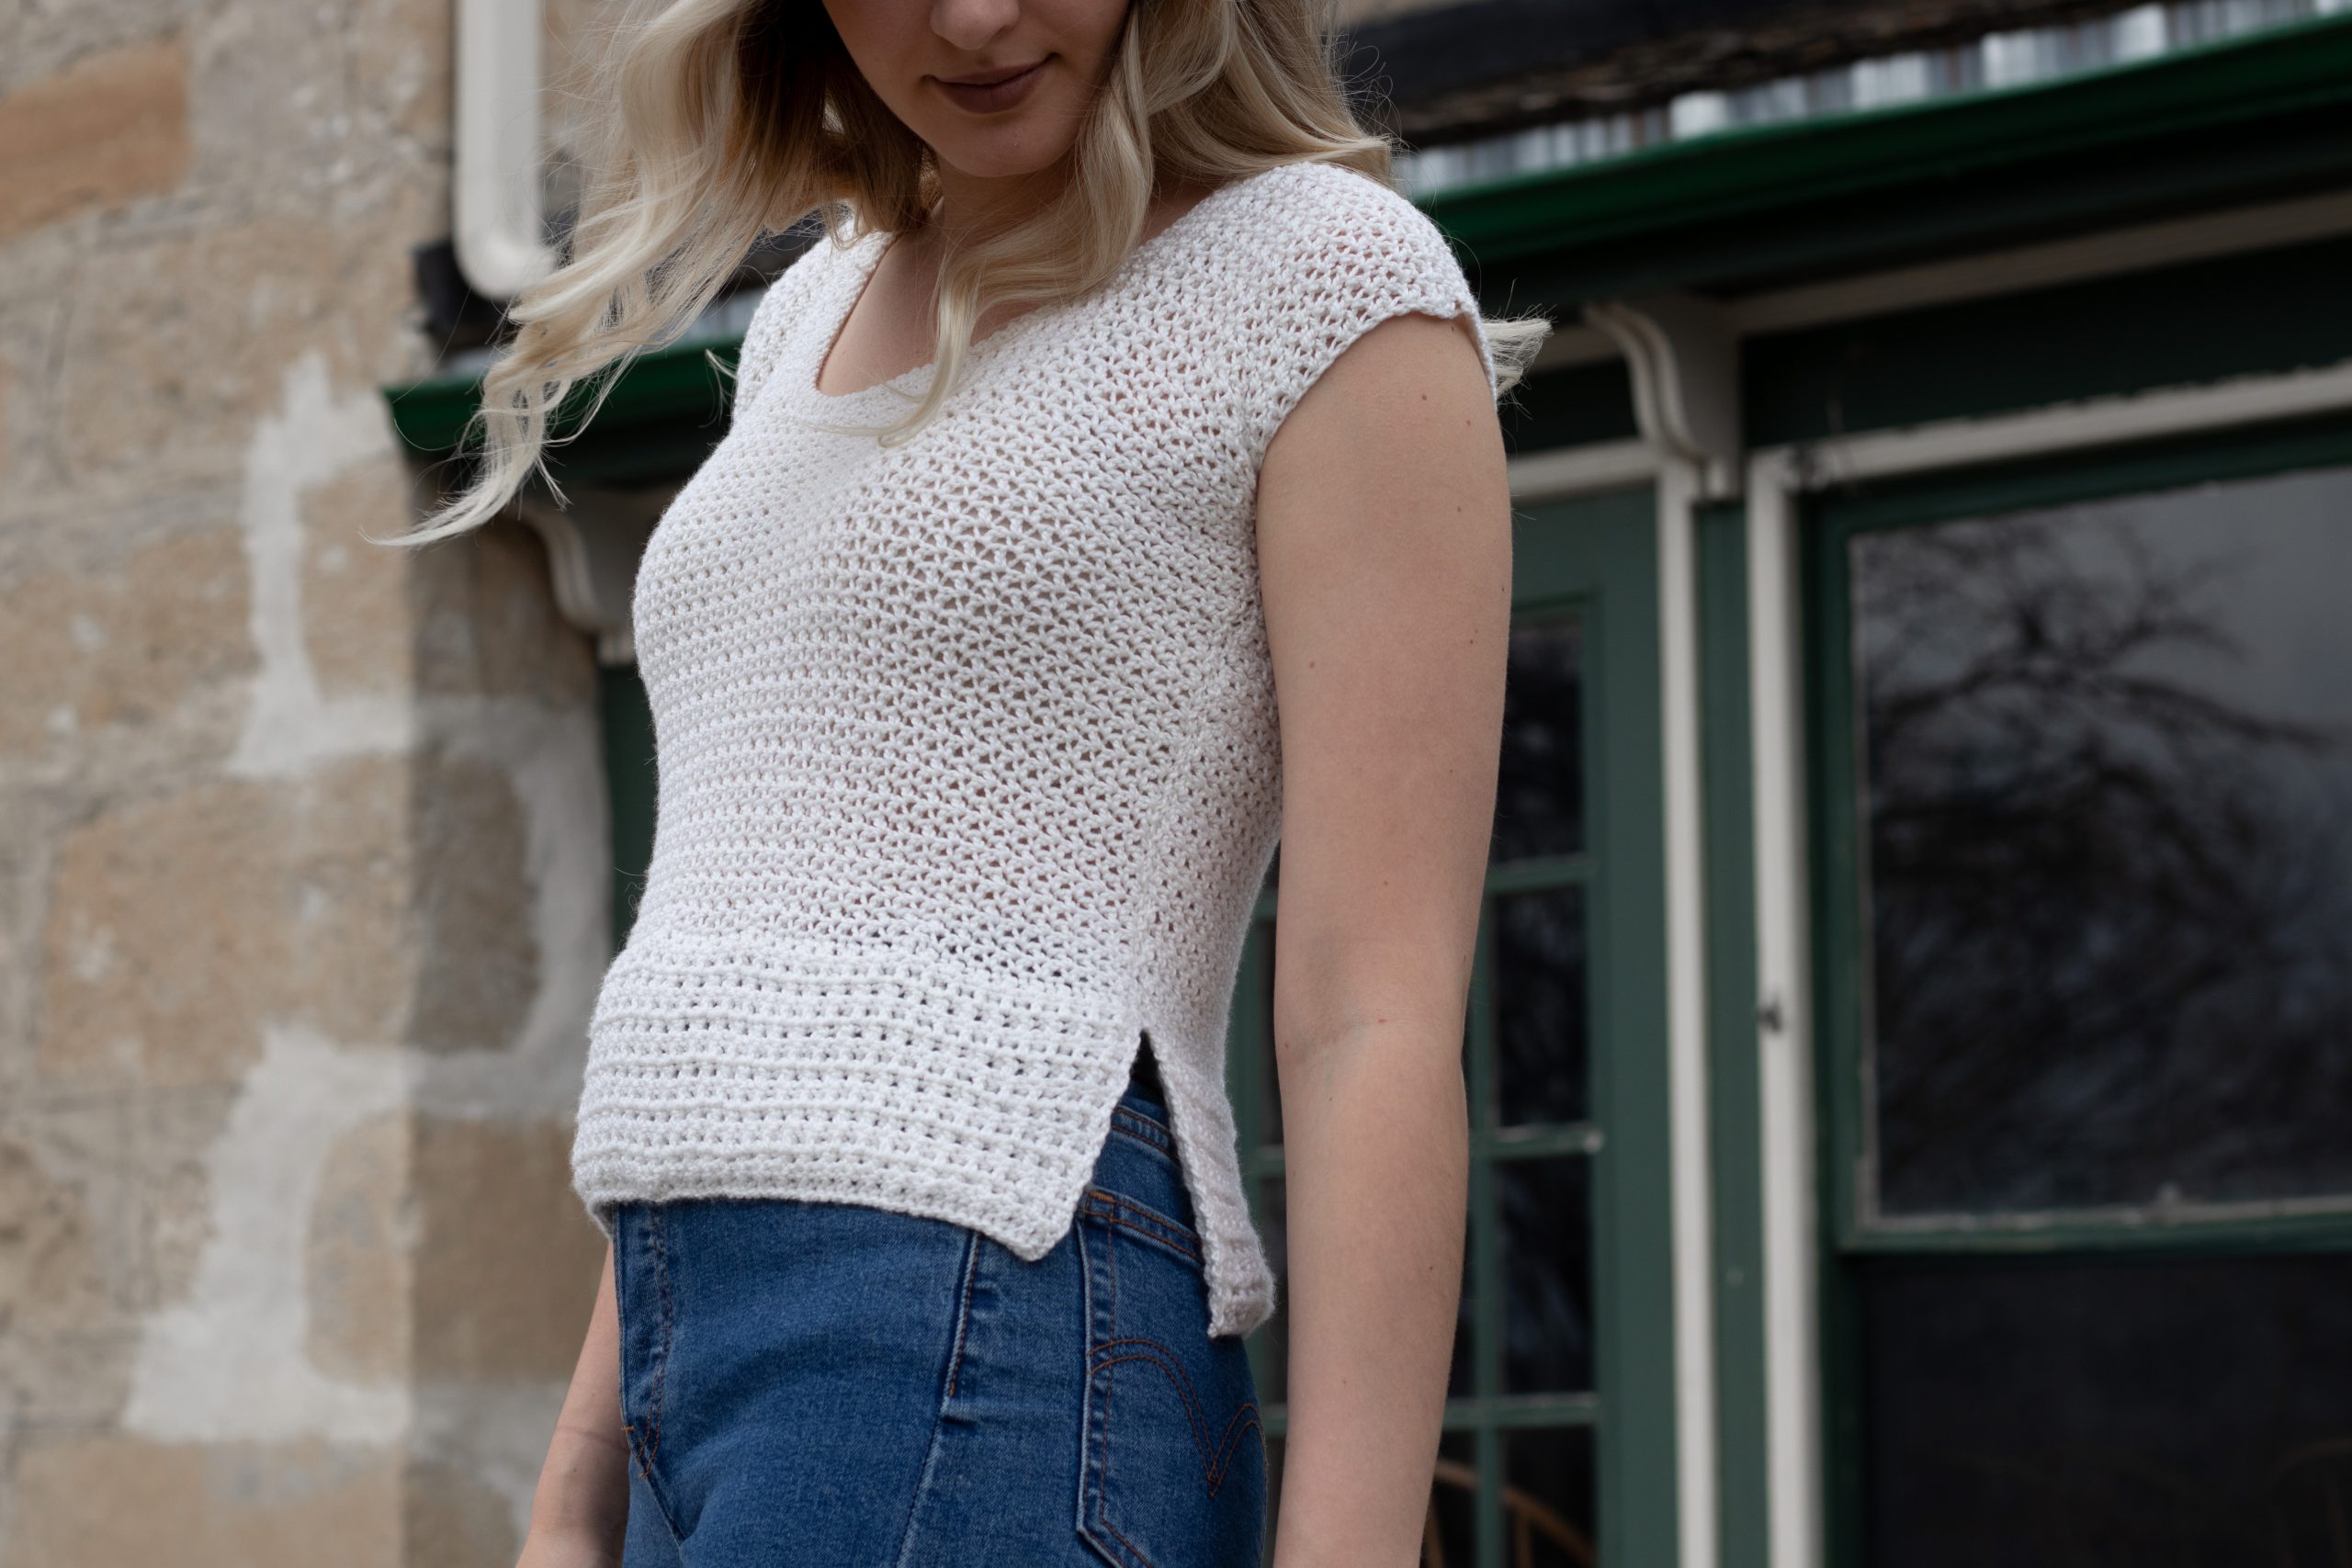
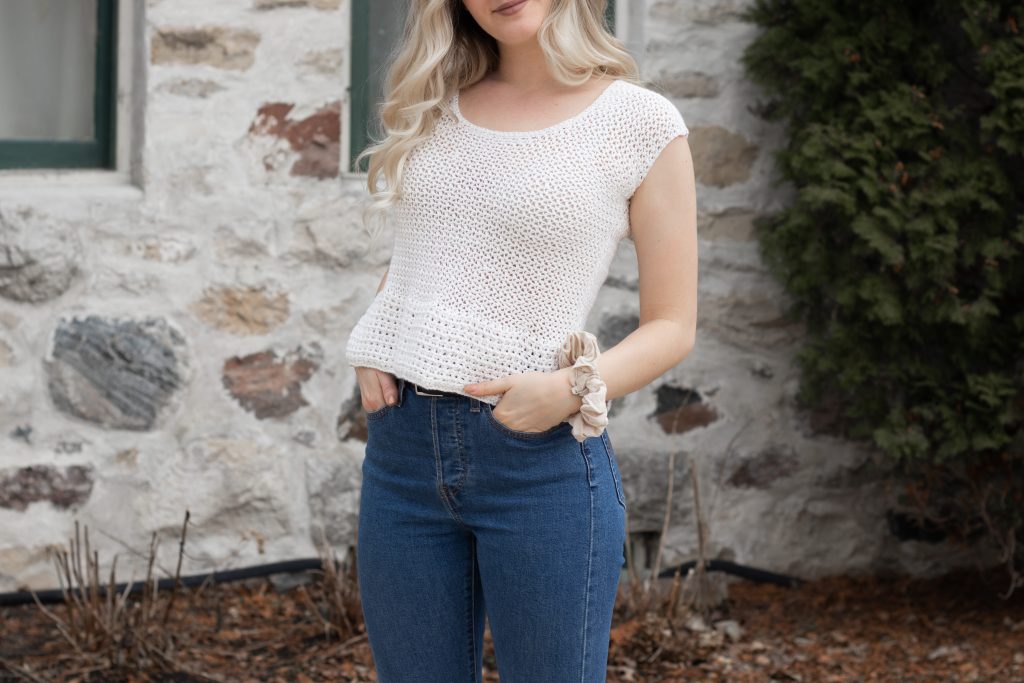
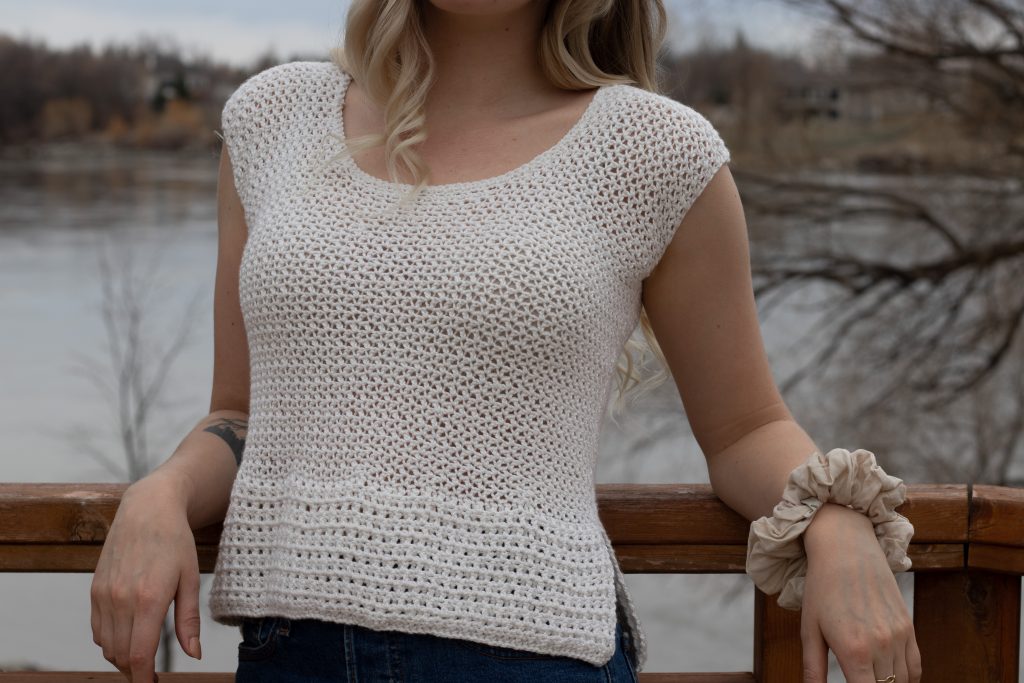
Today I’m sharing a FREE pattern with you – Teulon Tank – made with Paragon Sport from WeCrochet!
This post is sponsored by We Crochet.
Keep scrolling to view the free pattern below. Ad-free, paid PDF versions are also available on Etsy, Ravelry, and my website.


About
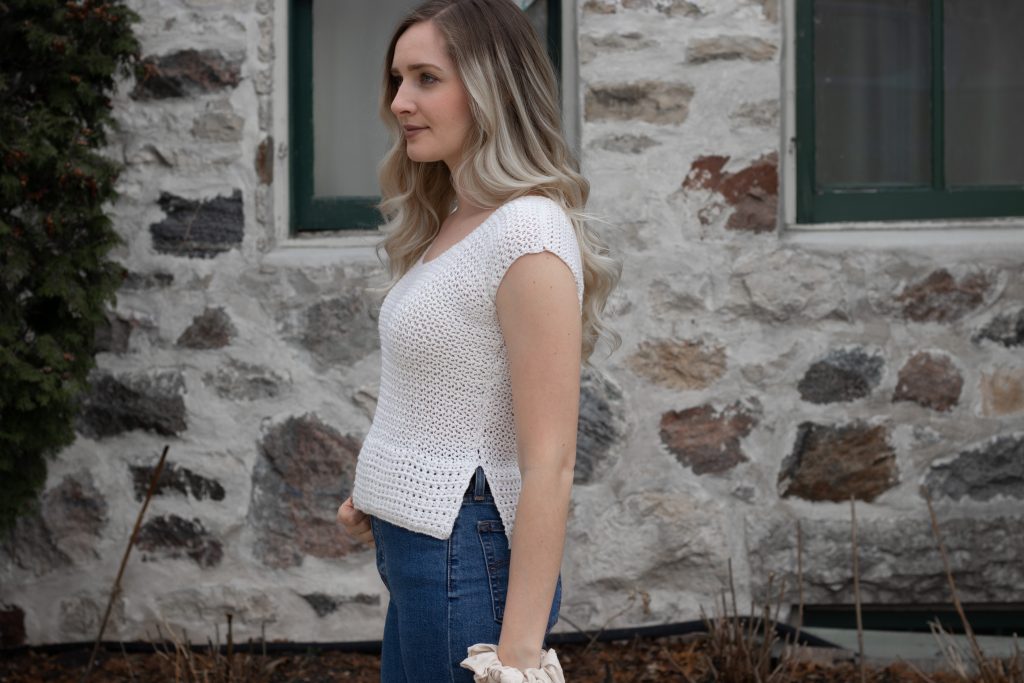
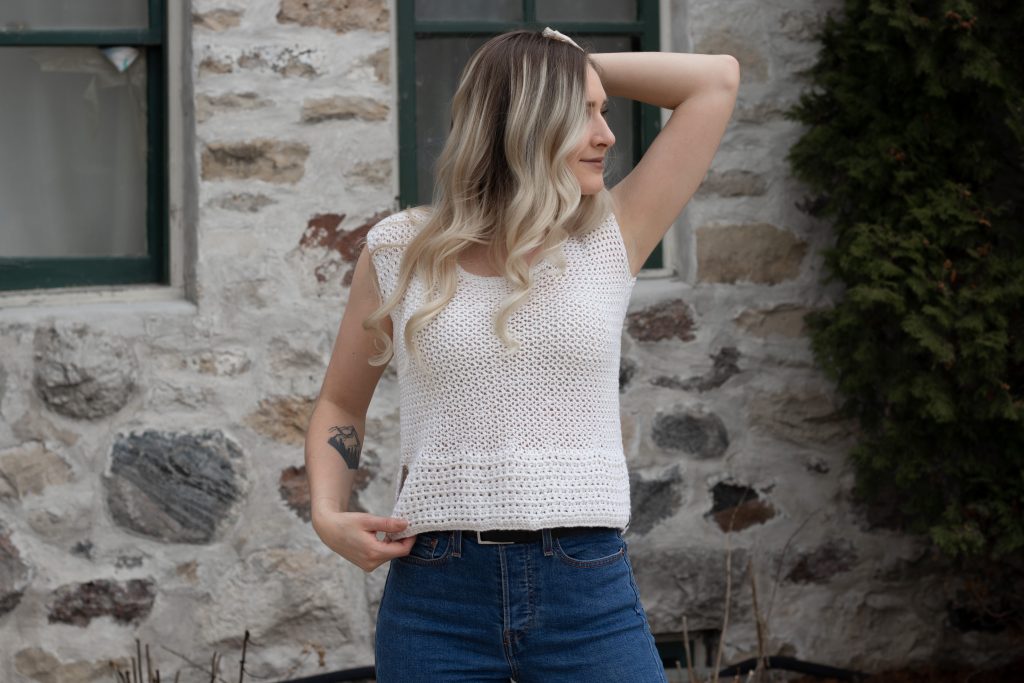
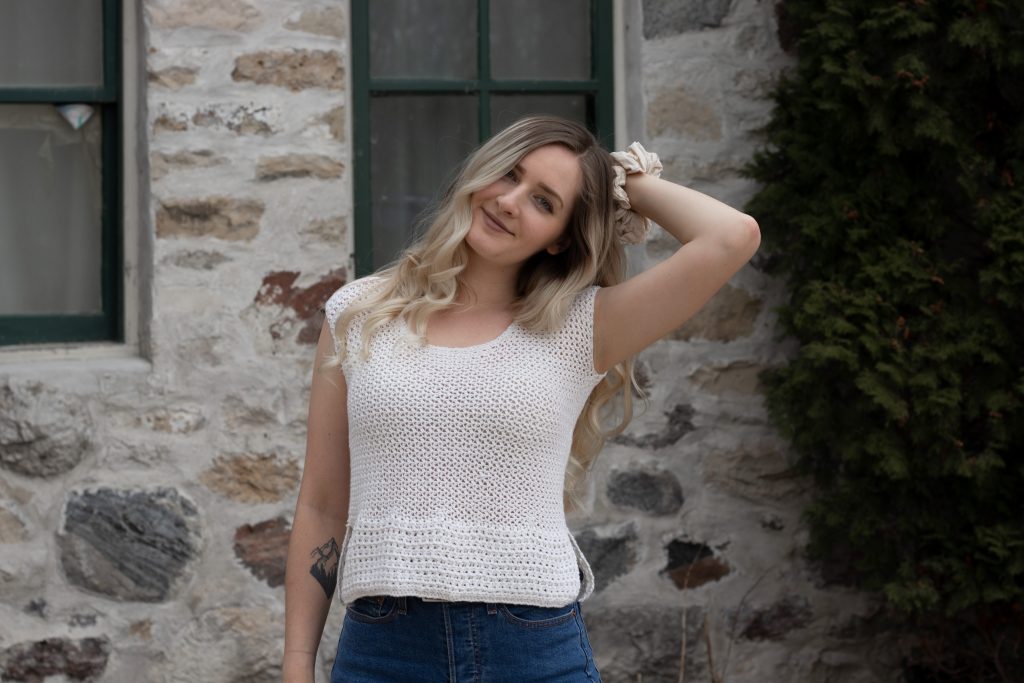
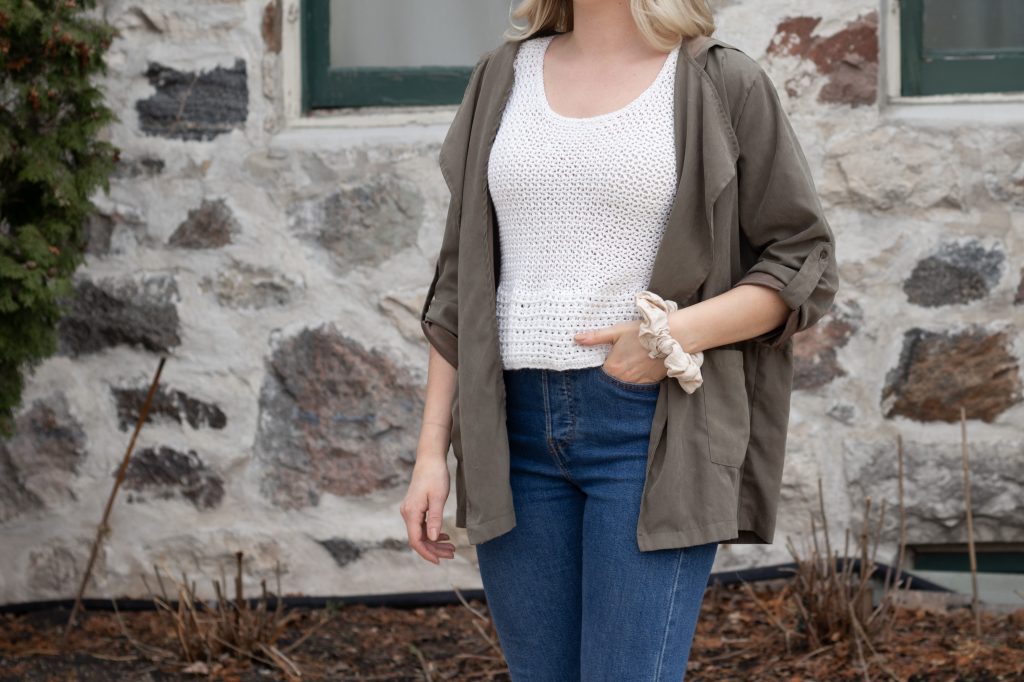
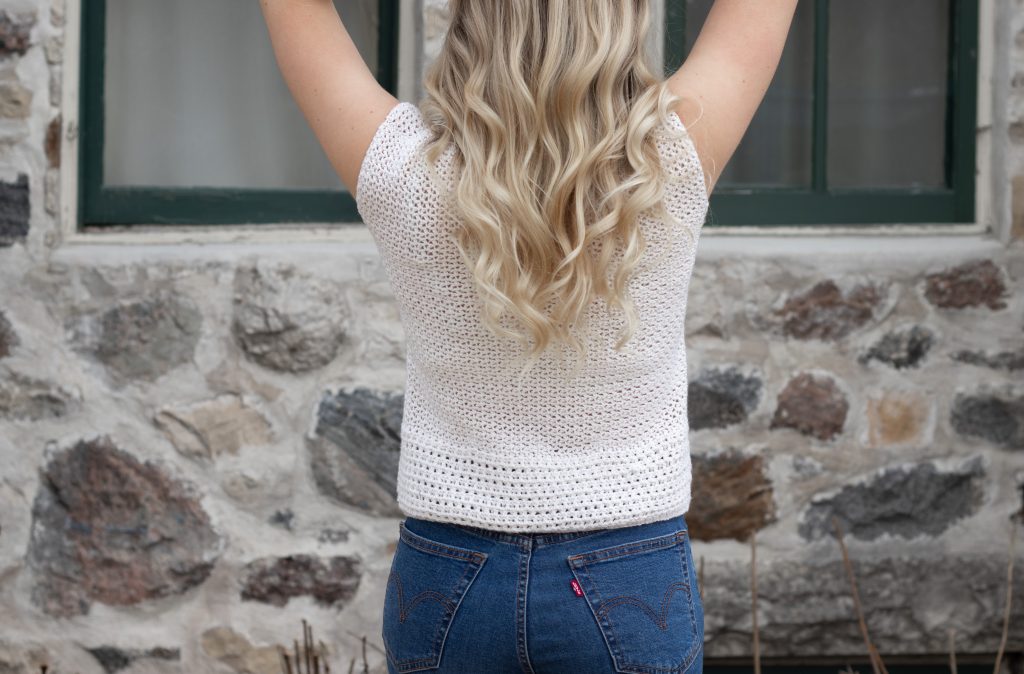
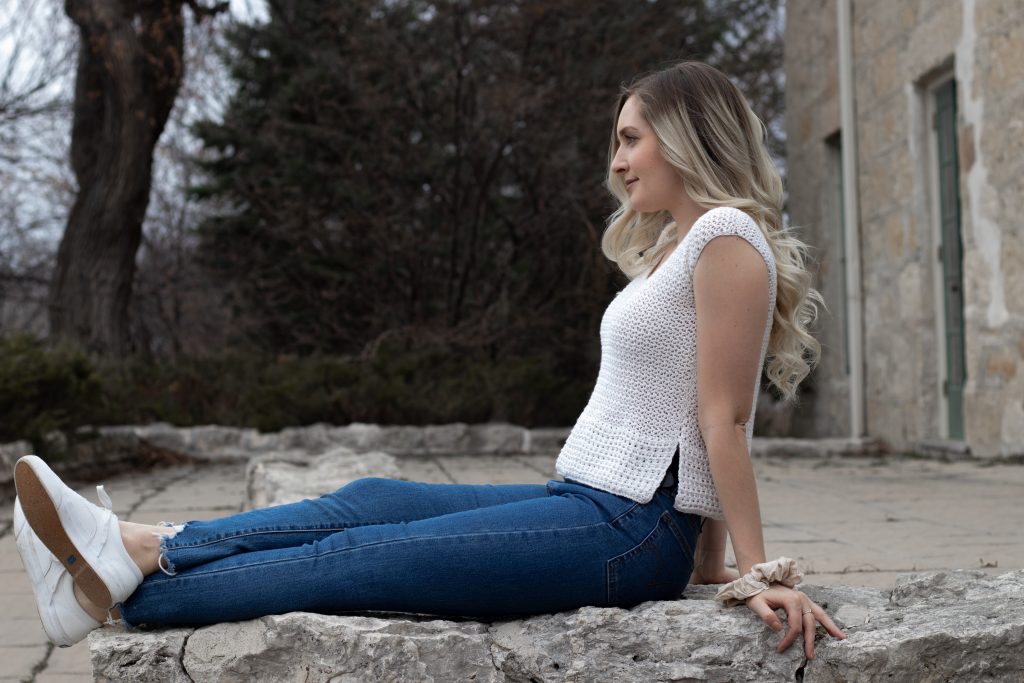
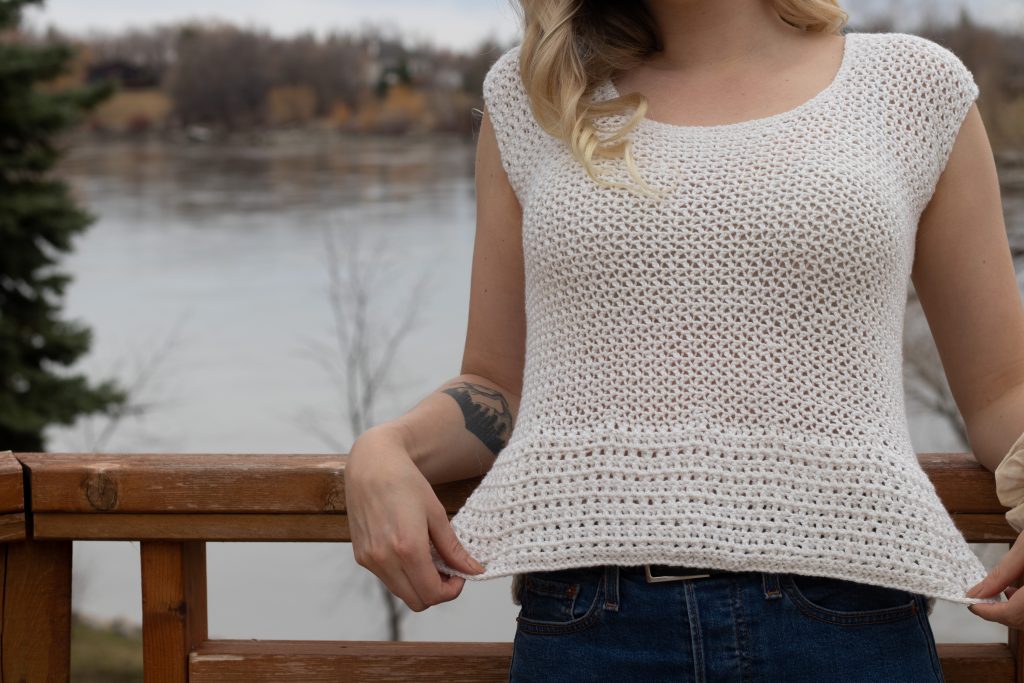
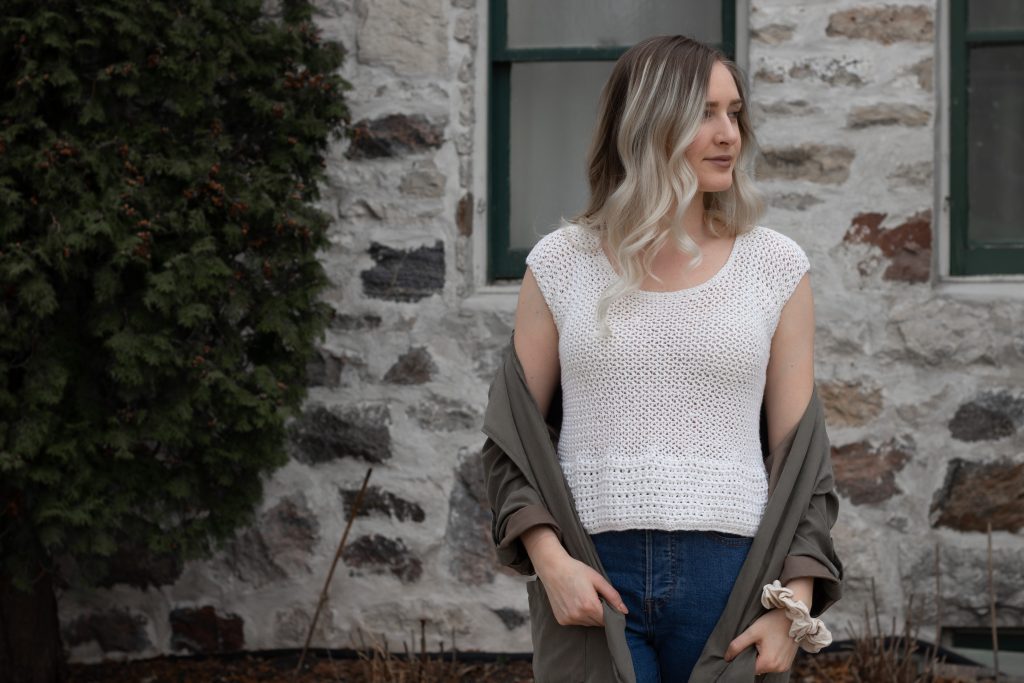
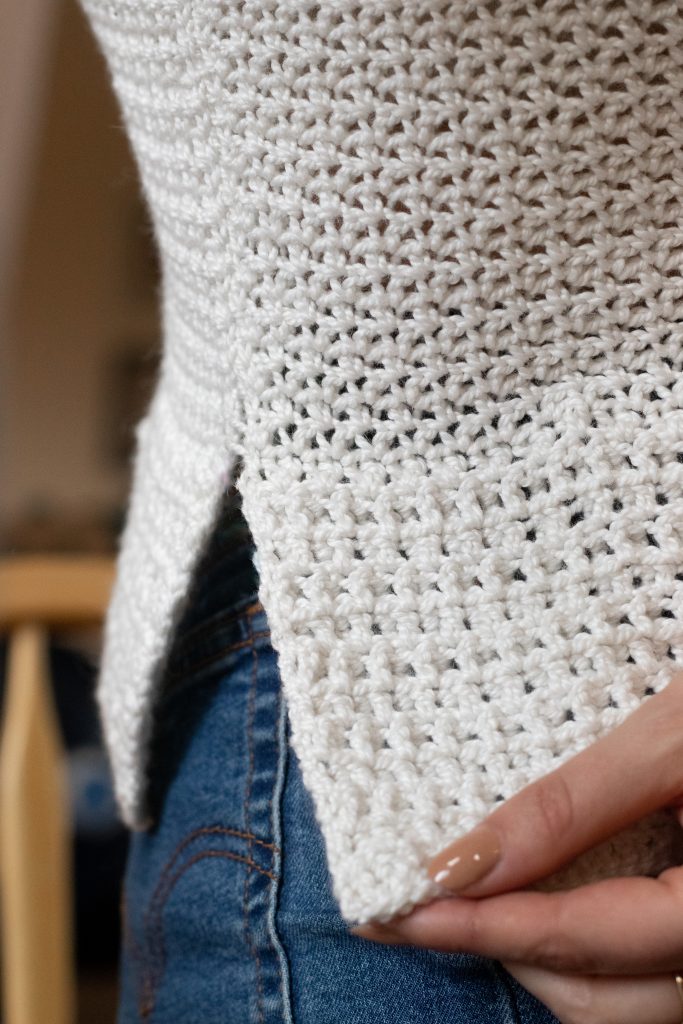
This is a beginner-friendly sleeveless top made with sport-weight yarn. The bottom features a ribbed texture, created by using post stitches. The remainder of the top is worked in a stitch that alternates single crochets and chain stitches. It’s got a modest scoop neck that isn’t too high and isn’t too low, but could be easily adjusted to suit your preference. Very minimal shaping is used to achieve this curved shape within the neckline – and this is the only part you will have to pay attention to any stitch counts. The split hem is flattering and helps to accommodate the increased circumference of the hips. I finished my top within 2 evenings, so I am confident you can crank this out pretty quickly, no matter the size you are making. It’s simple, repetitive, and has an interesting texture that will help keep your attention! (I don’t know about you, but sometimes straight single crochet can become tedious for me!)
Everything you need to complete this top can be found below. Make sure to tag me (@knitsnknotswpg) and tag your progress pics with #TEULONTANK so everyone can check out your work and you can see the progress from others’ Teulon Tanks!
TEULON TANK
Materials
- Size 3.5 mm & 4.0 mm crochet hook or hooks that allow you to meet gauge.
- I used these hooks!
- Yarn: WeCrochet Paragon Sport
- Fiber Content: 50% Fine Merino Wool; 25% Baby Alpaca; 25% Mulberry Silk (Can you understand why it’s called “Paragon”?!)
- Colour: White
- Sport weight, category 2 yarn
- 5 (5, 6, 7, 8)(10, 11, 12, 13) balls for sizes XS (S, M, L, XL) (2X, 3X, 4X, 5X)
- 495 (580, 685, 790, 900)(1130, 1260, 1395, 1535) yds
- Read my Paragon Yarn Review here.
- Tapestry needle
- Stitch markers or scrap yarn to help line up your work when seaming
Abbreviations
(US Terms)
- BPdc: back post double crochet
- ch(s): chain(s)
- chsp: chain space
- dc: double crochet
- FPdc: front post double crochet
- rep: repeat
- sc: single crochet
- sk: skip
- sl st: slip stitch
- st(s): stitch(es)
Schematic
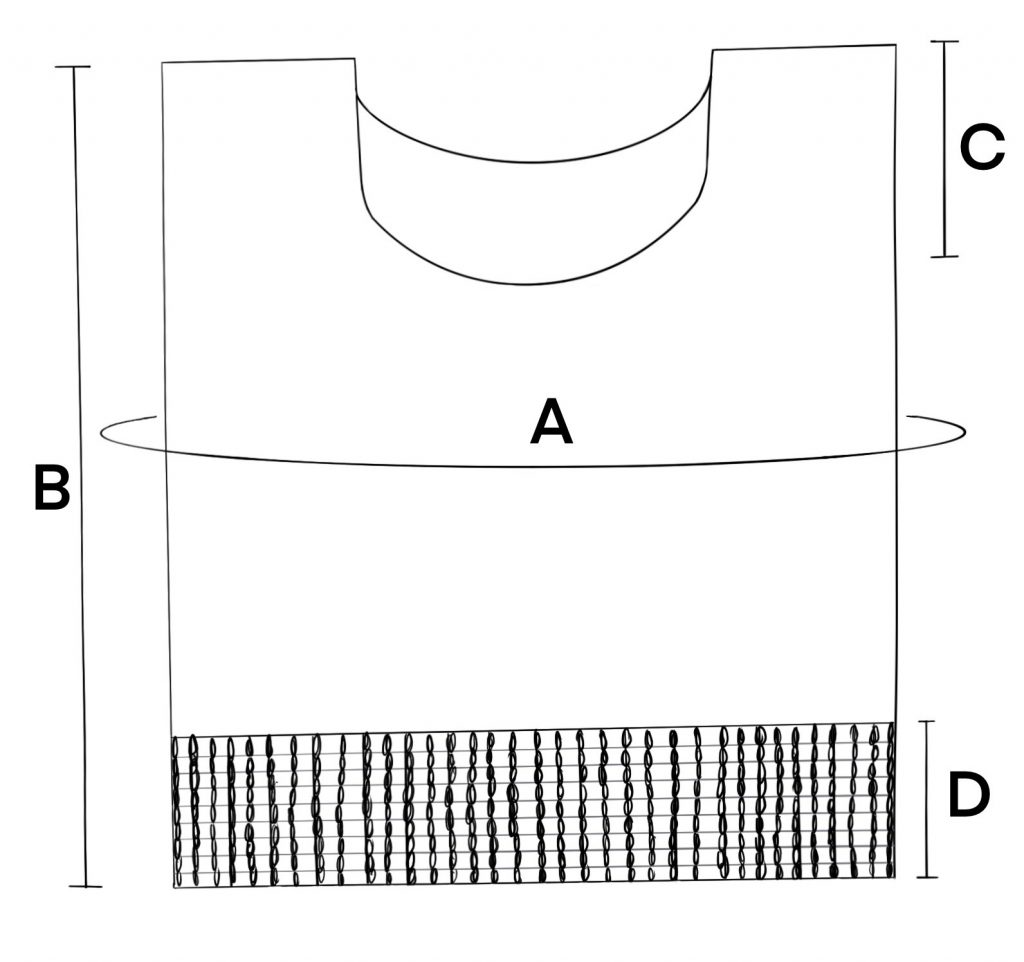
Measurement Chart (Inches)
| A | B | C | D | |
| Bust | Total Length | Strap Length/Scoop Neck Depth | Bottom Border | |
| XS | 30 | 13 | 4.75 | 4 |
| S | 34 | 13.5 | 4.75 | 4 |
| M | 38 | 14.5 | 5.25 | 4 |
| L | 42 | 15.5 | 5.75 | 4 |
| XL | 46 | 16.25 | 6 | 4 |
| 2X | 50 | 17 | 6 | 6 |
| 3X | 54 | 18 | 6.5 | 6 |
| 4X | 58 | 18.75 | 6.75 | 6 |
| 5X | 62 | 19.5 | 7 | 6 |
Notes
- Construction
This top is worked bottom-up in 2 panels that get seamed together. - Sizing
This top is written in 9 sizes as follows:
XS (S, M, L, XL) (2X, 3X, 4X, 5X).
Make sure to follow the numbers for your size only. It is recommended that you go through the pattern and highlight numbers pertaining to your size before beginning. - Length
To make top longer (or shorter), simply add more (or work fewer) repeats to the body before splitting for the straps. Keep note of how many additional (or fewer) rows you worked, and make the exact same adjustment to the back panel. - Stitch Counts
Stitch counts are included at the end of each row as follows: {XS (S, M, L, XL)(2X, 3X, 4X, 5X) sc}.Refer to the numbers for your size only. If there is no stitch count at the end of the row, it means the stitch count of that particular row did not change from the previous row. - Neckline
For a deeper neckline, work additional repeats after completing the strap decreases. Make sure to work the same number of additional rows on each strap for the front panel. For every row added to the straps, add this same number of rows to the body of the back panel.
Gauge
Stitch Gauge: 20 sts = 4″ (this means 20 sts = 10 sc and 10 chs) blocked.
Row Gauge: 15 rows = 4″ blocked.
For help with blocking, watch this video.
Below are the instructions for 2 swatches. The smaller hook is used for the bottom ribbing, while the larger hook is used for the remainder of the top. You may need to adjust one hook, or both hooks, to achieve the required gauge.
Pattern for gauge swatch (top section):
With larger hook, work an even number of chs.
Row 1: Sc in 2nd ch from hook, *sk next ch, sc in next ch; rep from * to end of row, turn.
Next Row: Ch 1, sc in first sc, *ch 1, sk next chsp, sc in next sc; rep from * to end of row, turn.
Rep last row until desired length.
Pattern for gauge swatch (bottom ribbed section):
With smaller hook, work an odd number of chs.
Follow instructions for “Bottom Section”.
Front Panel
Bottom Ribbed Section
With smaller hook, ch 77 (87, 97, 107, 117)(127, 137, 147, 157). Leave long tail for seaming panels together.
Row 1: Dc into 3rd ch from hook and in each ch across, turn. {75 (85, 95, 105, 115)(125, 135, 145, 155) dc}
Row 2: Dc in first dc, *FPdc in next dc, dc in next dc; rep from * to end of row, turn.
Row 3: Dc in first dc, *BPdc in next FPdc, dc in next dc; rep from * to end of row, turn.
Rep Row 2 and 3 until work measures 4 (4, 4, 4, 4)(6, 6, 6, 6)” or as many times as desired.
Body
Switch to larger hook.
Row 1: Ch 1, sc in first st, *ch 1, sk next st, sc in next st; rep from * to end of row, turn. {38 (43, 48, 53, 58)(63, 68, 73, 78) sc}
Row 2: Ch 1, sc in first sc, *ch 1, sk next chsp, sc in next sc; rep from * to end of row, turn.
Rep Row 2 35 (37, 39, 41, 43)(45, 47, 49, 51) more times.
First Strap
Row 1: Ch 1, work in stitch pattern until you have worked a total of 14 (17, 19, 21, 24) (27, 29, 31, 33) sc, stop here and turn work to begin working in opposite direction. {14 (17, 19, 21, 24) (27, 29, 31, 33) sc}
Row 2: [do not ch 1] sk first sc and first chsp, sc directly into second sc, continue in pattern to end of row, turn. {13 (16, 18, 20, 23) (26, 28, 30, 32) sc}
Row 3: Ch 1, work in stitch pattern to end of row, turn.
Row 4: Rep Row 2. {12 (15, 17, 19, 22)(25, 27, 29, 31) sc}
Row 5: Rep Row 3.
Row 6: Rep Row 2. {11 (14, 16, 18, 21)(24, 26, 28, 30) sc}
Next 12 (12, 14, 15, 16)(17, 18, 19, 20) rows: Rep row 3.
Fasten off.
Second Strap
With new yarn, attach yarn at 14th (17th, 19th, 21st, 24th)(27th, 29th, 31st, 33rd) sc from other edge with a sl st.
We will be working towards the unworked edge.
Work first sc in same st as sl st.
Row 1: Ch 1, work in stitch pattern to end of row, turn. {14 (17, 19, 21, 24) (27, 29, 31, 33) sc}
Row 2: Ch 1, work in stitch pattern to 13th (16th, 18th, 20th, 23rd)(26th, 28th, 30th, 32nd) sc, sl st into next chsp, turn. {13 (16, 18, 20, 23) (26, 28, 30, 32) sc}
Row 3: Ch 1, sc in first sc, *ch 1, sk next chsp, sc in next sc; rep from * to end of row, turn.
Row 4: Ch 1, work in stitch pattern to 12th (15th, 17th, 19th, 22nd)(25th, 27th, 29th, 31st) sc, sl st into next chsp, turn. {12 (15, 17, 19, 22)(25, 27, 29, 31) sc}
Row 5: Ch 1, work in stitch pattern to end of row, turn.
Row 6: Ch 1, work in stitch pattern to 11th (14th, 16th, 18th, 21st)(24th, 26th, 28th, 30th) sc, turn. {11 (14, 16, 18, 21)(24, 26, 28, 30) sc}
Next 12 (12, 14, 15, 16)(17, 18, 19, 20) rows: Rep Row 1.
Fasten off.
Back Panel
Bottom Ribbed Section.
Rep instructions from Front Panel – Bottom Ribbed Section.
Body
Switch to larger hook.
Row 1: Ch 1, sc in first st, *ch 1, sk next st, sc in next st; rep from * to end of row, turn. {38 (43, 48, 53, 58)(63, 68, 73, 78) sc}
Row 2: Ch 1, sc in first sc, *ch 1, sk next chsp, sc in next sc; rep from * to end of row, turn.
Rep Row 2 47 (49, 53, 56, 59)(62, 65, 68, 71) more times.
First Strap
Rep Rows 1-6 from Front Panel – First Strap. Fasten off.
Second Strap
Rep Rows 1-6 from Front Panel – Second Strap. Fasten off.
Finishing
Blocking:
Block each panel to dimensions.
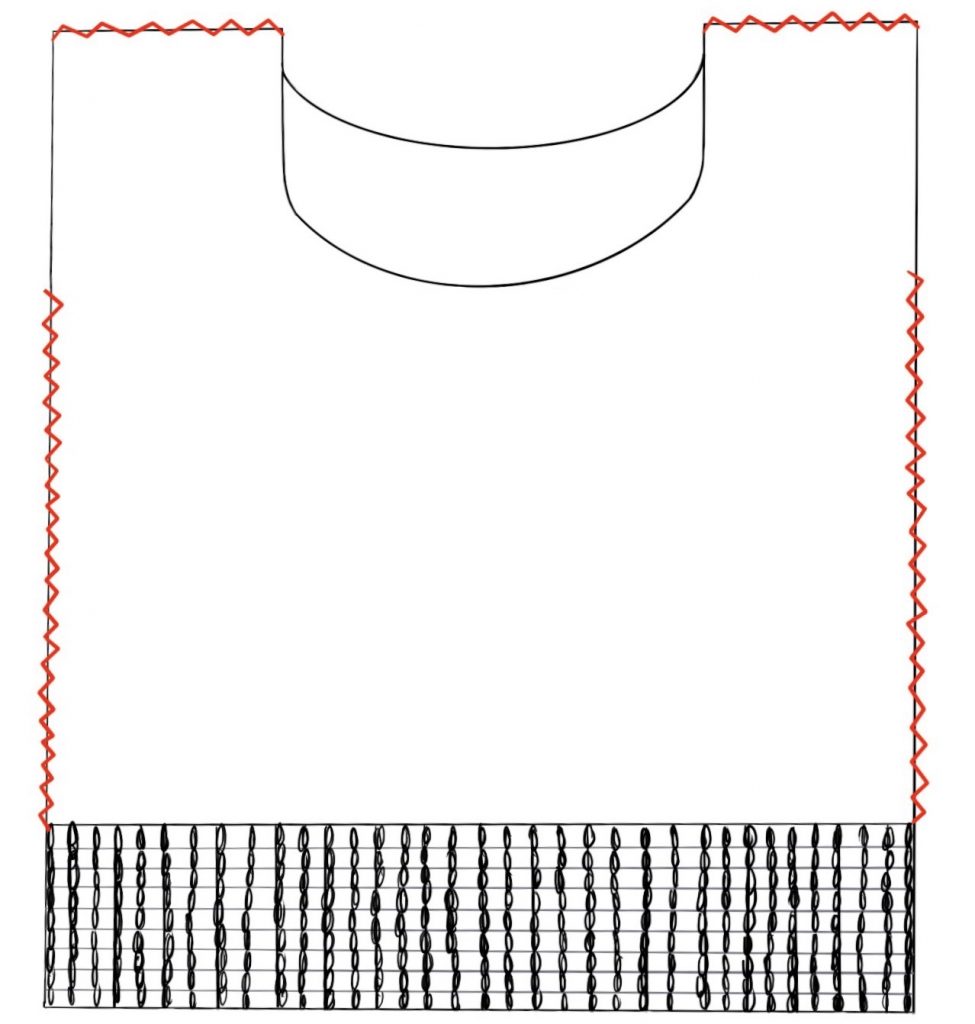
Seaming:
With right sides facing outward (wrong sides touching), seam the blocked panels together as shown in diagram below using whip stitch or seaming method of your choice.
When seaming the sides, use the long tails you left from your initial chain. For a split hem, weave the yarn through the stitches along the bottom border to get to the point where you want to begin seaming, and then start seaming both panels together.
When seaming the sides, try on your top before fastening off to see how high you need your seam to be. The higher you seam, the tighter your top will be at the upper arm. If you have loose fabric hanging over the shoulders, you can seam higher to tighten this up. If you want a little more finishing around the arms, you can sc evenly around the arm holes as well, once you have seamed the panels together.
Neckline:
Once seamed is finished, attach new yarn at neckline seam. Sc evenly around entire neckline, sl st to join, fasten off.
Weave all ends.
That’s it! Hope you love your top!
And remember, if you’d like the ad-free, inexpensive PDF version, click here. Thank you so much if you choose to purchase and support my small shop!
You can find the inexpensive, paid-pattern in these places:
(Use the code “PATTERN10” for 10% off all patterns)
Make sure to check out my other free patterns – the Faux Fade Wrap, Black Out Yoke, and the Sunny Hills Cowl.
To save big on all of my paid patterns, sign up below for exclusive subscriber discounts!
I can’t wait to see your WIPs! Make sure to tag me @knitsnknotswpg and use the pattern hashtag #TeulonTank so that everyone can see your projects!
Happy crocheting,
Janine xx
You May Also Like


