
Hi friends!
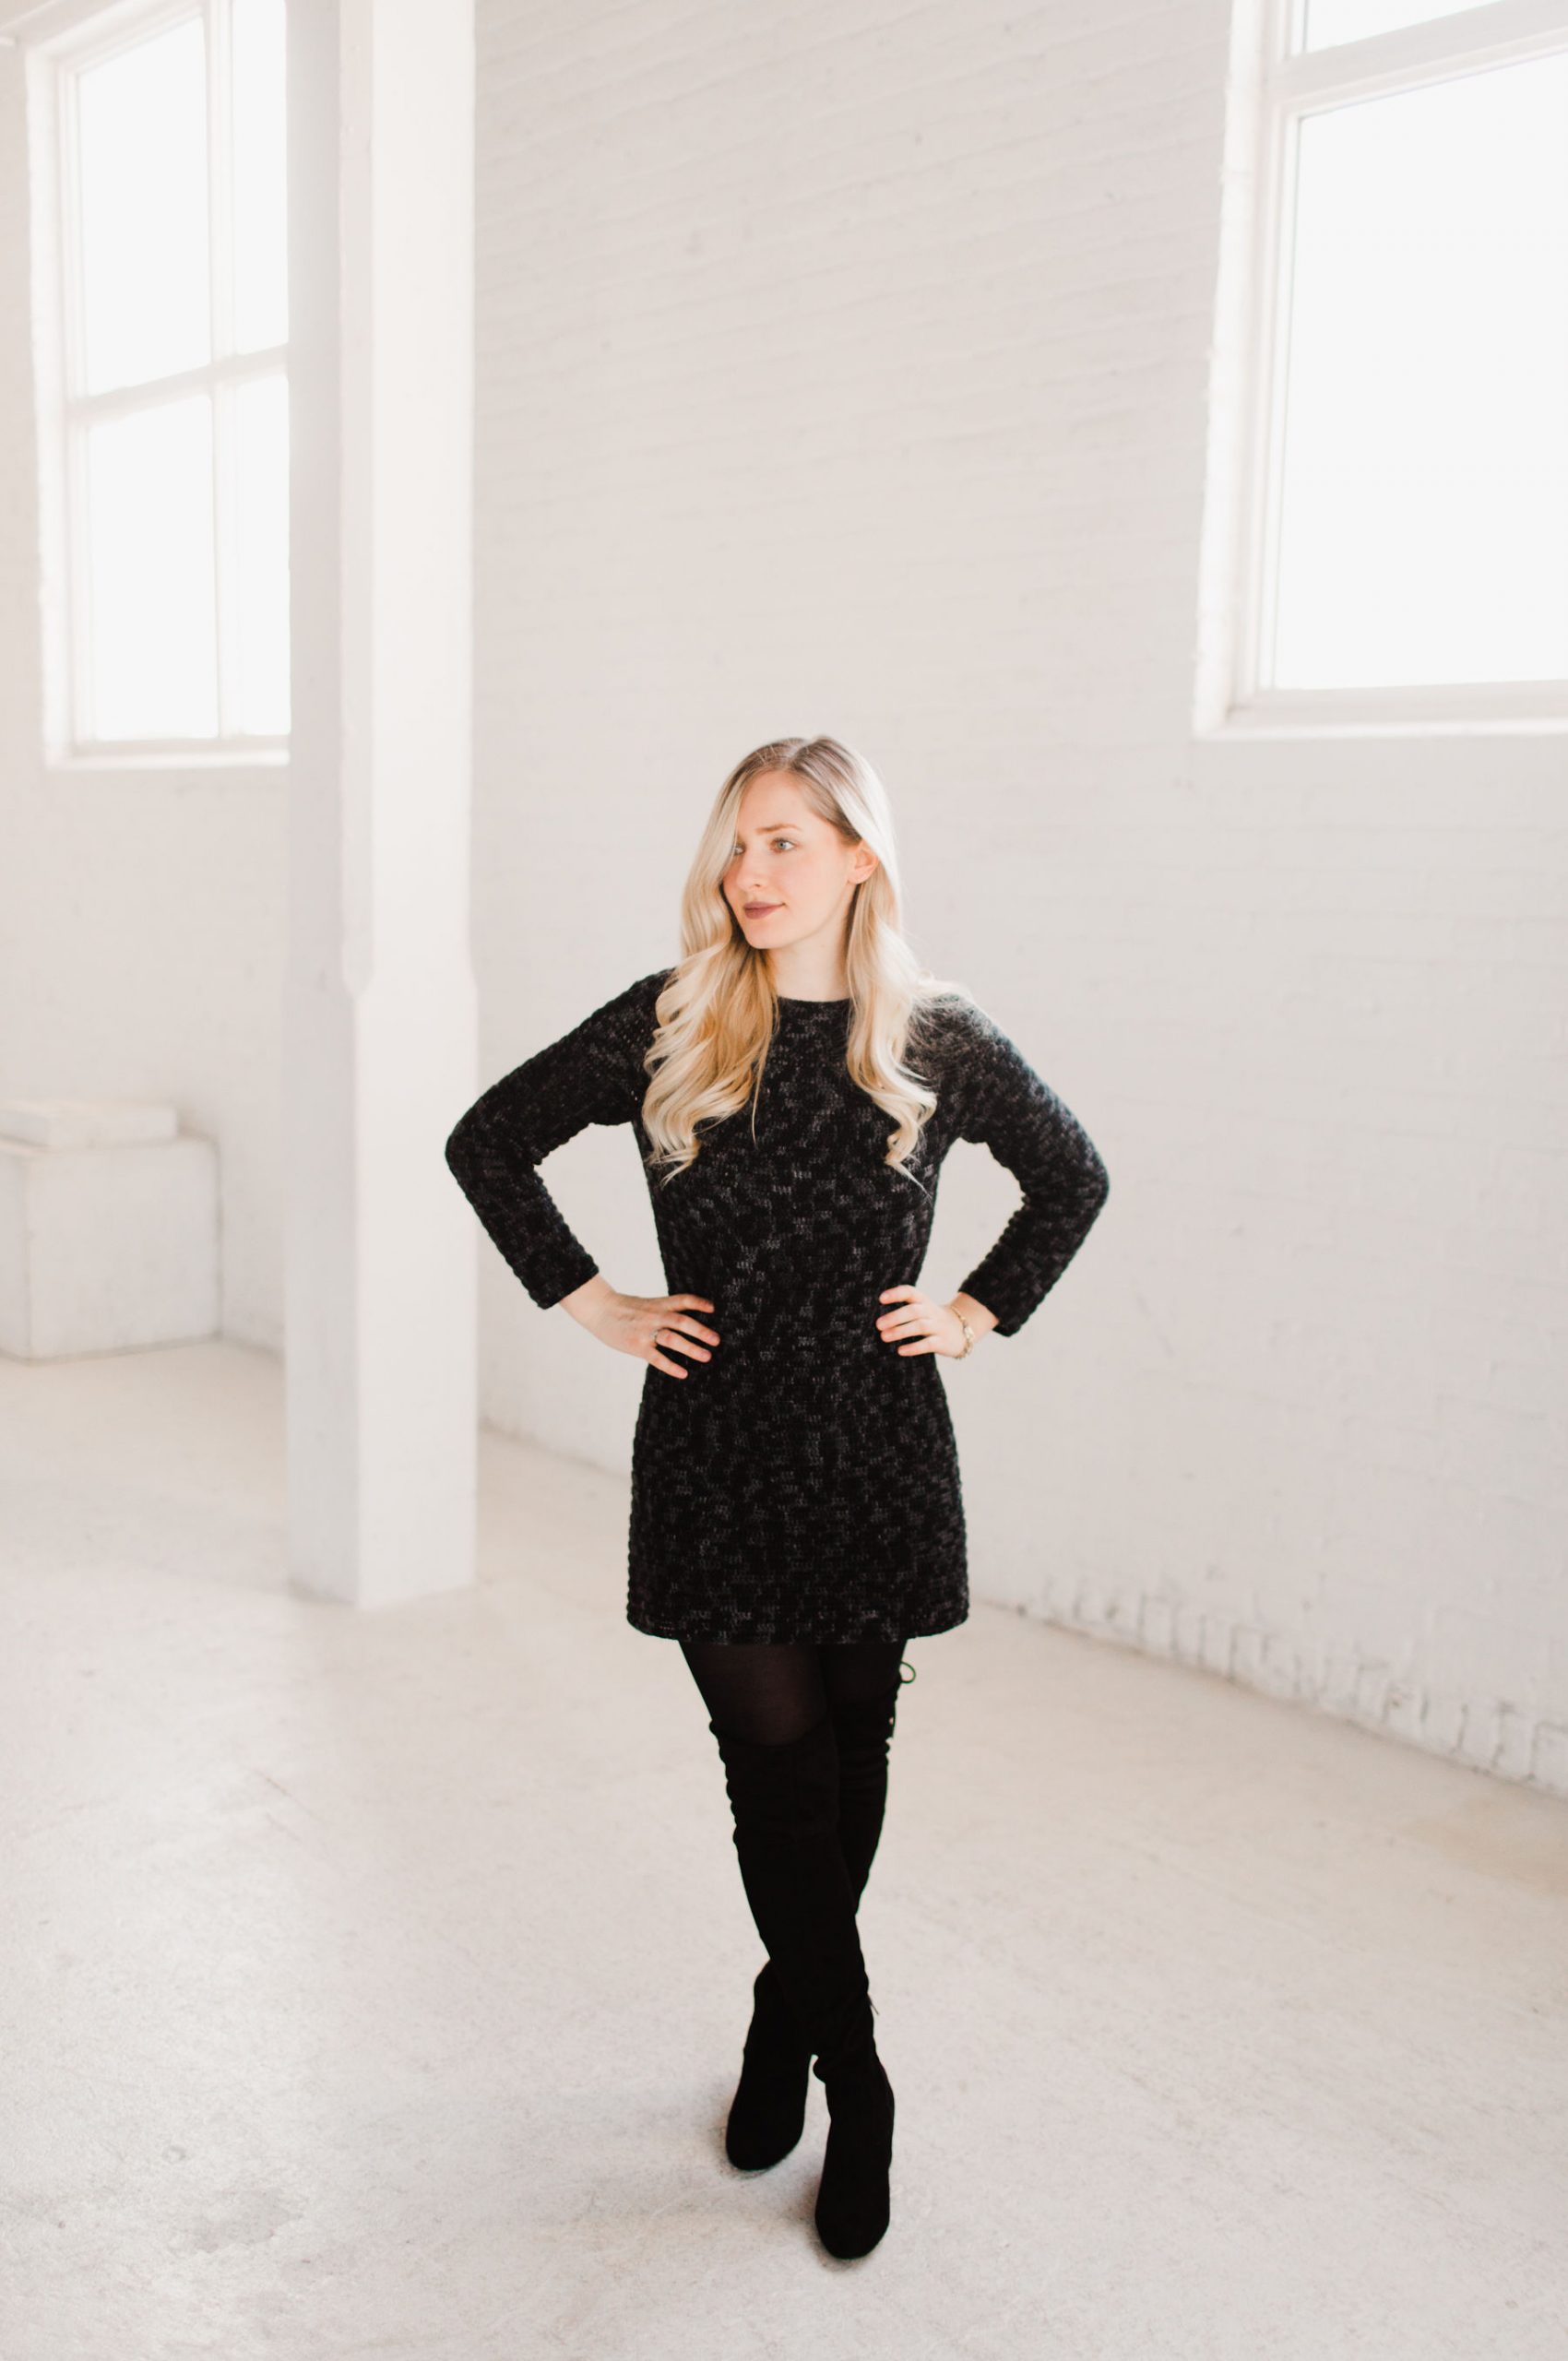
Today I’m sharing a brand new crochet pattern called Black Out Yoke. This is a beginner-friendly crochet circular yoke sweater and uses just the double crochet stitch!
Before we begin, here are some quick links for you:
- The PDF version is available on Ravelry here, my website here, and Etsy here!
- Use code PATTERN10 for 10% off!
- Use the pattern hashtag #BlackOutYoke on Instagram to show off your makes!
- Shop WeCrochet Hawthorne Fingering here!
- Shop my WeCrochet exclusive summer pattern bundle here (5 patterns for $9.99)
- For any questions about this pattern, please email knitsnknotswpg@gmail.com and I’ll get back to you asap!
Preorder my book – Modern Crochet Sweaters: 20 Chic Designs for Everyday Wear – here!
If you want to be notified of all new pattern releases (and get exclusive discounts on all new paid patterns), sign up below!
This post contains affiliate links. This means, should you make a purchase, I will receive a small portion of the sale at no extra cost to you. All opinions are my own. View my Privacy + Disclosures Policy here. This post is sponsored by We Crochet.


About
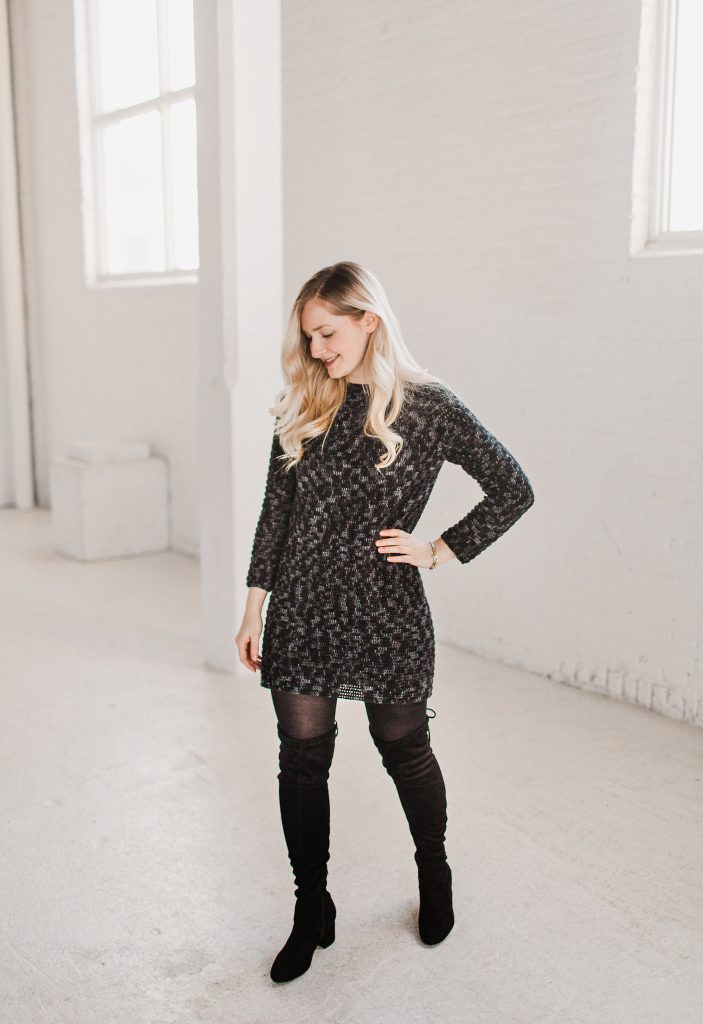
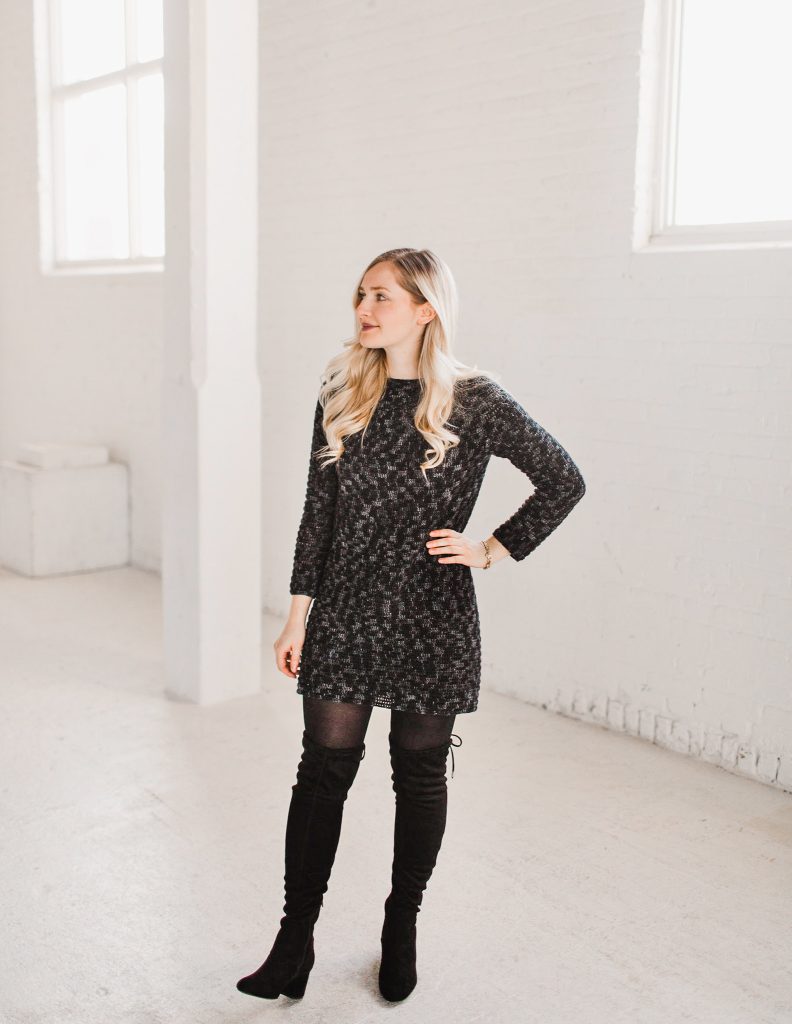
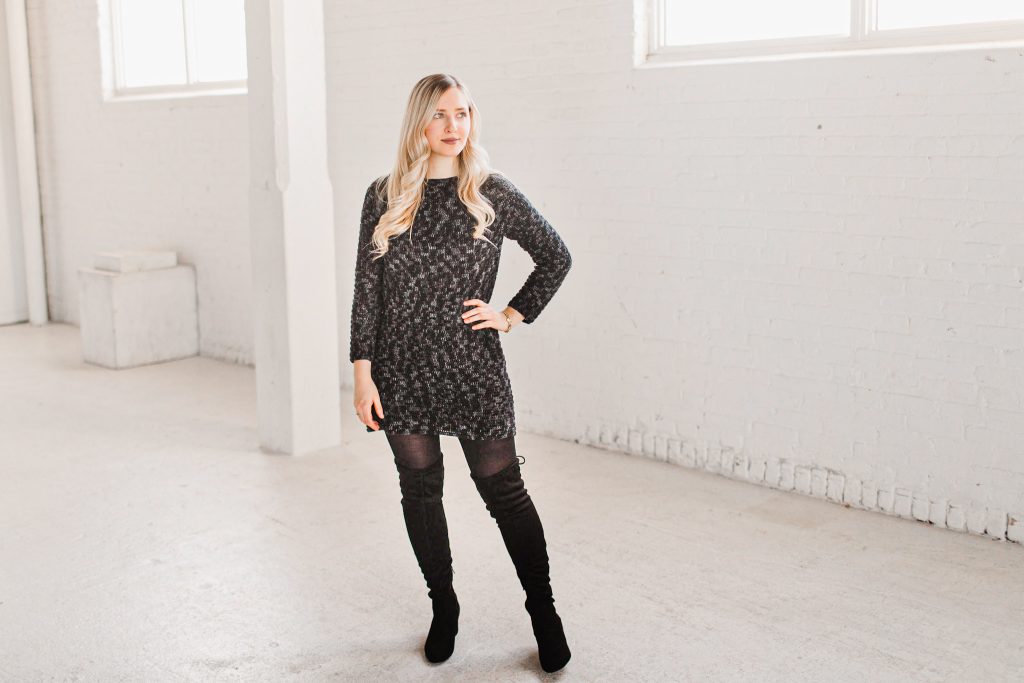
This sweater is a beginner-friendly, seamless, top-down circular yoke sweater made with Hawthorne Kettle Dye Fingering yarn from WeCrochet. I worked the body to a tunic/sweater-dress length to wear with tights.
The Black Out Yoke has a circular yoke construction, worked seamlessly from the top down. After completing the yoke increases, the yoke is then separated to create space for the body and the sleeves. The body is worked next with some optional waist shaping and then the sleeves are worked last.


PATTERN
Materials
Yarn: Fingering—WeCrochet Hawthorne Fingering Kettle Dye in Blackbird
- 80% Superwash Fine Highland Wool, 20% Polyamide (Nylon)
- 357 yds [326 m] per 3.5-oz [100-g] hank
- Find this yarn on crochet.com or visit yarnsub.com to find comparable substitutes.
Substitute WeCrochet Hawthorne Fingering with any fingering weight yarn that matches gauge. Most fibers should work out fine. Choose something soft (key: not itchy) that you would want to wear against your skin for long periods of time.
Yardage: 5 (6, 6, 7, 8) (8, 9, 9, 10) hanks of Hawthorne Fingering, or
- 1680 (1830, 2075, 2200, 2550) (2775, 3000, 3180, 3460) yds
- 1537 (1674, 1898, 2012, 2332) (2538, 2744, 2908, 3164) m
Hook: Size U.S. D (3 mm) crochet hook or size needed to obtain gauge
Notions: Tapestry needle, six locking stitch markers for waist shaping (optional)
Abbreviations
- ch: chain
- dc: double crochet
- FDC: foundation double crochet
- Ch 3, yo, insert hook into 3rd ch from hook, yo, pull up a loop, yo, pull through 1 loop (this creates the ch part of the stitch), yo, pull through 2 loops, yo pull through last 2 loops (this creates 1 FDC). *Yo, insert hook into both loops of previous ch, yo, pull up a loop, yo, pull through 1 loop, yo, pull through 2 loops, yo, pull through last 2 loops; rep from * as many times as indicated in pattern.
- Helpful video on FDC: click here
- inc: increase – work 2 dc into designated st
- rep: repeat
- rnd: round
- sl st: slip stitch
- st(s): stitch(es)
- yo: yarn over
Gauge
4 x 4” [10 x 10 cm] = 22 dc x 10.5 rows
Pattern Notes
Skill Level: Easy
Stitch Counts: Stitch counts are listed after each round. If no stitch count is given, there has been no change since the previous round. If only one number is provided, it applies to all sizes.
Sizing: This sweater is written in nine sizes as follows: XS (S, M, L, XL) (2X, 3X, 4X, 5X). Make sure to follow the numbers for your size only.
Turning Chain: The turning chain does not count as a stitch.
Join + Turn Each Round: This sweater is worked in back-and-forth joined, turned rounds. Be sure to turn your work after completing each round to begin working each new round in the opposite direction.
Reversible: There is no right side or wrong side of this fabric. You choose which side to wear as the “right side.”
Construction: This sweater has a circular yoke construction, worked seamlessly from the top down. After completing the yoke increases, the yoke is then separated to create space for the body and the sleeves. The body is worked next with some optional waist shaping and then the sleeves are worked last.
Sizing Information
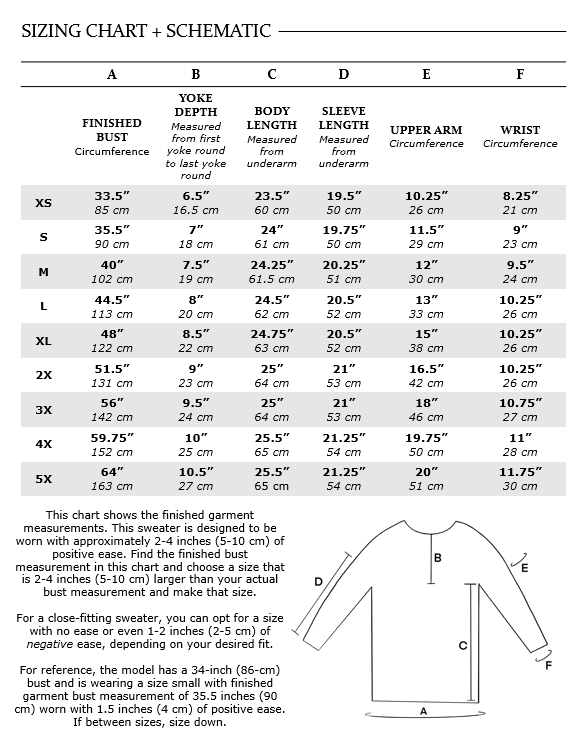
Pattern
YOKE
Row 1: FDC 96 (100, 102, 106, 108) (108, 112, 112, 112), sl st into first FDC to join rnd, turn.
Increase Rnd 1:
Rnd 2: Ch 2, *dc in next st, inc in next st; rep from * to end of rnd, sl st to join rnd, turn.
[144 (150, 153, 159, 162) (162, 168, 168, 168) dc]
Rnd 3: Ch 2, dc in each st around, sl st to join rnd, turn.
Rep Rnd 3 until work measures 3.5 (3.5, 2.5, 3, 2.5) (2.5, 2.5, 2.5, 2.5)” [9 (9, 6, 8, 6) (6, 6, 6, 6) cm].
Increase Rnd 2:
Ch 2, *dc in next 2 sts, inc in next st; rep from * to end of rnd, sl st to join rnd, turn.
[192 (200, 204, 212, 216) (216, 224, 224, 224) dc]
Next Rnd: Ch 2, dc in each st around, sl st to join rnd, turn.
Rep last rnd until work measures 5.5 (6, 4.5, 5, 4.5) (4.5, 4.5, 4.5, 4.5)” [14 (15, 11, 13, 11) (11, 11, 11, 11) cm].
Increase Rnd 3:
Ch 2, *dc in next 3 sts, inc in next st; rep from * to end of rnd, sl st to join rnd, turn.
[240 (250, 255, 265, 270) (270, 280, 280, 280) dc]
Next Rnd: Ch 2, dc in each st around, sl st to join rnd, turn.
Rep last rnd until work measures 6.5 (7, 6.5, 7, 6) (6.5, 6, 6, 6)” [17 (18, 17, 18, 15) (17, 15, 15, 15) cm].
Sizes XS and S finished with yoke; proceed to BODY.
Increase Rnd 4: follow your size only
Size M only:
Ch 2, *[dc next 9 sts, inc next st] 4 times, dc next 10 sts, inc next st; rep from * to end of rnd, sl st to join rnd, turn. [280 dc]
Next Rnd: Ch 2, dc in each st around, sl st to join rnd, turn.
Rep last rnd until work measures 7.5” [19 cm].
Size M finished with yoke; proceed to BODY.
Size L only:
Ch 2, dc in next 9 sts, inc in next st, *dc next 7 sts, inc next st, dc next 6 sts, inc next st; rep from * to end of rnd, sl st to join rnd, turn. [300 dc]
Next Rnd: Ch 2, dc in each st around, sl st to join rnd, turn.
Rep last rnd until work measures 8” [20 cm].
Size L finished with yoke; proceed to BODY.
Sizes XL (2X, 3X, 4X, 5X):
Ch 2, *dc next 4 sts, inc next st; rep from * to end of rnd, sl st to join rnd, turn. [324 (324, 336, 336, 336) dc]
Next Rnd: Ch 2, dc in each st around, sl st to join rnd, turn.
Rep last rnd until work measures 7.5 (8, 7.5, 7.5, 7.5)” [19 (20, 19, 19, 19) cm].
Increase Rnd 5: follow your size only
Size XL only:
Ch 2, dc next 4 sts, *dc next 19 sts, inc next st; rep from * to end, sl st to join rnd, turn. [340 dc]
Next Rnd: Ch 2, dc in each st around, sl st to join rnd, turn.
Rep last rnd until work measures 8.5” (22 cm).
Size XL finished with yoke; proceed to BODY.
Sizes 2X (3X, 4X, 5X):
Ch 2, *dc next 5 sts, inc next st; rep from * to end of rnd, sl st to join rnd, turn. [378 (392, 392, 392) dc]
Next Rnd: Ch 2, dc in each st around, sl st to join rnd, turn.
Rep last rnd until work measures 9” (23 cm).
Size 2X finished with yoke; proceed to BODY.
Increase Rnd 6: follow your size only
Size 3X only:
Ch 2, dc next 21 sts, inc next st, *[dc next 21 sts, inc next st] 3 times, dc next 20 sts, inc next st; rep from * to last 22 sts, dc next 21 sts, inc next st, sl st to join rnd, turn. [410 dc]
Next Rnd: Ch 2, dc in each st around, sl st to join rnd, turn.
Rep last rnd until work measures 9.5” (24 cm).
Size 3X finished with yoke; proceed to BODY.
Sizes 4X (5X):
Ch 2, *dc next 6 sts, inc next st; rep from * to end of rnd, sl st to join rnd, turn. [448 (448) dc]
Next Rnd: Ch 2, dc in each st around, sl st to join rnd, turn.
Rep last rnd until work measures 10 (9.5)” [25 (24) cm].
Size 4X finished with yoke; proceed to BODY.
Increase Rnd 7:
Size 5X only:
Ch 2, *dc next 15 sts, inc next st; rep from * to end of rnd, sl st to join rnd, turn. [476 dc]
Next Rnd: Ch 2, dc in each st around, sl st to join rnd, turn.
Rep last rnd until work measures 10.5” (27 cm).
Size 5X finished with yoke; proceed to BODY.
BODY
Next, you are going to join your yoke to create space for the body and sleeves.
Joining Rnd: Ch 2, dc in next 40 (41, 47, 51, 56) (61, 66, 71, 77) sts, ch 12 (16, 16, 20, 20) (20, 22, 22, 22), sk next 40 (43, 46, 48, 58) (67, 73, 82, 84) sleeve sts, dc in next 80 (82, 94, 102, 112) (122, 132, 142, 154) sts, ch 12 (16, 16, 20, 20) (20, 22, 22, 22), sk next 40 (43, 46, 48, 58) (67, 73, 82, 84) sleeve sts, dc in last 40 (41, 47, 51, 56) (61, 66, 71, 77) sts, sl st to join rnd, turn.
You should now have a total of:
160 (164, 188, 204, 224) (244, 264, 284, 308) dc, and 24 (32, 32, 40, 40) (40, 44, 44, 44) chs.
Next Rnd: Ch 2, dc into each dc and each ch to end of rnd, sl st to join rnd, turn. [184 (196, 220, 244, 264) (284, 308, 328, 352) dc]
Next Rnd: Ch 2, dc in each st around, sl st to join rnd, turn.
Rep last rnd until work measures 23.5 (24, 24.25, 24.5, 24.75) (25, 25, 25.5, 25.5)” [60 (61, 62, 62, 63) (64, 64, 65, 65) cm] from underarm or until desired sweater length. Fasten off.
If you need to increase to make more space for the hips, place a marker into 6 sts evenly spaced throughout your rnd once you have reached the point at which you need to increase and inc in each of these marked sts. This will add 6 new sts and an extra 1” (2.5 cm) to the circumference. Rep as many times as needed until you are comfortable with the circumference.
SLEEVES
Make sure you are working in the proper direction in order to keep the back-and-forth rows consistent.
Rnd 1: Attach new yarn in center of underarm with a sl st, ch 2, work 8 (10, 10, 12, 12) (12, 13, 13, 13) dc evenly before first sleeve st, dc across all 40 (43, 46, 48, 58) (67, 73, 82, 84) sleeve sts, work 8 (10, 10, 12, 12) (12, 13, 13, 13) dc evenly to end of rnd, sl st to join rnd, turn. [56 (63, 66, 72, 82) (91, 99, 108, 110) dc]
For the remainder of the sleeve, work the rnds as specified for your size, where:
A “decrease rnd” is worked as follows:
Ch 2, sk first st, dc in each st around until 1 st remains, sk last st, sl st to join rnd, turn. [decreases rnd by 2 sts]
Every rnd that is NOT a decrease rnd is worked as follows:
Ch 2, dc in each st around, sl st to join rnd, turn.
Follow your size only; total number of rnds given includes Rnd 1 you just completed. Since arm lengths differ from person-to-person, you can adjust the sleeve length by adding or eliminating non-decrease rnds as you see fit.
XS: Work a total of 51 rnds, working the following rounds as decrease rnds: 10, 20, 30, 40, 50. [46 sts]
S (M): Work a total of 52 (53) rnds, working the following rnds as decrease rnds: 7, 14, 21, 28, 35, 42, 49. [49 (52) sts]
L: Work a total of 54 rnds, working the following rnds as decrease rnds: 6, 12, 18, 24, 30, 36, 42, 48. [56 sts]
XL: Work a total of 54 rnds, working the following rounds as decrease rnds: 4, 8, 12, 16, 20, 24, 28, 32, 36, 40, 44, 48, 52. [56 sts]
2X: Work a total of 55 rnds, working the following rnds as decrease rnds: 3, 6, 9, 12, 15, 18, 21, 24, 27, 30, 33, 36, 39, 42, 45, 48, 51. [57 sts]
3X: Work a total of 55 rnds, working the following rnds as decrease rounds: 2, 5, 7, 10, 13, 15, 18, 21, 23, 26, 29, 31, 34, 37, 39, 42, 45, 47, 50, 53. [59 sts]
4X: Work a total of 56 rnds, working the following rnds as decrease rnds: 2, 4, 6, 8, 10, 12, 14, 16, 18, 20, 22, 24, 26, 28, 30, 32, 34, 36, 38, 40, 42, 44, 46, 48. [60 sts]
5X: Work a total of 56 rnds, working the following rnds as decrease rounds: 2, 4, 6, 8, 10, 12, 14, 16, 18, 20, 22, 24, 26, 28, 30, 32, 34, 36, 38, 40, 42, 44, 46. [64 sts]
Fasten off. Rep for second sleeve. Weave in any remaining ends. Block to dimensions listed in sizing chart.
That’s it! Hope you love your sweater!
And remember, if you’d like the ad-free, inexpensive PDF version, click here. Thank you so much if you choose to purchase and support my small shop!
You can find the inexpensive, paid-pattern in these places:
On my website here.
On Ravelry here.
On Etsy here.
(Use the code “PATTERN10” for 10% off all patterns)
I can’t wait to see your WIPs! Make sure to tag me @knitsnknotswpg and use the pattern hashtag #BlackOutYoke so that everyone can see your projects!
Happy crocheting,
Janine xx
You May Also Like


