

Hi everyone!
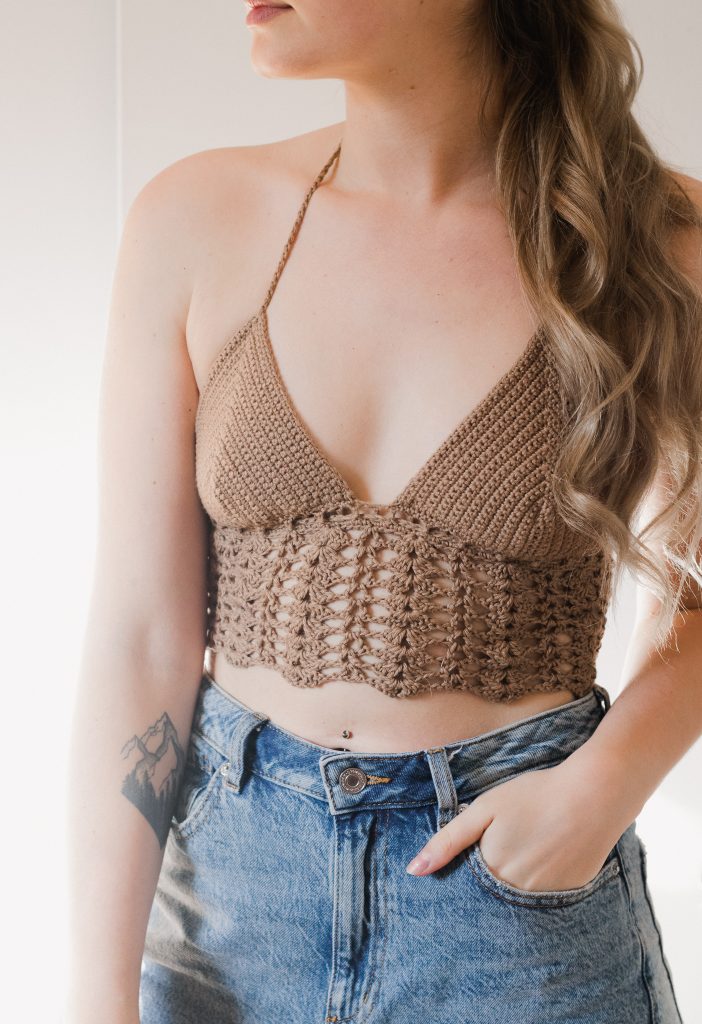
Today I’m sharing a brand new FREE bralette pattern using WeCrochet Cotlin DK, called the Goldstone Bralette.
A few years ago, I crocheted bralettes almost exclusively, and I’ve really missed making summer-y boho stuff like this! I hope you enjoy this pattern!
Before we begin, here are some quick links for you:
- Find the PDF version on Ravelry here, and on my website here.
- Add your finished project and view other completed projects on Ravelry here.
- Use the pattern hashtag #GoldstoneBralette on Instagram to show off your makes!
- Shop WeCrochet CotLin DK here!
- View my other WeCrochet CotLin Pattern (CotLin DK): Wings of a Butterfly here!
- Shop my WeCrochet exclusive summer pattern bundle here (5 patterns for $9.99)
- For any pattern questions, please email knitsnknotswpg@gmail.com.
Preorder my book – Modern Crochet Sweaters: 20 Chic Designs for Everyday Wear – here!
If you want to be notified of all new pattern releases (and get exclusive discounts on all new paid patterns), sign up below!
This post contains affiliate links. This means, should you make a purchase, I will receive a small portion of the sale at no extra cost to you. All opinions are my own. View my Privacy + Disclosures Policy here. This post is sponsored by We Crochet.

About
For a knitter or crocheter, summer brings forth the perfect opportunity for lacy stitch patterns and a chance to finally be able to show off some skin! Knitwear (crochet-wear) is often imagined as thick woolly sweaters to wear in the middle of winter, but there is a whole other realm of possibility that opens up with the change in seasons. Exploring yarns with lighter weights and plant-based fibers such as cotton, linen, bamboo, hemp, and other breathable materials is part of the fun when it comes to warm-weather crochet.
For this pattern, I’ve opted to use a cotton/linen blend from WeCrochet that is aptly named CotLin.
Sizing
This is a size-inclusive pattern, written in a tutorial-style for you to crochet any size of bralette that you’d like. All you need to know is the distance from the bottom of the breast to the center of the breast in order to crochet the correct cup size, and the circumference of your rib cage to work the body panel.
Materials
Yarn: DK–WeCrochet CotLin in Cashew
- 70% Tanguis Cotton, 30% Linen
- 123 yds [112 m] per 1.76-oz [50 g] skein
- Only $4.99 per skein
- Find this yarn on crochet.com
This is a light, DK weight, category #3 yarn. Substitute WeCrochet CotLin with any similar, DK weight yarn. Most fibers should work fine in place of CotLin, but for similar results to the sample shown, choose a cotton yarn. You can also choose a different yarn weight and follow the pattern as it’s written if you would rather use a different weight!
Yardage: 2 (2, 2, 3, 3) (4, 4, 5, 5) skeins of CotLin for sizes XS (S, M, L, XL) (2X, 3X, 4X, 5X). This is just a guide – yardage will vary slightly due to the tutorial-style nature of working to your exact measurements and the actual yardage will depend on your desired coverage.
For reference, the sample shown used 1.5 skeins.
Hook: Size U.S. C/2 (2.75 mm)
Notions: Tapestry needle, 2 locking stitch markers, additional stitch markers or scrap yarn to help with seaming the cups to the body (optional)
Gauge
Cups – 4″ x 4″ [10 cm x 10 cm] = 22 stitches and 28 rows in Single Crochet
Body – Each Shell/V-stitch repeat measures approximately 2.5″ [6.5 cm]
Abbreviations
Ch: Chain
Ch-sp: Chain space
Dc: Double crochet
Rep: Repeat
Sc: Single crochet
Shell: work (3 dc, ch 2, 3 dc) in designated stitch
Sk: Skip
Sl st: Slip stitch
St(s): Stitch(es)
V-stitch (v-st): work (dc, ch 2, dc) in designated stitch
Pattern Notes
Sizing: This pattern is written in a tutorial style, meaning you will repeat certain instructions until reaching your desired size or fit.
Reversible: There is no right side or wrong side of each piece. You choose which side to wear as the “right side”.
Turning Chain: The turning chain does not count as a stitch unless otherwise indicated.
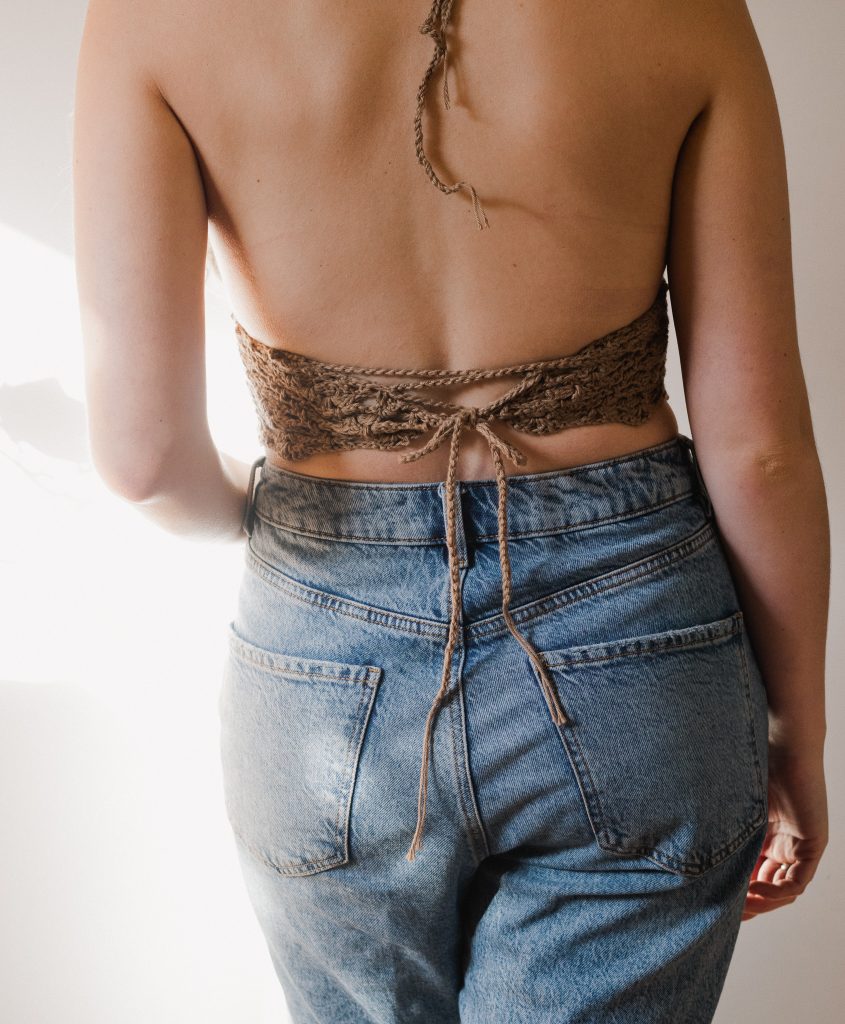
Construction: This top is worked in 3 main pieces: two identical cups, and one body panel that are seamed together. Two neck straps are added to the top of each cup, and a long chain is created to lace up the back. The body panel is worked from the top-down, with one row of mesh in the top row so that the back-tie can be woven under the bust and through the mesh before being laced up in the back for extra support.
Measurements: There are no measurements provided since this is a tutorial-style pattern. You can work to any measurements that you like.
Yarn Weight: Since this pattern is written in a tutorial-style, you can ignore the gauge provided and follow this pattern using any yarn weight and corresponding hook.
Pattern
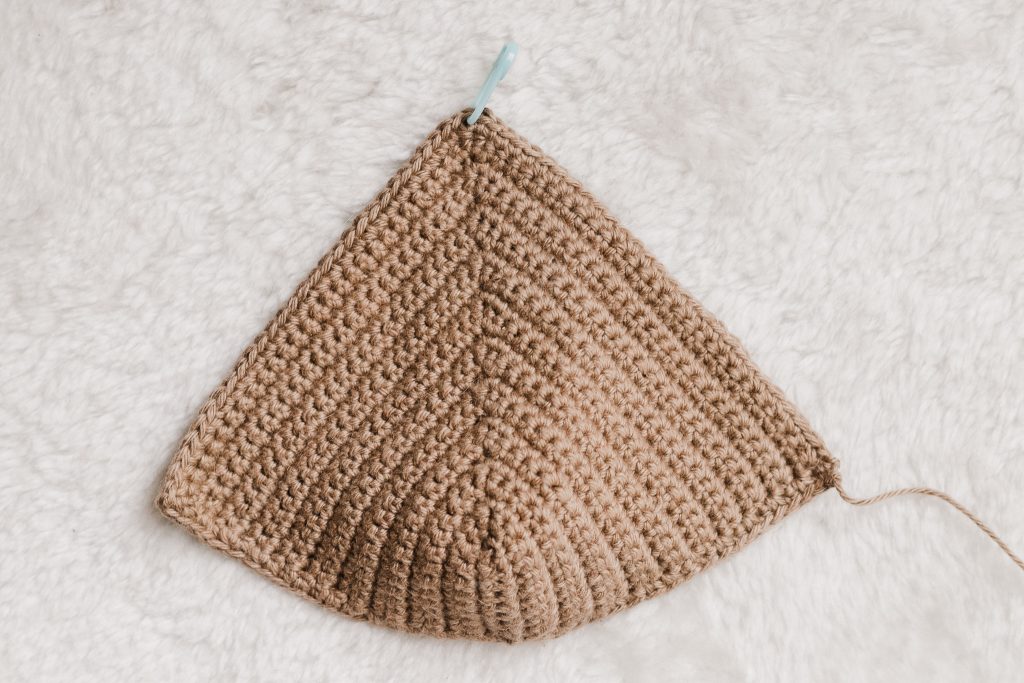
CUPS
Work a chain that approximately measures the length from the bottom of your breast to the center of your breast.
Establishing the pattern
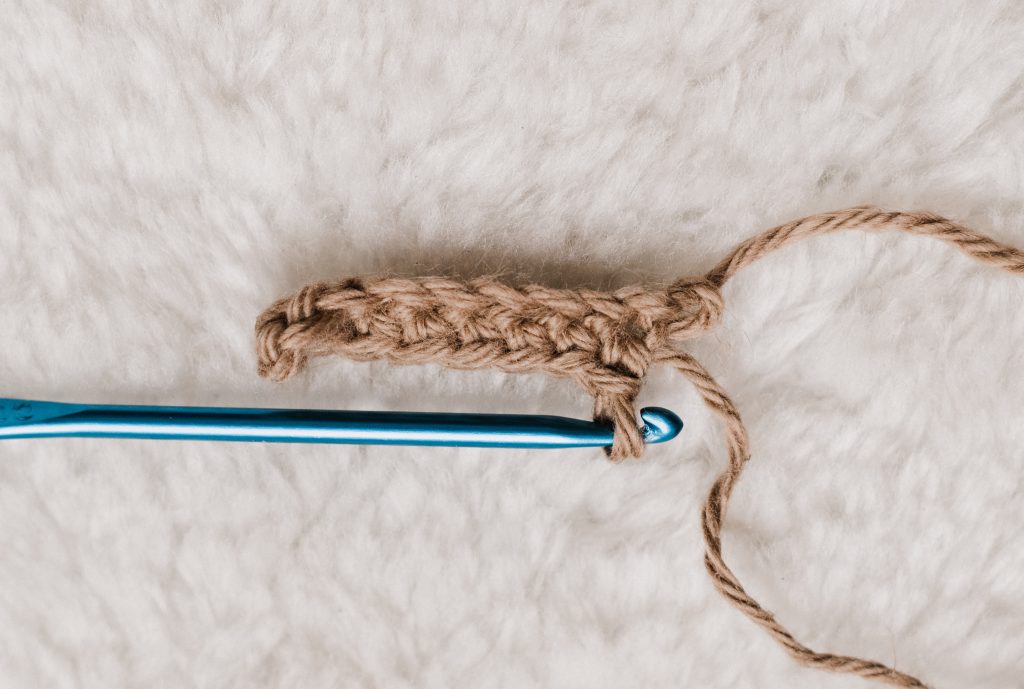
Step 1: Sc in 2nd ch from hook and in each ch across until you have 1 left unworked. [See Fig. 1]
Step 2: Work 3 sc in the last ch, place a marker in the center sc of these 3 sc. This marker denotes the top-center of your cup. Do not turn work, you are going to continue crocheting along the other side of your chain. [See Fig. 2]
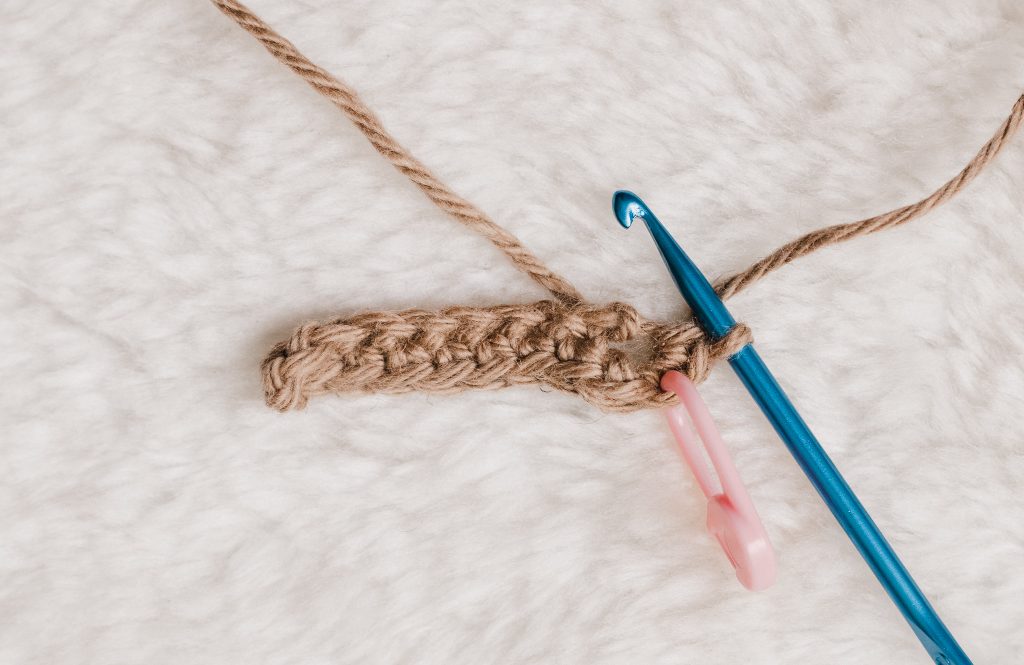
Step 3: Work 1 sc into the opposite edge of each ch until reaching the last ch. [See Fig. 3]
Once you reach the end of the ch, your work should be symmetrical, with the same number of sc on each side of your marked st. Your stitch count will likely be different from mine since you are working a custom size to fit your body, however you should still have an odd number of stitches here, since you have two symmetrical sides plus one center marked stitch.
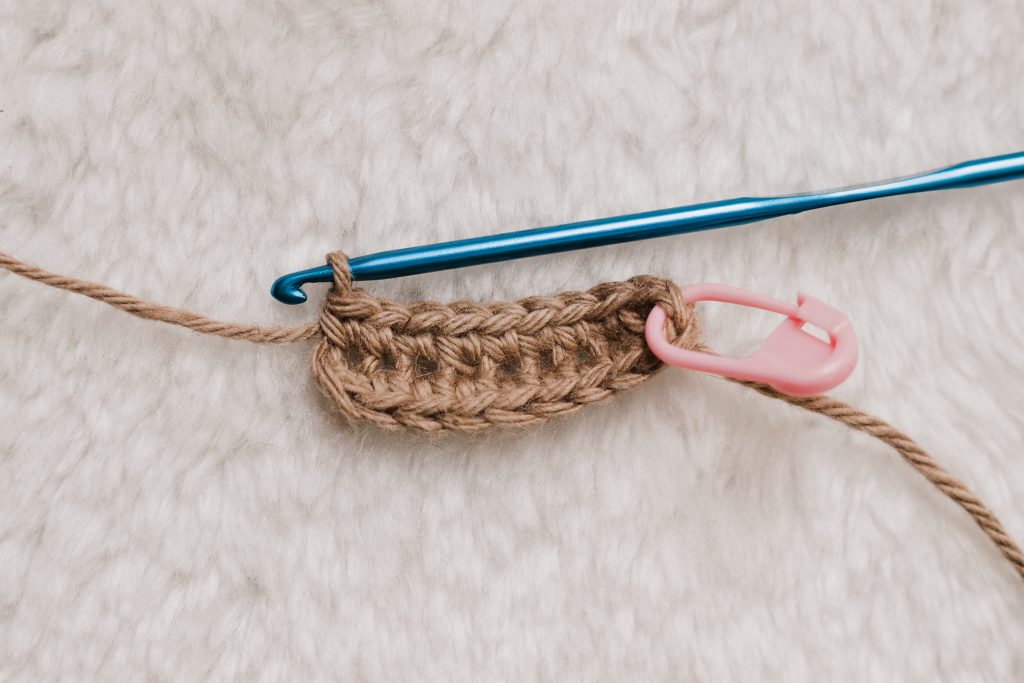
Step 4: Turn your work to begin working back on this row you just completed. [See Fig. 4]
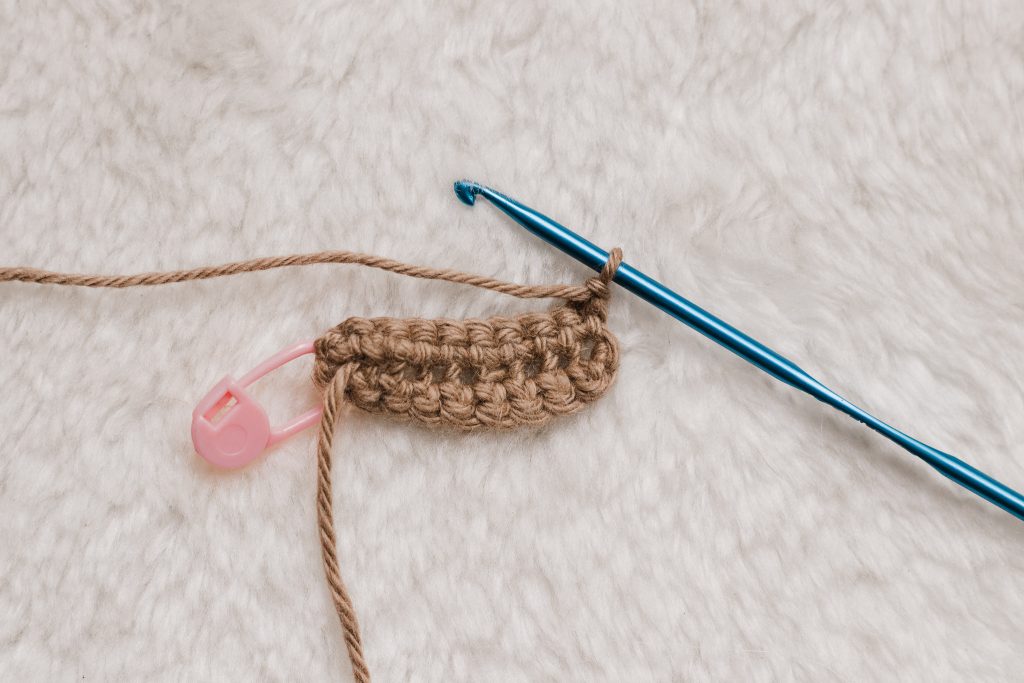
Step 5: Ch 1, sc in each st until reaching marked center st, work 3 sc into marked st, replace marker into the new center st of these 3 sc, sc in each st until reaching end of row, turn. [See Fig. 5]
Step 6: Rep Step 5 until reaching desired cup size.
The next row and each subsequent row will work this same way, by single crocheting up to the marker, working 3 single crochets in the marked stitch and replacing the marker to the new center of this single crochet group, then single crocheting down the opposite side until reaching the end, and turning your work. As you progress, your work will begin to take the shape of a triangle.
My suggestion is that it’s better to err on the smaller side than the larger side. If your cups are smaller, they will still be able to stretch over your chest as you tie up your bralette, hugging your body (and if they are too small, you can always make them larger). However, if they are too big, they will not pull tight to your body as you tie up your top and there will be a noticeable, loose point in the center of your cup that will sag, and it will look too big. It can take some finessing until you get the proper size that you like. But once you get it, you can use this cup as a reference size for other bralettes out there with similar constructions! When you hold up both cups to your body, you want there to be a tiny gap in between each cup so that they do not touch each other.
Step 7: Once you reach the size you like, turn your work to begin crocheting along the bottom of the cup. Ch 1, sc evenly along bottom edge, working approximately 1 sc for every row-end until reaching the opposite bottom corner. Leaving long tail for seaming cup to the body panel, fasten off. [See Fig. 6]
This is an optional finishing row. I like to work this row to make the seaming process a little easier, however you can definitely skip this step if you like your cups without it. If you choose to omit it, fasten off leaving a long tail after Step 6.
Repeat all instructions for a second, identical cup.

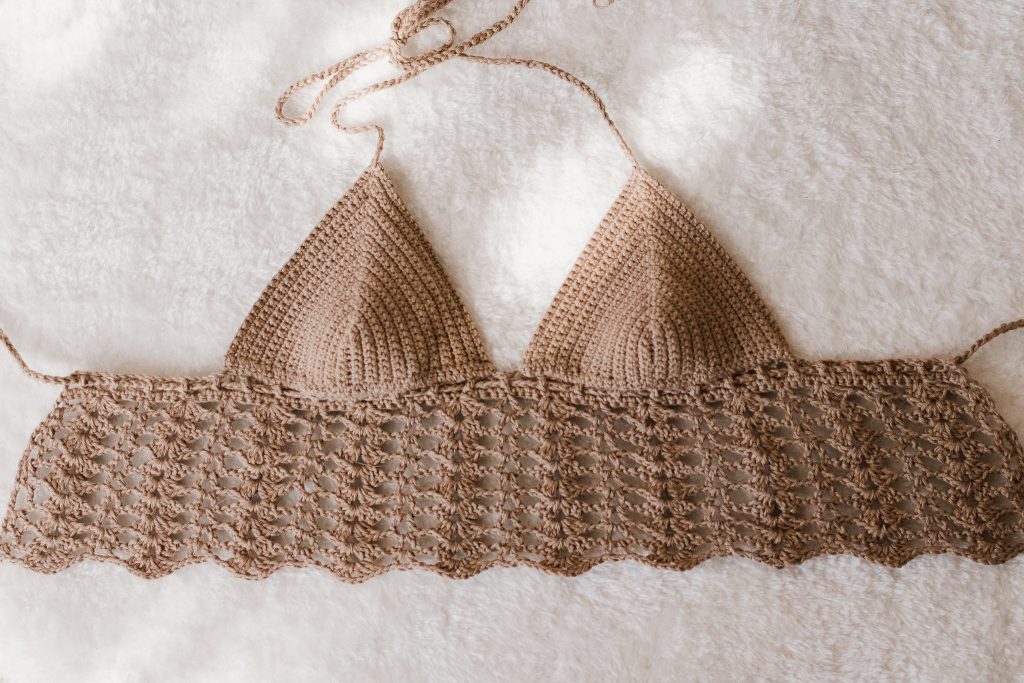
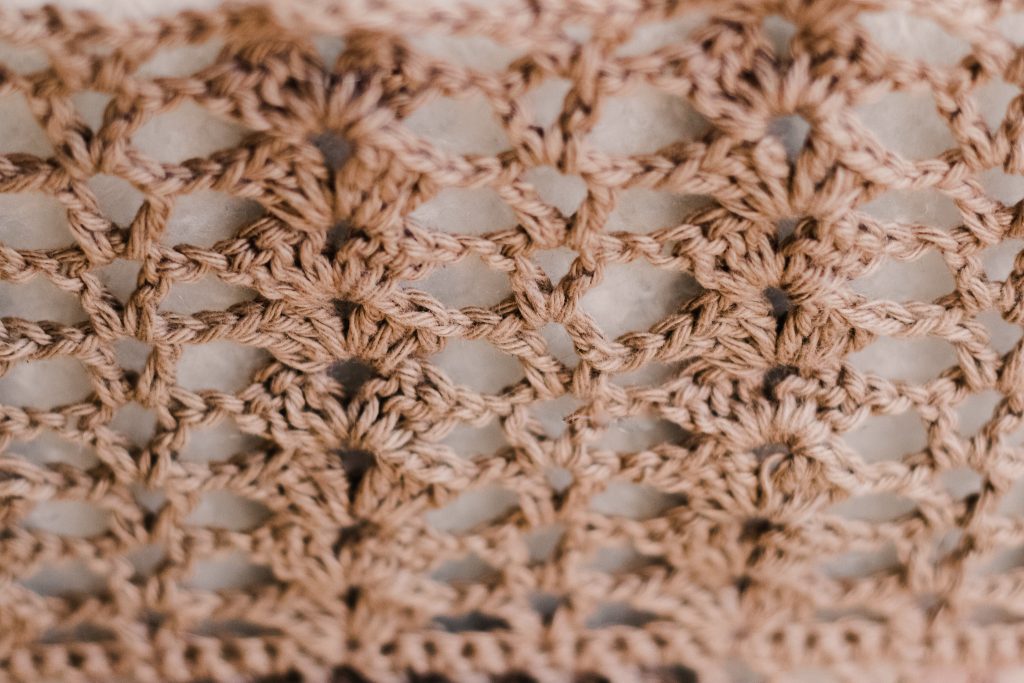
BODY
Measure the circumference of your body around your rib cage just under your chest, and make note of this number.
Work a chain in a multiple of 10 that measures approx. 8″ [20 cm] shorter than your rib cage measurement. You need it to be shorter than your actual body measurement so that it you can lace it up and tighten it to wear it. Sample shown worked a chain of 100.
Row 1: Ch 4 (counts as 1 dc + 1 ch), dc in 5th ch from hook, *ch 1, sk next ch, dc in next ch; rep from * to end of row, turn. You should finish this row with an odd number of dc.
Row 2: Ch 1, sc in first dc, *sc in next ch-sp, sc in next dc; rep from * to end of row, turn.
Row 3: Ch 2, V-st in first sc, ch 1, sk next 4 sc, Shell in next sc, *ch 1, sk next 4 sc, V-st in next sc, ch 1, sk next 4 sc, Shell in next sc; rep from * until 5 sts remain unworked, ch 1, sk next 4 sc, V-st in last sc, turn.
Row 4: Ch 2, V-st in ch-2 space of first V-st, *ch 1, Shell in ch-2 space of next Shell, ch 1, V-st in ch-2 space of next V-st; rep from * to end of row, turn.
Rep Row 4 seven more times or until desired length.
Block your body panel if desired. This will help your stitches open up and look more uniform before seaming your pieces together.
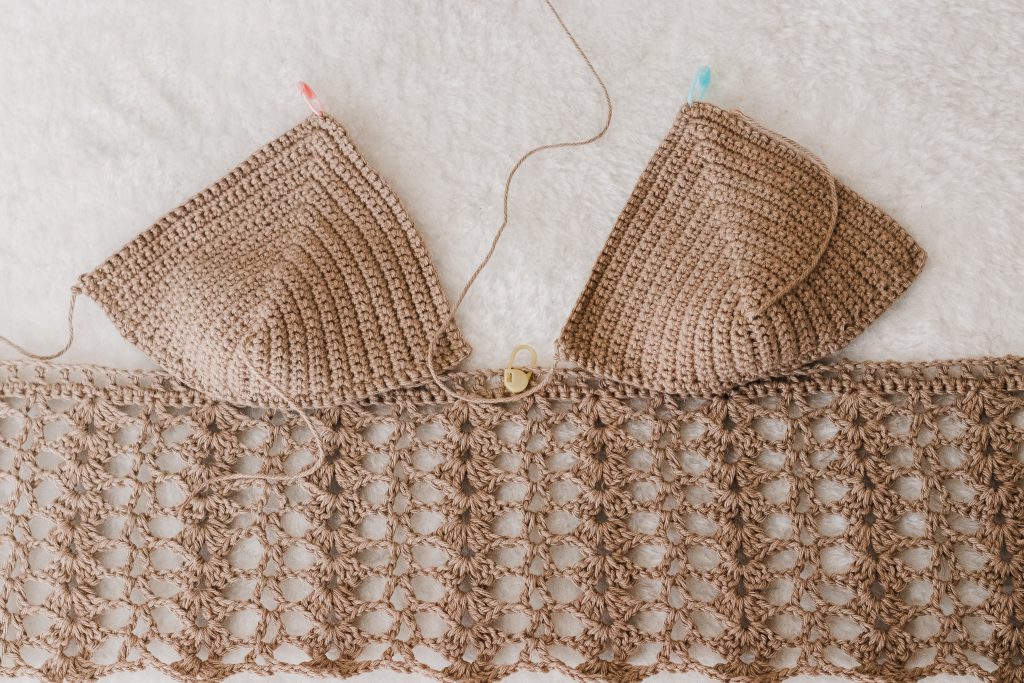
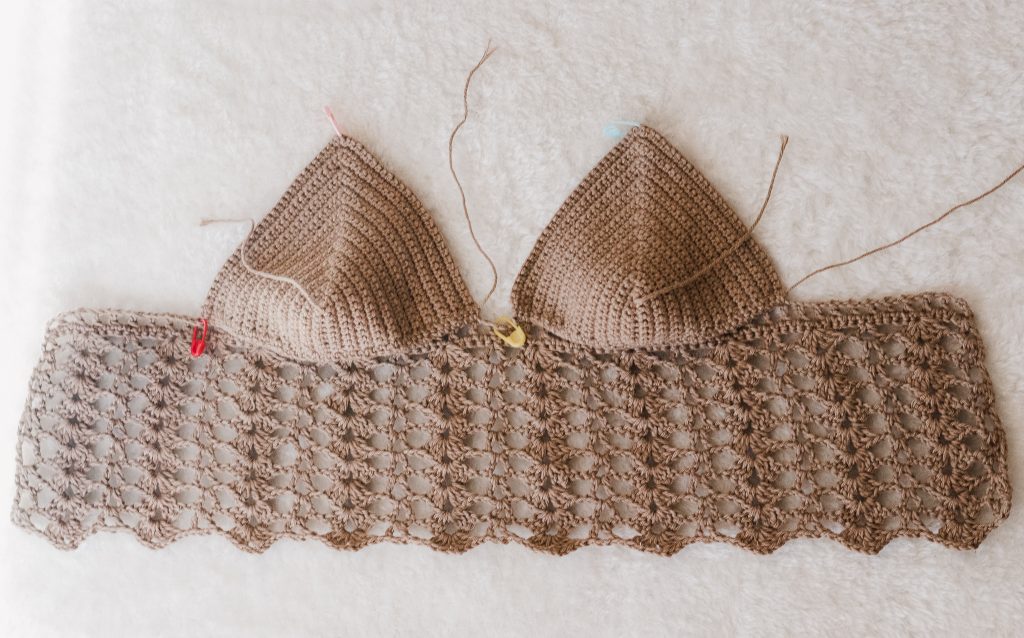
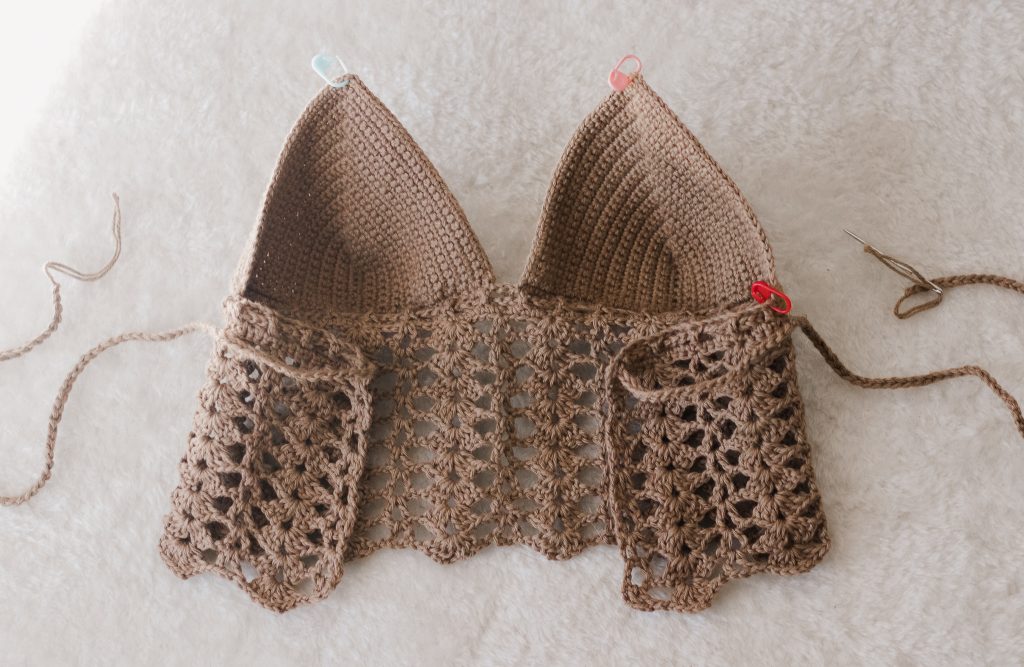
Seaming Cups to Body
Find the half-way point along the first row of your Body and place a stitch marker in this stitch.
Lay your cups 2 or 3 stitches away from this center marker to pin your cups in place, starting from the center and working your way outward. Make sure they are even and equally spaced. [See Fig. 7] With a tapestry needle, whip stitch your cups to the body, stitching through the bottom row of single crochets along your cup and the beginning chain on your body panel. [See Fig. 8] Your single crochets may not line up exactly with each chain, don’t worry about this. Just seam them together so that they look as neat as you can get them. Your work should look something like Fig. 9 once you are done. For larger cups, they may extend the entire width of your body – in this case, you may need to skip a few single crochets from the cups while you are seaming so that the cups remain in the center-front of your body panel and do not extend too far into the back of your top.

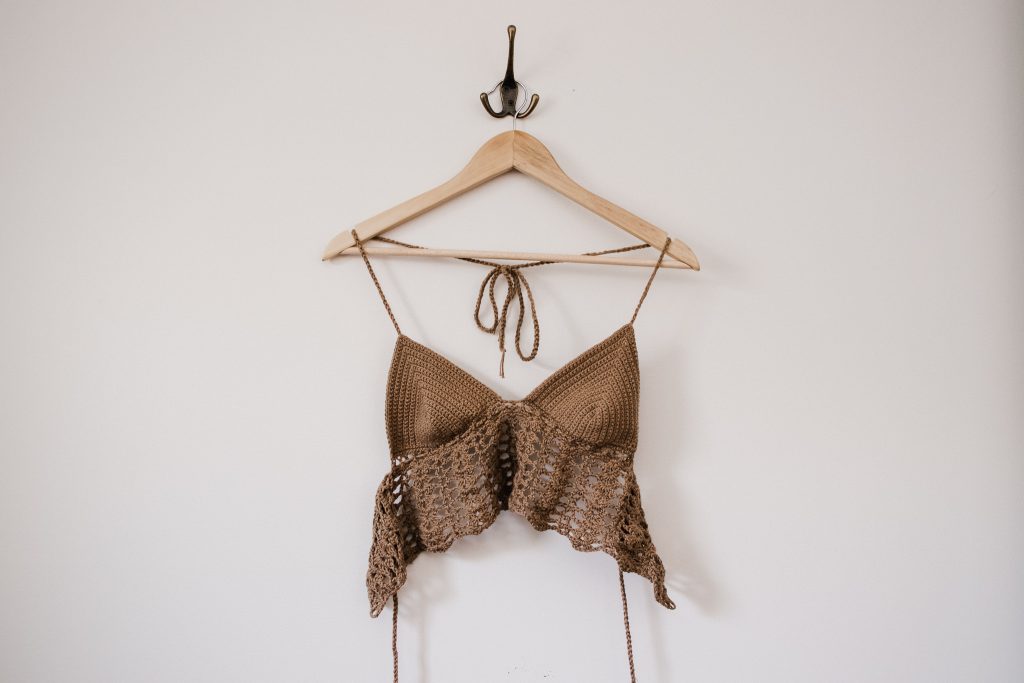
Neck Straps
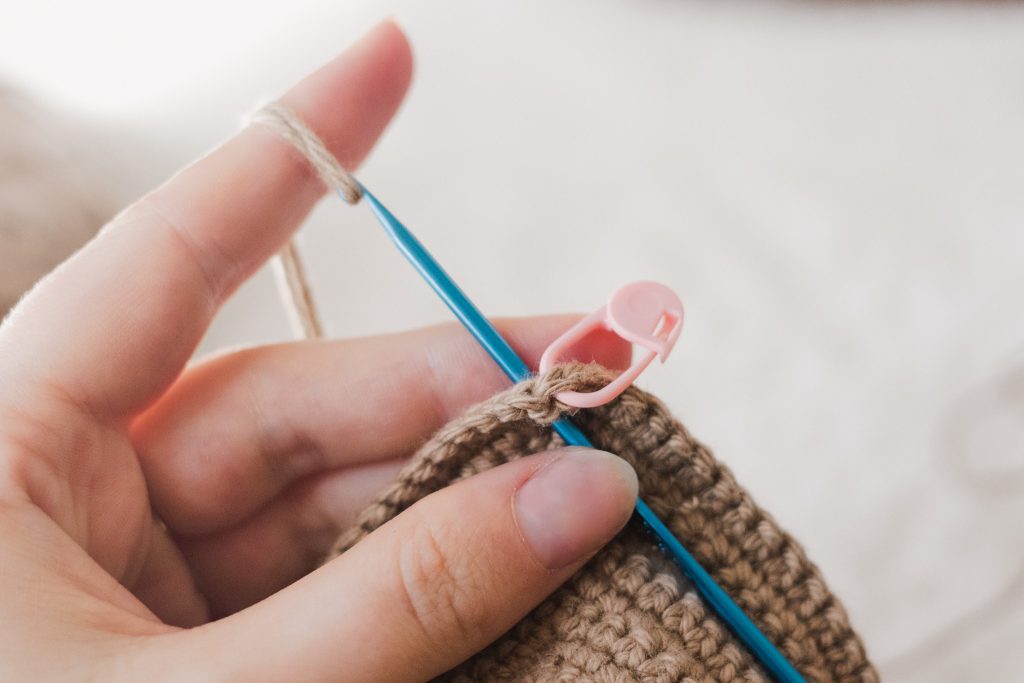
Step 1: Insert your hook between the last two rows in the top corner of your cup – one row below your marked stitch. [See Fig. 10]
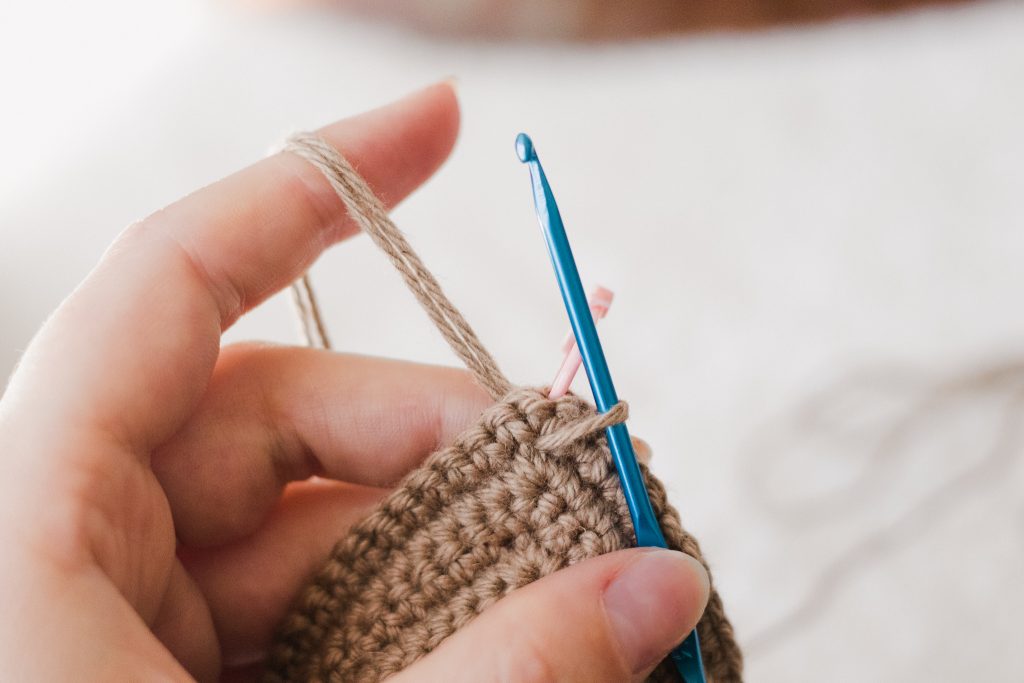
Step 2: Pull your yarn out so that you have approximately 3 wingspans worth of yarn pulled out. At this point, grab the yarn with your hook, folding the yarn because the working yarn and 3 arm-spans worth of yarn are going to be worked together as one strand. [See Fig. 11]
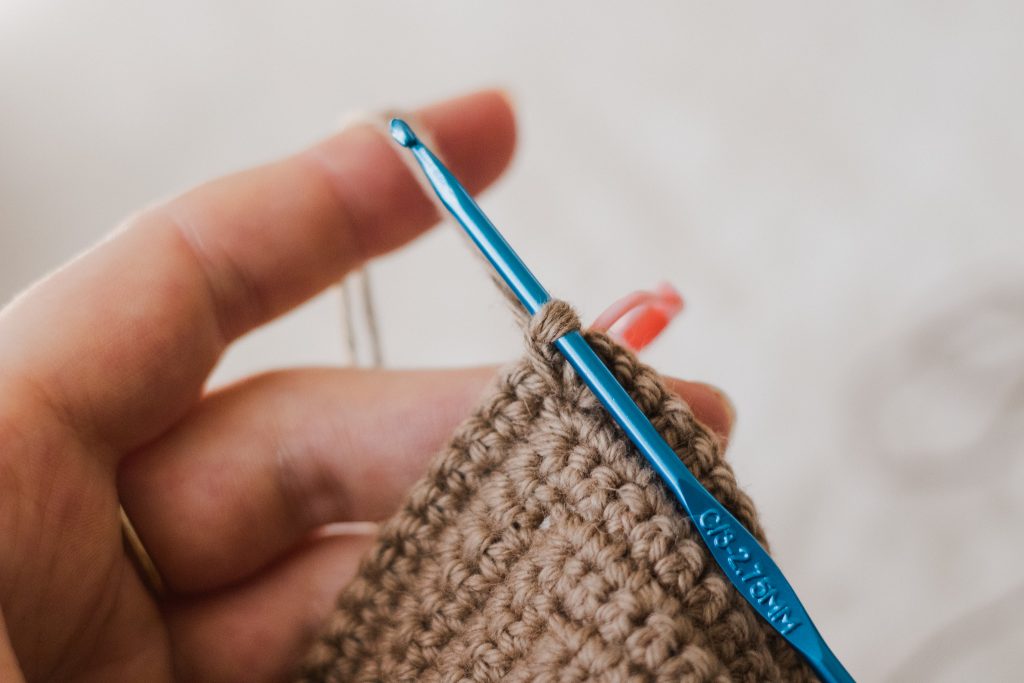
Step 3: Pull the yarn through the stitch. [See Fig. 12]
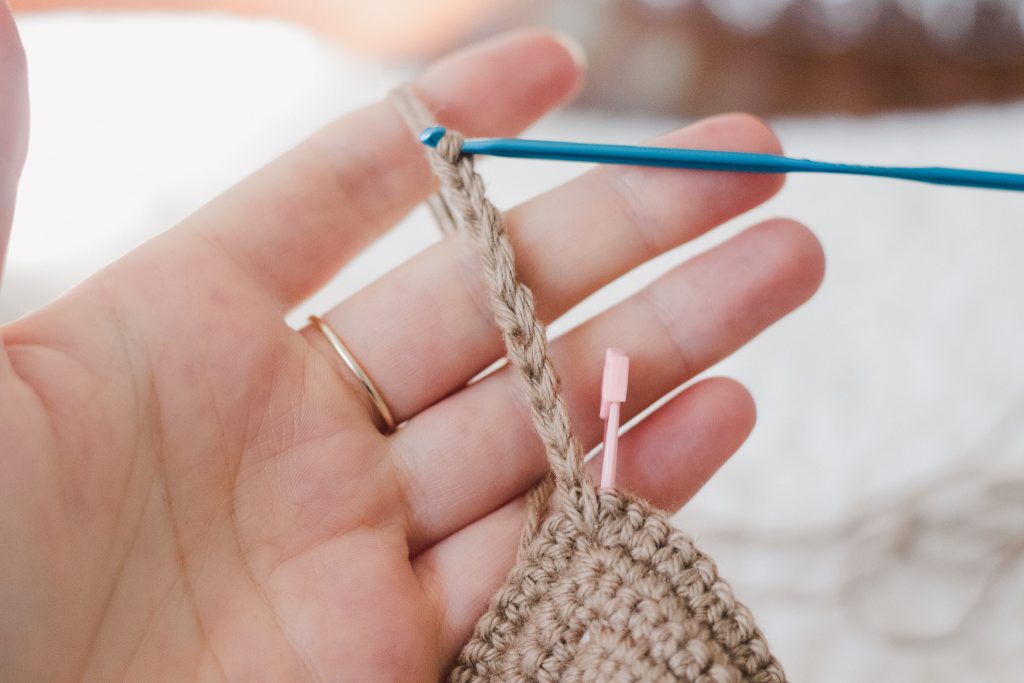
Step 4: Yarn over with both strands, working as if they were one, and pull through the loop on your hook. [See Fig. 13]
Step 5: Work a long chain until you reach the end of your yarn or until desired strap length, fasten off. [See Fig. 14]
Rep for second strap.

Back Tie
For the back tie, we will work with two strands and hold them together as if they were one. It will be easiest to pull from two separate balls of yarn, or to pull from the center of one ball and then pull from the outside of the same ball, and work them together as one (rather than folding it as we did for the neck straps) since this tie will be significantly longer than the neck-ties. [See Fig. 15]
Holding two strands of yarn together and working as if they were one, work a chain long enough to wrap around your body twice, but don’t fasten off just yet. We will insert this tie through our top and lace up the back before fastening off just to make sure it’s the correct length before snipping the yarn!
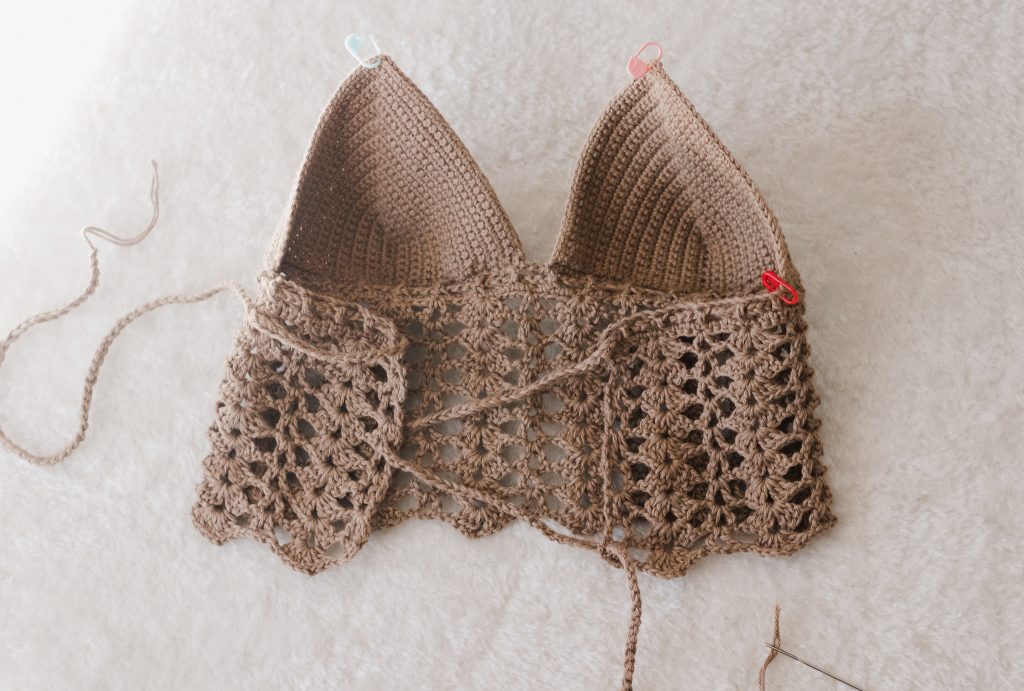
Thread the beginning of this chain through a tapestry needle and weave it through the mesh row of your body panel, weaving it through each ch-sp. [See Fig. 16 and Fig. 17]

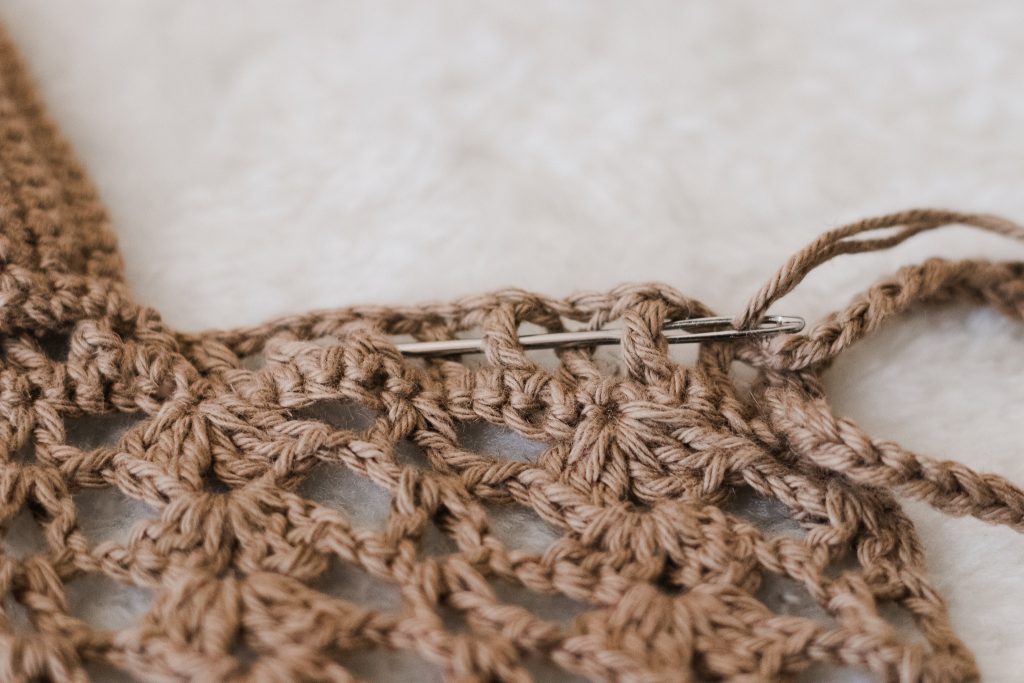
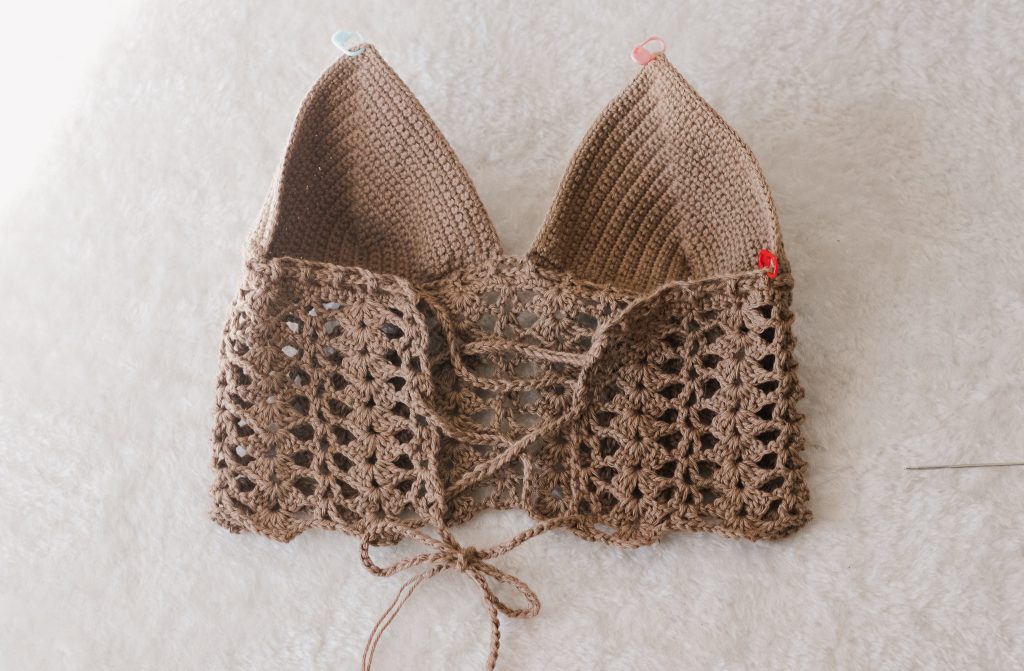
Lacing Up the Back
Your work should look something like Fig.16, with your back-tie pulled through the mesh row of the body panel. Make sure it is centered, then take the tail on the right-hand side and weave it through the edge stitch around the mid-point of your body panel on the left-hand side, then across and through the edge stitch around the bottom row on the right-hand side. Do the same thing with the tail on your left-hand side, weaving through the stitches on the opposite side, and you’re done! [See Fig. 18-20 below]
Weave in any remaining ends, and enjoy your new top!

That’s it! I hope you loved making your top as much as I did!
#GoldstoneBralette
That’s it! Hope you love your new bralette!
If you like this bralette, try one of my other bralette patterns: the Beginner Bralette and the Gilmore Bralette!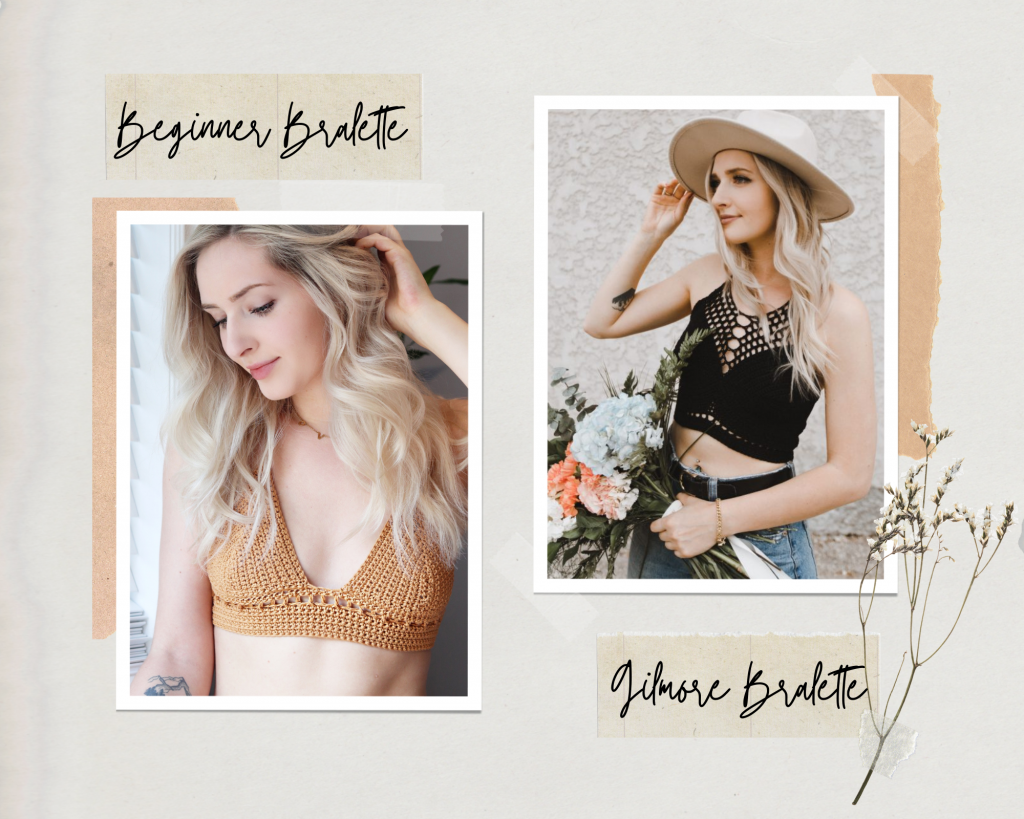
Here are some other free patterns you might like – the Tyndall Top, Ripple Plant Rug, the Easy Hanging Planter, and the Teulon Tank!
I can’t wait to see your WIPs! Make sure to tag me @knitsnknotswpg and use the pattern hashtag #GoldstoneBralette so that everyone can see your projects!
Happy crocheting,
xx
Janine
You May Also Like


