

Hi everyone!
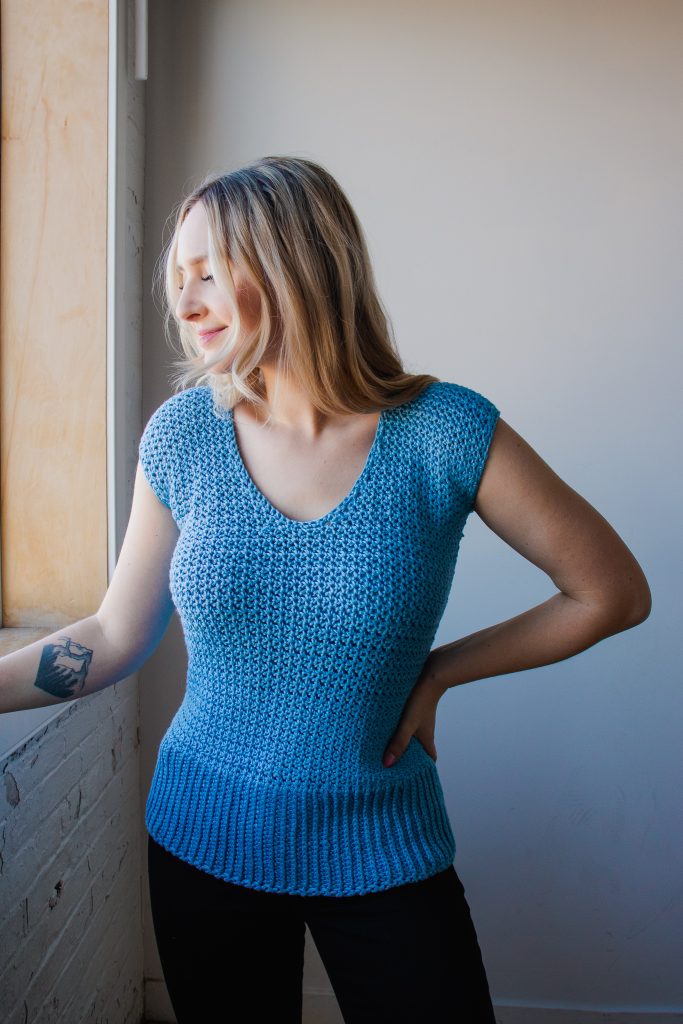
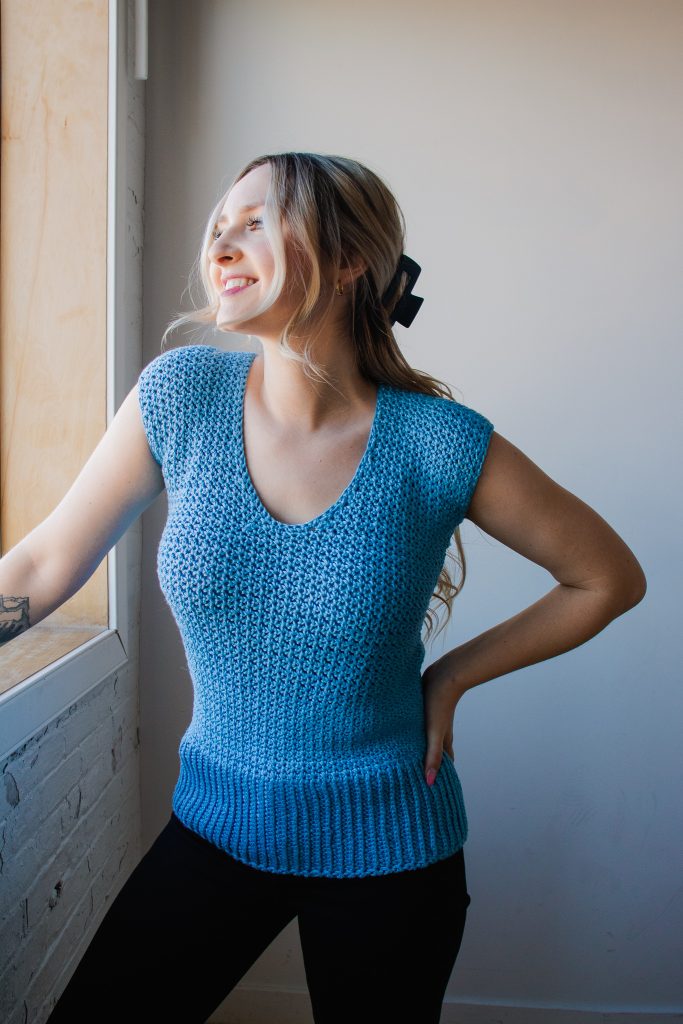
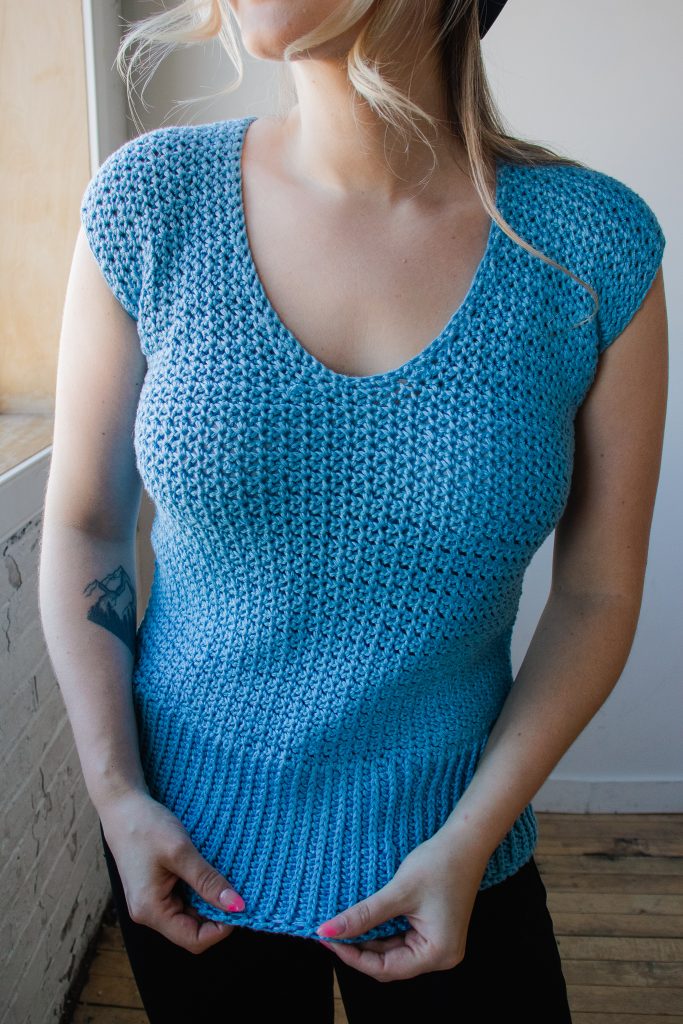
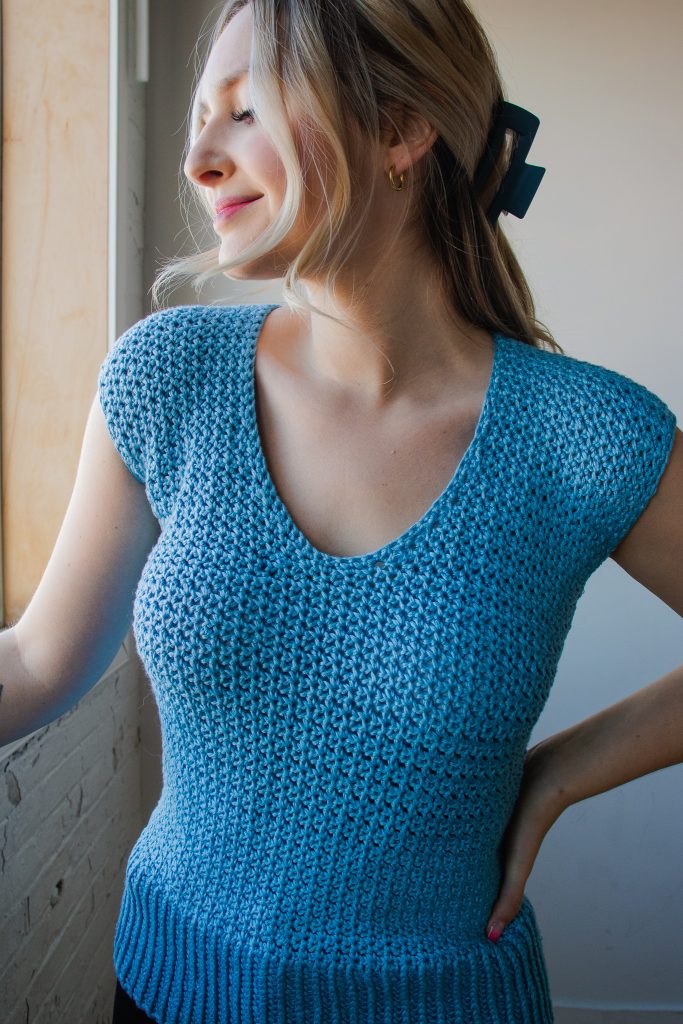
This post includes everything you need to know about the Tyndall Top, a (FREE!) sleeveless summer top featuring a rounded V-neck, an all-over texture, and a knit-like ribbing.
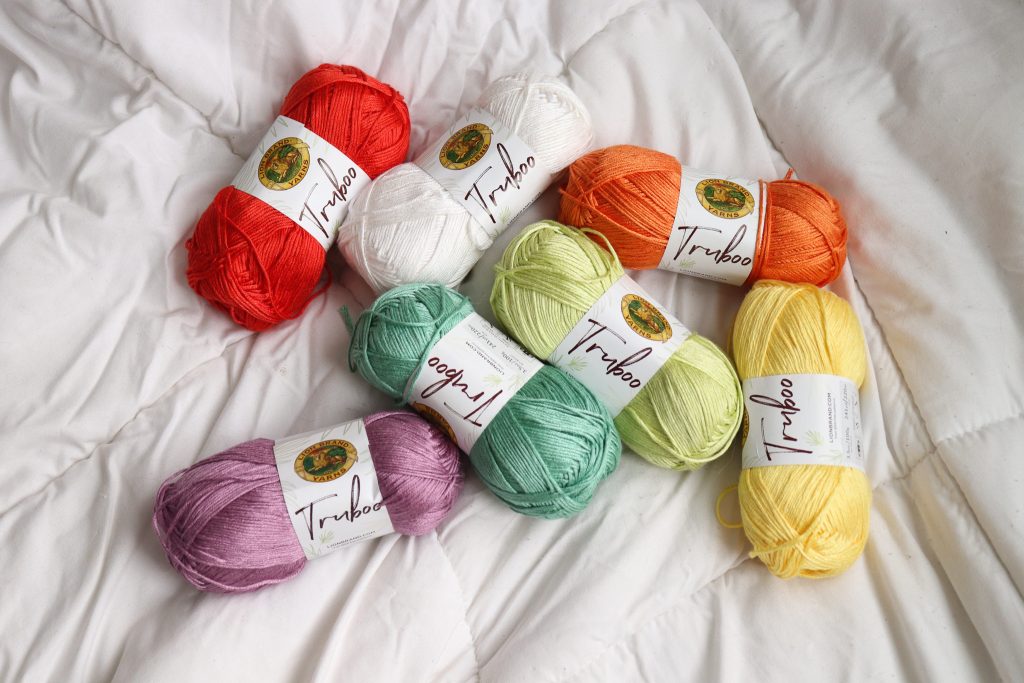
This pattern uses Lion Brand Truboo held double to help you complete it twice as fast!
Scroll down for the free pattern.
Here are some quick links for you:
- Find the PDF version on Ravelry here
- Get the full Tyndall Top Crochet Kit with Lion Brand if you’d prefer to get your yarn + pattern all in one place.
- Add your finished project and view other completed projects on Ravelry here.
- Use the pattern hashtag #TyndallTop on Instagram to show off your makes!
- Shop Lion Brand Truboo here!
- View my other Lion Brand kits here!
- For any pattern questions, please email knitsnknotswpg@gmail.com.
Preorder my book – Modern Crochet Sweaters: 20 Chic Designs for Everyday Wear – here!
If you want to be notified of all new pattern releases (and get exclusive discounts on all new paid patterns), sign up below!
This post contains affiliate links. This means, should you make a purchase, I will receive a small portion of the sale at no extra cost to you. All opinions are my own. View my Privacy + Disclosures Policy here.
About
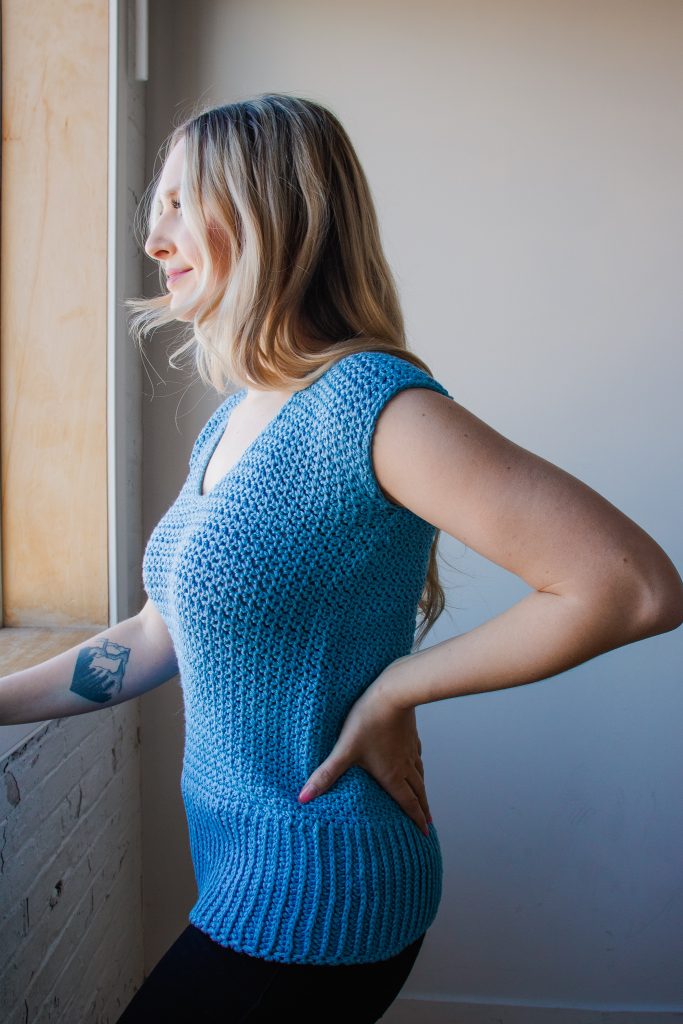
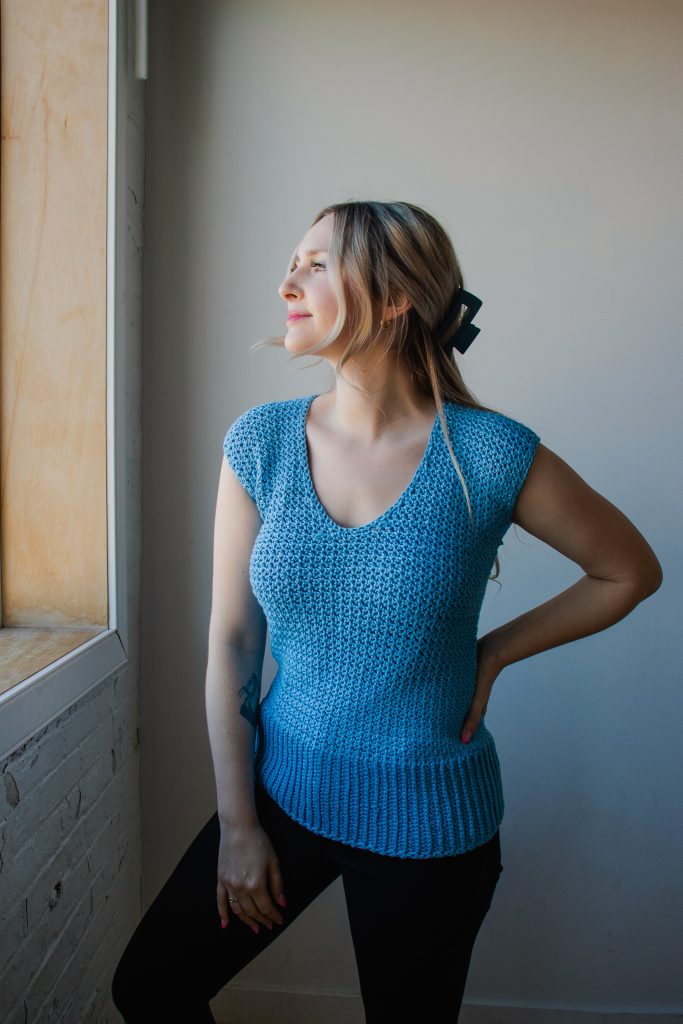
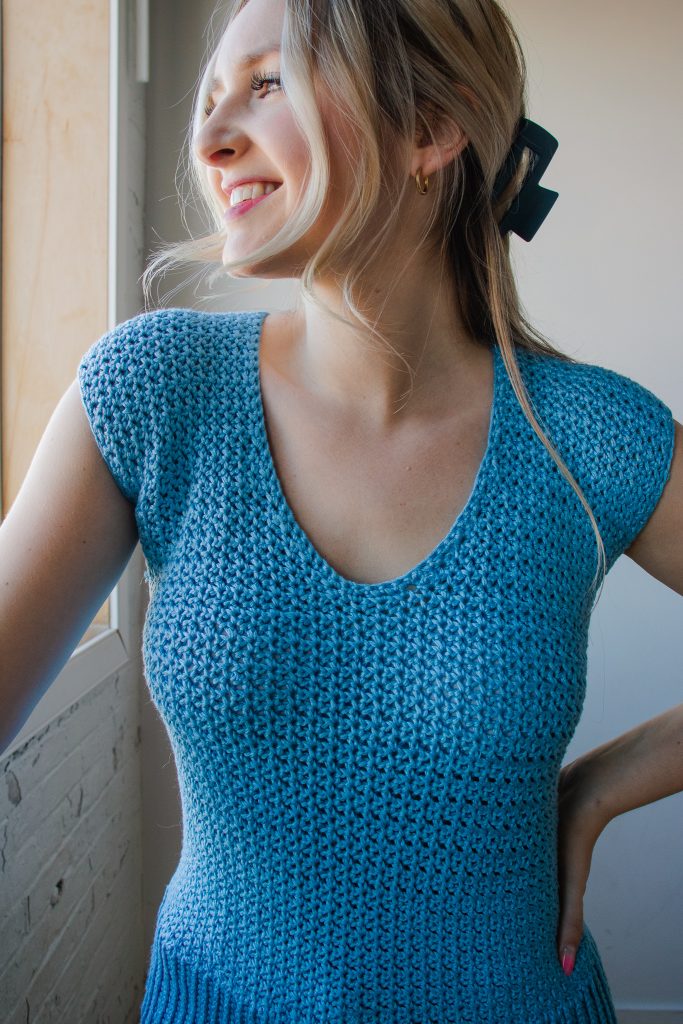
Designed with warm weather in mind, the Tyndall Top is a beginner-friendly, sleeveless crochet top, featuring a curved neckline and a bottom border with a knit-like ribbing. Worked flat in two panels using Lion Brand Truboo, the Tyndall Top is crocheted with two strands of yarn as if they were one. The incredible drape is due to the bamboo fiber content of this yarn; even when held double, the resulting fabric remains flowy, feeling breathable and slinky without the bulk. The main body of this design is worked in a stacked single crochet stitch pattern, further emphasizing the drape and bringing movement to this design. Instructions are included to easily adjust the length of the body or the depth of the neckline to suit your personal taste.
This is one of several projects I’ve completed using Lion Brand Truboo, and I truly love garments worked in this yarn. The drape that you get with Truboo, or bamboo fiber in general, is unmatched. One of my most popular blog posts is actually a Truboo yarn review – read it here!
And if you like to work with this yarn, you may want to check out my Pride Yoke (knit) and Pride Yoke (crochet) and Coastline-Cover Up that all use Truboo!
This top is created in a 2 pieces: a back panel and a front panel that splits into two sections to create the gorgeous neckline. The stitch pattern used is like a stacked linen-stitch, and creates a really flowy, breathable fabric that produces the most interesting texture. I try my best to avoid the basic back-and-forth rows of defined stitches that you usually see in crochet to give a more dimensional fabric.
Materials
Yarn: DK held double (acts as worsted/aran weight)—Lion Brand Truboo in Blue
- 100% Rayon from Bamboo
- 241 yds (220 m) per 3.5-oz (100-g) skein
- Find this yarn on lionbrand.com or visit yarnsub.com to find comparable substitutes.
Substitute Lion Brand Truboo with a similar DK weight yarn, held double stranded. For a similar drape to the sample shown, choose a yarn with similar fiber content. You can also match gauge with most worsted weight yarns held single stranded. If using a thicker weight held single stranded, you will need only half the yardage that is listed below.
Yardage: 6 (6, 7, 8, 9) (9, 10, 11, 12) skeins, or
- 1250 (1400, 1625, 1725, 1925) (2100, 2300, 2425, 2650) yds
- 1143 (1281, 1486, 1578, 1761) (1921, 2104, 2218, 2424) m
Hook: Size U.S. I/9 (5.5 mm) or size needed to obtain gauge
Notions: Tapestry needle, several locking stitch markers to help with seaming
Gauge
Main Gauge: 4 x 4″ (10 x 10 cm) = 17.5 sts and 17 rows in main stitch pattern; where each sc and each ch counts as a stitch.
For Swatch:
Ch 22.
Row 1: Sc in second ch, *ch 1, sk next ch, sc in next ch; rep from * to end of row, turn. [11 sc; 10 ch-sp]
Row 2: Ch 1, sc in first sc, *ch 1, sk next ch-sp, sc in next sc; rep from * to end of row, turn.
Rep Row 2 until you have at least 20 rows worked. If you plan on blocking your finished top, block your swatch before measuring.
Measure the inner 4” (10 cm) of your swatch to get the most accurate measurement. When measuring the stitch gauge, 4” (10 cm) should equal 17 full stitches (including single crochets and chains) and approximately half of the next stitch.
Bottom Ribbing Gauge:
Although my sample used the same 5.5mm hook for the entire piece, I’m including the gauge for the bottom ribbing as well in case you would like to swatch for both stitch patterns. Depending on your tension, you may need to use different hooks for the bottom ribbing and main stitch pattern. The width of the bottom ribbing is the same width as the top portion of this design.
Gauge: 4 x 4″ (10 x 10 cm) = 20 sts and 17.5 rows in yo-slst.
For swatch:
Follow pattern as written in Front Panel-Bottom Ribbing until you have at least 20 rows worked.
Abbreviations
Written in U.S. Crochet terms
- ch: chain
- ch-sp: chain space
- rep: repeat
- sc: single crochet
- sc2tog: single crochet 2 stitches together
- (pattern will specify over which stitches to work this decrease)
- sk: skip
- sl st: slip stitch
- st(s): stitches
- yo-slst: yarn over slip stitch-yarn over, insert hook into the 3rd loop of designated stitch, yarn over, draw loop through stitch and immediately through both loops on hook
Pattern Notes
Skill Level: Easy
Sizing: This top is written in nine sizes as follows: XS (S, M, L, XL) (2X, 3X, 4X, 5X). Make sure to follow the numbers for your size only.
Stitch Counts: Stitch counts are listed after each row. If no stitch count is given, there has been no change since the previous row. If only one number is provided, it applies to all sizes.
Reversible: There is no right side or wrong side; both sides are identical. You choose which side to wear as the “right side.”
Seaming: When seaming your garment, make sure not to pull too tight in order to maintain some stretch, otherwise this seam will pucker during wear.
Turning Chain: The turning chain does not count as a stitch.
Yarn Held Double: This entire piece is worked holding two strands of Truboo together and crocheting as if they were one. You can also use most worsted weight yarns in place of Truboo, held single stranded (requiring half the yardage).
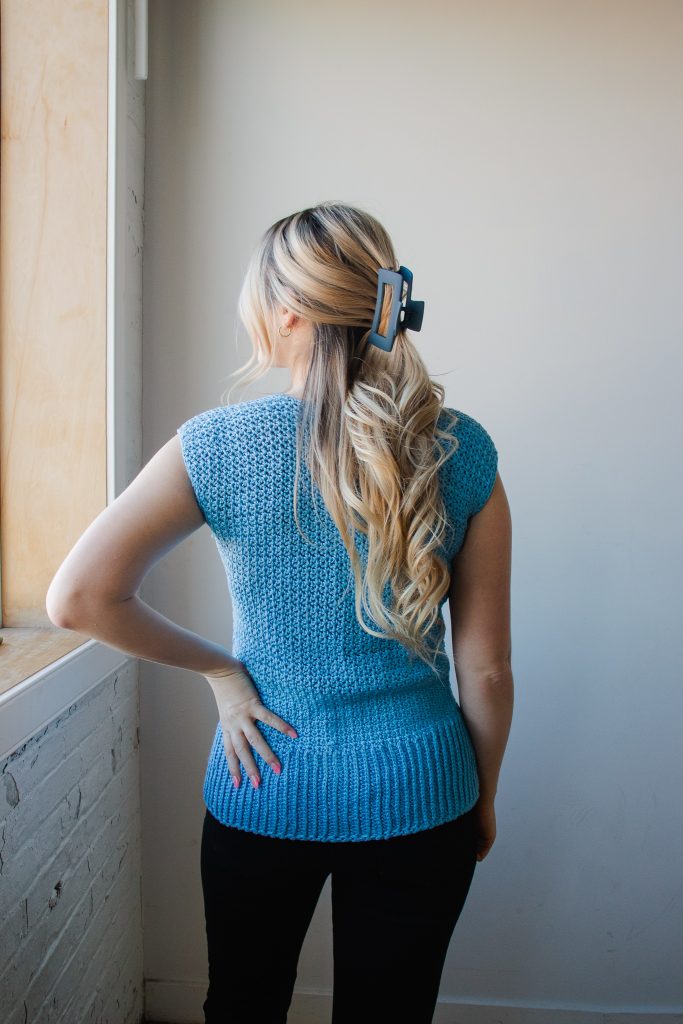
Construction: This top is worked in a front and back panel that get seamed together along the tops of the shoulders and partially seamed together along the sides, leaving space for the armholes. Both panels are worked from the bottom-up, beginning with the bottom ribbing. The front panel splits into two sections to create the deep neckline.
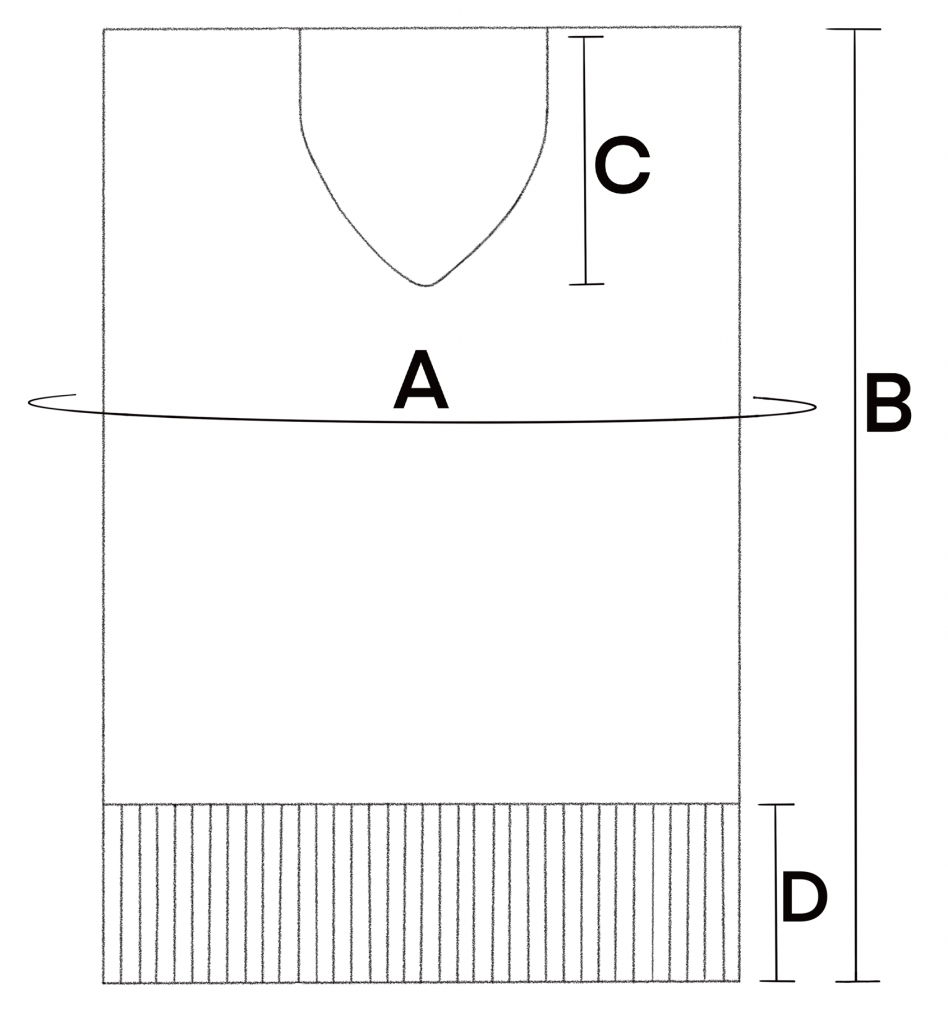
MEASUREMENTS + SIZING
A – Finished Bust Circumference
30 (34, 38, 42, 46) (50, 54, 58, 62)”
76 (86, 97, 107, 117) (127, 137, 147, 157) cm
B – Total Length
21” (53 cm)
C – Neckline Depth
6.5” (17 cm)
D – Ribbing Height
5” (13 cm)
PATTERN
FRONT PANEL
Bottom Ribbing
Leaving a long tail for seaming, ch 26.
For taller (or shorter) bottom ribbing, work a longer (or shorter) ch.
Row 1: Yo-slst into 2nd ch from hook and each ch across, turn. [25 yo-slst]
Row 2: Ch 1, yo-slst into the 3rd loop of each st across row, turn.
Rep Row 3 until you have completed a total of 65 (75, 83, 91, 101) (109, 119, 127, 135) rows. If you matched gauge, this should measure approximately 15 (17, 19, 21, 23) (25, 27, 29, 31)” / 38 (43, 48, 53, 58) (64, 69, 74, 79) cm in length.
After last row, turn your work to begin working into the edges of the rows you just completed.
Body
In Row 1, you will begin the body by working into the row-ends of this established ribbing to work across the width of the garment. This creates a row that is perpendicular to the ribbing. There is not an exact place for your stitch to go when working into the row-ends, so place your hook into the end of the row wherever looks right.
Row 1: Ch 1, sc into the first row-end, *ch 1, sk next row-end, sc into next row-end; rep from * to end of row, turn. [33 (38, 42, 46, 51) (55, 60, 64, 68) sc]
Row 2: Ch 1, sc in first sc, *ch 1, sk next ch-sp, sc in next sc; rep from * to end of row, turn.
Rep Row 2 until you have completed a total of 40 rows in your Body section, or until you reach your desired length before splitting for the V-neck.
Note that adding length requires more yarn than is listed in the Materials section.
Do not fasten off, continue to Front Panel – Side 1
Front Panel – Side 1
Row 1: Ch 1, sc in first sc, *ch 1, sk next ch-sp, sc in next sc; rep from * until you have worked a total of 16 (18, 20, 22, 24) (26, 29, 31, 33) sc, turn.
Row 2: Ch 1, sk first sc and first ch-sp, sc into second sc, *ch 1, sk next ch-sp, sc in next sc; rep from * to end of row, turn. [15 (17, 19, 21, 23) (25, 28, 30, 32) sc]
Row 3: Ch 1, sc in first sc, *ch 1, sk next ch-sp, sc in next sc; rep from * to end of row, turn.
Rep Row 2 and 3 two more times.
[13 (15, 17, 19, 21) (23, 26, 28, 30) sc]
Row 8-9: Rep Row 3.
Row 10: Rep Row 2. [12 (14, 16, 18, 20) (22, 25, 27, 29 sc]
Row 11-27: Rep Row 3.
For deeper neckline, work additional Row 3 reps. For more conservative neckline, work fewer Row 3 reps.
Fasten off, leaving 12“ (30 cm) tail for seaming shoulders.
Front Panel – Side 2
Lay your front panel flat with your completed Side 1 on the right. Count 1 (2, 2, 2, 3) (3, 2, 2, 2) sc from completed V-neck edge, leaving these stitches unworked, and attach yarn into the next available sc with a sl st.
Row 1: Ch 1, sc in first sc (same sc as sl st), *ch 1, sk next ch-sp, sc in next sc; rep from * to end of row, turn. [16 (18, 20, 22, 24) (26, 29, 31, 33) sc]
Row 2: Ch 1, sc in first sc, *ch 1, sk next ch-sp, sc in next sc; rep from * across row until 2 sc remain unworked, then sc2tog over these last 2 sc, turn. [15 (17, 19, 21, 23) (25, 28, 30, 32) sc]
Row 3: Ch 1, sc in first sc, *ch 1, sk next ch-sp, sc in next sc; rep from * to end of row, turn.
Rep Row 2 and 3 two more times.
[13 (15, 17, 19, 21) (23, 26, 28, 30) sc]
Row 8-9: Rep Row 3.
Row 10: Rep Row 2. [12 (14, 16, 18, 20) (22, 25, 27, 29 sc]
Row 11-27: Rep Row 3.
If you adjusted the length of Front Panel – Side 1, make the same adjustment to Side 2.
Fasten off, leaving 12“ (30 cm) tail for seaming shoulders.
BACK PANEL
Follow the instructions from Front Panel – Bottom Ribbing.
Follow the instructions from Front Panel – Body, up to and including Row 2.
Rep Row 2 from Front Panel – Body until you have completed a total of 67 rows in your Body section, or until your back panel measures the same as your front panel. Fasten off.
ASSEMBLY
Lay the front panel over top of the back panel so that the long tails from your beginning chains are on opposite sides. Starting from the bottom, line up the sides stitch-for-stitch as best you can. Use locking stitch markers to help hold your work in place for seaming. With a tapestry needle, seam the sides of your top using the whip stitch (or seaming method of your choice), starting from the bottom and working your way up. Leave as much space as you would like for your arm opening before fastening off and weaving your ends. This opening is intended to fit snug to your arm as you wear it.
To seam the tops of the shoulders, line up the top row of your panels stitch-for-stitch, starting from the outside and working your way toward the center. Use locking stitch markers to help hold your work in place for seaming. With the 12“ (30 cm) tails and a tapestry needle, seam the tops of the shoulders using the whip stitch (or seaming method of your choice), starting from the outside and working your way toward the center. Fasten off, weave in ends.
ARMHOLE FINISHING ROW
Attach yarn with a sl st to the bottom of your armhole opening.
Ch 1, sc evenly around the opening, until reaching starting point, sl st into first sc to join, fasten off, weave in ends. Rep for both sides.
NECKLINE FINISHING ROW
Lay your top flat with the RS of the back panel facing you. Attach yarn to the neckline with a sl st where the back-neck meets the right shoulder seam to begin working across the back-neck.
Ch 1, sl st into each sc and each ch across the back-neck, then sc around the remainder of the neckline until reaching starting point, sl st into first sl st to join round, fasten off.
Weave in any remaining ends and block to dimensions listed in Measurements section.
You’re done!

#TyndallTop
Thanks so much for reading!
Shop the full Tyndall Top crochet kit here (comes with all yarn required + FREE copy of the PDF pattern)!
Find the pattern in these places:
On Ravelry
For free in the Lion Brand kit!
x
Janine
You can find my full print book, Modern Crochet Sweaters: 20 Chic Designs For Everyday Wear on the shelves of all major retailers or see purchasing options here!
For exclusive discounts on all new patterns, join the Knits ‘N Knots newsletter list here!
You May Also Like


Loose And Comfortable Crochet Tops - Pattern Center
[…] original free pattern on knitsnknots.ca, or read more about […]
16 . Apr . 2021Goldstone Bralette – Make this Easy Boho Adjustable Crochet Pattern in Any Size – Knits 'N Knots
[…] are some other free patterns you might like – the Tyndall Top, Ripple Plant Rug, the Easy Hanging Planter, and the Teulon […]
23 . Apr . 2021