

Hi friends!
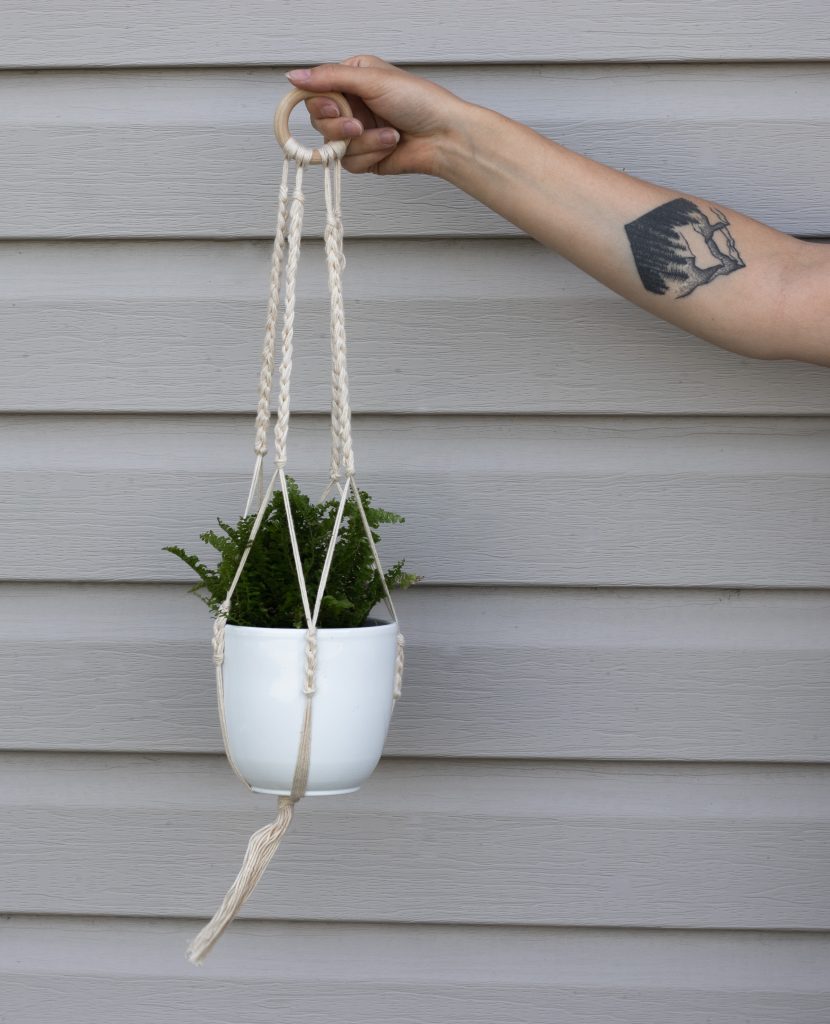
I am sooo excited to share this free pattern with you – my easy hanging planter! It looks like macrame but it’s not – it’s just basic crochet!
This post contains affiliate links. This means, should you make a purchase, I will receive a small portion of the sale, at no extra cost to you. All opinions are my own. View my Privacy + Disclosures Policy here. This post is sponsored by We Crochet.
To save big on all new pattern releases and receive exclusive subscriber discounts on all new pattern releases, sign up below!
About
I’m sharing a FREE pattern with you – Easy Hanging Planter – made with Comfy Fingering from WeCrochet! I’ve always loved the boho look of macrame planters and have always wanted to try to achieve this same look with crochet! I have seriously wanted to do this forever but never actually made the time for it. I could not believe how easy it is! I think I finished mine in under 20 minutes.
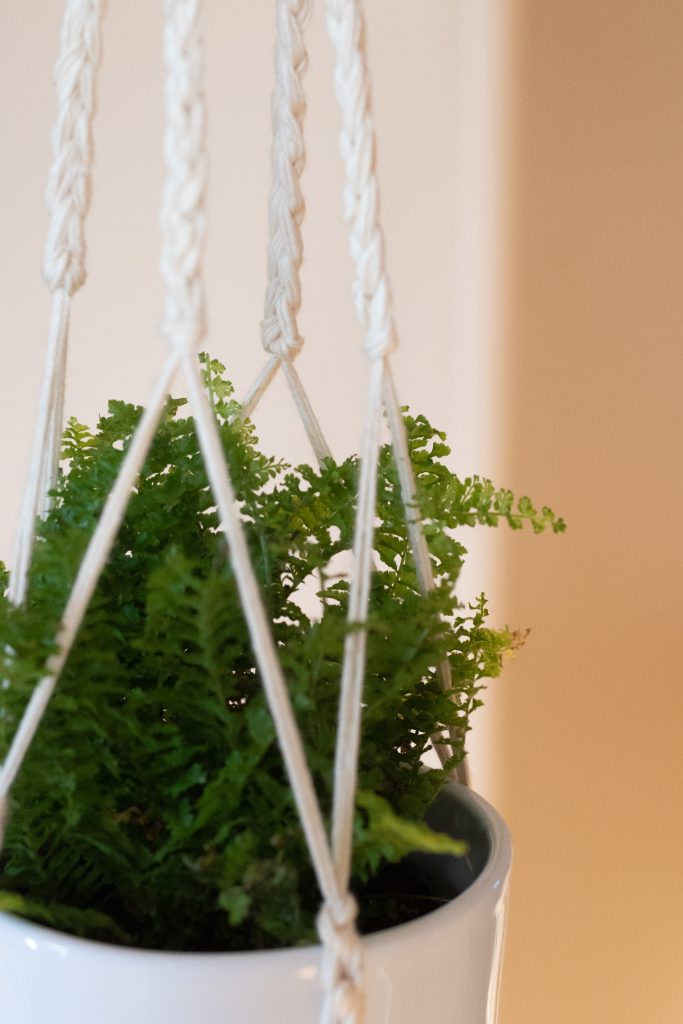
This is just a simple, fun, beginner project that uses chain stitches .. and that’s it! Just chain stitches.
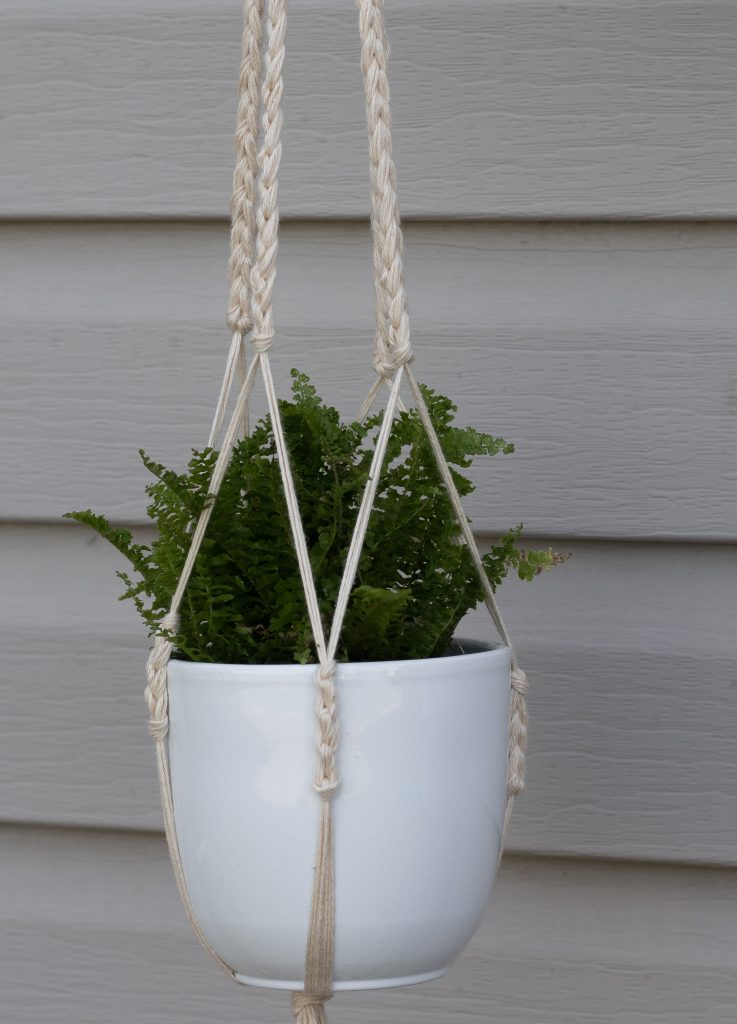
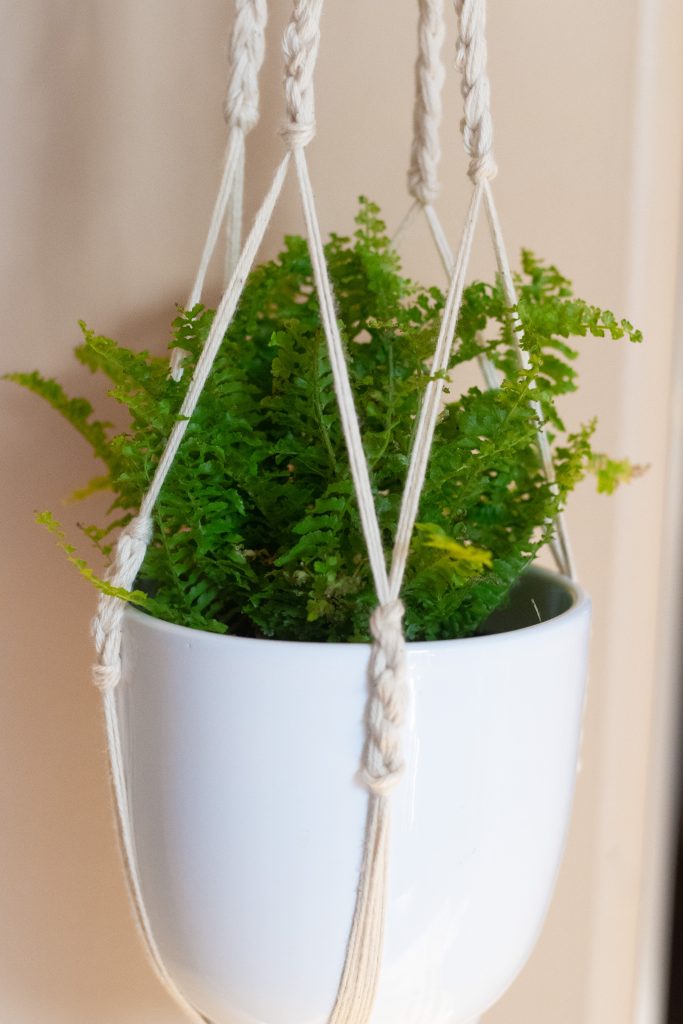
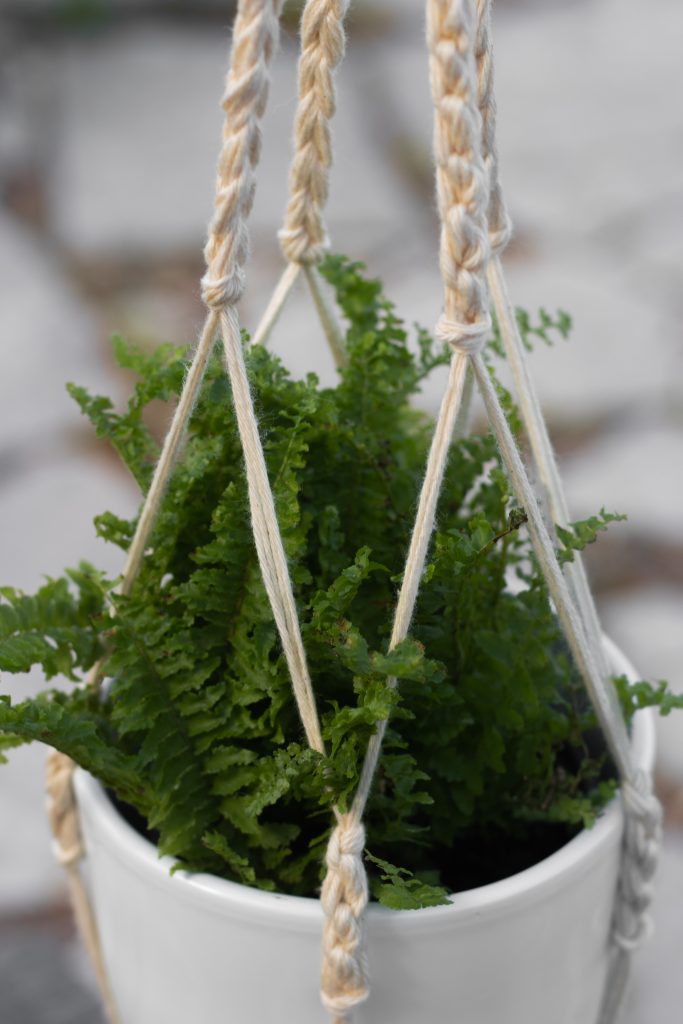
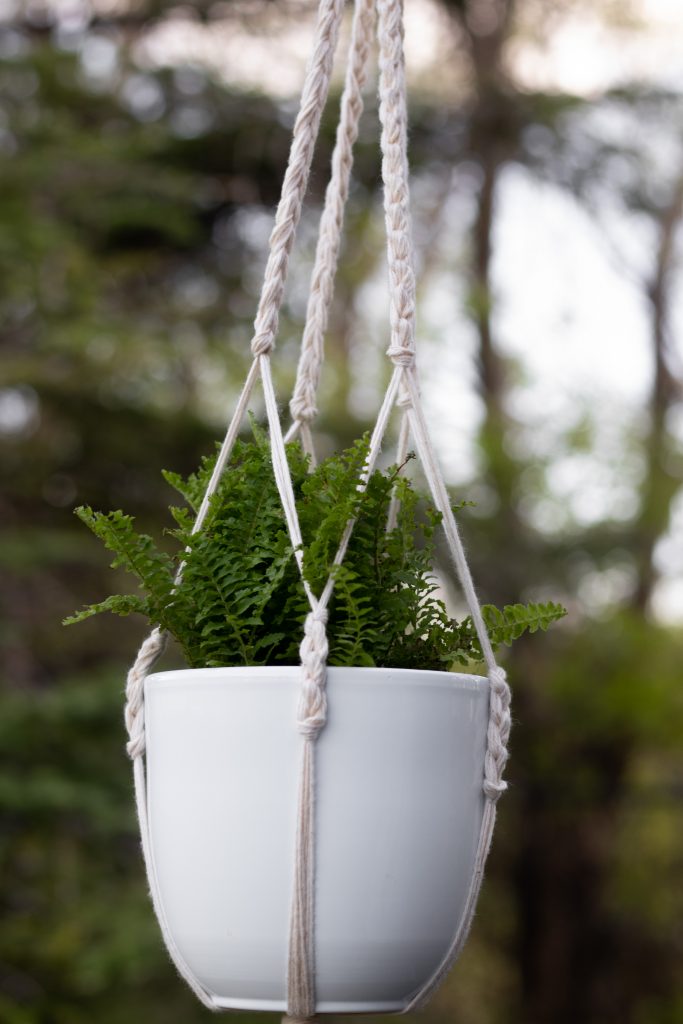
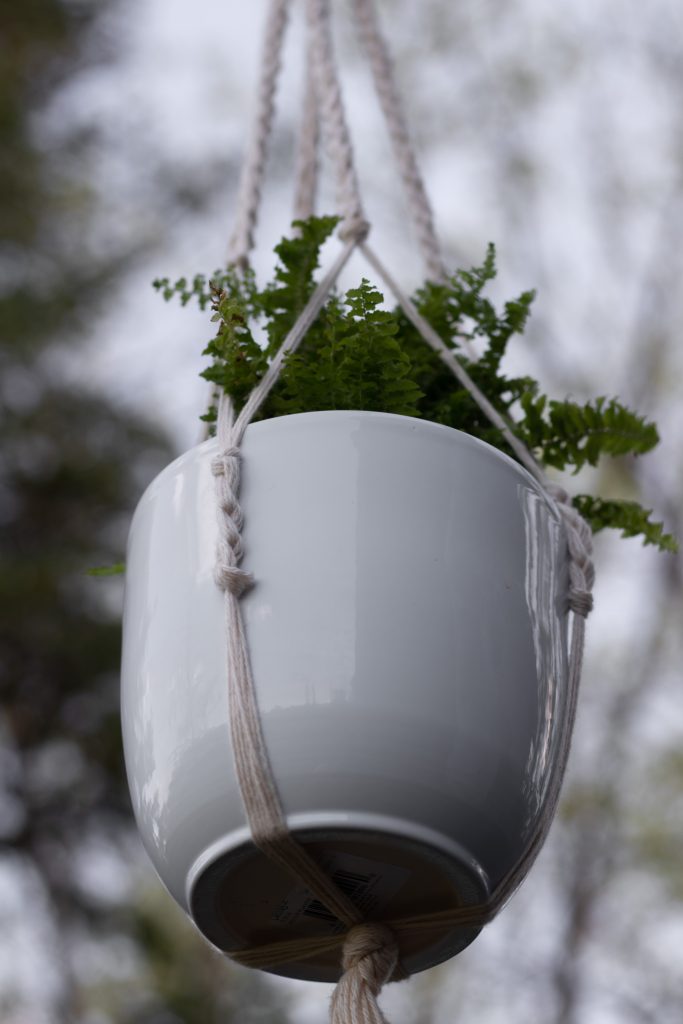
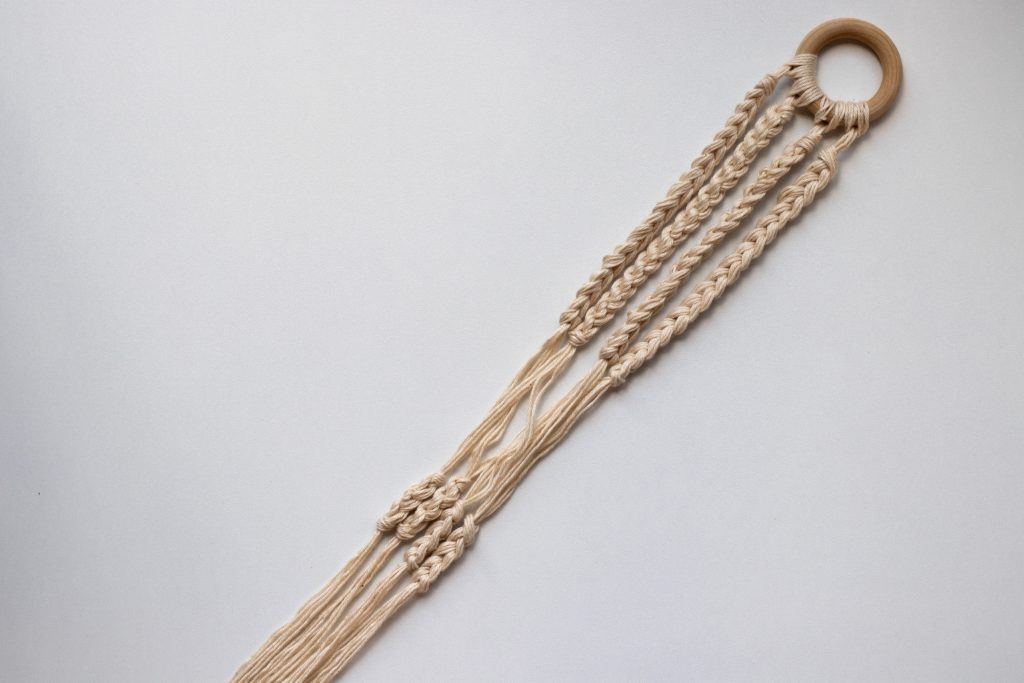
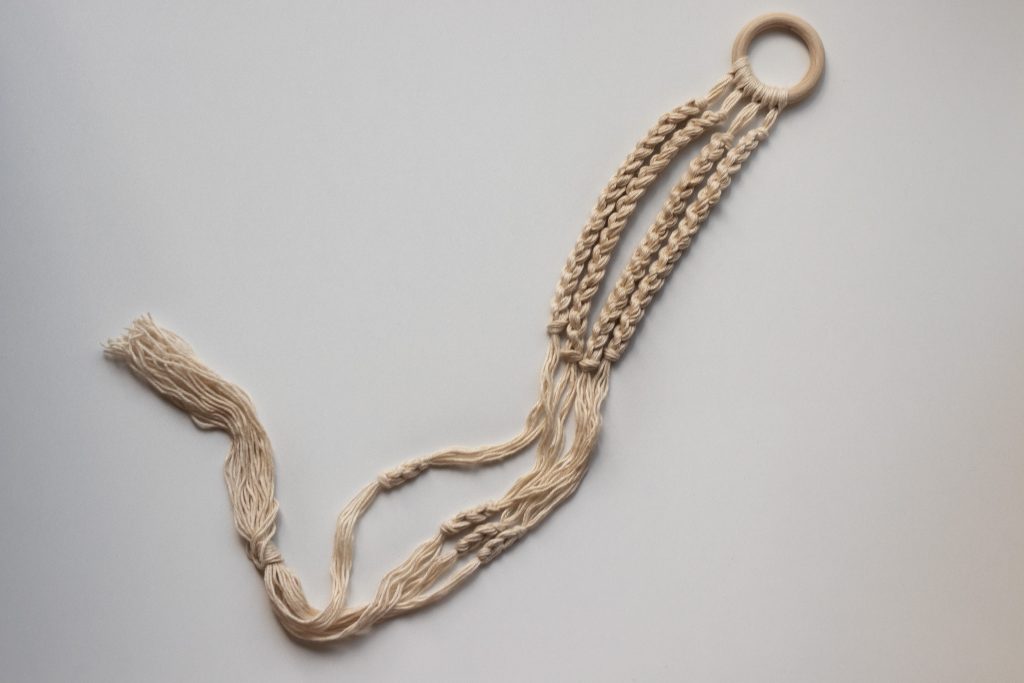
I used a 5″ pot for the photos, but you can fit a wide range of plant pot sizes (since the yarn will take the shape of whatever size planter you put in there). This post contains a ton of photo tutorials to help you make this exact planter and also includes instructions on where you could adjust for other sizes. When laying flat, this hanging planter measures approx. 24″ in length.
Make sure to tag me (@knitsnknotswpg) and tag your progress pics with #EASYHANGINGPLANTER so everyone can check out your work and you can see the progress from others’ Easy Hanging Planters!

Materials
Here’s what you’ll need to make your own planter –
- Yarn: WeCrochet Comfy Fingering in Ivory – just 1 skein or 70yds of similar fingering weight yarn (75% Pima cotton, 25% acrylic)
- 1 skein (just $3.99) has enough yarn for 3 planters!
- 1 Wooden ring or something similar to attach your strands to. (You could use any type of ring or a metal S hook if you have one of those laying around!) Just something so that your planter can hang on a hook.
- 5.5 mm hook or desired hook size
Yarn Substituting:
I used WeCrochet Comfy Fingering, held 8 strands at once (working with 4 strands folded in half). You could also try WeCrochet Comfy Worsted, but use only half the number of strands listed in the pattern when using a worsted weight yarn for the same look as the planter shown. For example, if told to lay 4 strands flat and fold in half to give 8 strands, read this as “lay 2 strands flat and fold in half to give 4 strands”.
If you want a more substantial, bulky planter than shown here in the photos, use a heavier weight (like DK or worsted) and follow the pattern exactly as written.
To substitute yarns, I would recommend to use a cotton or linen yarn. You could use synthetic fibers too – I would just avoid “fuzzy” yarns for this project.
Gauge
There is no gauge because there are no rows or stitches to measure. There are only two small groups of chain stitches. Choose your yarn, hold it 8 strands at once, and work a few chain stitches with a few different hooks to see which hook size you like the look of best. I used a 5.5mm. If you use heavier yarn than Comfy Fingering, you may want to use a larger hook and, similarly, if you use a yarn lighter than Comfy Fingering, you may want to use a smaller hook. There’s really no messing this up – use your judgement here.
PATTERN – EASY HANGING PLANTER
This is going to be more of a tutorial-style pattern than a technical written pattern.
For each step, I will give you an overview of what is required in that step. Then, I will include multiple photos to break down what was just explained + show you exactly what to do.
Step 1
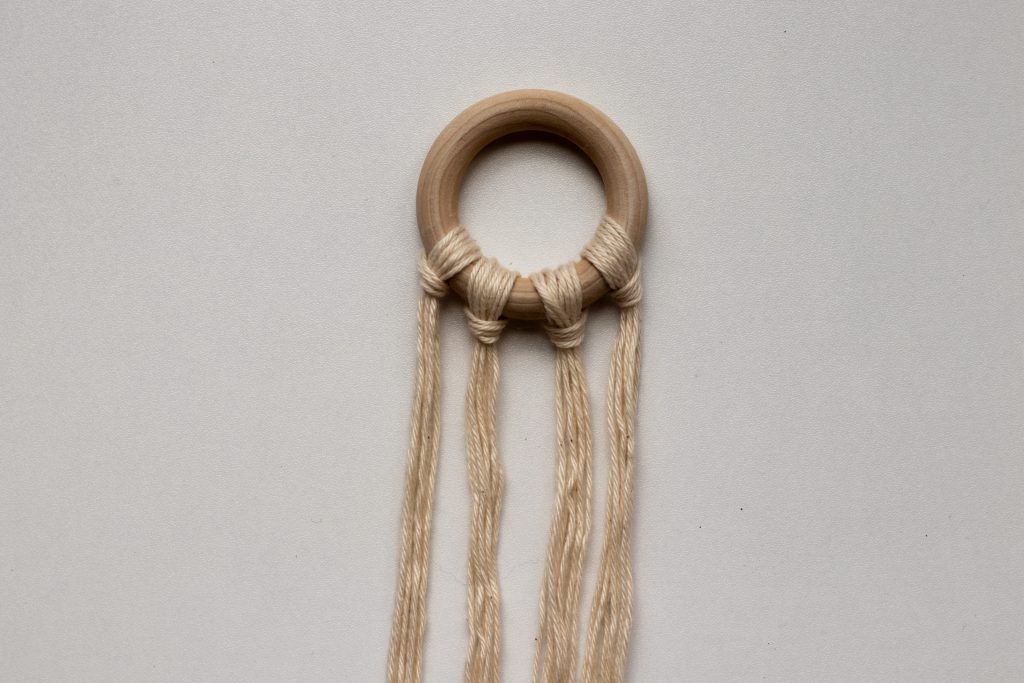
Cut 16 strands of yarn each measuring approx. 120″ or 10 feet long. Arrange into 4 groups of 4, and fold each group in half.
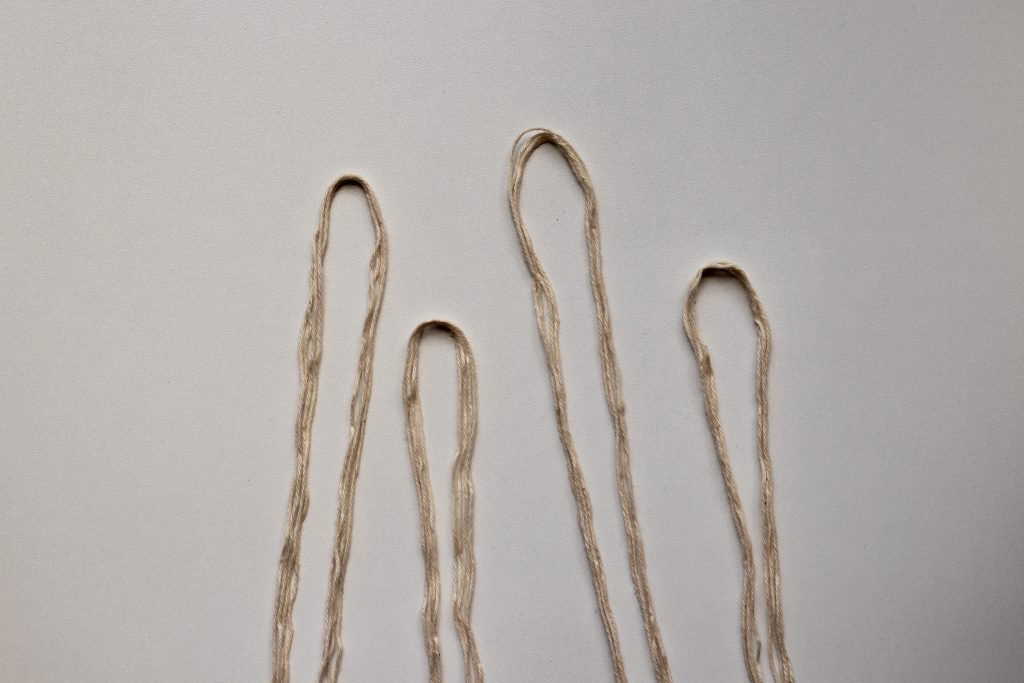
Step 2
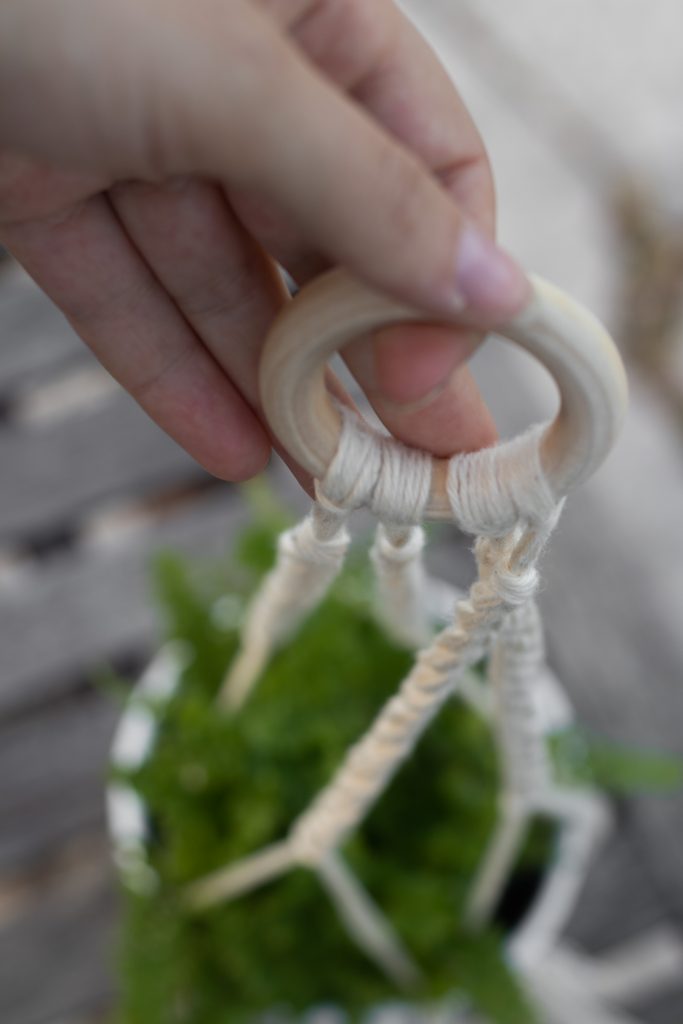
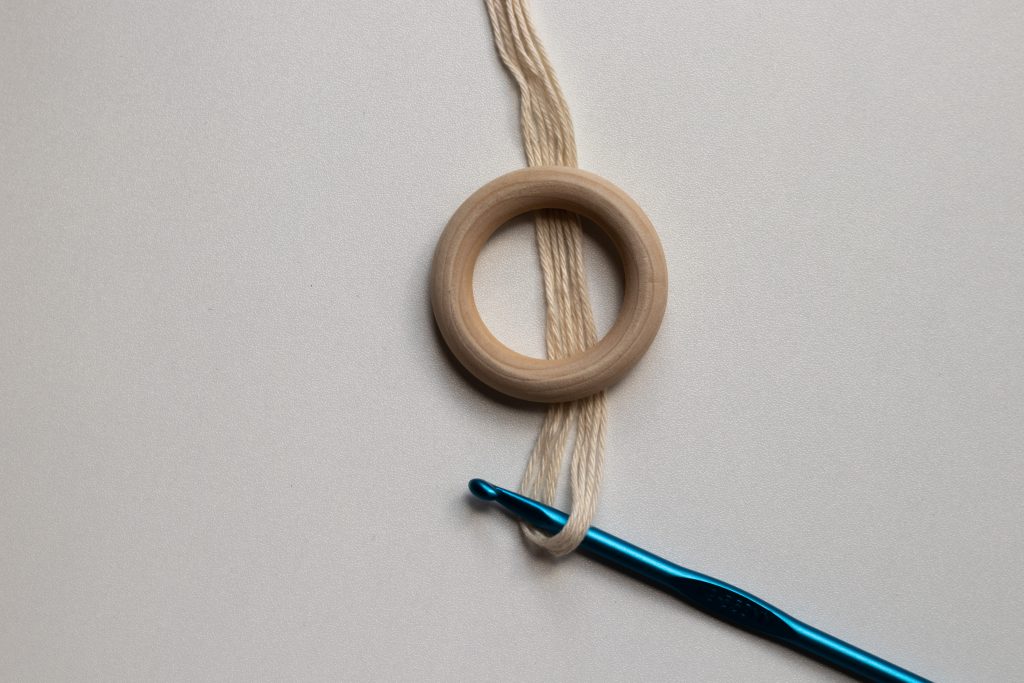
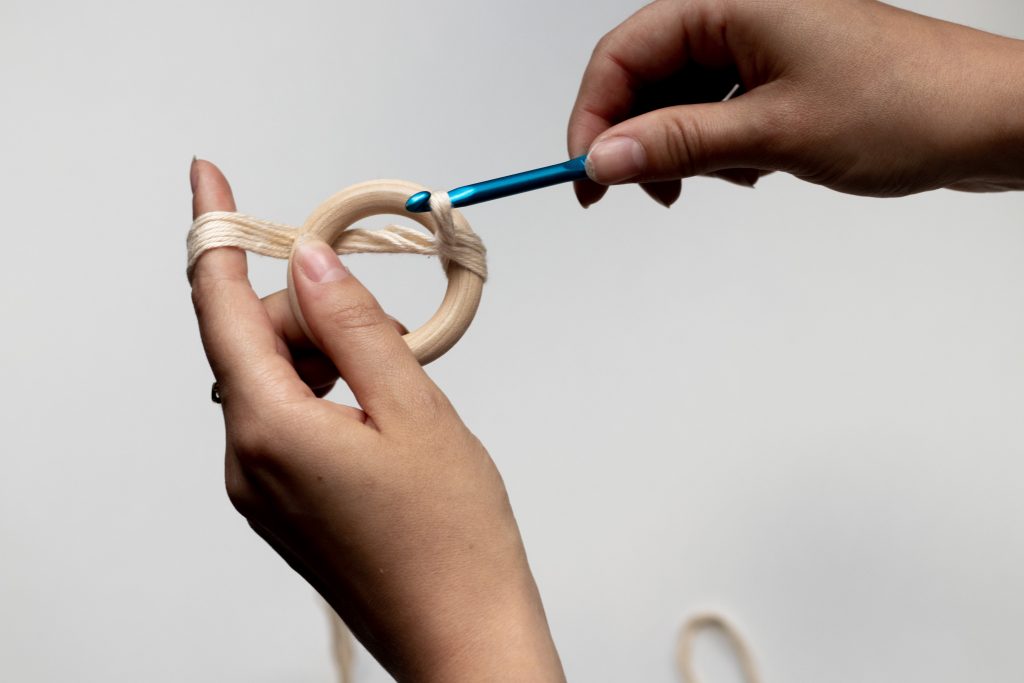
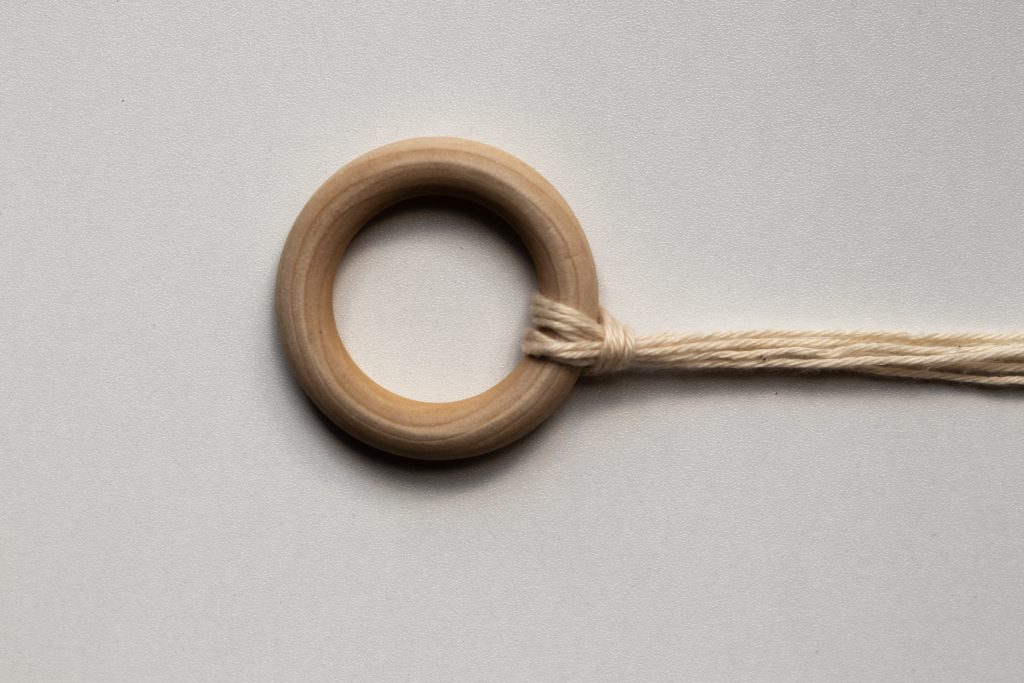
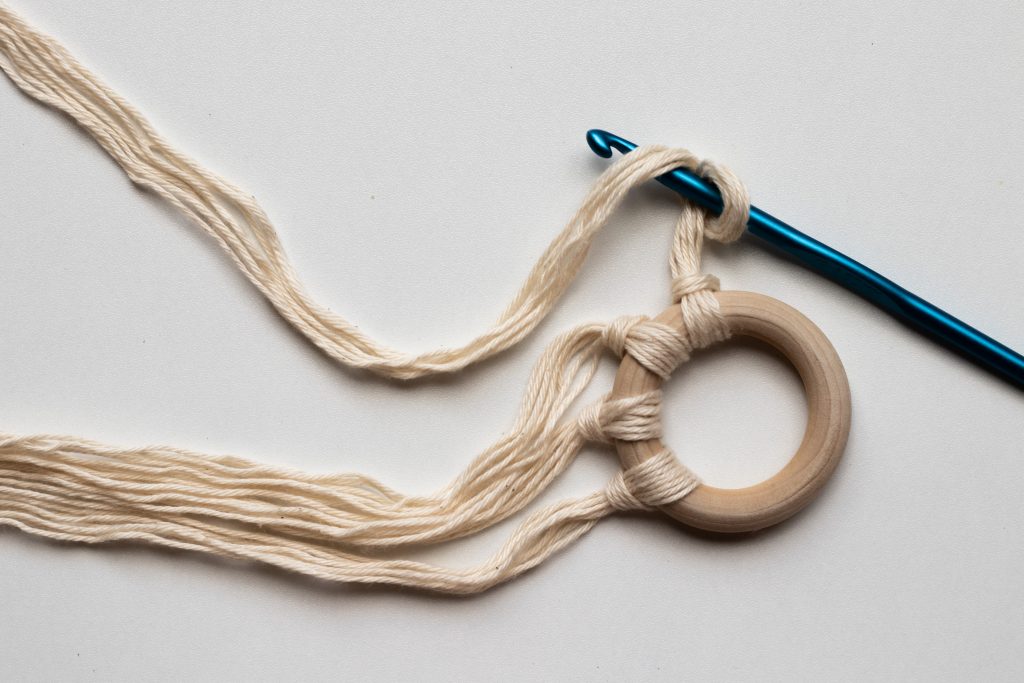
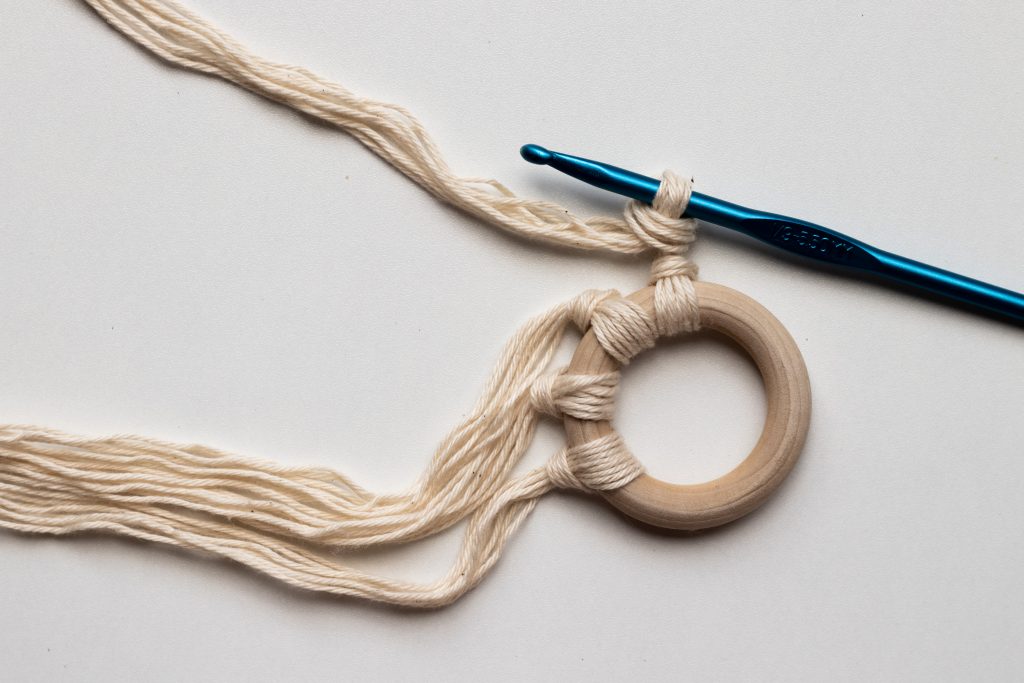
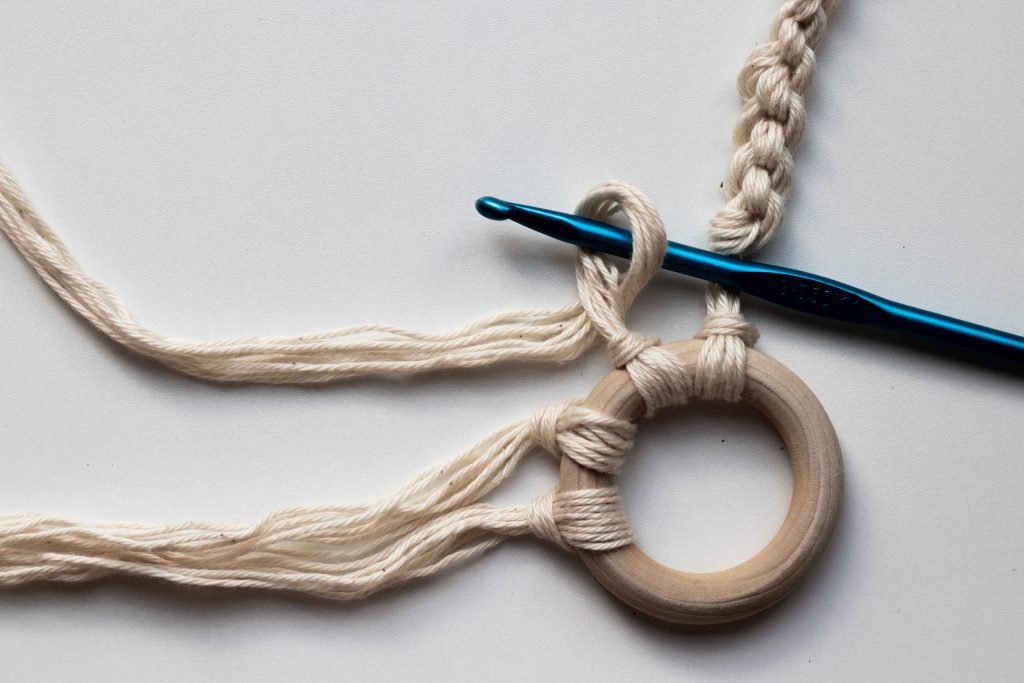
Attach each group of strands to your ring, one at a time. Take one group of 4 strands and grab the center fold with your hook. Lay the ring on top so you can see the yarn ends through the center of the ring. Grab these strands with your hook through the center of the ring by yarning over with the entire bundle and pull through loop on hook. Pull all the way through.
Repeat for remaining 3 groups.
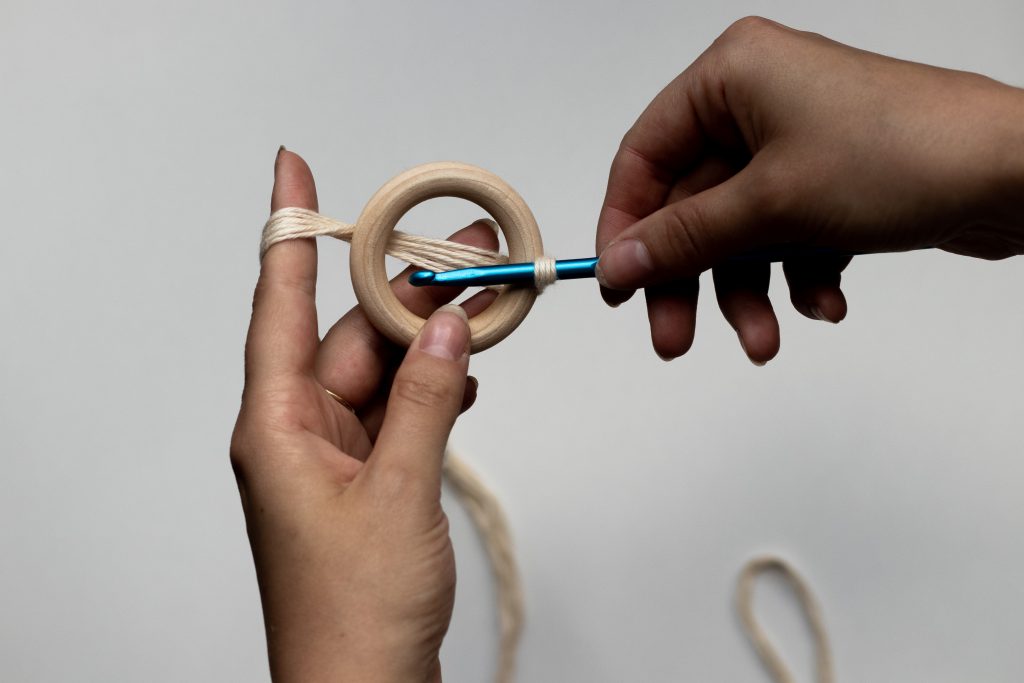
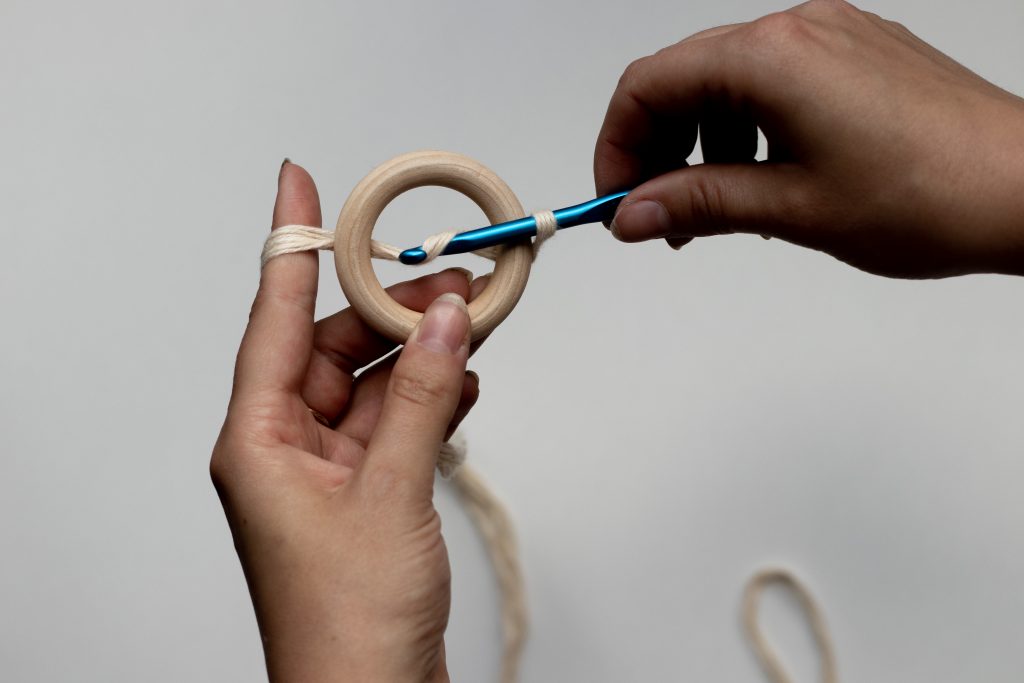
Step 3
Working with 1 bundle at a time, form loop as shown in photo below. Insert hook through this loop from the bottom-up. Yarn over with ends of strands and pull through loop on hook. Chain 17. After last chain, pull yarn through loop. Repeat for remaining 3 groups.
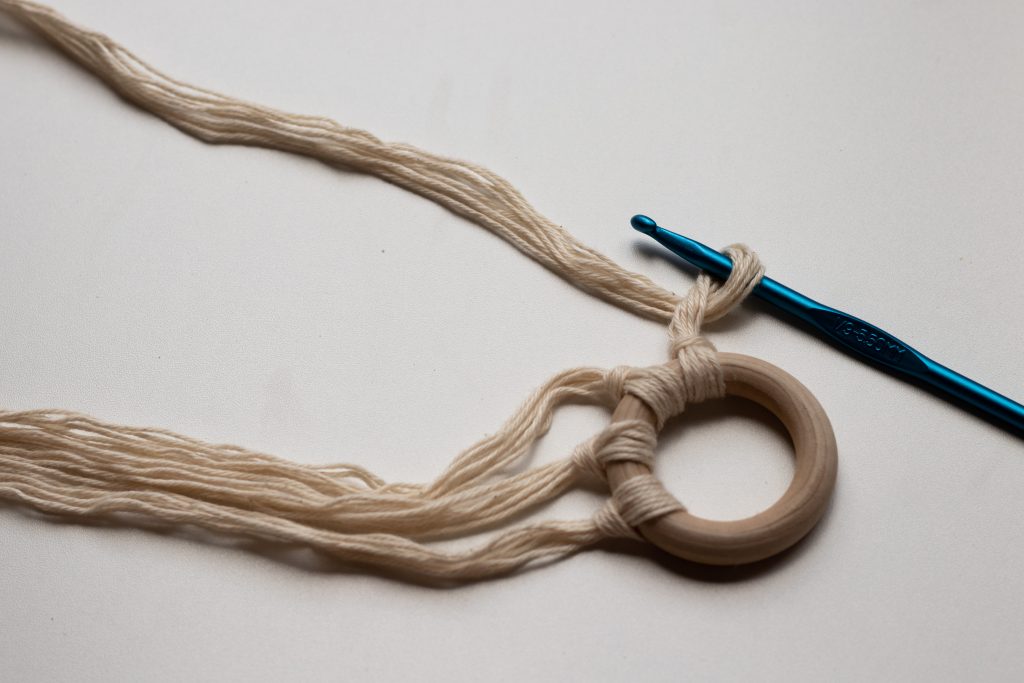
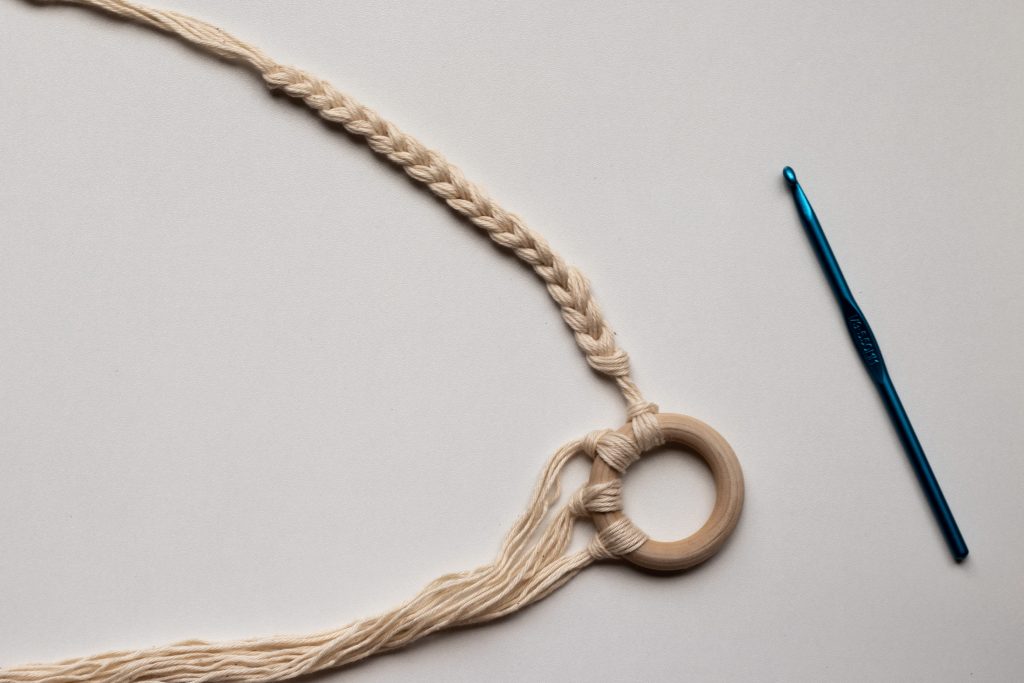
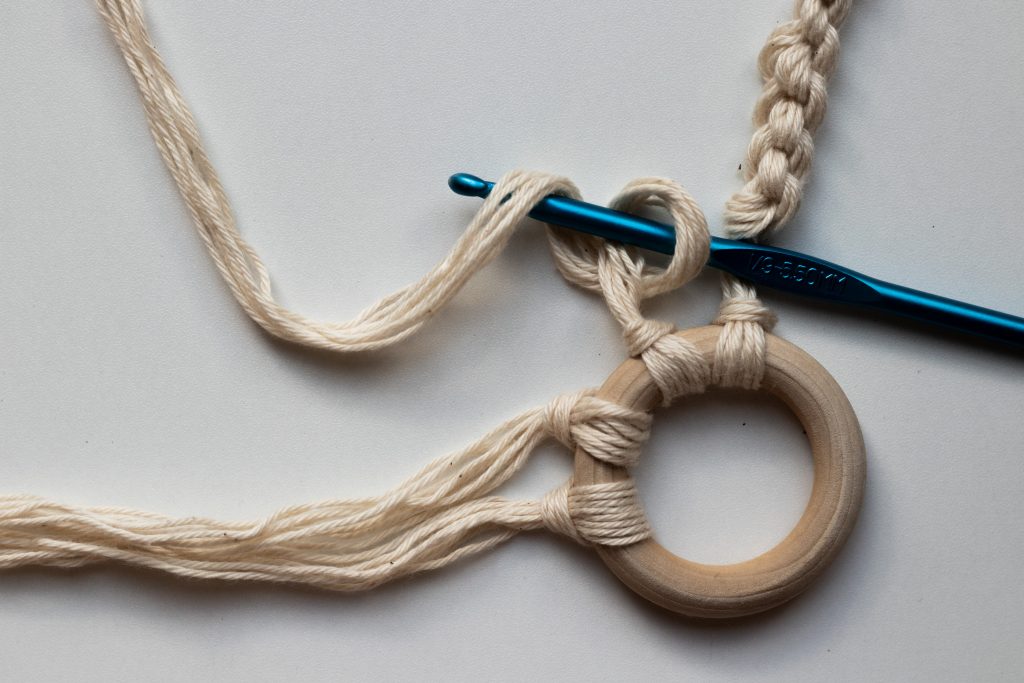
Repeat for remaining bundles.
Step 4
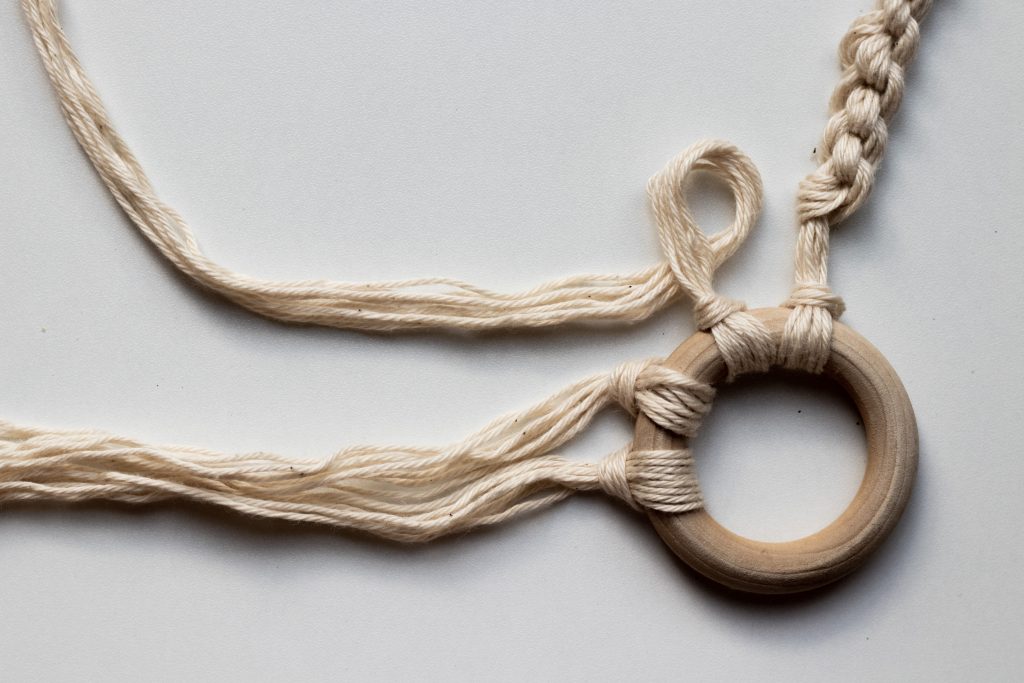
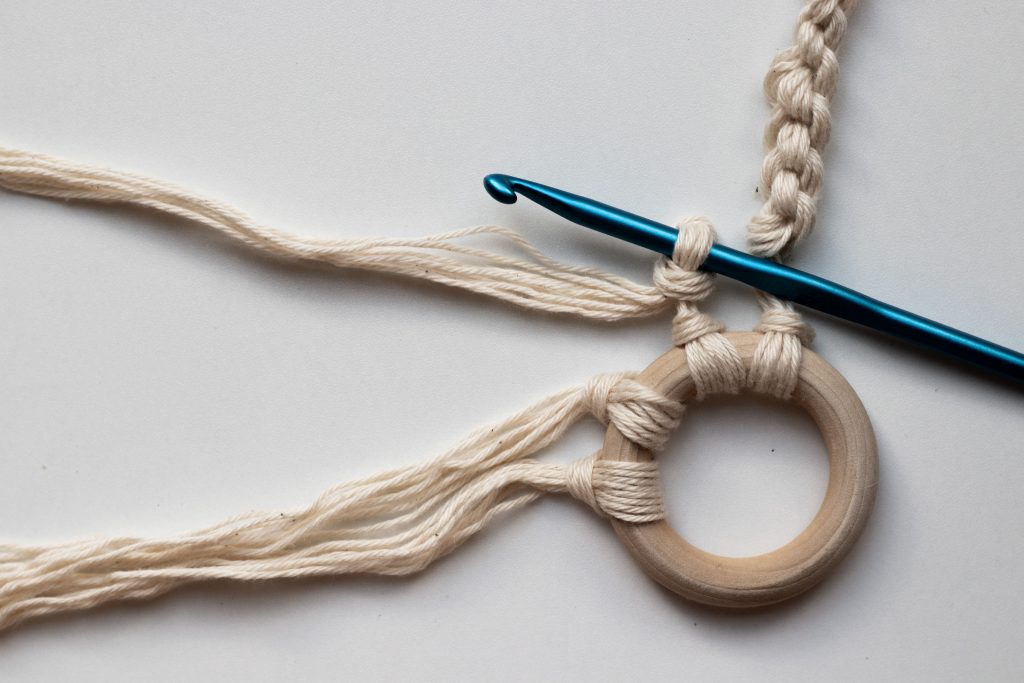
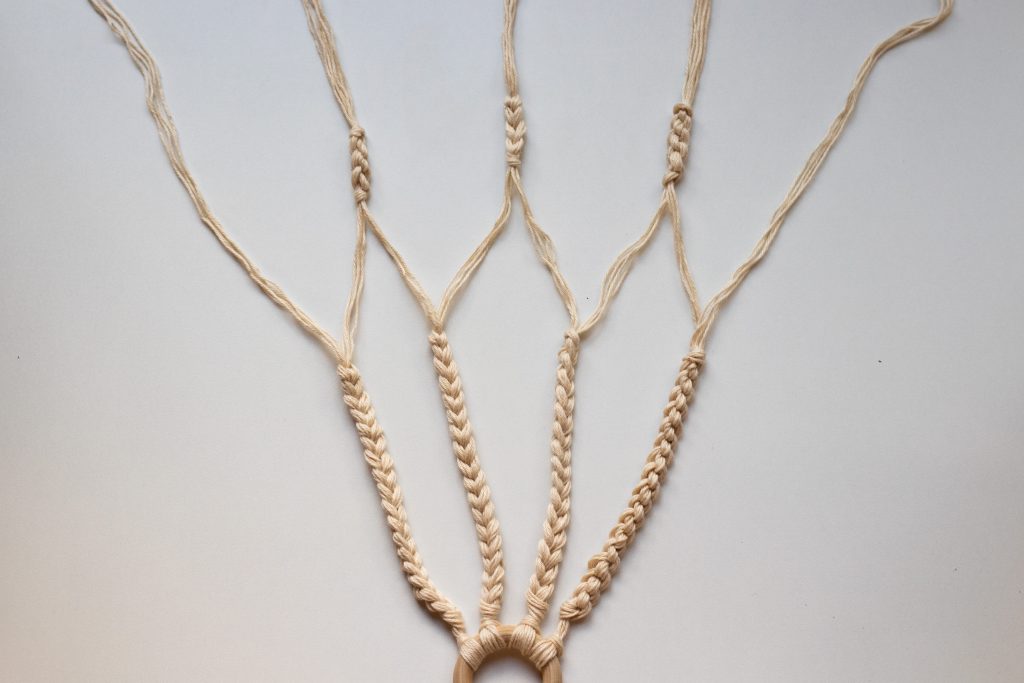
Keep each of the 4 bundles separate. For this step, we will label each bundle as A, B, C, and D, as shown in the photo below for reference.
Each bundle has 8 strands. We are going to connect each bundle to its neighbours by splitting each bundle in half and working half of the strands from each neighbour together as one. If this sounds confusing, don’t worry – this will make more sense once you begin following the photos below!
Lay your work as shown in the photo below, and divide bundles A and B (the two bundles on the right-hand side) into strands of 4. Looking only at these split bundles A and B, you now have 4 small groups of 4. Take the inner 2 groups and treat these as one. This is denoted by the asterisk in the photo below.
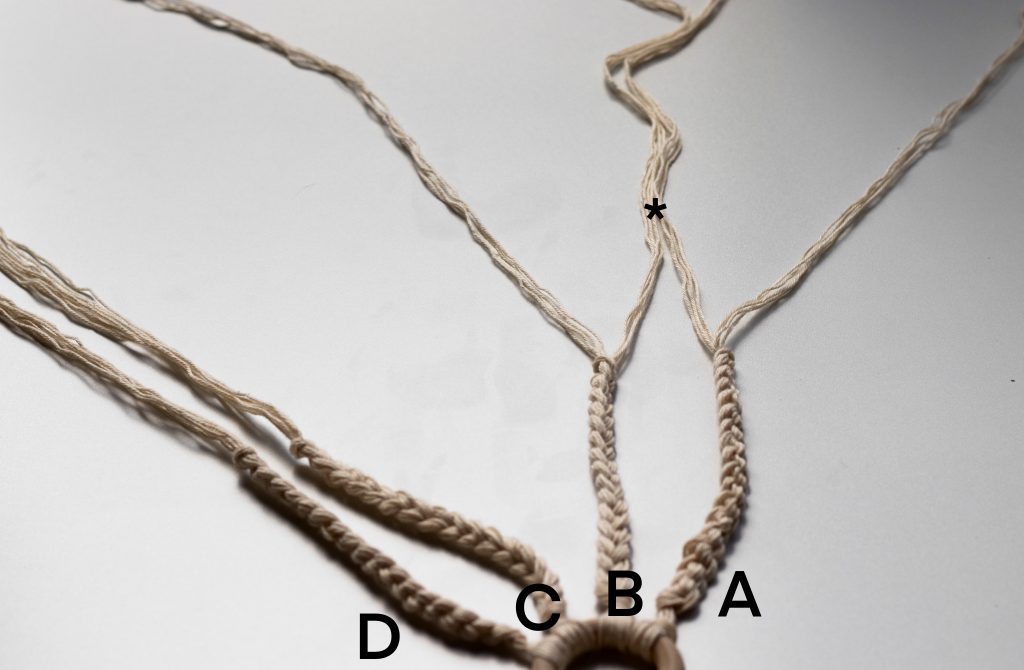
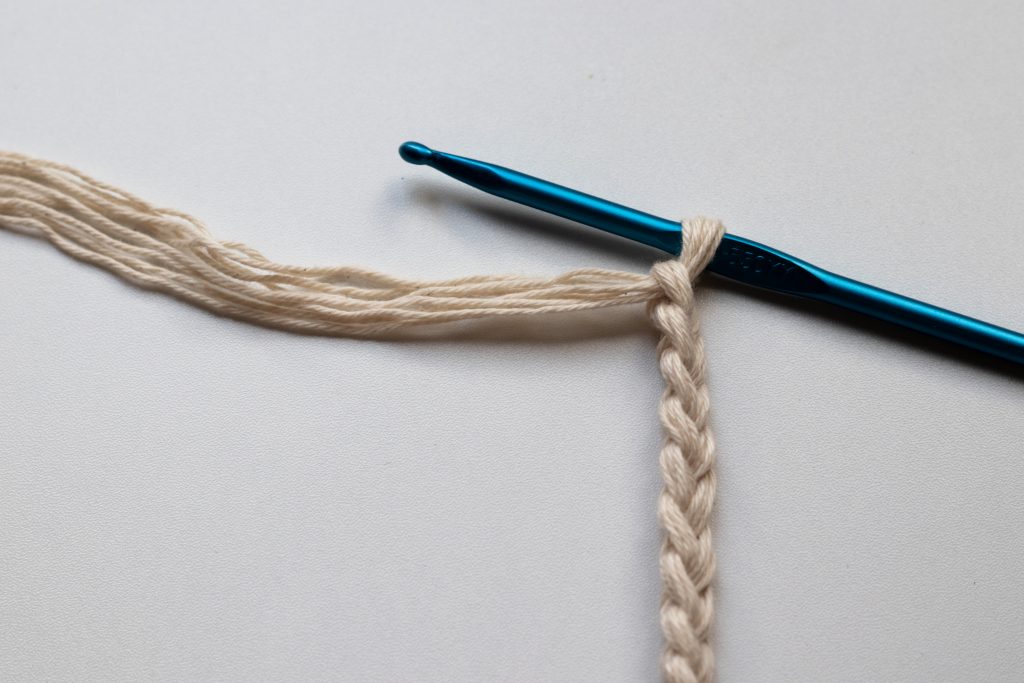
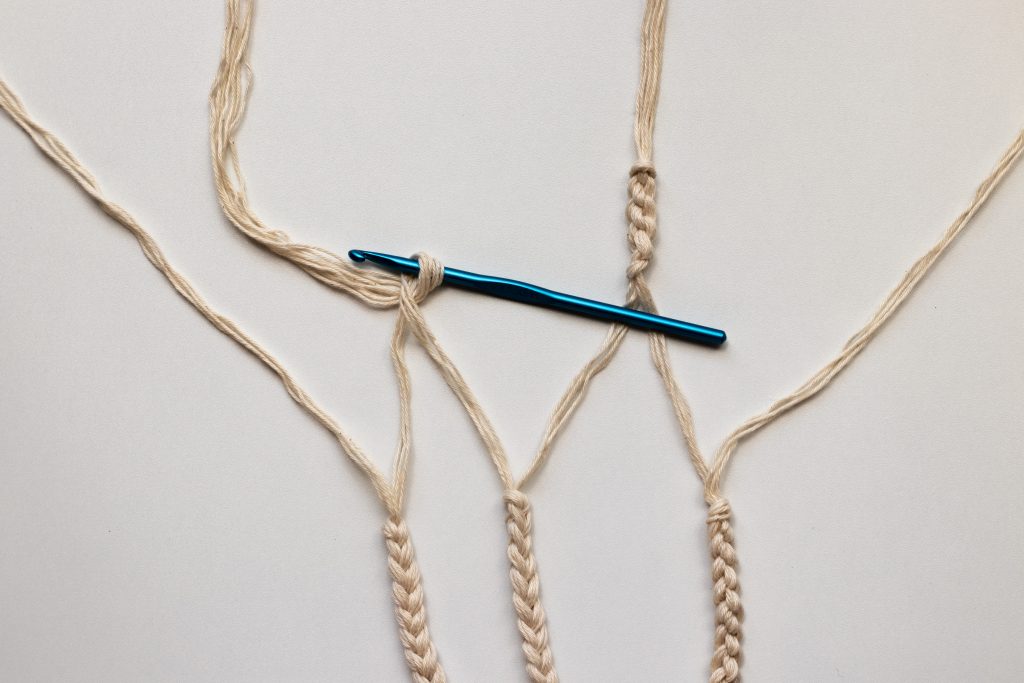
About 4″ from your last chain, form loop as shown below and insert hook into loop from the bottom-up. Grab the ends with your hook and pull through the loop on your hook as shown in photo below. For smaller planter, leave less space than 4″.


Take the next bundle (bundle C) and split this one into 2 groups of 4 strands as well. Take 4 strands from bundle C and the remaining 4 strands form bundle B and lay these together, treating them as one.

Take the remaining bundle D and split it into 2 groups of 4 strands. Do the same thing with 4 strands from C and 4 strands from D, treating them as 1.
Next, we will connect bundles A and D.

Make 1 knot tying all strands together approx. 4″ below your closest chain.
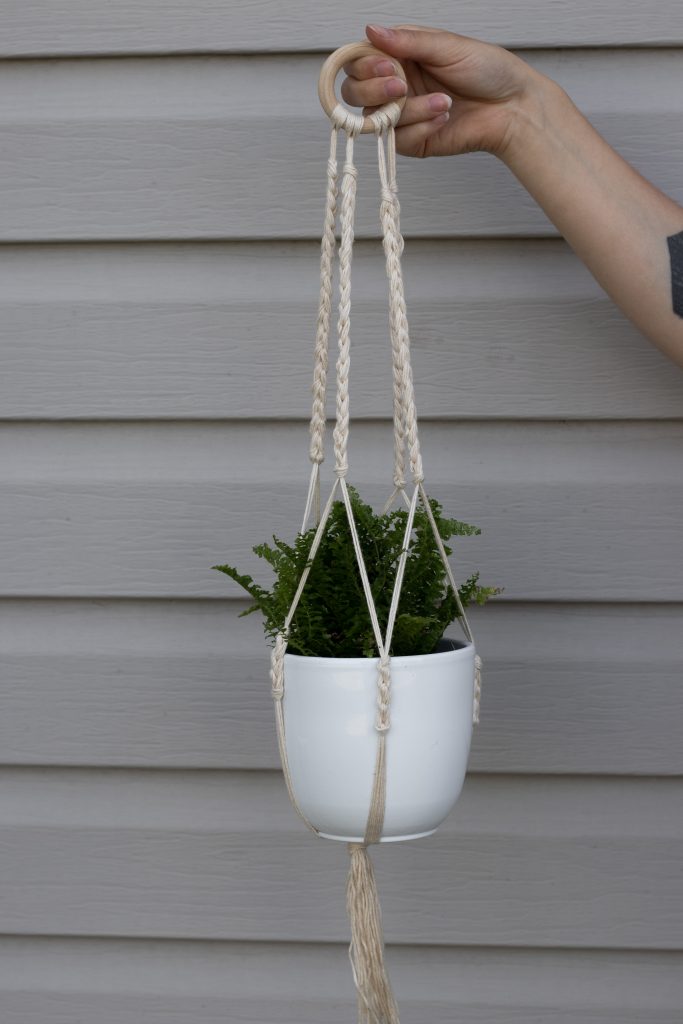
That’s it! Hope you love your new hanging planter!
Make sure to check out my other free patterns – the Faux Fade Wrap, Black Out Yoke, the Sunny Hills Cowl, and the Teulon Tank!
I can’t wait to see your WIPs! Make sure to tag me @knitsnknotswpg and use the pattern hashtag #EasyHangingPlanter so that everyone can see your projects!
Happy crocheting,
Janine xx
You May Also Like


