Hi everyone!
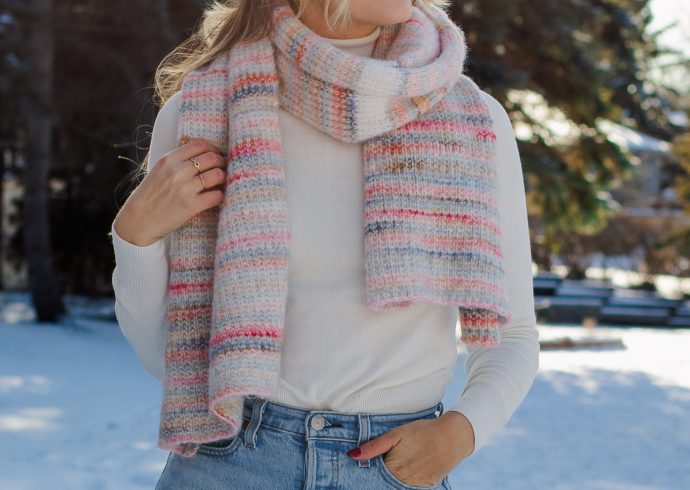
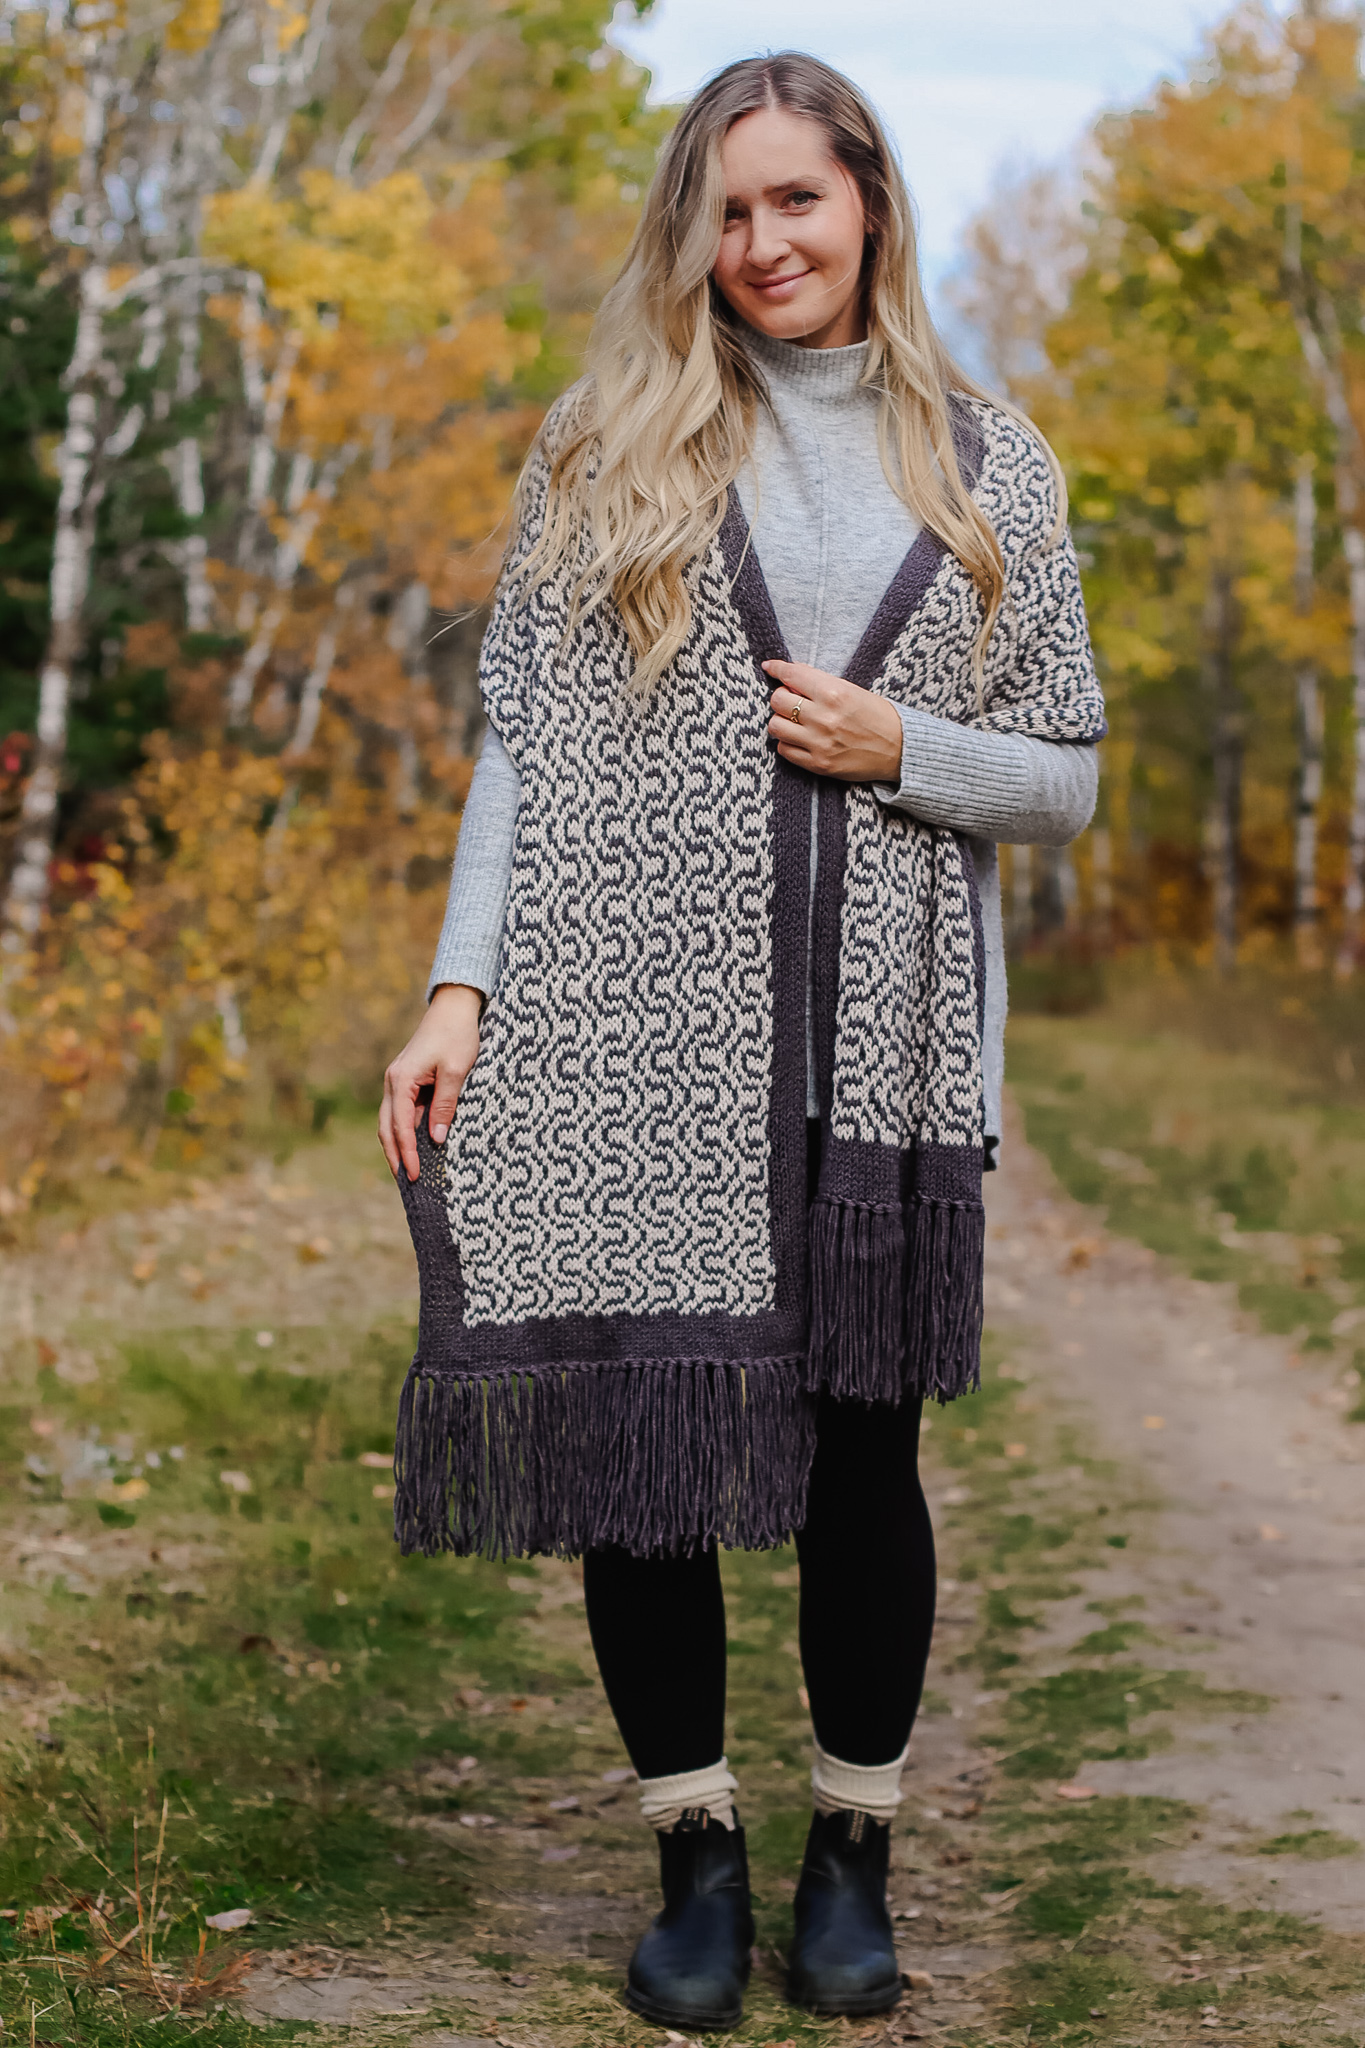
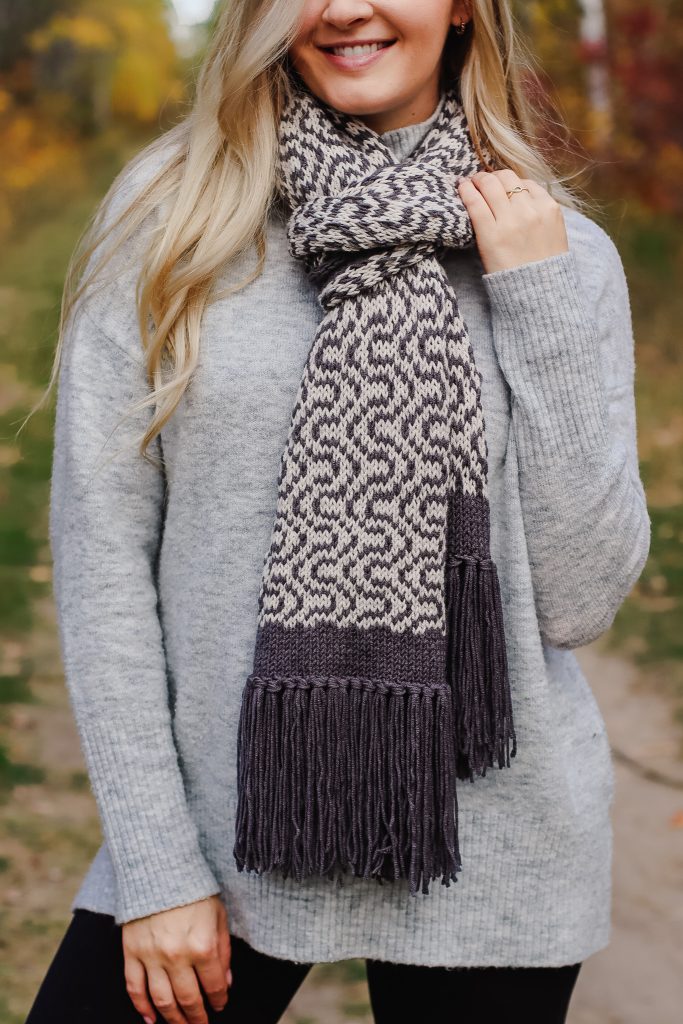
This post includes everything you need to know about the Wavelength Scarf – a colorwork scarf with a high-contrast, two-tone squiggly design! Knit in one of my favourite new worsted weight yarns: Lion Brand Color Theory!
Color Theory is a brand new line of yarn designed by Alexandra Tavel of Two of Wands, in collaboration with Lion Brand. (I love everything Alexi does, so a new yarn line was super exciting to me!) Color Theory is the second yarn line added to the bulky weight version, Hue And Me.
Get the Lion Brand Knitting Kit here!
For the free pattern, scroll down.
Before we begin, here are some quick links for you:
- Find the paid PDF version on Ravelry here, on Etsy here, on my website here.
- Add your finished project to Ravelry here.
- Shop the recommended yarn, Lion Brand Color Theory, here!
- Get the full Lion Brand Knitting Kit here!
- For any questions about this pattern, please email knitsnknotswpg@gmail.com and I’ll get back to you asap!
Shop my new book – Modern Crochet Sweaters: 20 Chic Designs for Everyday Wear – here!
If you want to be notified of all new pattern releases (and get exclusive discounts on all new paid patterns), sign up below!
This post is sponsored by Lion Brand and contains affiliate links. This means, should you make a purchase, I will receive a small portion of the sale at no extra cost to you. All opinions are my own. View my Privacy + Disclosures Policy here.
ABOUT
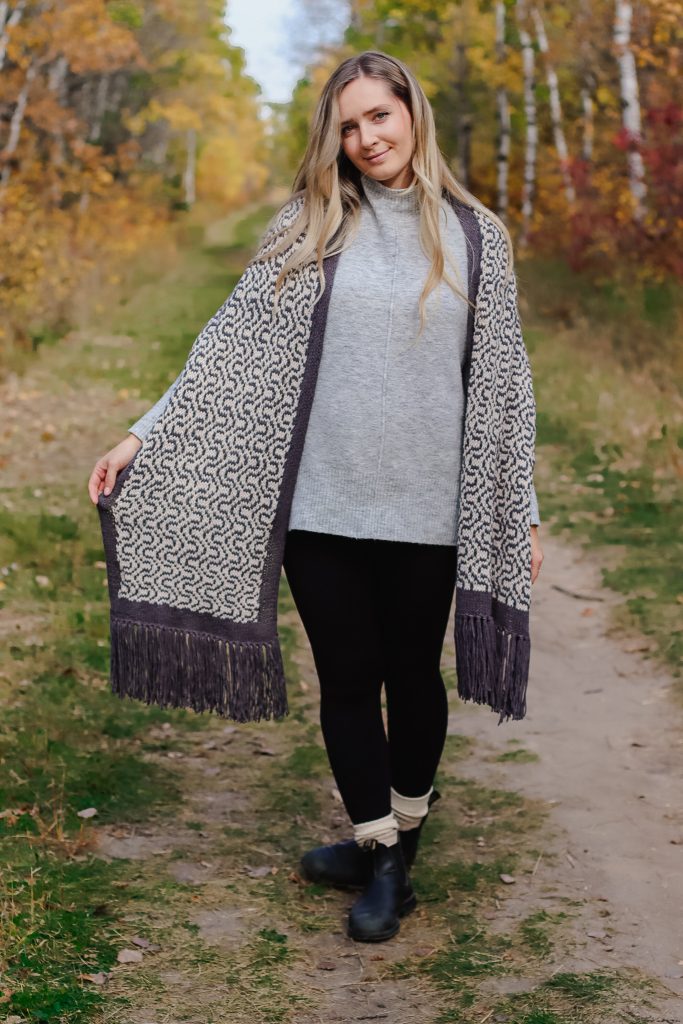
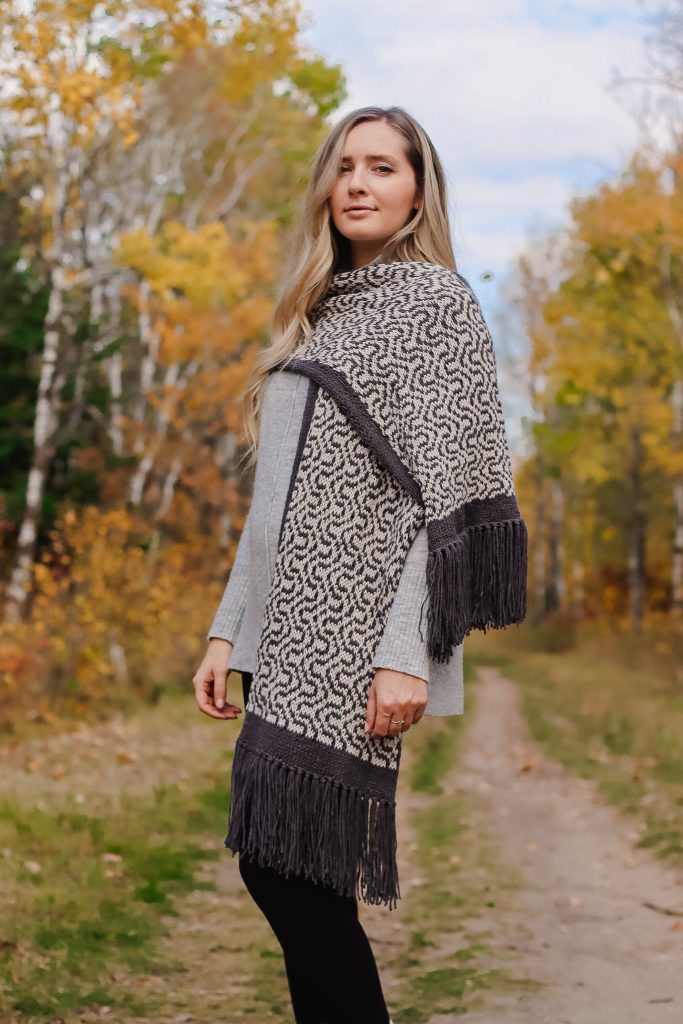
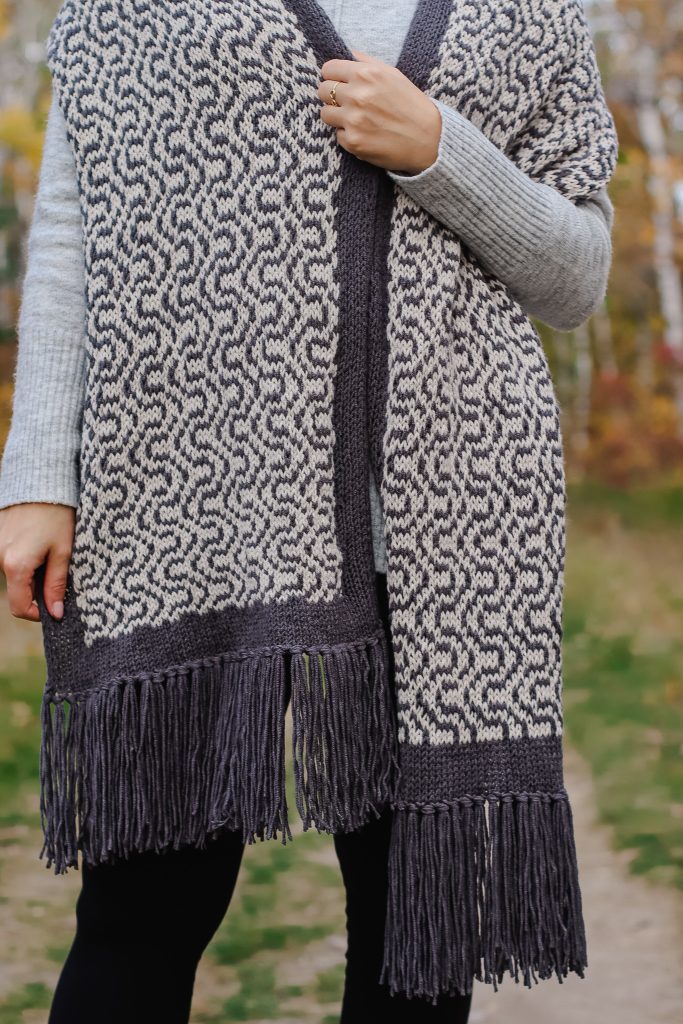
Loosely inspired by curvy lines and bold design from the art deco movement, this fair-isle scarf uses two contrasting colors to create a bold, wavy effect that ripples throughout the fabric. In this pattern you’ll get to explore two-tone colorwork with both charted and written instructions.

MATERIALS
Yarn: Worsted—Lion Brand Color Theory in 2 colorways: Thunder (Main Color – MC) and Moonbeam (Accent Color – AC)
- 100% Acrylic
- 246 yds (225 m) per 3.5 oz (100 g) skein
- Find this yarn on lionbrand.com or visit yarnsub.com for a list of substitutes
- Get the full knitting kit here!
Yardage: 3 skeins or 550 yds (503 m) of MC (Thunder), 2 skeins or 345 yds (316 m) of AC (Moonbeam)
If substituting Color Theory, choose any similar, category #4 worsted weight yarn that matches gauge. Most fiber types should work out fine. Always swatch before beginning to ensure you are happy with the resulting fabric.
Needles: Size U.S. 9 (5.5 mm) or size needed to obtain gauge
Notions: Tapestry needle, 2 fixed stitch markers, a crochet hook that will fit through your stitches (anything 6 mm or smaller should work) for adding fringe, an object measuring approximately 6” (15 cm) in length to wrap yarn around to create fringe (such as your phone, a book, a piece of cardboard, etc.)
MEASUREMENTS
All measurements given are after blocking.
Finished scarf measures approximately 14.5” (37 cm) in width and 75” (191 cm) in length, not including fringe.
GAUGE
4 x 4” (10 x 10 cm) = 20 sts and 16 rows in stockinette colorwork pattern, blocked.
When swatching your chosen yarns, swatch in the colorwork pattern (shown below) rather than in a single color for a more accurate representation of your tension in this project.
CAN I MAKE THIS IN ANOTHER YARN WEIGHT?
YES! Feel free to ignore the gauge of the pattern and work this pattern using any yarn and corresponding hook to your desired width. Just note that you’ll need a multiple of 8 stitches in order to follow the pattern as-written. You can easily adjust the number of solid stitches on either edge of the colorwork to achieve your desired border width, just make sure you have a multiple of 8 stitches for the colorwork.
ABBREVIATIONS
- AC: accent color (Moonbeam)
- k: knit
- MC: main color (Thunder)
- p: purl
- PM: place marker
- rep: repeat
- RS: right side (the knit side)
- sl1kw: slip 1 stitch knitwise
- sl1pw: slip 1 stitch purlwise
- SM: slip marker
- st(s): stitch(es)
- WS: wrong side (the purl side)
PATTERN NOTES
Skill Level: Easy
Colorwork: This scarf is knit using the fair isle technique for changing colors. A full color chart and written instructions are included on the following page. Be sure to keep your floats loose in the back of your work for neat, smooth color changes and to prevent any puckering.
To adjust the width: For wider (or more narrow) scarf, add more (work fewer) colorwork repeats by casting on additional (fewer) stitches in multiples of 8, then continue to follow the pattern as written. Note that this will alter the required yardage.
Using a different yarn weight: You can easily make this scarf in a different yarn weight by casting on any number of stitches in a multiple of 8 until you are satisfied with your scarf width. Then, follow the pattern as written.
- If you would like a different number of stitches bordering your colorwork, cast on your multiple of 8 for the colorwork plus the number of stitches you would like bordering your colorwork on each side. Then, on Row 1, place your two markers so that they border your colorwork.
YARN SUBSTITUTIONS
Since this is a scarf and not a garment that must fit your dimensions exactly, there is some wiggle room. For a scarf that resembles the photos and dimensions listed in the pattern, you’ll want to use a worsted weight yarn with whichever needle size allows you to achieve gauge. For a list of yarns that will work in this pattern, click here.
Some other Lion Brand Yarns that will work:
- Basic Stitch Anti-Pilling
- Basic Stitch Premium
- Chainette
- Heartland
- Lazy Days
- Jeans
- Re-Spun
- Schitt’s Creek
- Touch of Alpaca
- Vanna’s Choice
- Wool-Ease
PATTERN
Using MC, cast on 72 sts using cast-on method of your choice.
Note: If you plan on wearing your scarf without any fringe, you may want to use the i-cord cast-on or some type of sturdy cast-on since you will not have the weight of the fringe to help prevent your edges from curling.
Row 1 (RS): Sl1kw, k7, PM, k to last 8 sts, PM, k to end of row.
Row 2 (WS): Sl1pw, p to first marker, SM, p to next marker, SM, p to end of row.
Rep rows 1 and 2 four more times for a total of 10 rows worked, finishing on a WS row. (Treat “PM” as “SM” on the RS rows.)
Colorwork Section
Next Row (RS): Sl1kw, k to first marker, SM, k to next marker as according to the color chart or written instructions below (scroll down to Color Chart section), SM, k to end of row.
Next Row (WS): Sl1pw, p to first marker, SM, p to next marker as according to the color chart or written instructions below, SM, p to end of row.
Continue to rep the color chart between your two markers while maintaining the slipped stitch at the beginning of each row as established in the RS and WS rows. Continue until you have worked the full color chart a total of 28 times or until your colorwork portion measures approximately 70” (178 cm) from your first colorwork row.
Cut your AC, continue with MC only.
Remove your two markers as you knit the following row.
Next Row (RS): Sl1kw, k to end of row.
Next Row (WS): Sl1pw, p to end of row.
Rep rows 1 and 2 four more times for a total of 10 rows worked, finishing on a WS row.
Bind off all sts.
Note: If you plan on wearing your scarf without any fringe, you may want to use the i-cord bind-off or some type of sturdy bind-off since you will not have the weight of the fringe to help prevent your edges from curling.
Fringe
Fringe will be added to every second stitch on the short ends of your scarf. To create nice, full fringe, you will be using four strands at a time, treating them as one.
Cut 296 strands of yarn measuring approximately 12” (30 cm) each. For the sample shown, I wrapped yarn around my phone (which measures approximately 6” or 15 cm in length) about 50 times before carefully sliding the yarn off and cutting through all strands of your yarn loop in one place to create multiple strands of equal length.
Tip: For longer fringe, use a larger object. For shorter fringe, use a smaller object.
Tip: To avoid cutting too many strands of fringe, you may want to attach fringe to your scarf right after you cut each new set of strands rather than cutting all 296 strands at once (since it is easy to lose count). Once you are close to completing and attaching all of your fringe, this will allow you to see how many stitches remain that need fringe and you can cut exactly what is needed for your last batch of fringe.
To attach your fringe, lay your scarf with the WS facing up. Insert your crochet hook from WS to RS into the corner stitch where you would like your first bundle of fringe to be placed. Lay four strands of yarn flat and grab the middle of this bundle with your hook, essentially folding your strands in half. Pull your hook and the strands through the stitch to the WS of your work. Now you should have 8 yarn ends on the RS of your work, and a loop created on the WS of your work from the center of the strands. Grab all 8 ends with your hook and pull them through the loop you have just created to secure your fringe. Pull tight. Repeat for every second stitch, then repeat for the other end of your scarf.
Tip: Steam your fringe to get rid of any crinkly yarn strands. This creates a nice, polished look. Once steamed, you can take a pair of scissors to your fringe and trim off any uneven strands.
Blocking
Do not skip this step! While the knitting is done, there is one crucial step left: blocking.
Blocking is going to help relax your colorwork as well as flatten out your edges to prevent them from curling.
I recommend using one of the following blocking techniques:
1. Submerging your scarf in warm water, roll it up in a towel and step on it to blot out any excess water. Pin your damp scarf to the correct dimensions on a blocking board and let it fully dry before removing.
2. Pin your scarf to the correct dimensions on a blocking board and steam it aggressively with a handheld steamer, paying special attention to all the edges, then let dry fully before removing.
Enjoy your scarf!
COLOR CHART
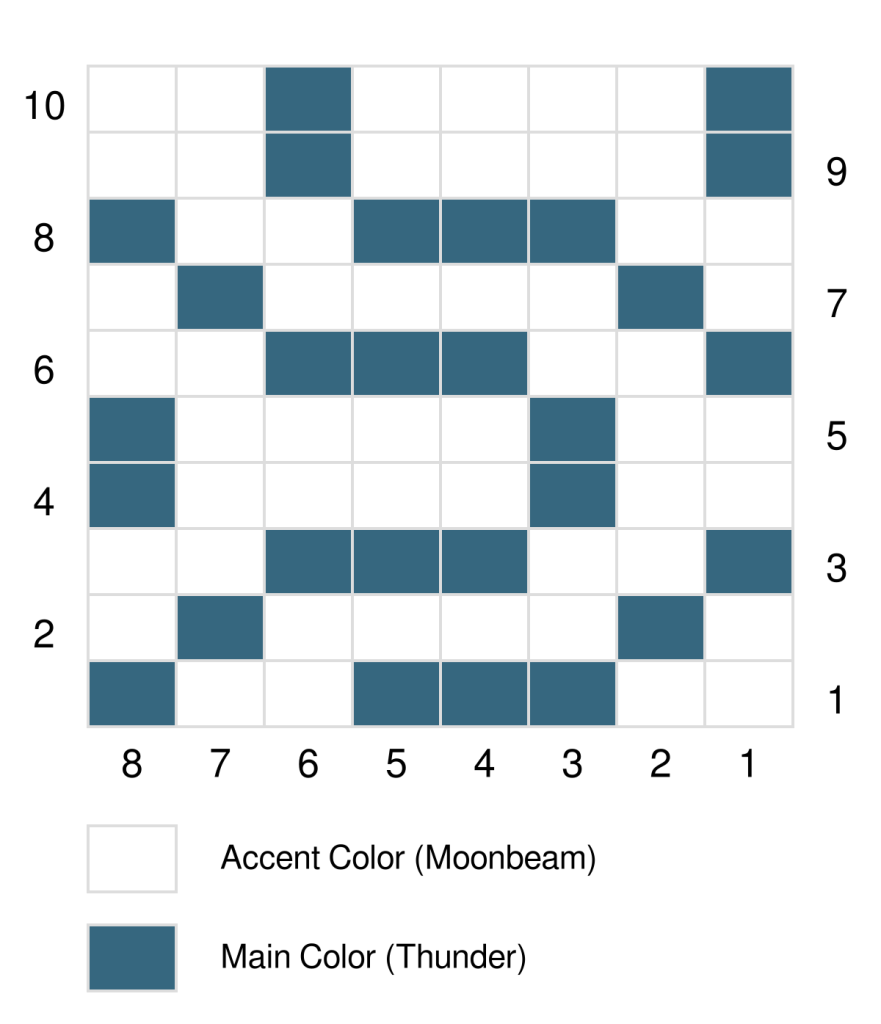
WRITTEN INSTRUCTIONS
K all RS rows and P all WS rows.
Row 1 (RS): (AC) x 2, (MC) x 3, (AC) x 2, (MC) x 1
Row 2 (WS): (AC) x 1, (MC) x 1, (AC) x 4, (MC) x 1, (AC) x 1
Row 3: (MC) x 1, (AC) x 2, (MC) x 3, (AC) x 2
Row 4: (MC) x 1, (AC) x 4, (MC) x 1, (AC) x 2
Row 5: (AC) x 2, (MC) x 1, (AC) x 4, (MC) x 1
Row 6: (AC) x 2, (MC) x 3, (AC) x 2, (MC) x 1
Row 7: (AC) x 1, (MC) x 1, (AC) x 4, (MC) x 1, (AC) x 1
Row 8: (MC) x 1, (AC) x 2, (MC) x 3, (AC) x 2
Row 9: (MC) x 1, (AC) x 4, (MC) x 1, (AC) x 2
Row 10: (AC) x 2, (MC) x 1, (AC) x 4, (MC) x 1

#WavelengthScarf
Thanks so much for reading!
To shop the full Lion Brand Wavelength Scarf knitting kit here!
Find the pattern in these places:
On Ravelry
On Etsy
On my website
In the Wavelength Scarf Lion Brand Knitting Kit
Shop my other Lion Brand kits here!
x
Janine
If you also crochet, you can find my full print book, Modern Crochet Sweaters: 20 Chic Designs For Everyday Wear on the shelves of all major retailers or see purchasing options here!
For exclusive discounts on all new patterns, join the Knits ‘N Knots newsletter list here!
You May Also Like