Hi guys!
Today I’m sharing my first FREE pattern!
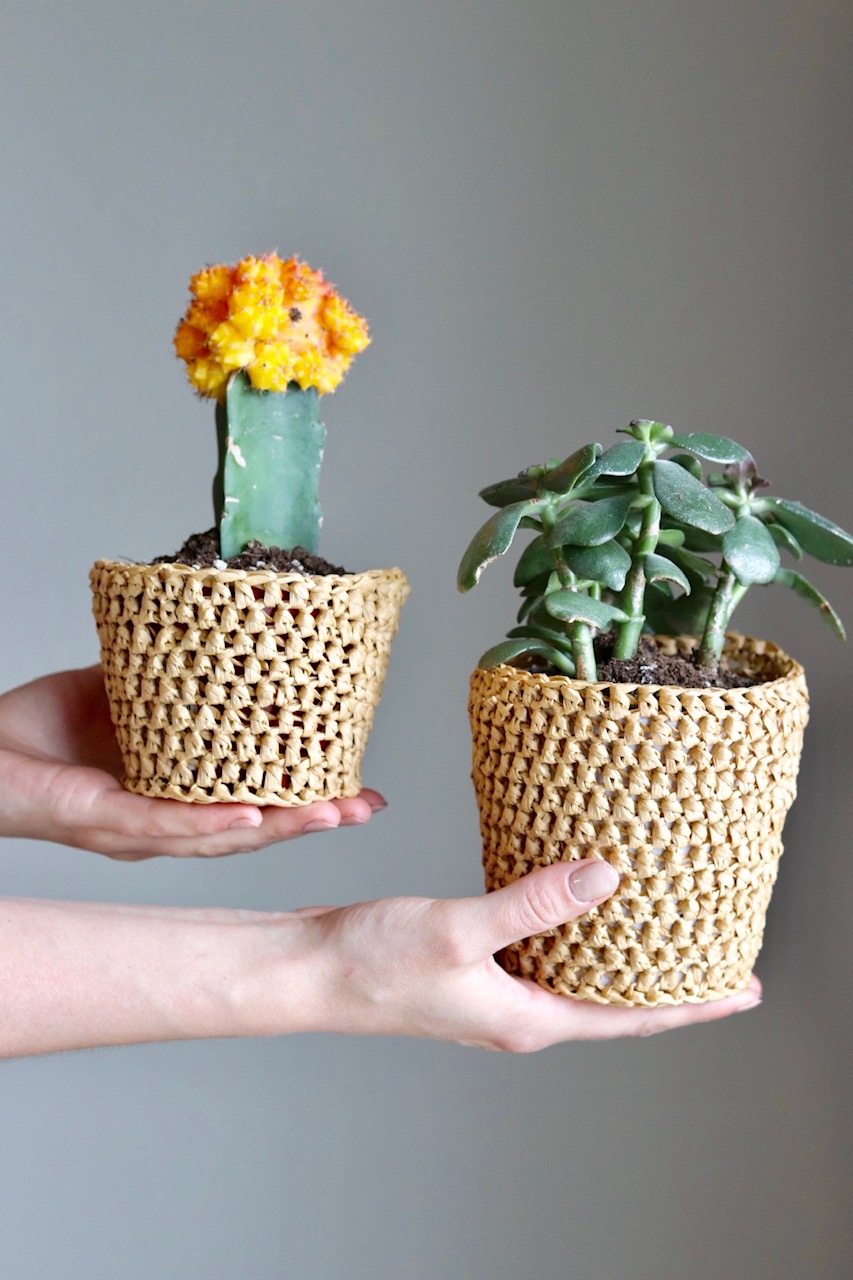
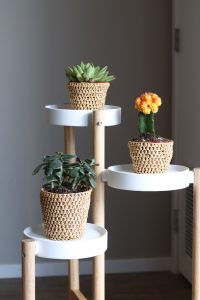
I just purchased some succulents and cacti from IKEA to give our new apartment a little more life, and I needed some pots to put them in. I didn’t want to wait to buy some, instead I just made some little planters with my Wool and the Gang Ra-Ra-Raffia yarn that I already had in my stash!


What is raffia?
Raffia is a paper material used for packaging and other craft uses. You can usually find raffia in the gift wrap section of department stores or craft stores.
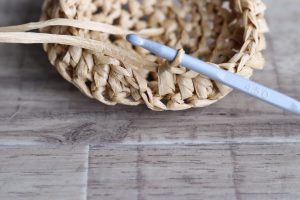
I chose Wool and the Gang’s raffia, which is 100% paper, and meant for crocheting. Like other yarn, this label has relevant crochet info, showing that it is intended to be used with a 4.5mm crochet hook, and also includes care instructions and the recommended gauge. You’ll be able to make multiple planters with just one roll of it! You can find this material here, or you can search through your local craft stores to try to find a similar material. Any raffia will do!
This pattern is really simple and quick to make. You can follow the pattern exactly as it is written to make your own identical planter that holds 4″ pots like the ones shown (purchased from IKEA), or you can customize it to any size you like. I have included photos for almost every step of the way to help you along. If you have any questions, send me a message and I’ll be happy to help!
Materials
- 4.5mm crochet hook
- Ra-Ra Raffia yarn from Wool and the Gang (I used colour: Desert Palm)
- Stitch marker
Abbreviations (US terminology)
- Ch – Chain
- Hdc – Half double crochet
- PM – Place stitch marker
- Rep – Repeat
- RS/WS – right side/wrong side
- Sl st – Slip stitch
- St(s) – Stitch(es)
- 3rd loop – The third loop of a hdc stitch (behind the front and back loop that make up the “V” shape)
Gauge
3″ = 10.5 sts x 8 rows in hdc in the round (approx.)
About
This pattern will fit any 4″ (10 cm) pot of any height.The base is crocheted first, then the body to build height for your planter. I have decided to crochet the body in a spiral to avoid a seam but if you’d rather join your rounds with a slip stitch, that will work too. The plant pot gets wider at the top of the pot, so I did a few increases to account for this. If you’d like to make a planter that has straight sides, simply make the base slightly larger than your pot, and once you get to the body, crochet each of your rounds without making any increases.
Pattern:
Planter Base
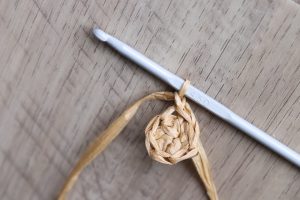
Make magic ring.
Round 1: Hdc 6 into ring, join with sl st, ch 1.
Round 2: hdc 2 into each st around, ch 1. (12 hdc)
Round 3: 1 hdc, hdc 2 in next st, rep from * to end of round, ch 1. (18 hdc)
Round 4: *1 hdc, hdc 2 in next st, rep from * to end of round, ch 1. (24 hdc)
Round 5: *2 hdc, hdc 2 in next st, rep from * to end of round, ch 1. (30 hdc)
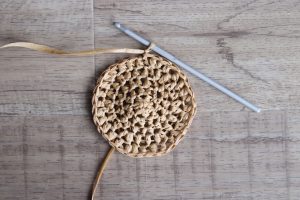
For larger planters, continue this pattern, increasing each round by 6 sts until you reach your desired base size.
The “right side” is the side facing you.
If your base puckers and does not lay flat, simply use your fingers to stretch out the stitches until you are left with a flat circle.
Flip the circle over, so the “wrong side” is now facing you.
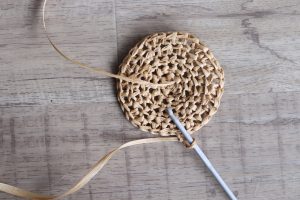
Planter Body
For this next row, make your stitches into the 3rd loop of the hdc sts from Round 5. You should be able to see the entire “v” left below your new stitch, and looks like a slip stitch. (See photo)
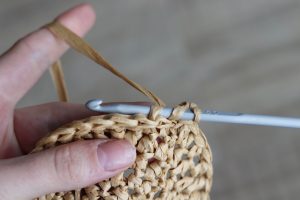
Round 6: Working with wrong side facing, hdc in 3rd loop in each st around, PM in last st. (30 hdc)
At the end of Round 6, do not ch 1. Begin the first st of Round 7 directly into the first hdc from Round 6 to work in a spiral. Once you reach the marked st, crochet into that st, remove marker, and place the marker into this new st. The st with the marker is always the last st of each round.
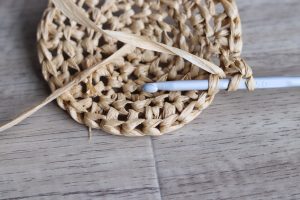
Note: If making custom planter size, continue working in a spiral until you reach the desired height, sl st 4, cut raffia, weave in ends.
Round 7 & 8: Hdc in each st around. (30 hdc)
Round 9: *5 hdc, hdc 2 in next st, rep from * to end of round. (35 hdc)
Round 10: Hdc in each st around. (35 sts)
Round 11: *6 hdc, hdc 2 in next st, rep from * to end of round. (40 hdc)
Round 12-14: Hdc in each st around. (40 hdc)
Continue last round until desired height.
To finish off, sl st 4.
Cut raffia, weave in ends.
If your planter looks small, don’t worry. Use your hands to stretch out your planter to fit your plant pot. The raffia will allow for quite a bit of stretch!
There ya go! Easy-peasy!
Now go make one for all your plant babies. These are kind of like chips.. you can’t have just one. Seriously. I am making one for all of my plants, and now I feel like I need to go buy some more plants just so that I can make more raffia planters.
I can’t wait to see your WIPs! Make sure to tag me @knitsnknotswpg and use the pattern hashtag #RaffiaMiniPlanter so that everyone can see your projects!
Happy crocheting,
Janine xo
You May Also Like