
Hi all!
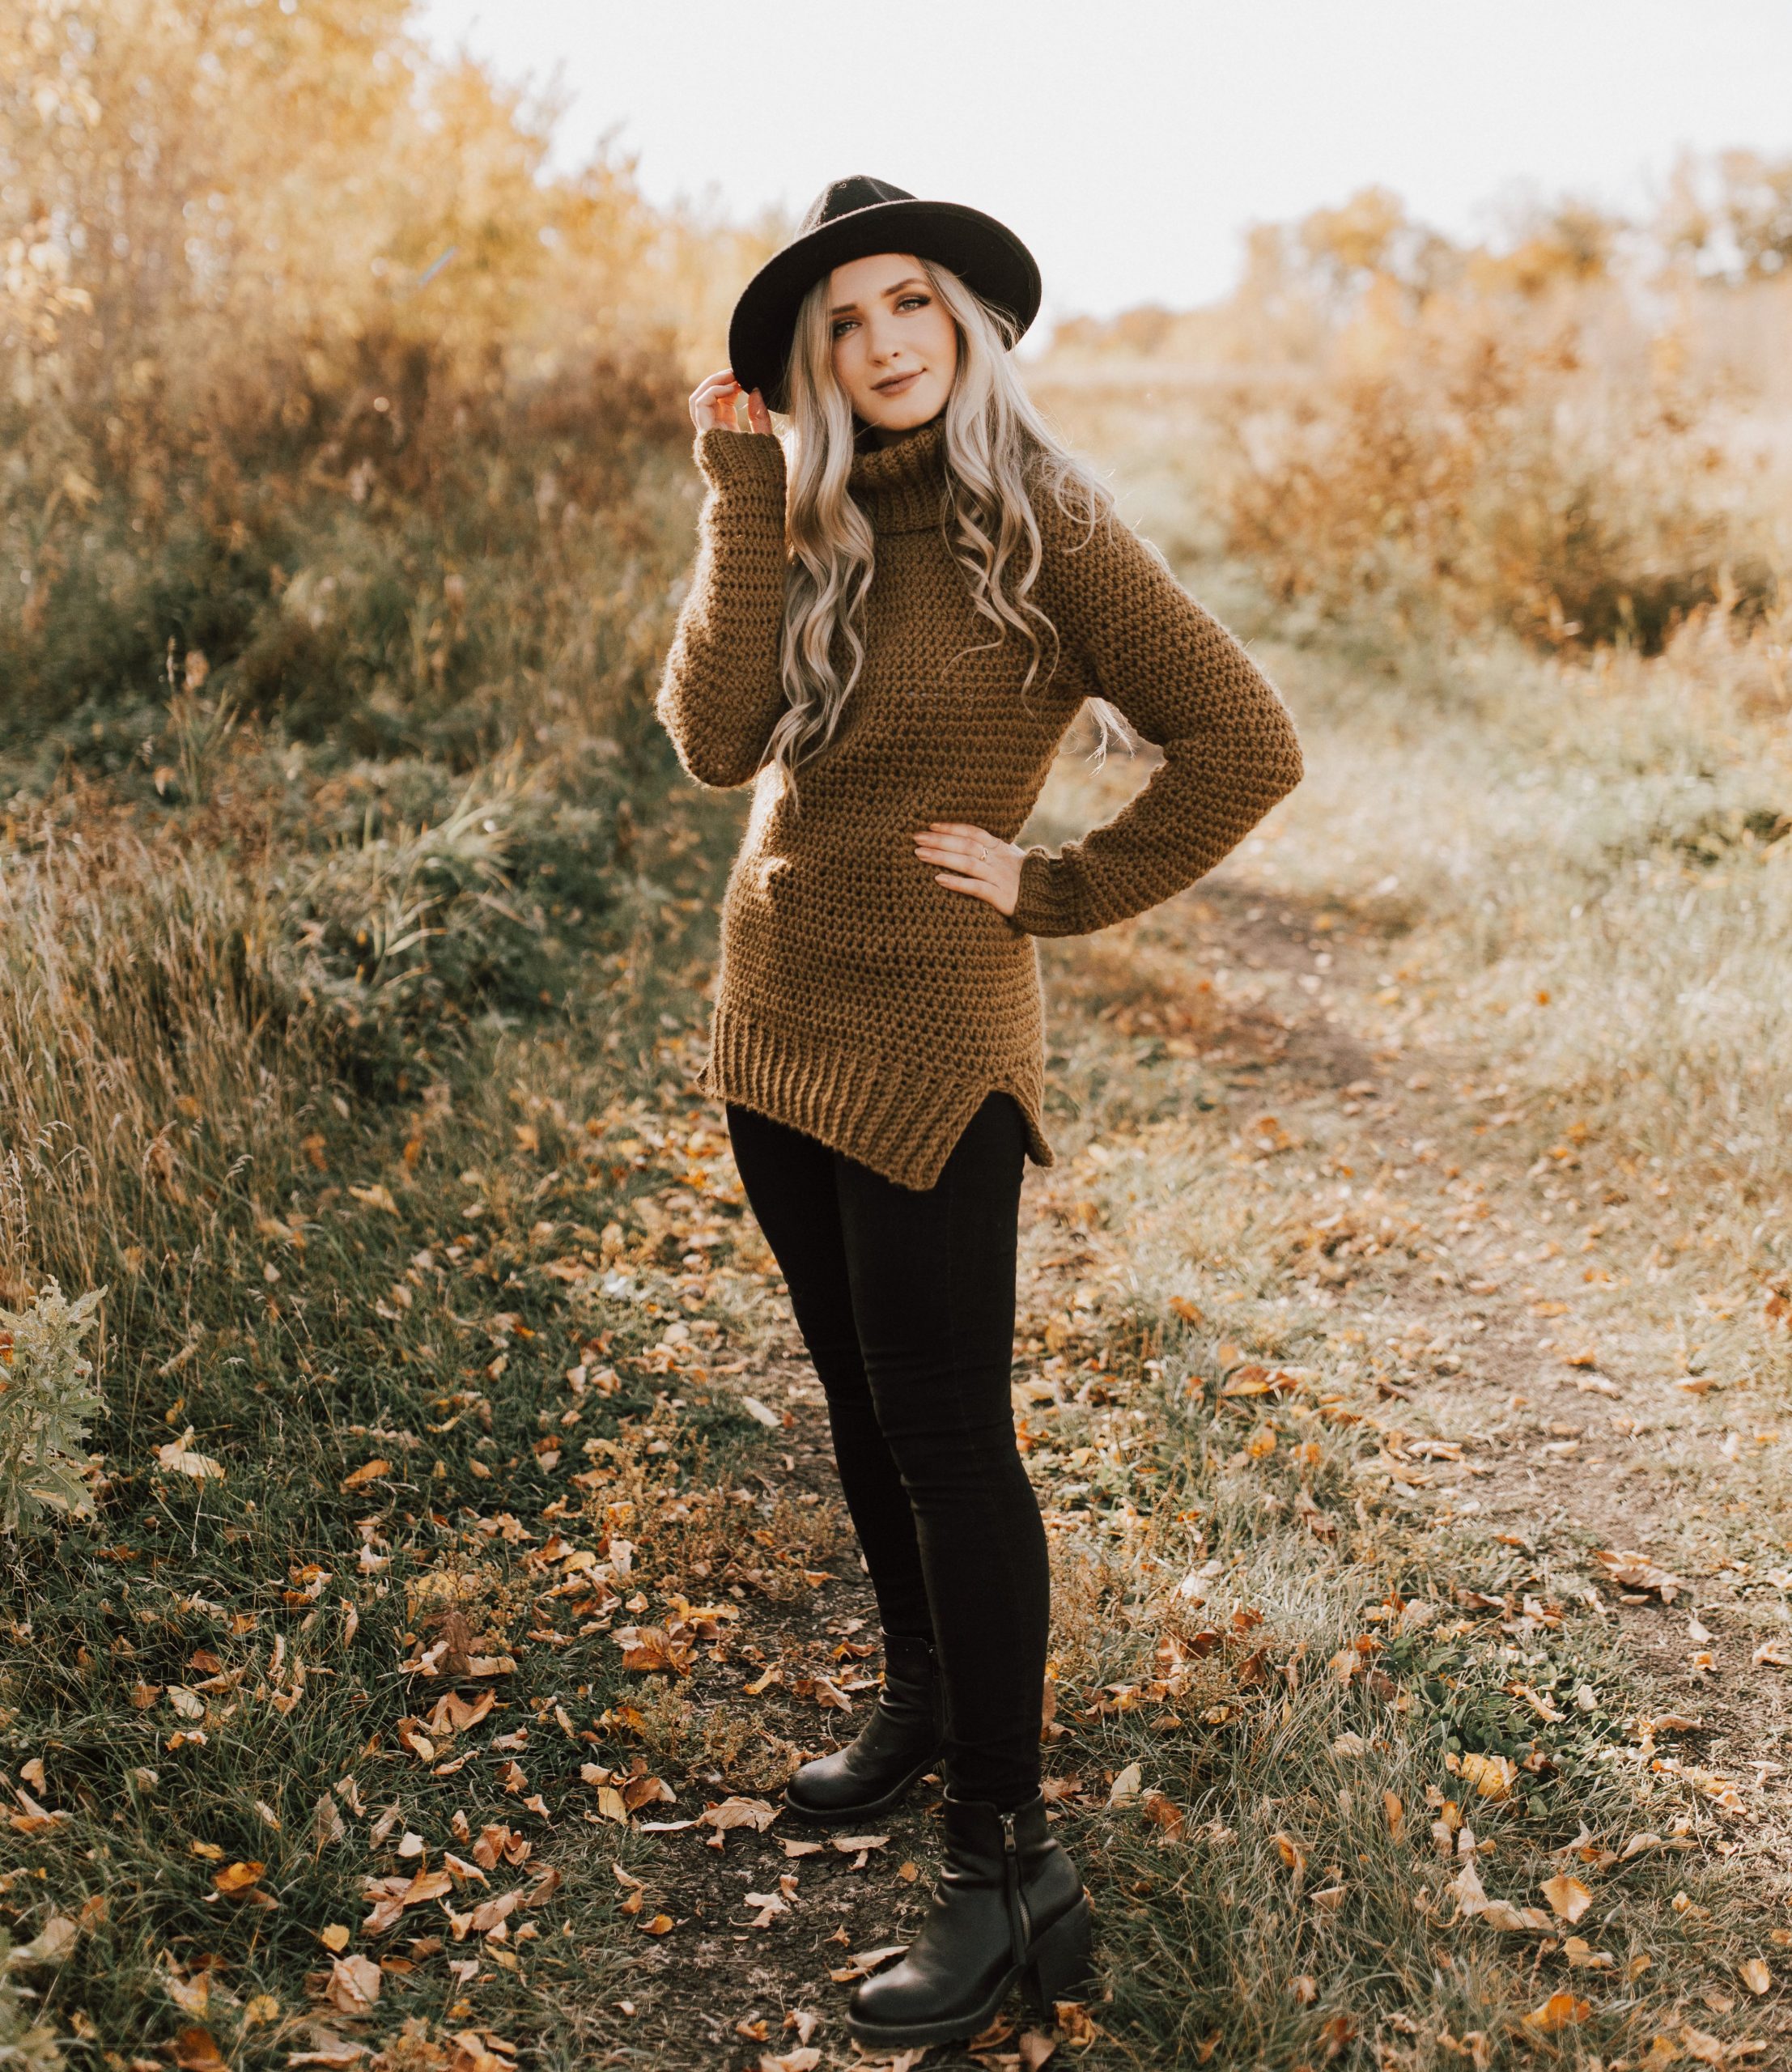
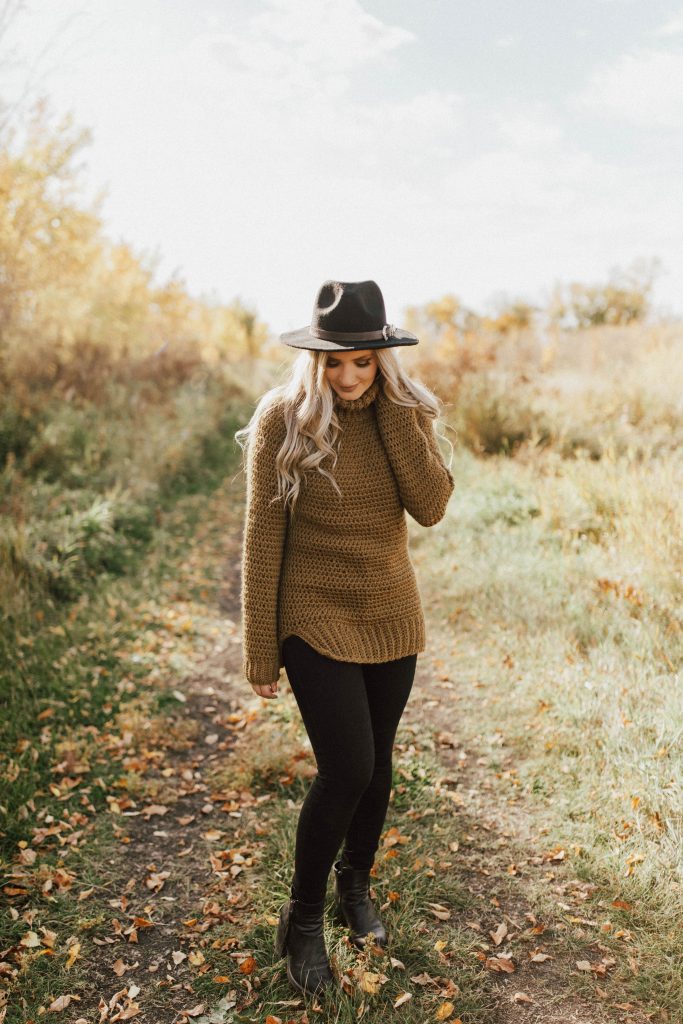
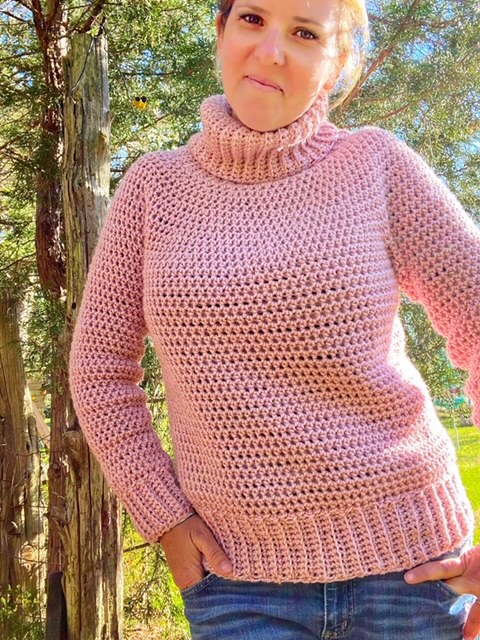
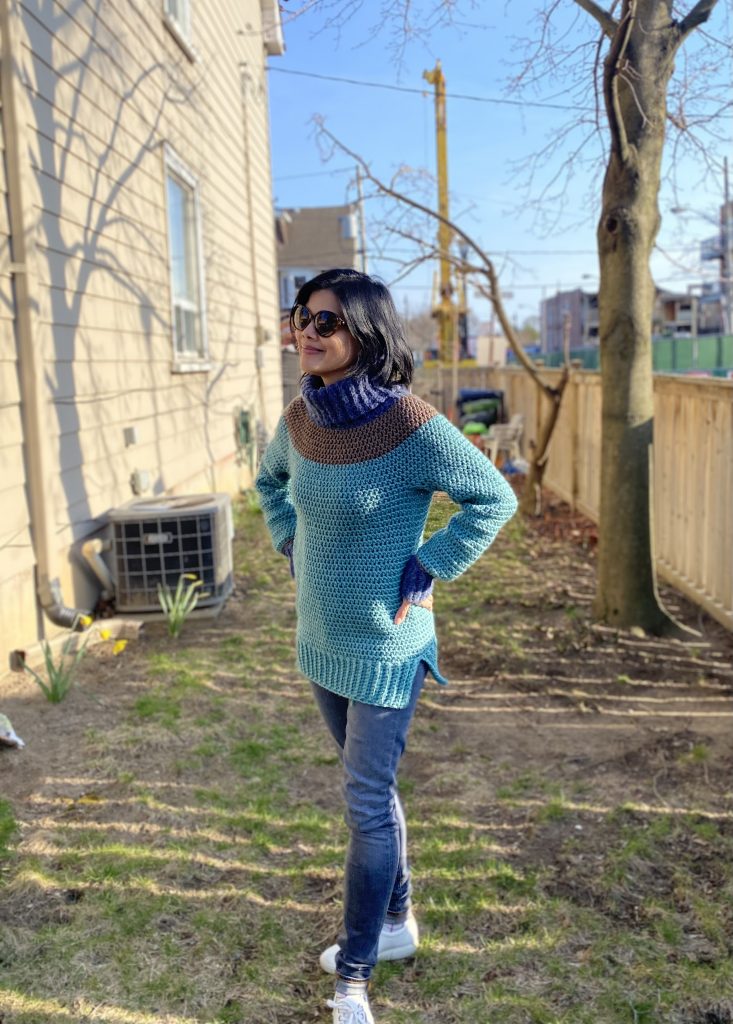
This post includes everything you need to know about the Vintage Moon Sweater, a size-inclusive crochet pattern for a chunky, circular yoke sweater featuring a turtleneck and split hem that lands at the upper-thigh.
The Vintage Moon Sweater is from my book Modern Crochet Sweaters: 20 Chic Designs for Everyday Wear. This book includes 20 size-inclusive sweater patterns using a variety of techniques and construction methods to ensure there is something of value for every skill level. Each pattern is written in 9 sizes from XS to 5XL and each size has been thoroughly tested! We had over 500+ crochet pattern testers for this book to make sure that each size fits its intended wearer in a way that makes them feel beautiful. You can buy this book with confidence, knowing that each pattern was written for you and your unique body measurements.

Before we begin, here are some quick links for you:
- Find the PDF version on Ravelry here, on Etsy here, and on my website here.
- Add your finished project and view other completed projects on Ravelry here.
- Use the pattern hashtag #VintageMoonSweater on Instagram to show off your makes! Be sure to check out the book hashtag, #ModernCrochetSweaters, too!
- Shop The Hook Nook Yummy here! (Be sure to scroll down to see other great yarn substitutes!)
- Shop my book on Amazon (US) here.
- Shop my book on Amazon (CA) here.
- Shop my book on other platforms outside of North America here.
- Read about my experience getting a book deal here!
- For any questions about this pattern, please email knitsnknotswpg@gmail.com and I’ll get back to you asap!
Order my book – Modern Crochet Sweaters: 20 Chic Designs for Everyday Wear – here!
If you want to be notified of all new pattern releases (and get exclusive discounts on all new paid patterns), sign up below!
This post contains affiliate links. This means, should you make a purchase, I will receive a small portion of the sale at no extra cost to you. All opinions are my own. View my Privacy + Disclosures Policy here.

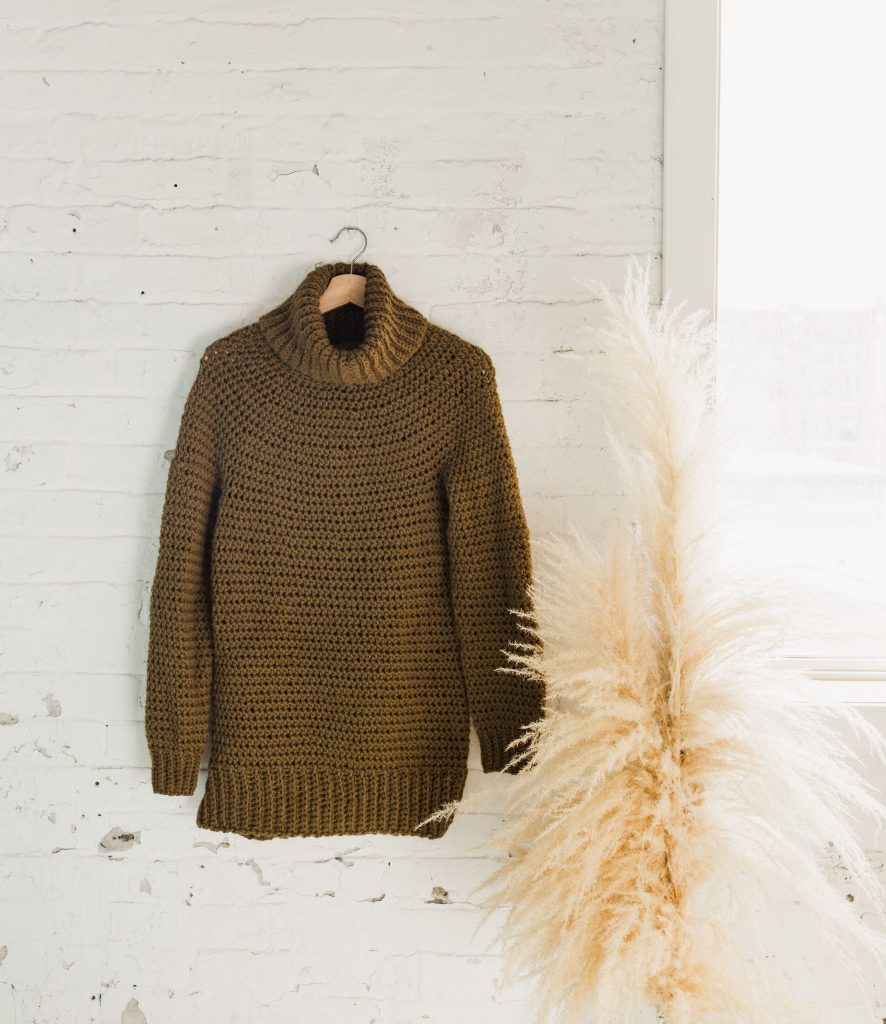
About Vintage Moon
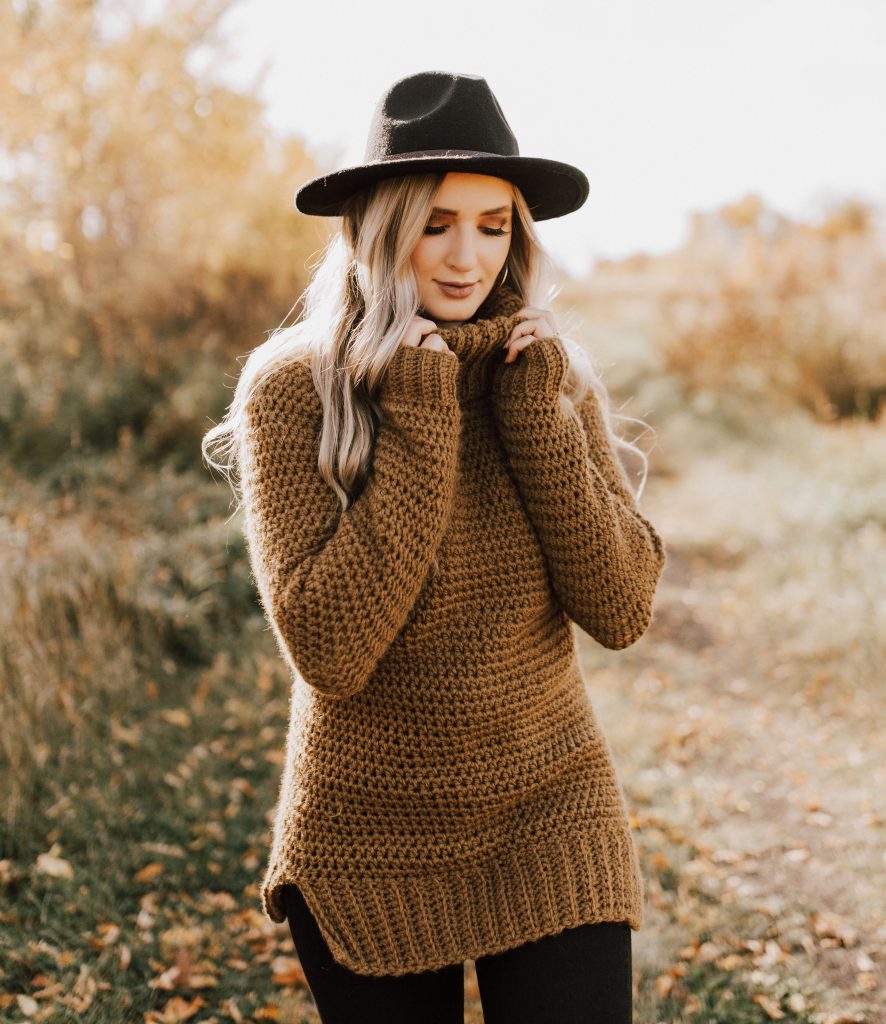
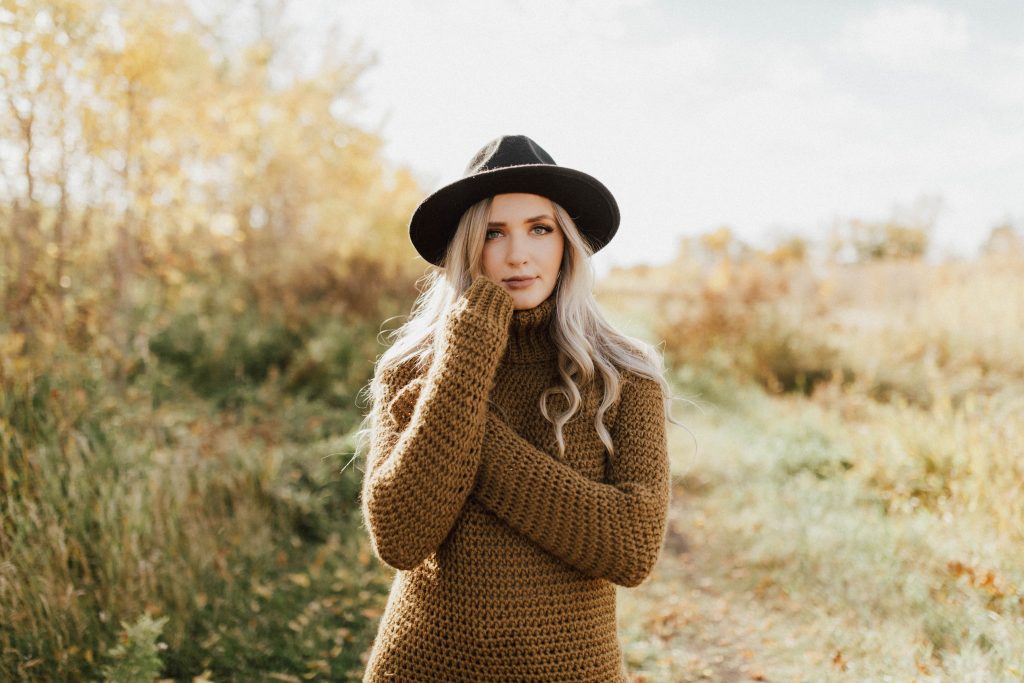
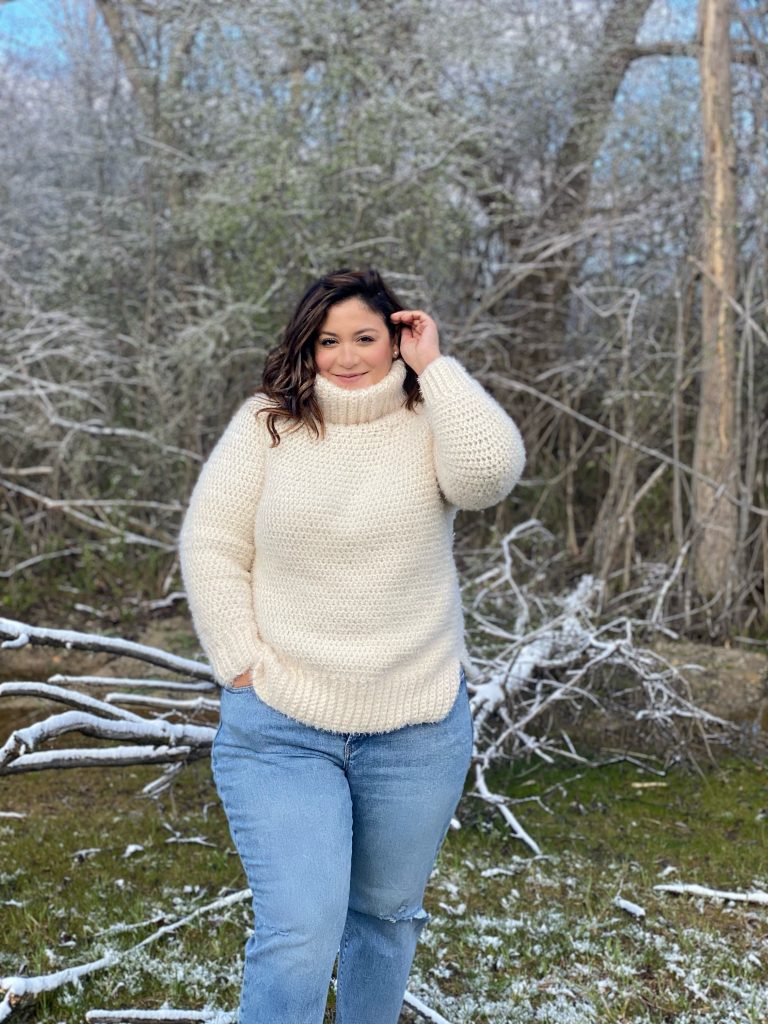
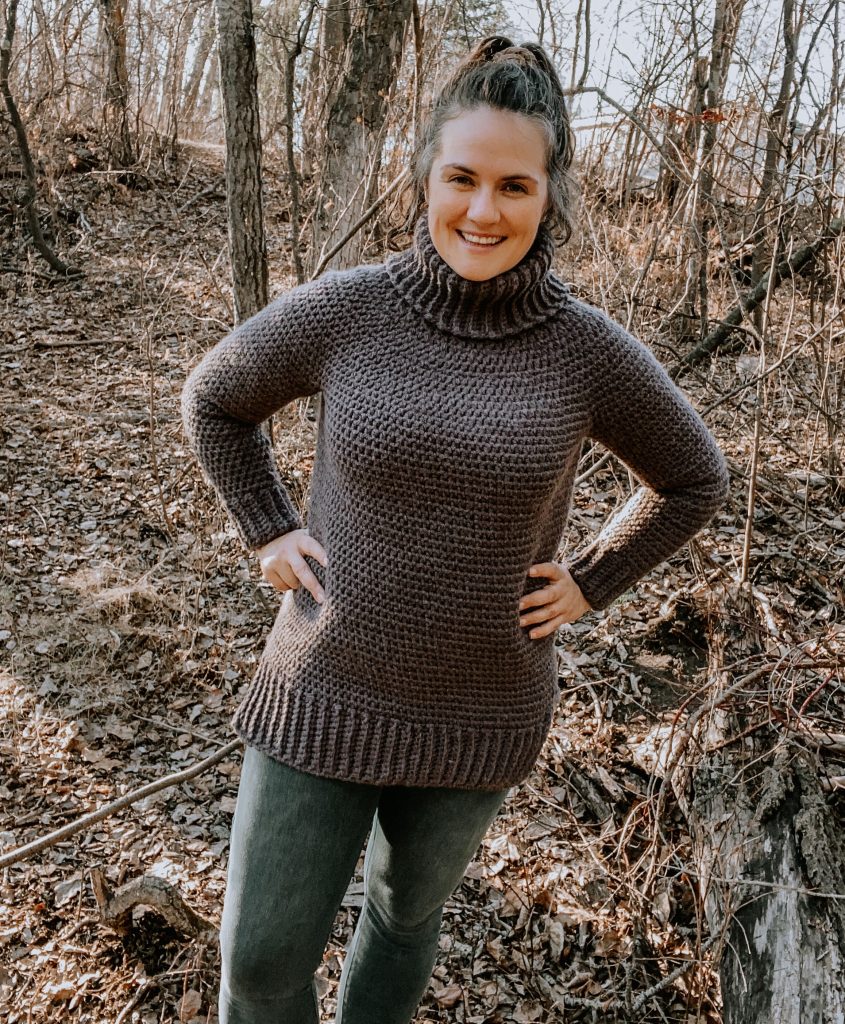
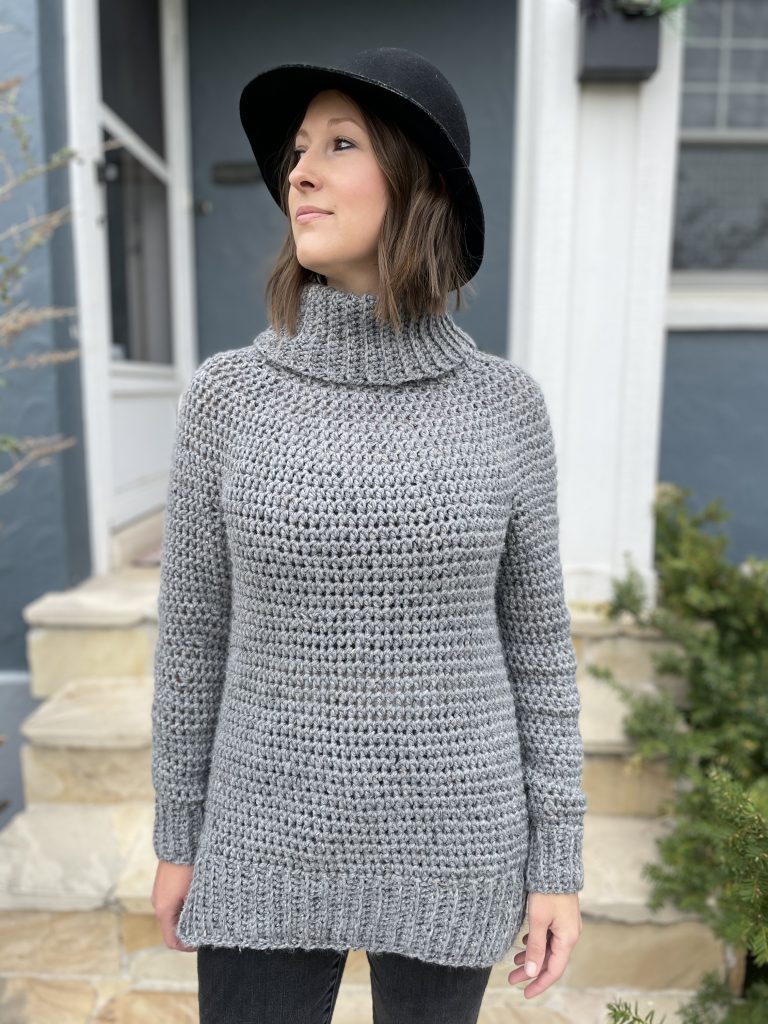
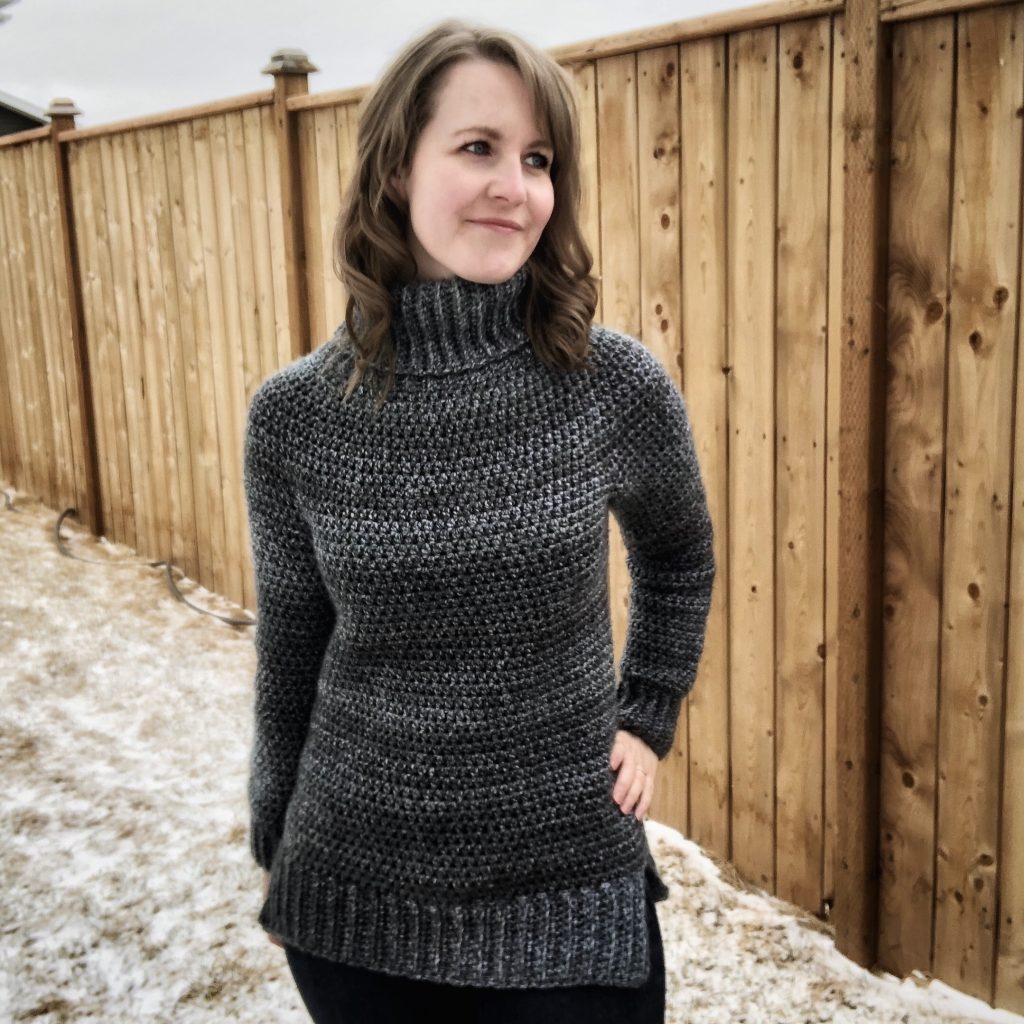
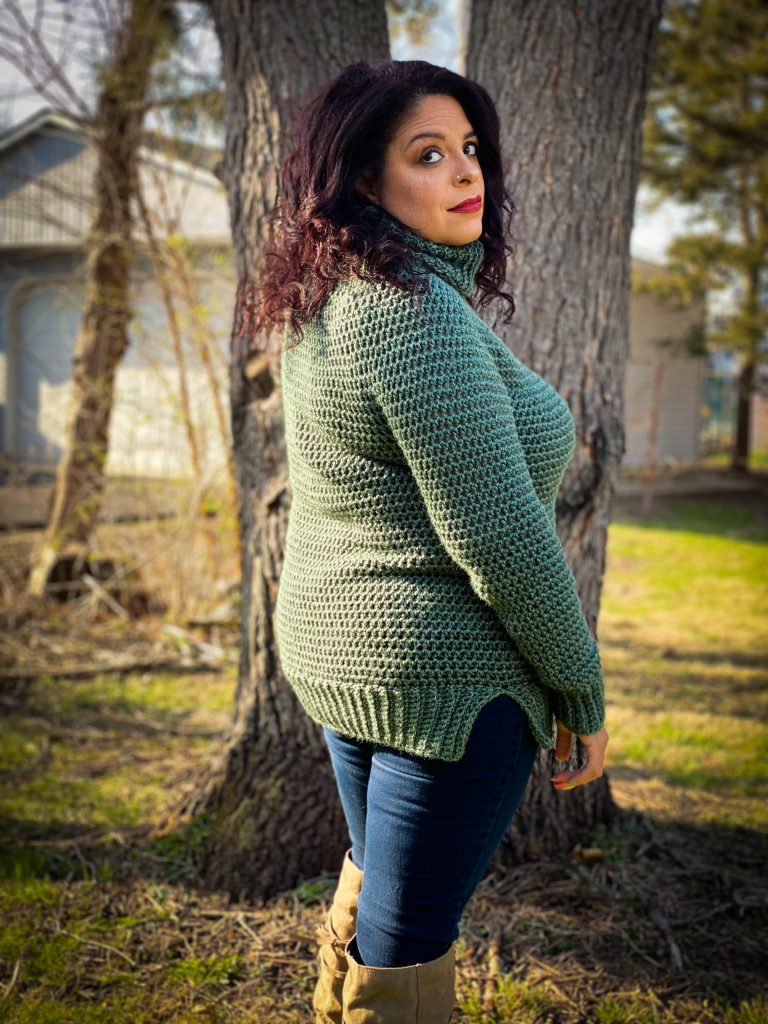
No sweater collection would be complete without a turtleneck. Like a moth to a flame, I am constantly drawn to the polished look of high necklines. There is a certain warmth and security that comes with a high neckline, an inherently sophisticated addition to any garment. Bringing style and function to this simple yoke sweater, the turtleneck radiates a classic elegance; like a fashion-forward nod to the past.
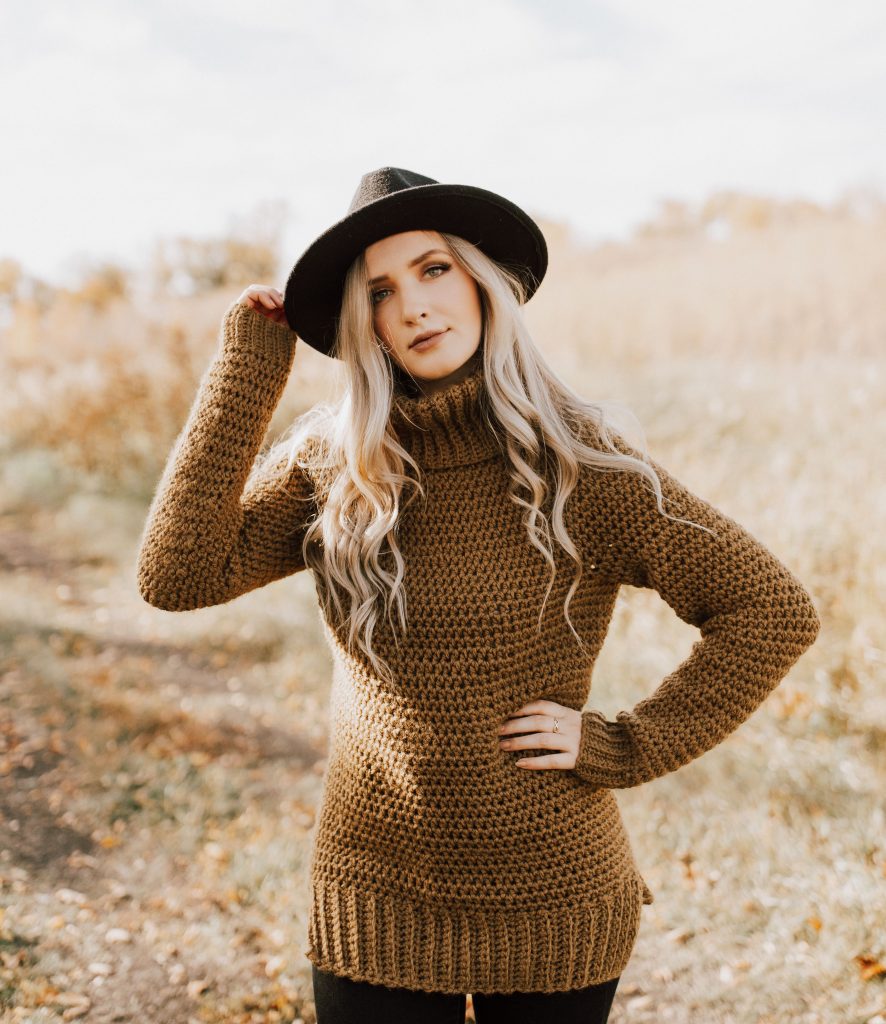
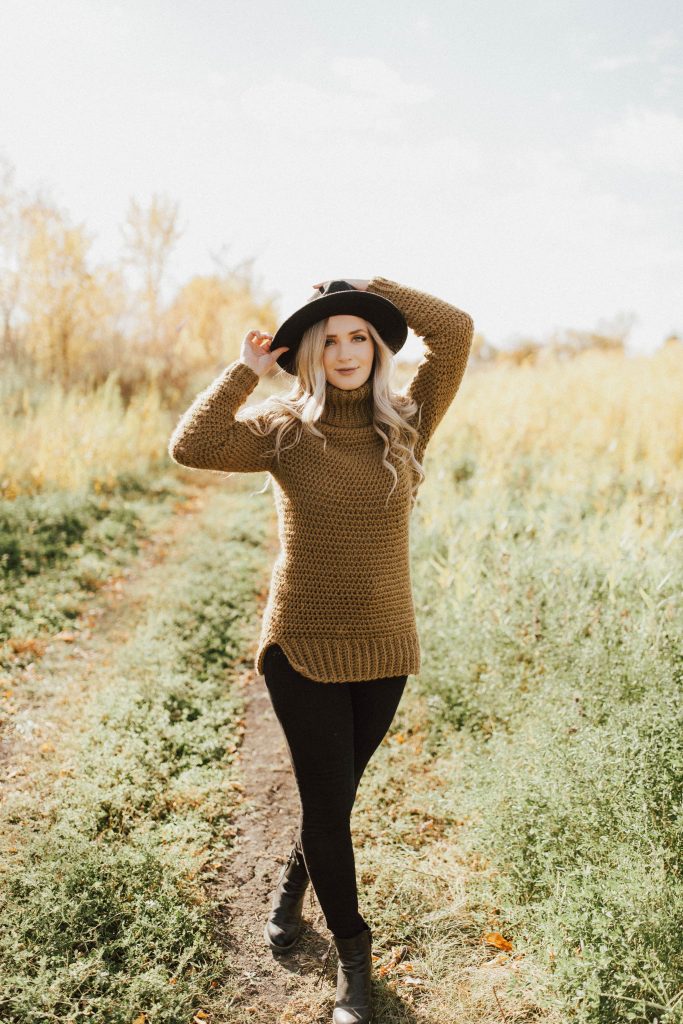
With its relaxed fit and slim, tapered sleeves, Vintage Moon can be comfortably worn under a parka, sheltering your neck from harsh winter winds. This sweater lands where the thigh begins (though you can adjust the length to suit your preference), and the sleeves extend slightly past the wrist for additional protection from the cold. This design feels warm and grounding, while adding a touch of poise to any outfit.
Getting Started: the Vintage Moon Sweater
Yarn: Bulky—The Hook Nook Yummy in Olive You
- 80% acrylic, 20% wool
- 185 yds [170 m] per 3.5-oz [100-g] ball
- Scroll down for an extensive list of yarn substitutes and yarns used during testing.
Yardage: 6 (6, 6, 7, 7) (8, 8, 8, 9) skeins of Yummy, or
950 (1000, 1075, 1150, 1250) (1300, 1400, 1475, 1550) yds
[869 (915, 983, 1052, 1143) (1189, 1281, 1349, 1418) m]
Substitute The Hook Nook Yummy with any bulky weight, category #5 yarn or worsted weight, category #4 yarn that matches gauge. Yummy feels lighter than most other category #5 yarns; much like an aran or heavy worsted weight.
Hooks
- Main gauge hook: Size U.S. K/10½ (6.5 mm) or size needed to obtain gauge
- Hook for cowl and sleeve cuffs: Size U.S. J/10 (6 mm) or hook that is 0.5 mm smaller than main gauge hook
Notions: Tapestry needle, 5 locking stitch markers
Gauge: 6 x 6″ [15 x 15 cm] = 14 sts and 12 rows in half double crochet in the round using main gauge (larger) hook
Getting Started: Knowing Your Measurements
This book uses the Craft Yarn Council (CYC) to determine sizing. The CYC is the industry standard when it comes to knit and crochet sizing. While you will be able to produce a beautiful sweater by following the written patterns, I also like to include customization tips throughout each pattern so that you can adjust based on your unique body measurements. For example, shortening or lengthening a sleeve, or adjusting for a larger upper arm than written for your size. This way, you can modify the pattern with confidence, if needed. For me personally, I usually need to shorten garments because I have a short torso. My hips also fall under a different size than my bust – not everyone fits perfectly into these sizing standards; they are simply averages, not set-in-stone numbers.
Understanding how your body deviates from the CYC standard measurements gives you the ability to tailor a sweater to perfectly fit you, rather than feel disappointed that your body doesn’t fit into the sizing standards. I recommend that you measure the largest part of your bust and then refer to the CYC website (click here) to find out which size you would fall under. Then, look at the other measurements that are included for your size, and see which of these measurements deviate from your actual body measurements. Knowledge is power, and once you understand how your body deviates from the CYC standards, you will be able to anticipate this deviation and assume it translates through most patterns. For example, if your upper arm circumference is slightly larger than the CYC sizing chart reads, then you can expect you may have to ignore a few decrease rows when working the sleeves of your next sweater, or even follow the sleeve instructions for the next size up, if possible.
Customization Ideas + Tips When Crocheting This Sweater
Tips
- Sizing: This sweater is written in nine sizes as follows: XS (S, M, L, XL) (2X, 3X, 4X, 5X). Make sure to follow the numbers for your size only.
- Stitch Counts: Stitch counts are listed after each row/rnd. If no stitch count is given, there has been no change since the previous row/rnd. If only one number is provided, it applies to all sizes.
- Right Side: The “right side” is the side of your work that faces you as you crochet the yoke, body, and sleeves.
- Turning Chain: The turning chain does not count as a stitch.
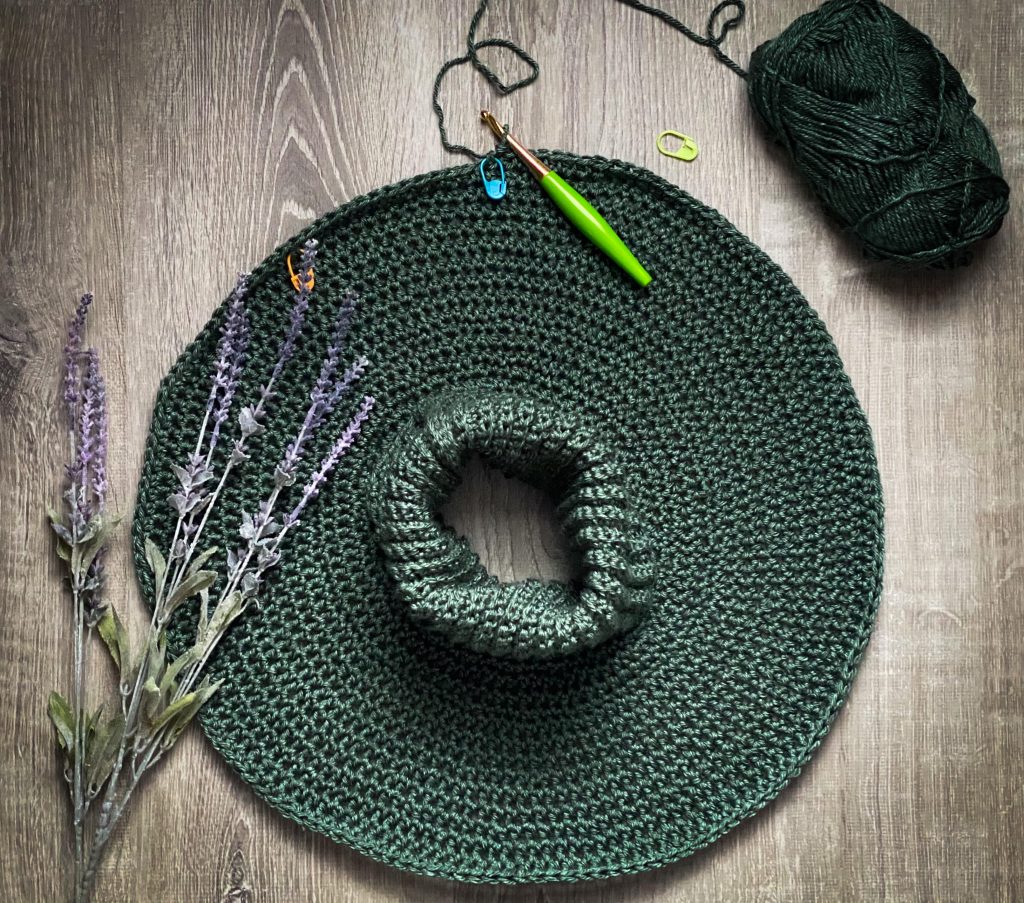
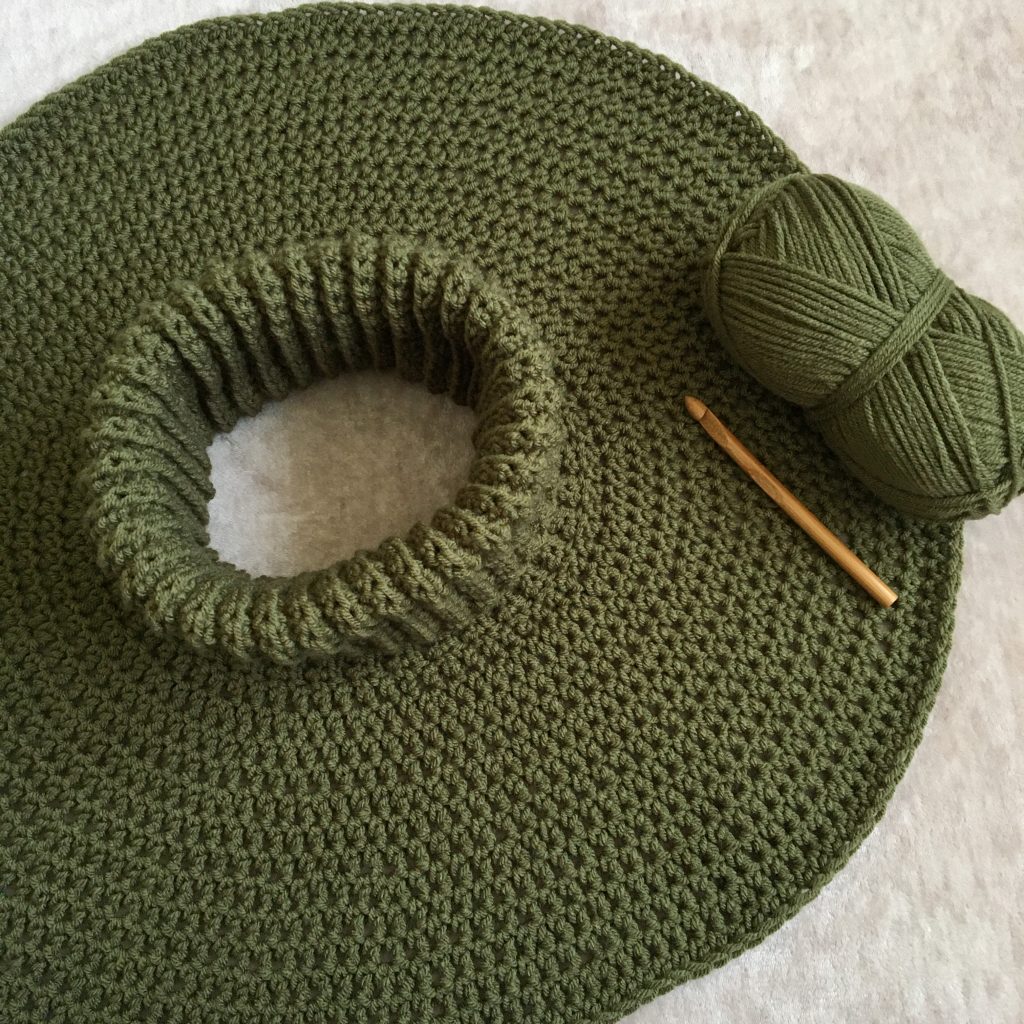
- Construction: This sweater has a circular yoke construction, worked seamlessly from the top down after working the cowl ribbing. After completing the yoke increases, the yoke is then separated to create space for the body and the arm holes. The body is worked next, and the sleeves are worked last. The benefit to this type of top-down construction is that you can try it on as you crochet it and make adjustments as necessary to ensure a perfect fit. This is especially helpful for discovering your desired sleeve and body length. The entire piece is worked in a spiral for a smooth, seamless fabric with no visible seams or joins.
Customization Idea
- To change the length of your sweater: With top-down sweaters, like this one, adjusting your finished length could not be easier! All you have to do is crochet the body until your sweater measures 4″ (10 cm) shorter than your desired length. Then, work the instructions for the bottom split-hem!
- Adjusting Sleeve Tightness + Length: For tighter (or looser) sleeves, work additional (or fewer) decrease rounds than instructed for your size. For longer (or shorter) sleeve, work additional (fewer) non-decrease rounds wherever you see fit. Make note of any modifications so that you can create a second identical sleeve.
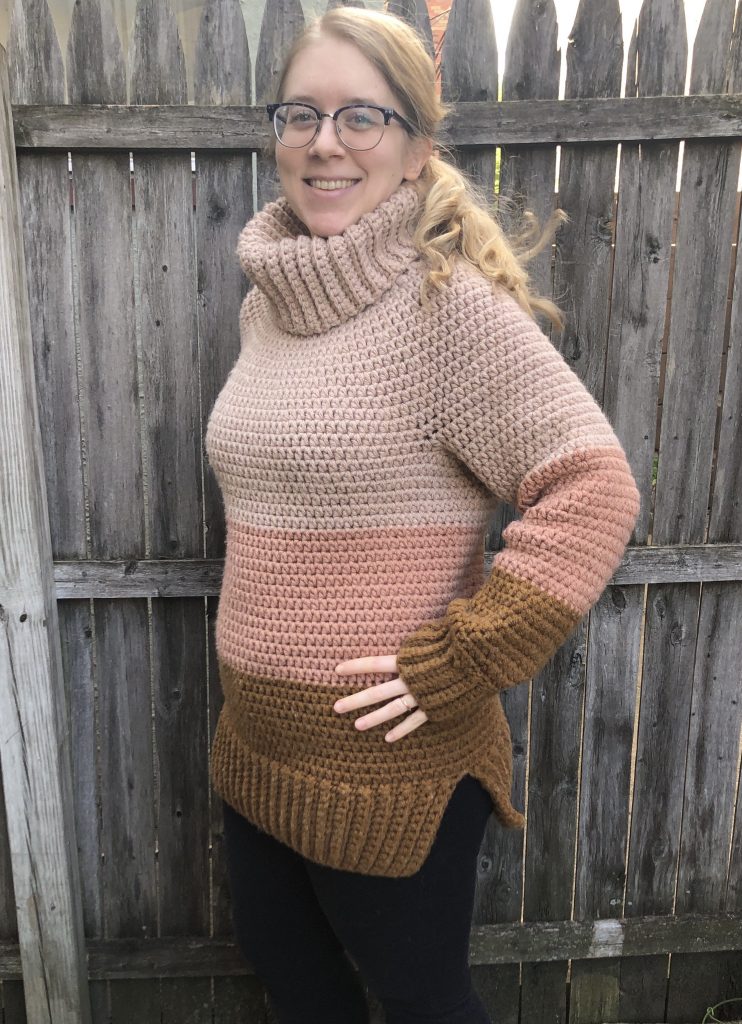
- For a colour-blocked sweater: Just as easy as changing the length – simply work your sweater in your top colour until you are ready to switch to a new one. You may want to change colours on the side of your sweater rather than the center front or back, just to keep the jog inconspicuous. When finishing the round with your new colour, you will notice a colour jog, but don’t worry about this – when you tie your ends, pull tight until the jog is nearly invisible, then tie a knot and weave in these ends.
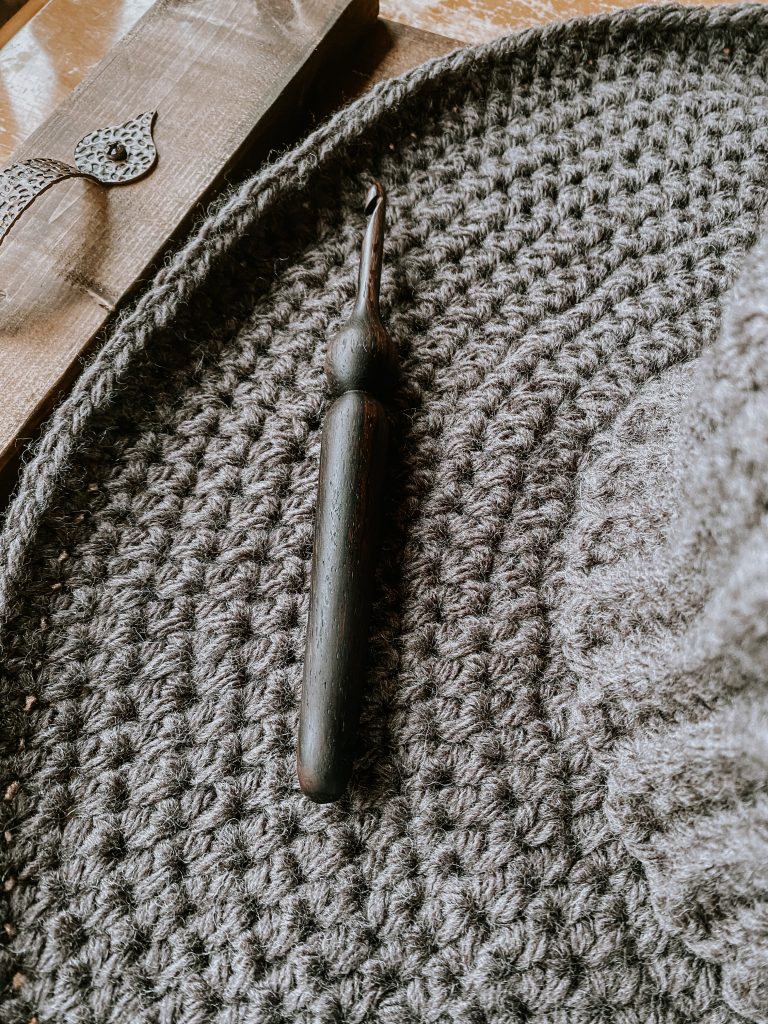
All About The Ribbing
If you’ve never worked applied ribbing onto an existing piece of crocheted fabric, have no fear! It is so incredibly easy. The pattern outlines every step, but here are some supplementary photos to ensure you are on the right track.
The Sleeve Cuff Ribbing
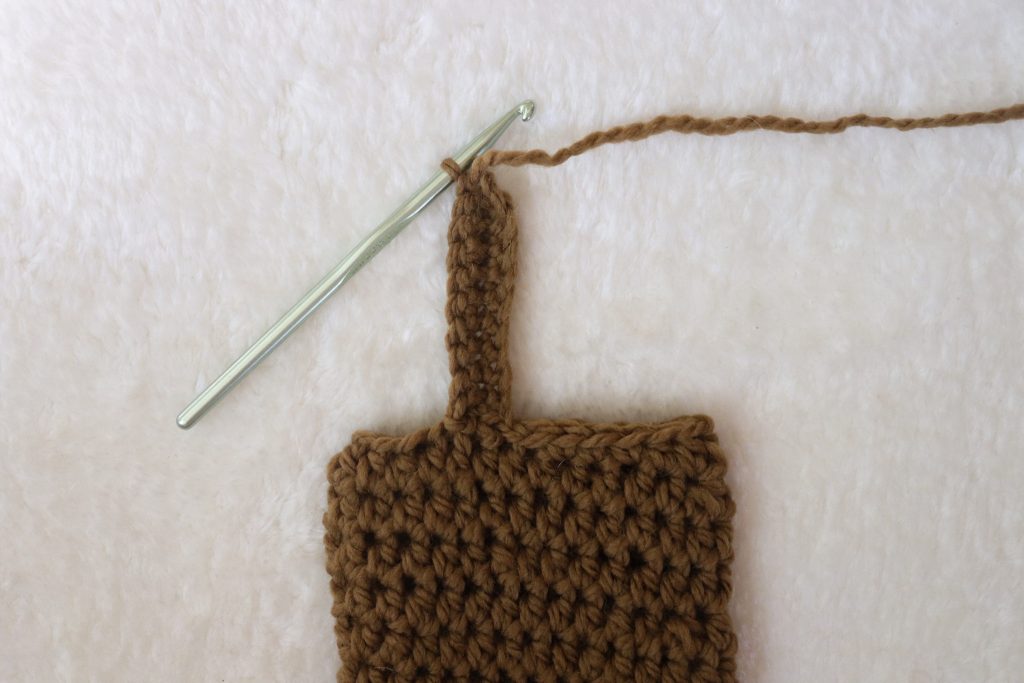
At this point, you’re instructed to join your very last sleeve round with a slip stitch, and then work a chain. You can turn your work before chaining or leave it in the same direction – it does not matter.
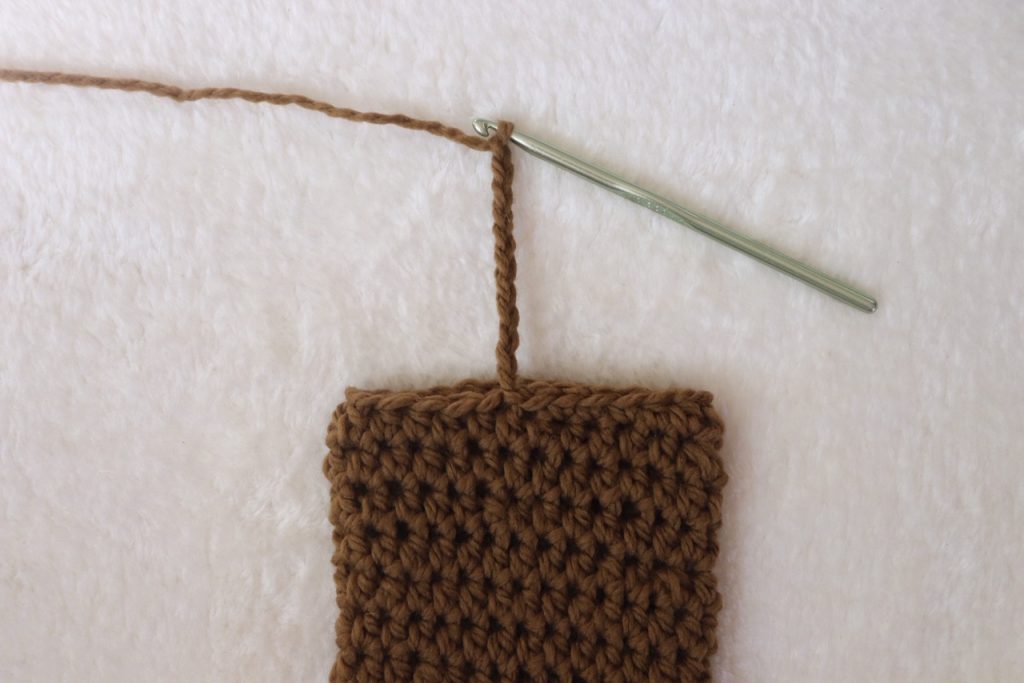
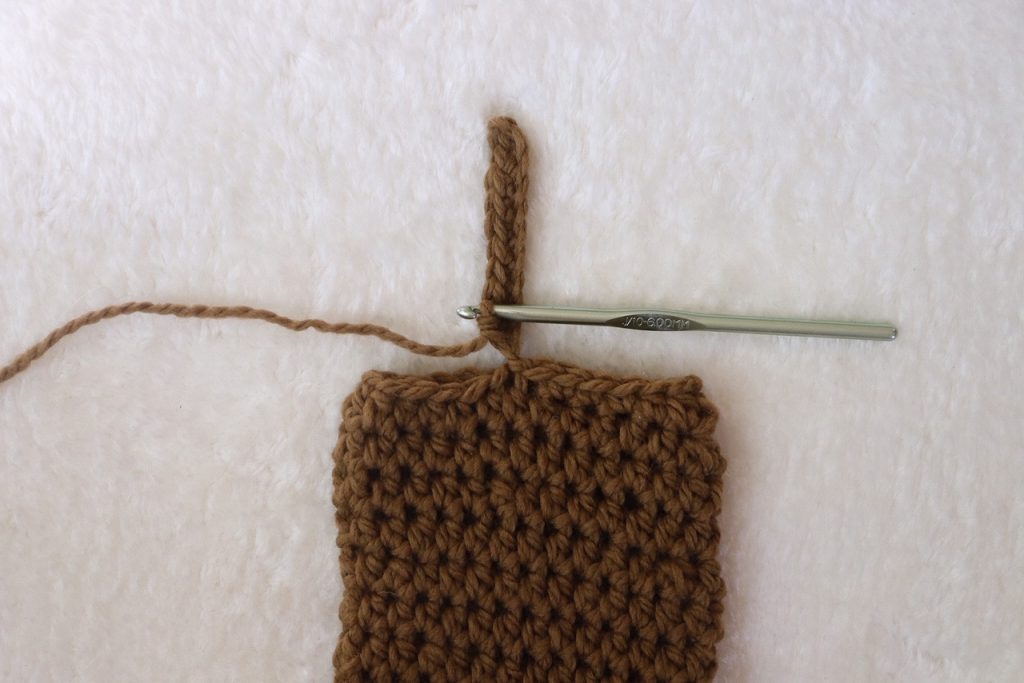
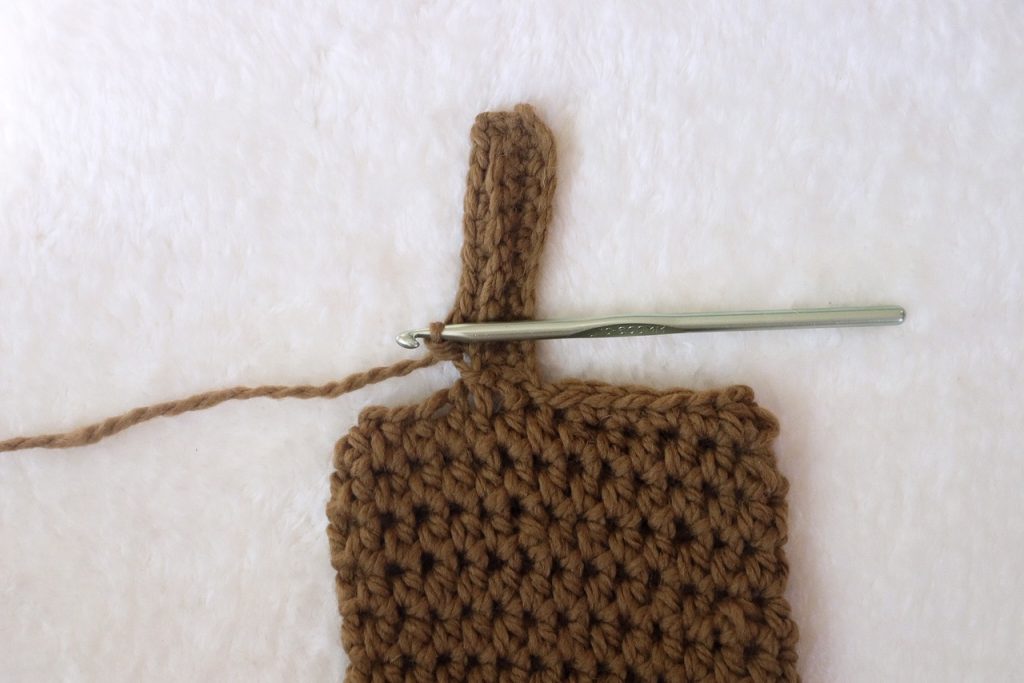
Next, you will be instructed to find the st that the initial ch came out of. Do not work into this st, but sl st into the next 2 sts of the last sleeve rnd (See Fig 2. below). Turn work to begin working back on the previous row of sc.

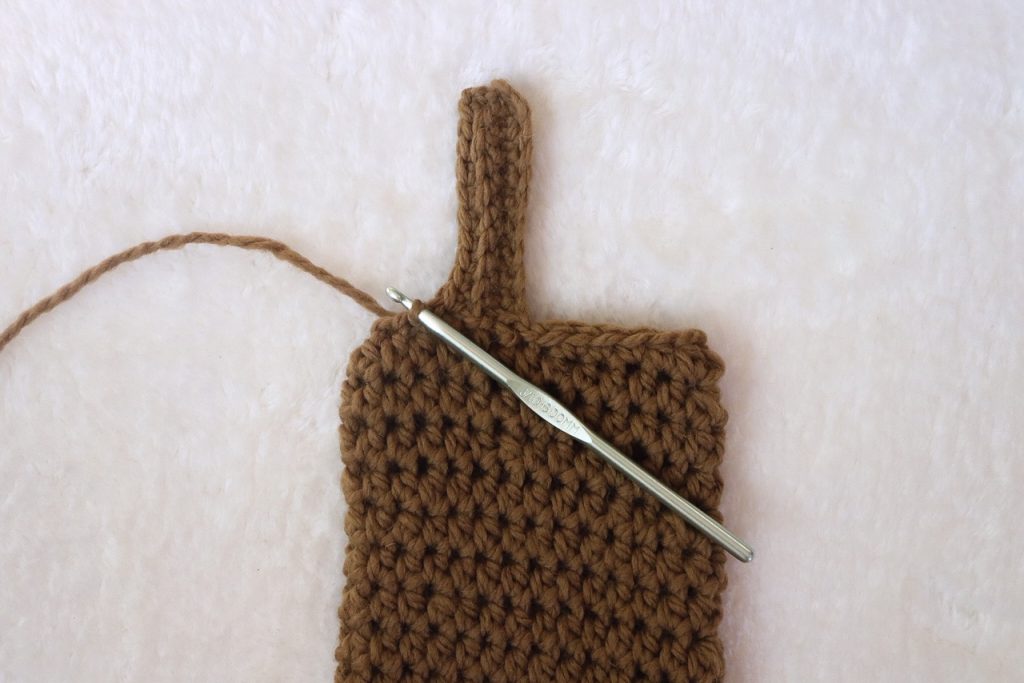
You will be instructed to repeat Rows 2 and 3 from the pattern until you have worked your way around the entire sleeve cuff. It does not matter whether or not you finish on a Row 2 rep or Row 3 rep. Just continue until you have worked your way around the entire sleeve opening. With a tapestry needle, seam the first and last row of ribbing together using the whip stitch or seaming method of your choice. Fasten off and weave in ends.
The Bottom Hem Ribbing
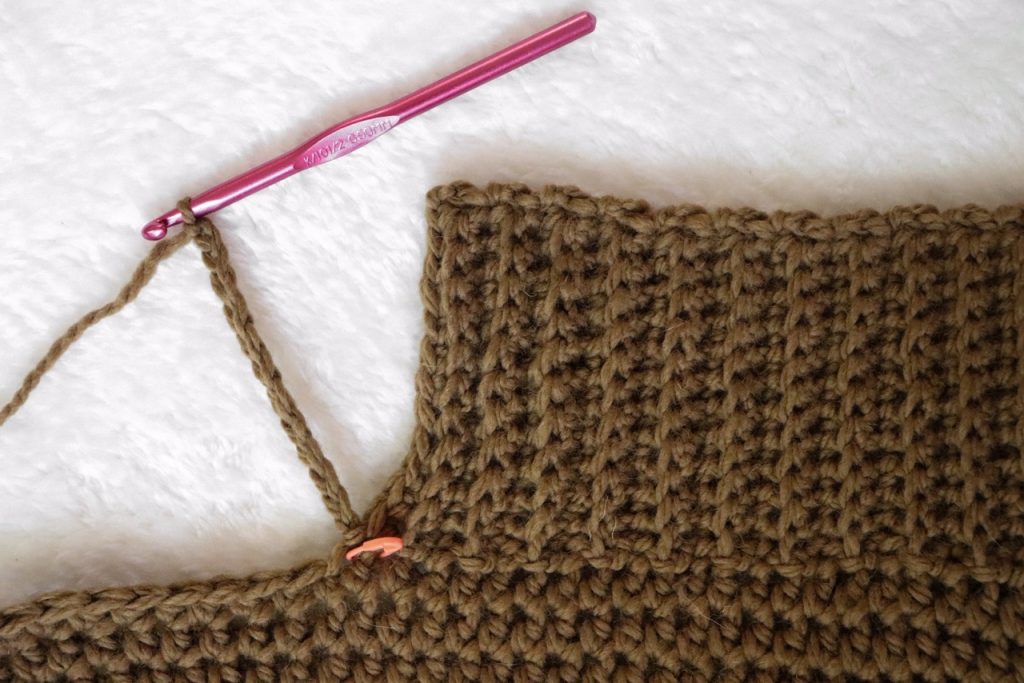
The bottom hem ribbing is much like the sleeve cuff ribbing, with one small change to create the side slits.
Once you have worked around to your second marker, you’ll create the split-hem. You must finish on a Row 3 rep in order to begin your split-hem at the stitch marker that you placed. You will be instructed to work a chain instead of working onto your previous row of single crochets. It will look like this:
Yarn Substitutions
The yarn used in my sample is a blend of 80% acrylic and 20% wool. Yummy is a yarn line from Jessica of the Hook Nook, so if you choose to use this sample yarn, you’ll be supporting another small business! It’s affordable and extremely soft to work with. I used the colour “Olive You” which is a really beautiful olive-brown colour.
When substituting, there are a lot of great options you can try! Matching the fiber content isn’t necessary; most fibers should produce a beautiful sweater. Substitute The Hook Nook Yummy with any bulky weight, category #5 yarn or worsted weight, category #4 yarn that matches gauge. Yummy feels lighter than most other category #5 yarns; much like an aran or heavy worsted weight.
The following yarns can be used in this pattern and will produce a lovely finished cardigan:
Lion Brand Yarns:
- Lion Brand Chainette
- Lion Brand Hue And Me
- Lion Brand Scarfie
- Lion Brand Heartland
- Lion Brand Woolspun
Knit Picks/WeCrochet Yarns:
- Snugglepuff
- Biggo
- City Tweed Aran
- Wonderfluff
- Wonderfluff Ombre
- Provincial Tweed
- Swish Bulky
- Wool of the Andes Superwash Bulky
LoveCrafts Yarns:
- Stylecraft Special Chunky
- Red Heart Hygge
- Red Heart Soft
- Bernat Velvet
- Malabrigo Worsted
- Rowan Kid Classic
- Cascade 128 Superwash
- Berroco Comfort Chunky
- Cascade Eco+
- See more bulky weight yarns from LoveCrafts here!
Other Yarns:
- Yarn Bee Soft & Sleek Low Pill Fiber (Hobby Lobby brand)
- Patons Norse
- Patons Shetland
- Sewrella Yarn Classic Bulky
- Bernat Wavelength
- Big Twist Classic (JoAnn brand)
- Estelle Chunky
- Hobbii Divina
- James C Brett Top Value Chunky
- K & C Roving (JoAnn brand)
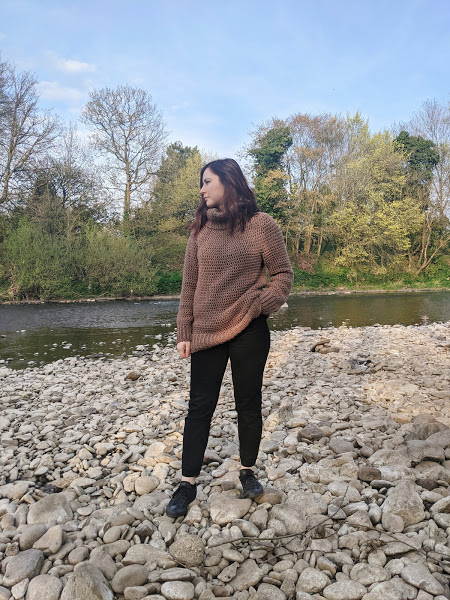
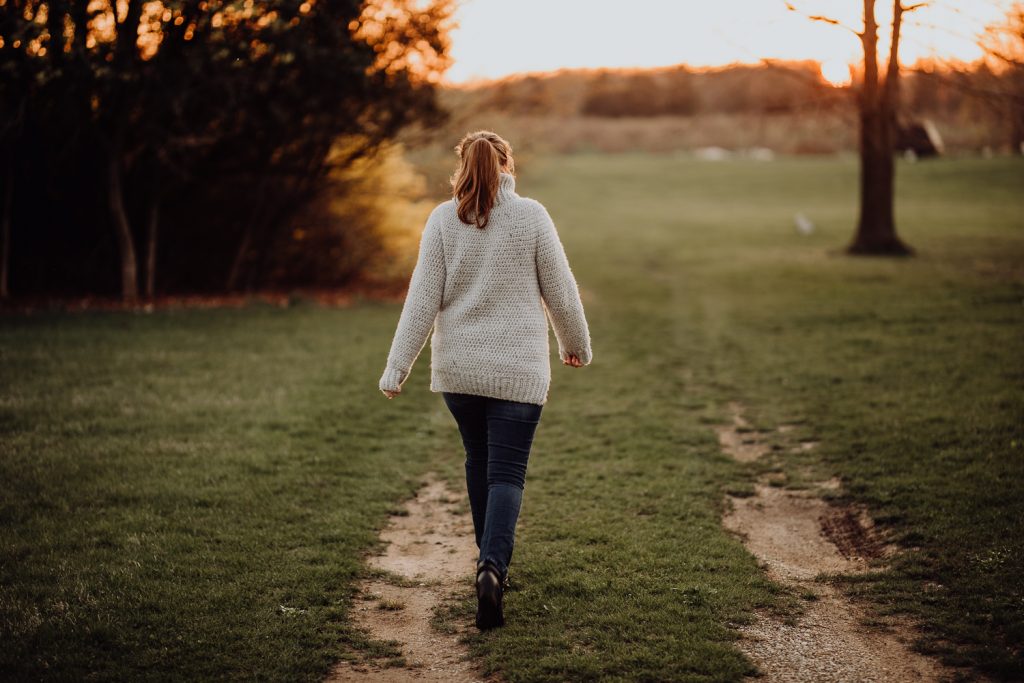
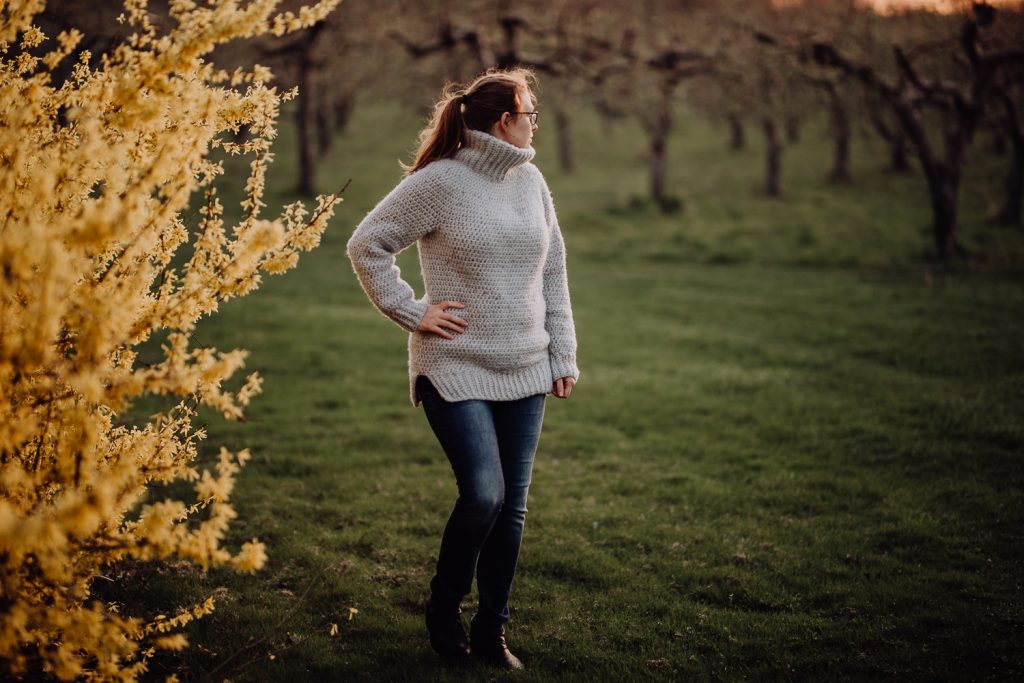
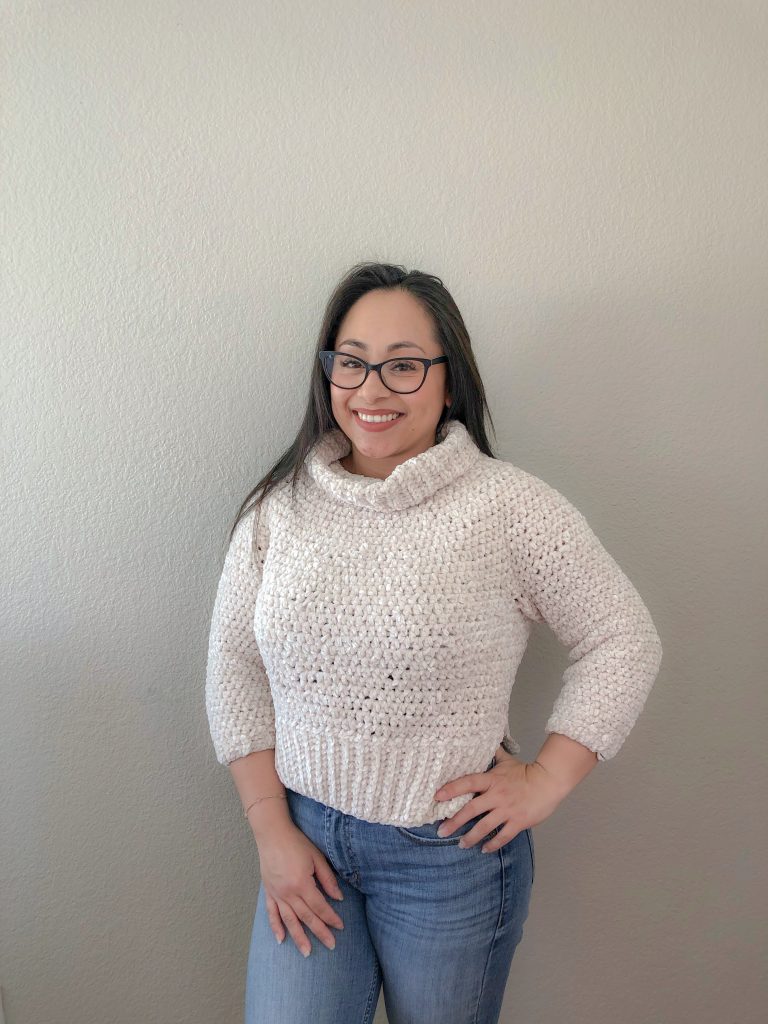
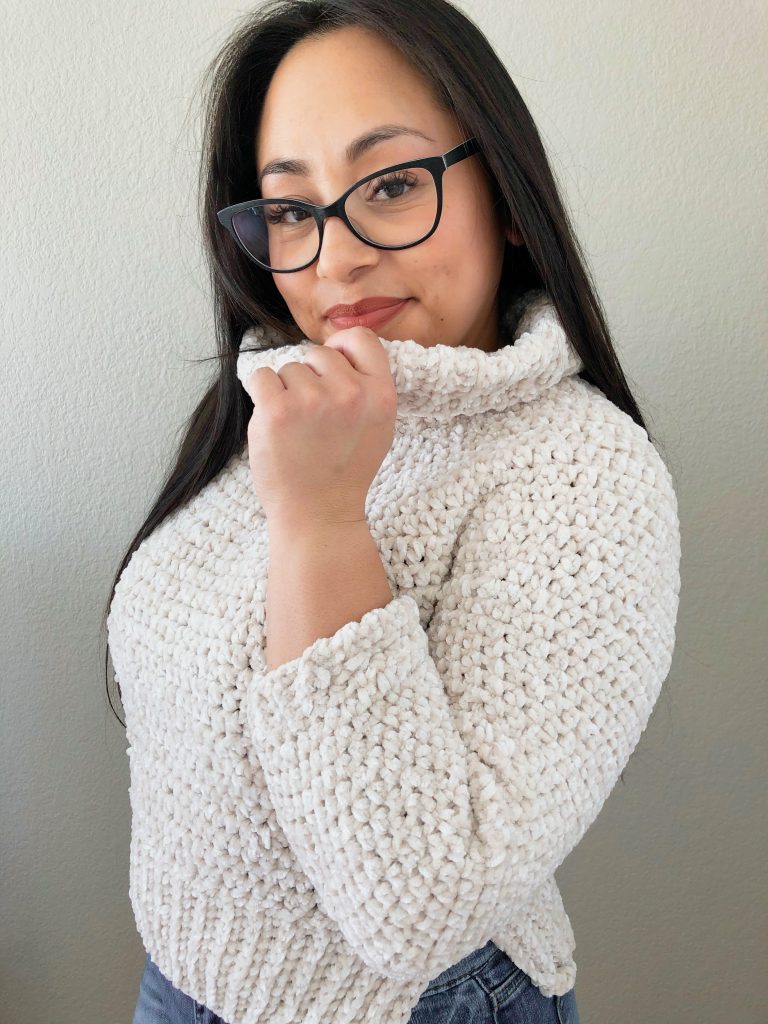
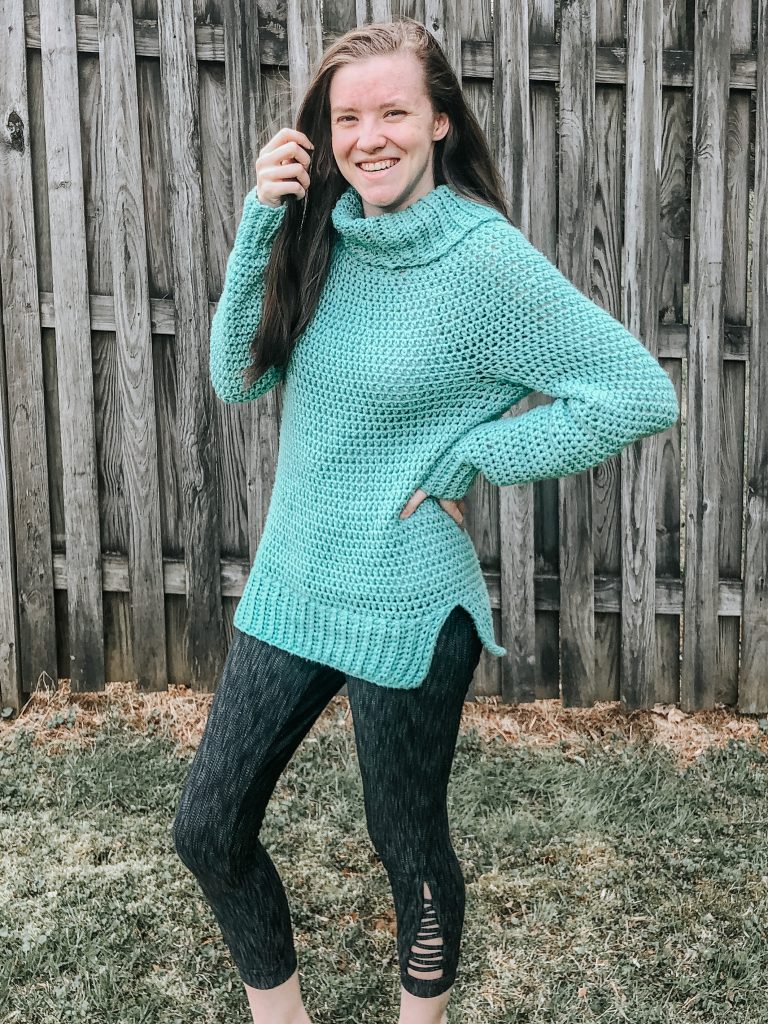
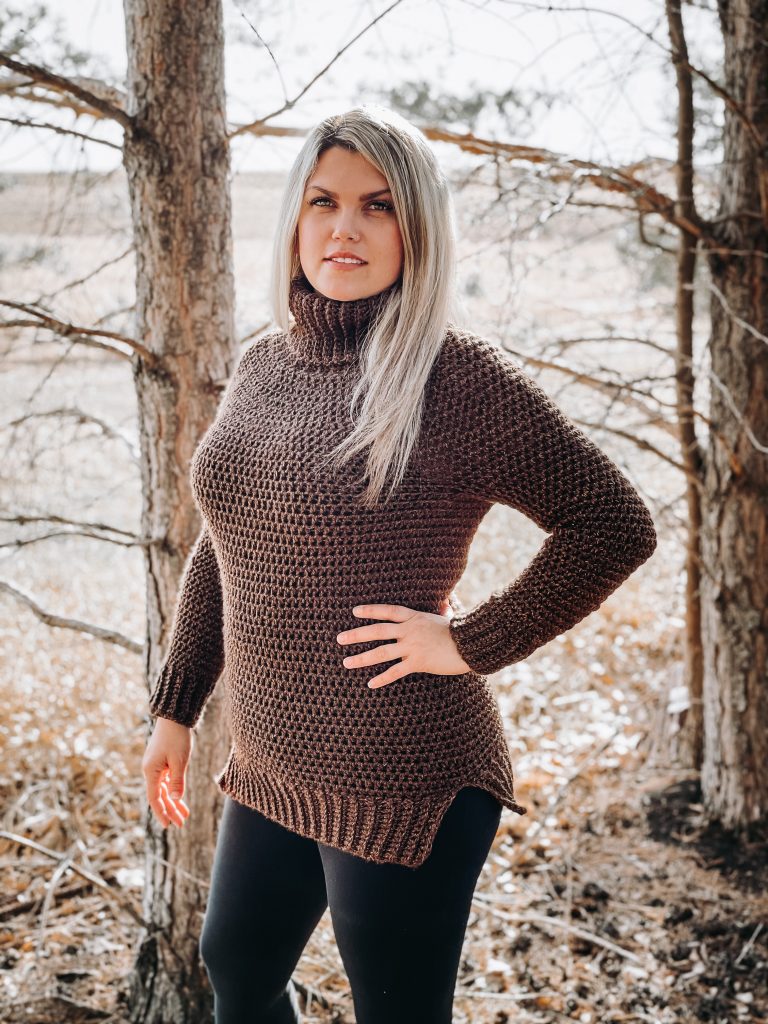
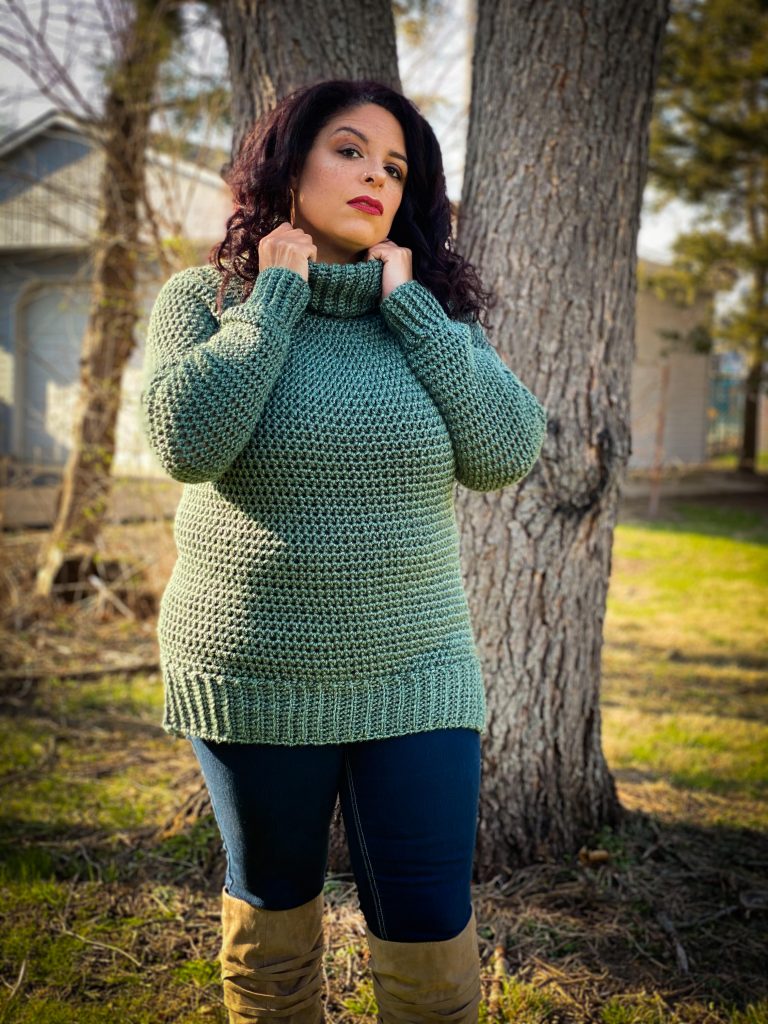
Pattern Tester Photos
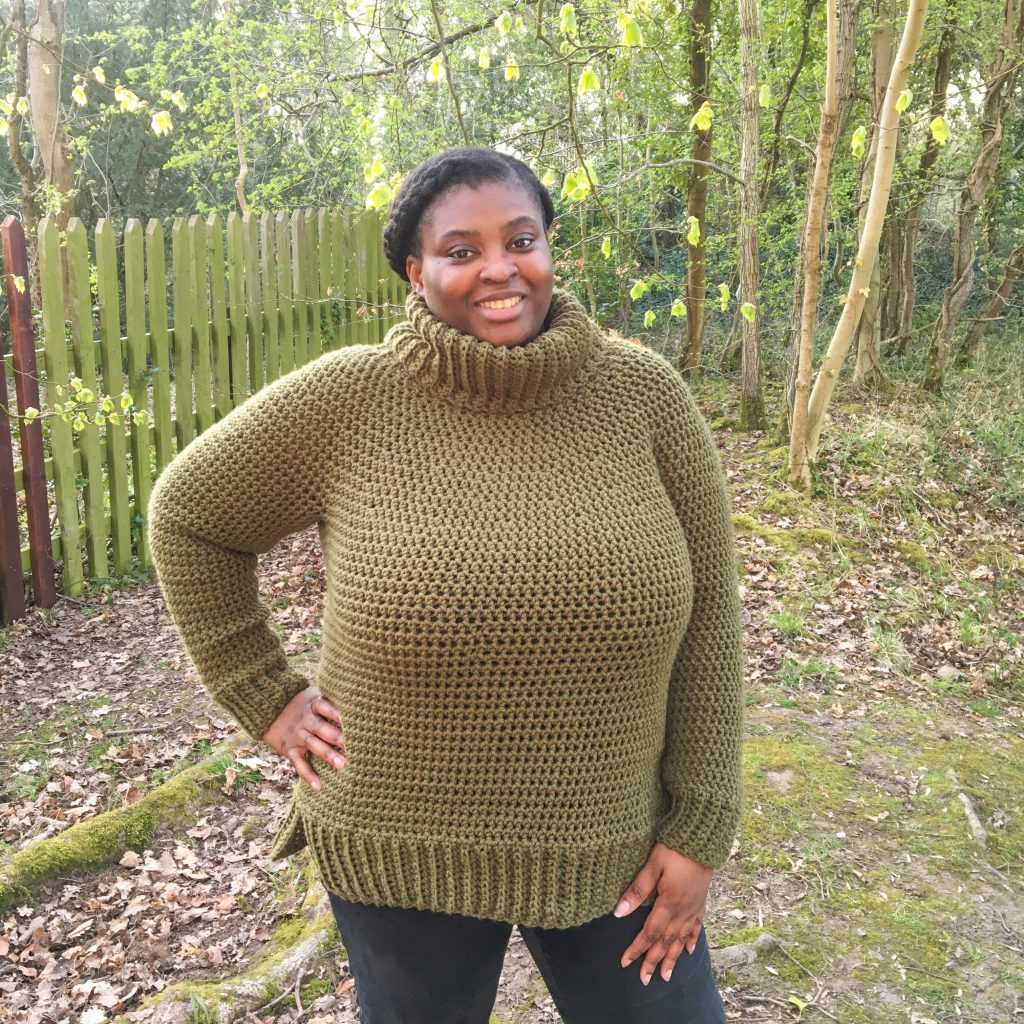
There were 500+ pattern testers for this book because I wanted to ensure all sizes are satisfied with the pattern and fit! Below you can see photos from the testing process to see how the sweater looks on different bodies with different modifications made using a variety of yarns.


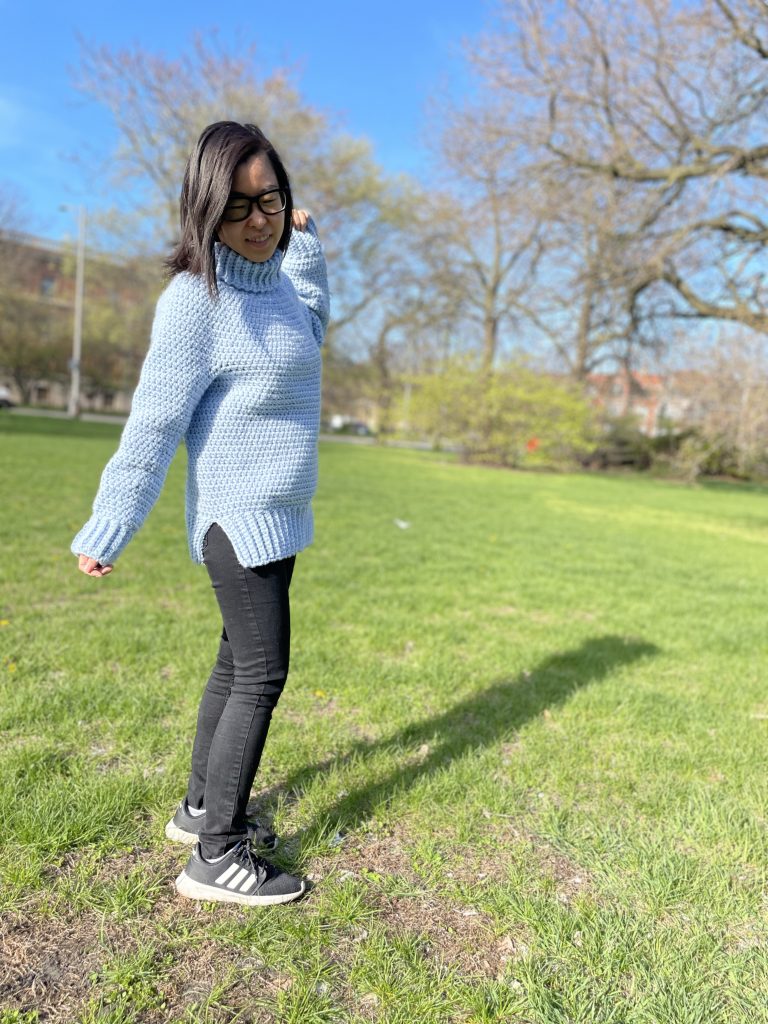
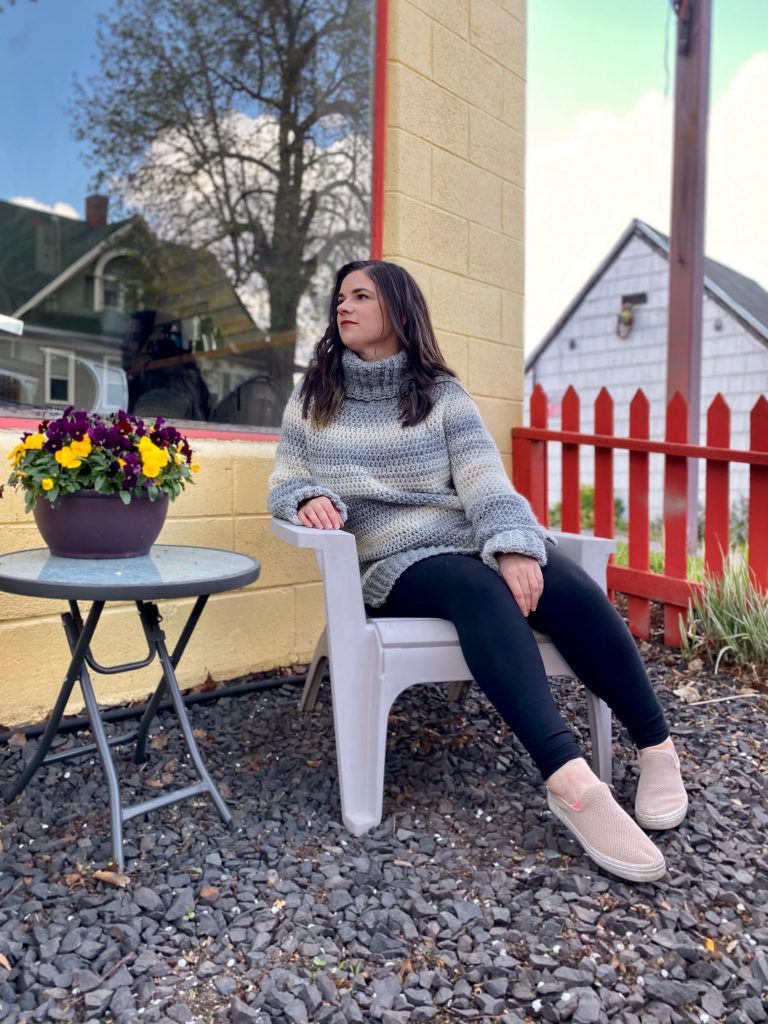
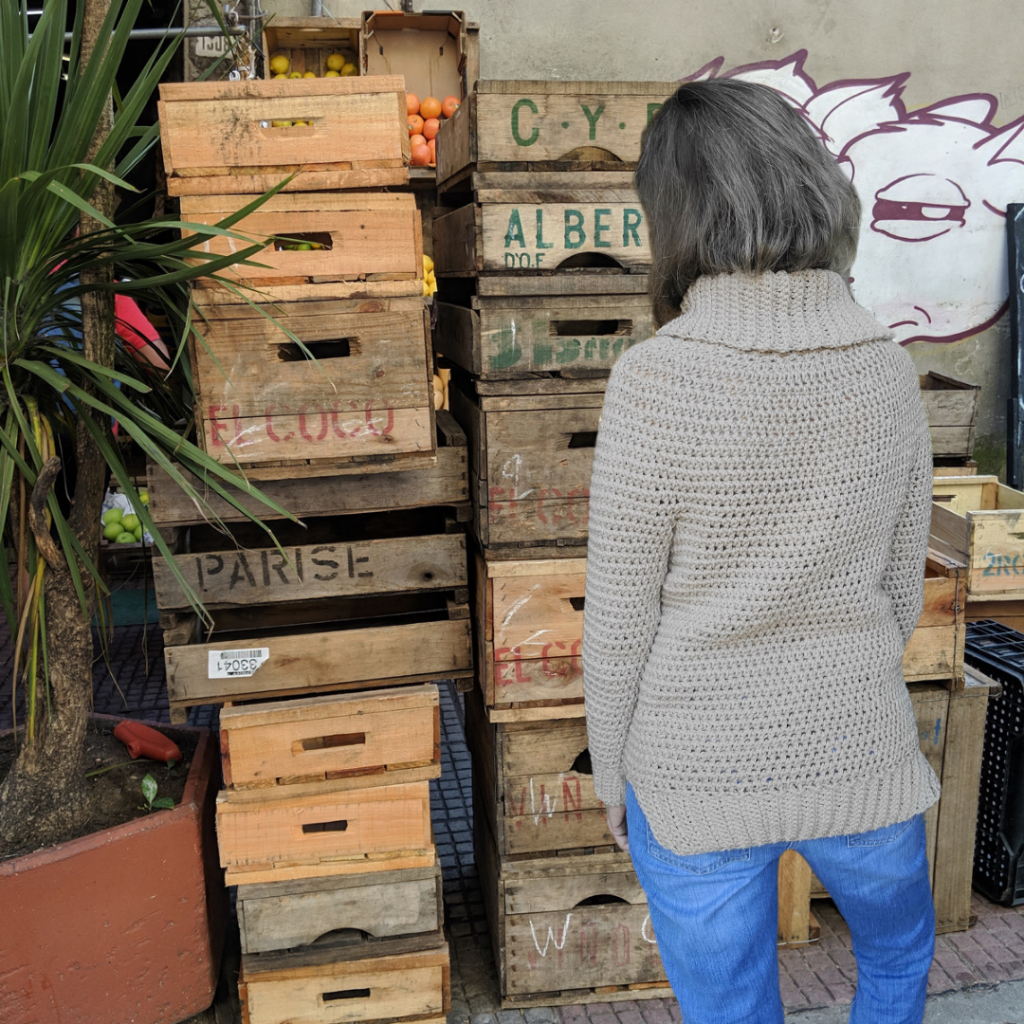
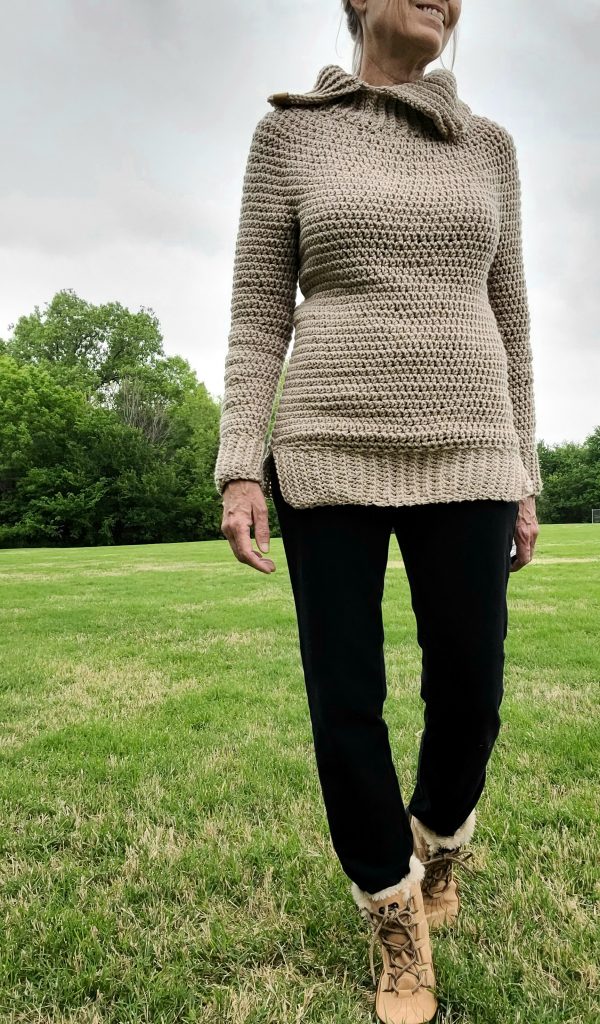
#ModernCrochetSweaters
#VintageMoonSweater
Thanks so much for reading!
You can find my full print book, Modern Crochet Sweaters: 20 Chic Designs For Everyday Wear on the shelves of all major retailers or see purchasing options here!
To shop this Vintage Moon crochet pattern, find it on Ravelry, Etsy, or my website!
Shop The Hook Nook Yummy yarn here.
x
Janine
For exclusive discounts on all new patterns, join the Knits ‘N Knots newsletter list here!
You May Also Like


