Hi everyone!
View this post for Rosebud Raglan help + join the Rosebud Raglan Facebook help group here!
If you have previously purchased this pattern, you will receive an automatic updated version unless you purchased on Etsy, whose platform unfortunately does not allow for automatic updates. If you purchased on Etsy and would like an updated version, please email me @ knitsnknotswpg@gmail.com with your proof of purchase (screen shot, order #, or forwarded confirmation email are all fine) and I will get the new version to you right away!
The Rosebud Raglan is my most popular pattern to date! It’s a classic, simple, sophisticated design that looks amazing on everyone. I know you’re going to love this pattern!
Before we begin, here are some quick links for you:
- Find the PDF version on Ravelry here, on Etsy here, and on my website here.
- Use code “PATTERN10” for 10% off your cart!
- Add your finished project and view other completed projects on Ravelry here (there are over 160+ projects posted!)
- Use the pattern hashtag #RosebudRaglan on Instagram to show off your makes!
- Shop Lion Brand Jeans here!
- Shop the Lion Brand: Rosebud Raglan – Crochet Kit here!
- View the Rosebud Poncho (sister pattern) here and crochet kit here!
- Keep an eye out for the Rosebud Cardigan, coming in November 2021!
- It will be in my book and will also be available independently on all of my usual platforms.
- For any questions about this pattern, please email knitsnknotswpg@gmail.com and I’ll get back to you asap!
Preorder my book – Modern Crochet Sweaters: 20 Chic Designs for Everyday Wear – here!
If you want to be notified of all new pattern releases (and get exclusive discounts on all new paid patterns), sign up below!
This post contains affiliate links. This means, should you make a purchase, I will receive a small portion of the sale at no extra cost to you. All opinions are my own. View my Privacy + Disclosures Policy here.
![]()

About
Okay, where to start!?
This sweater was originally designed and released in 2019. Now, this is a totally re-written, updated version of that same pattern with clearer instructions and a more tailored fit for all sizes! If you have previously purchased the old version of the Rosebud Raglan and have not yet received the updated 2021 version, send me at email at knitsnknotswpg@gmail.com with your proof of purchase and I will get you the new copy asap!
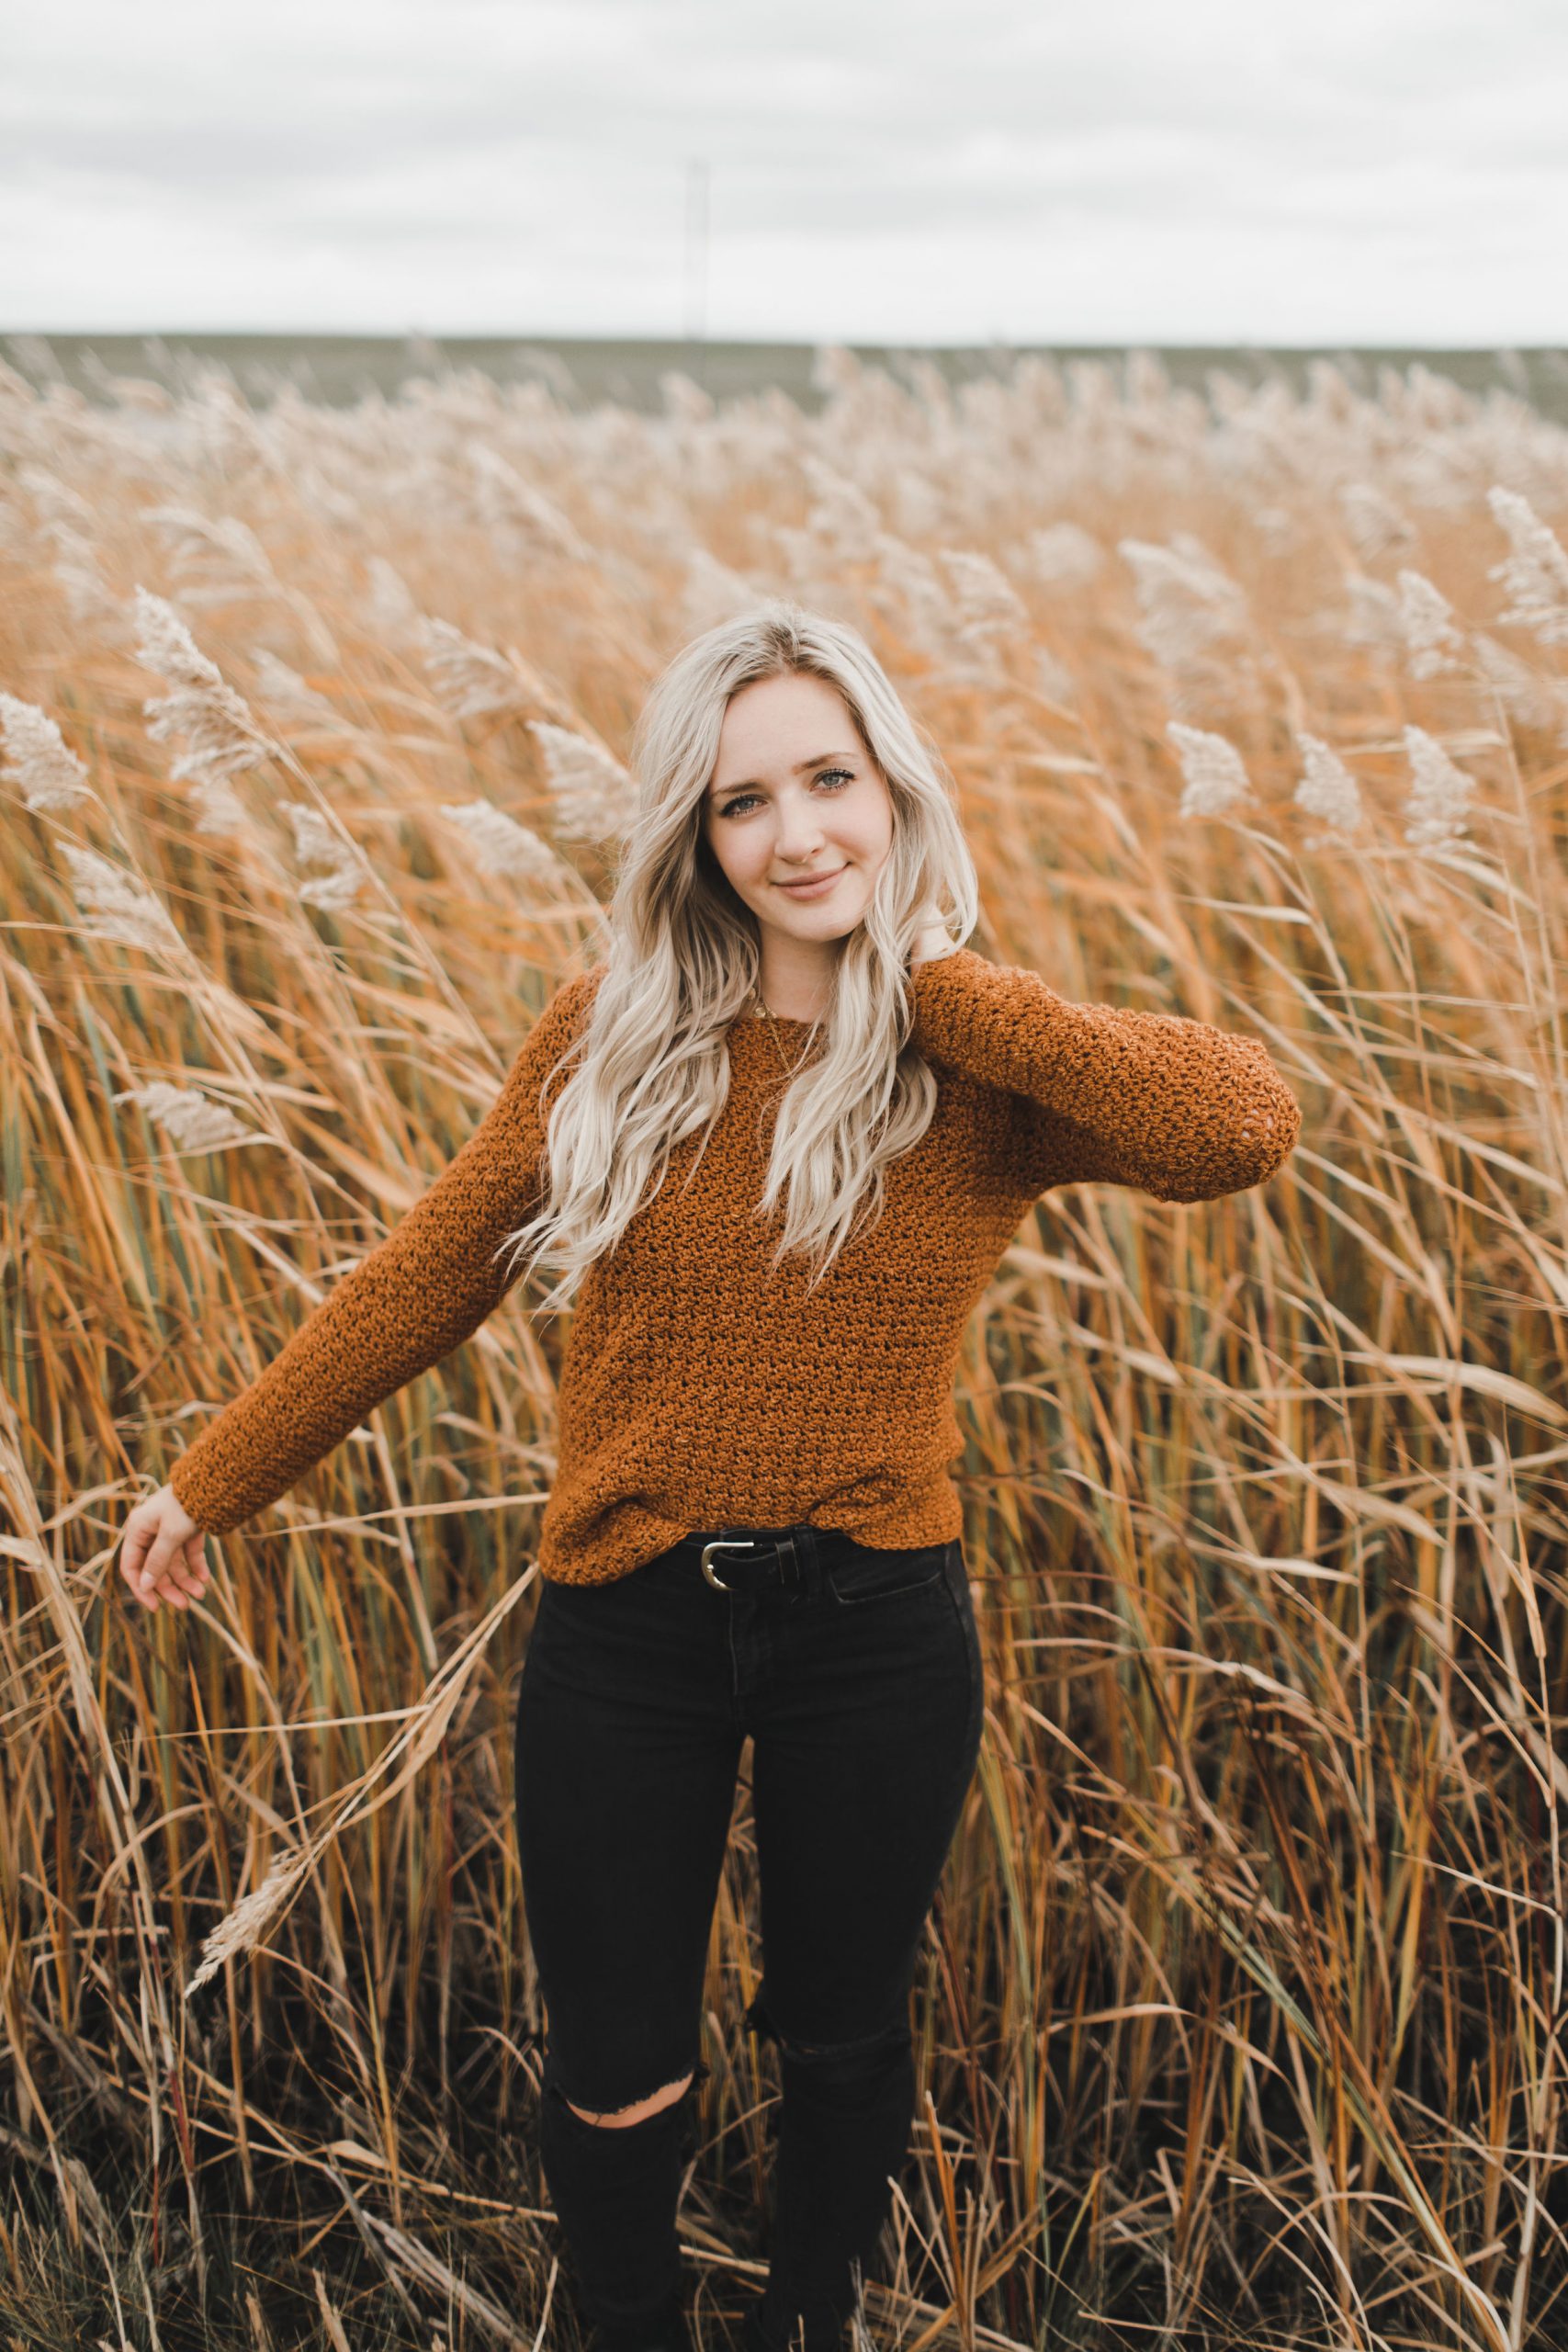
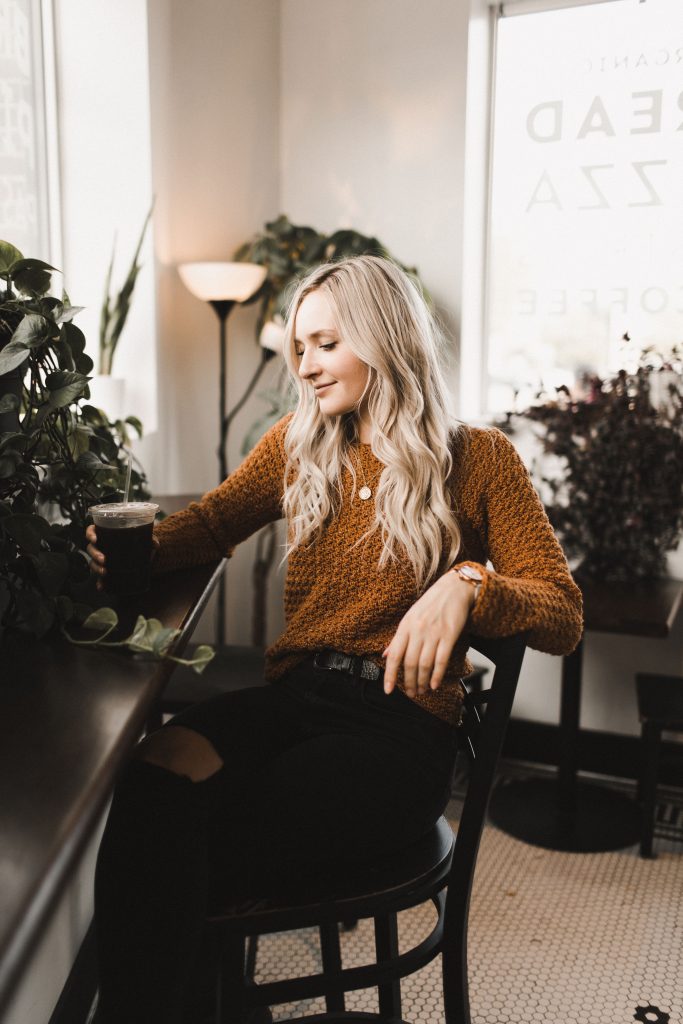
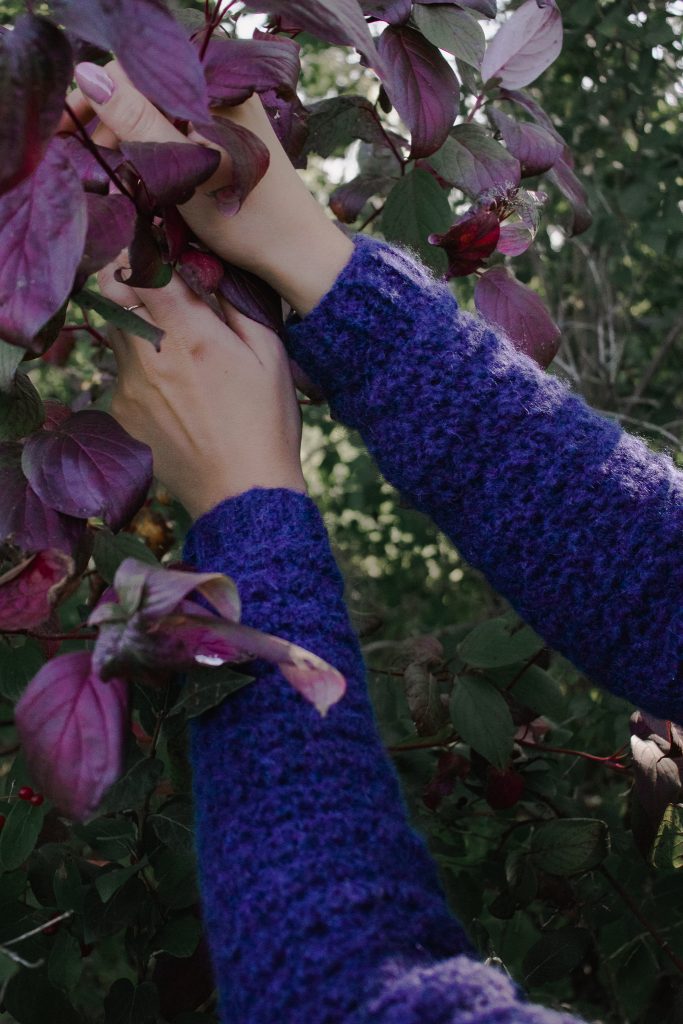
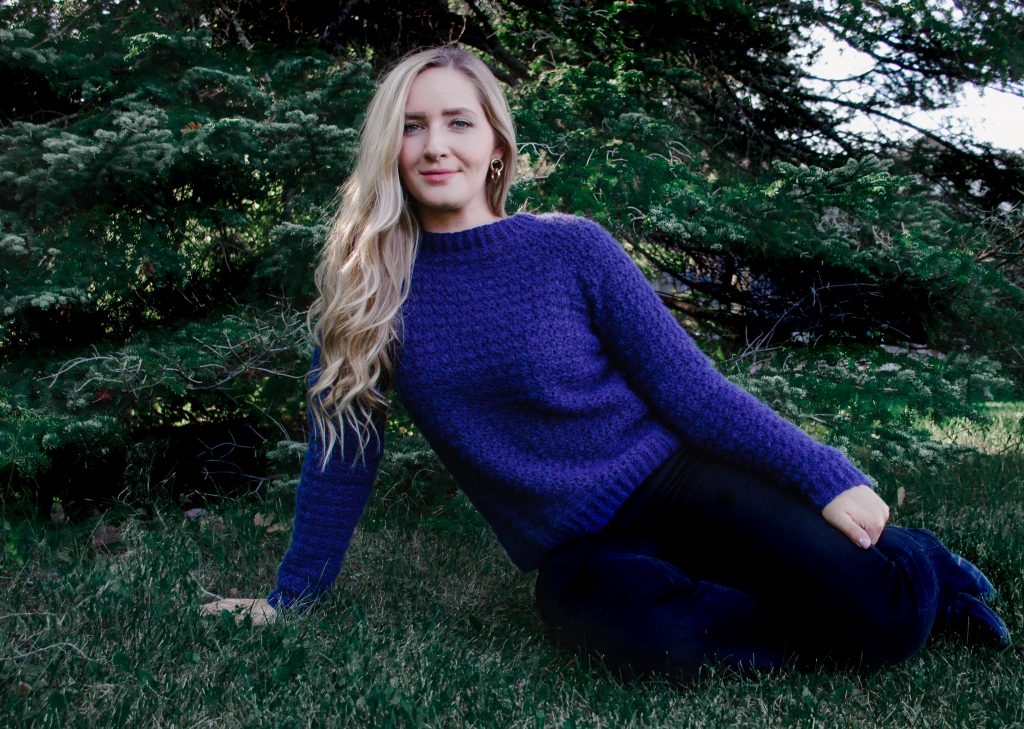
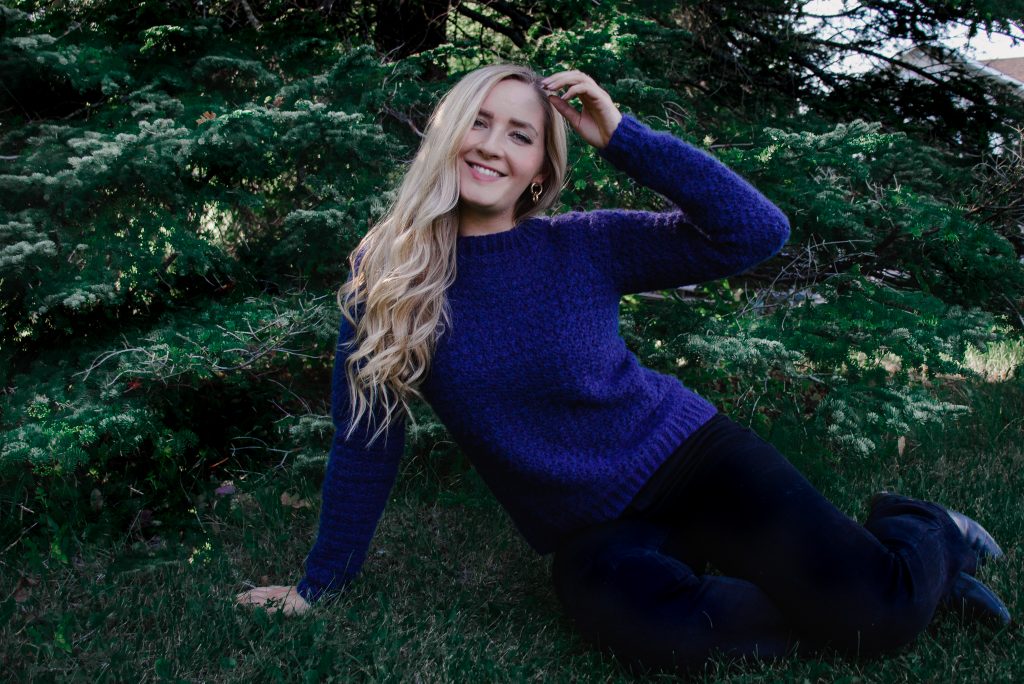
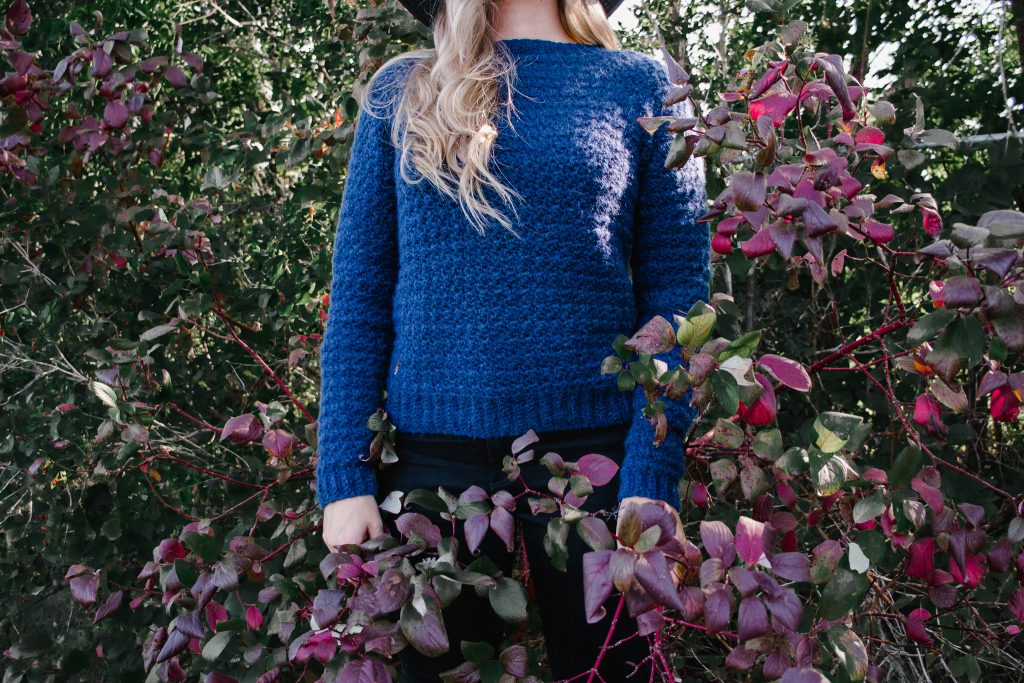
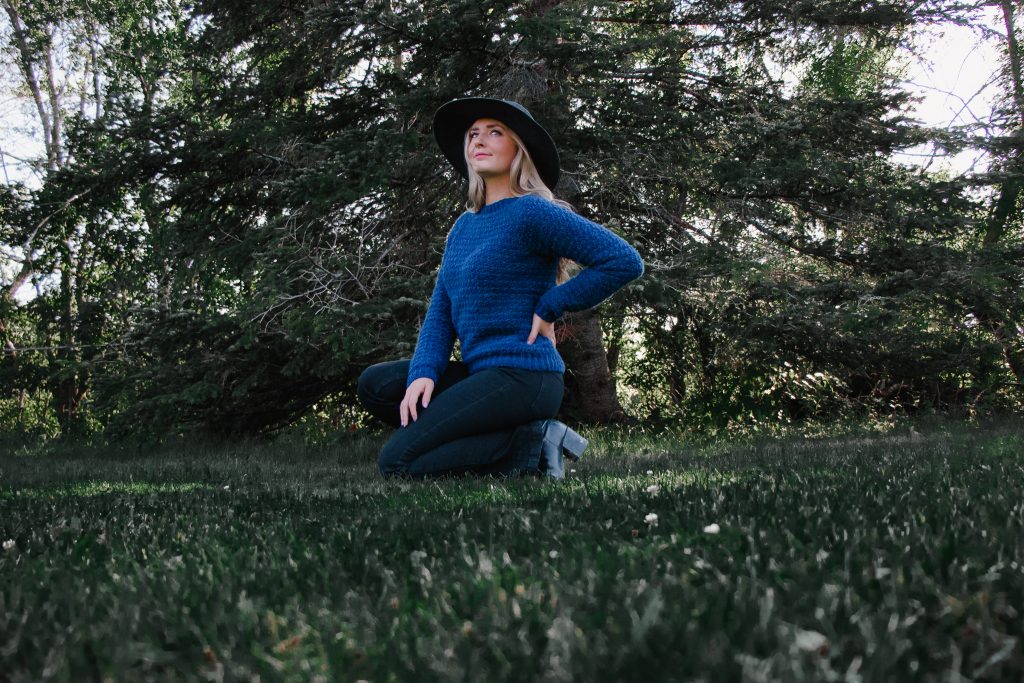
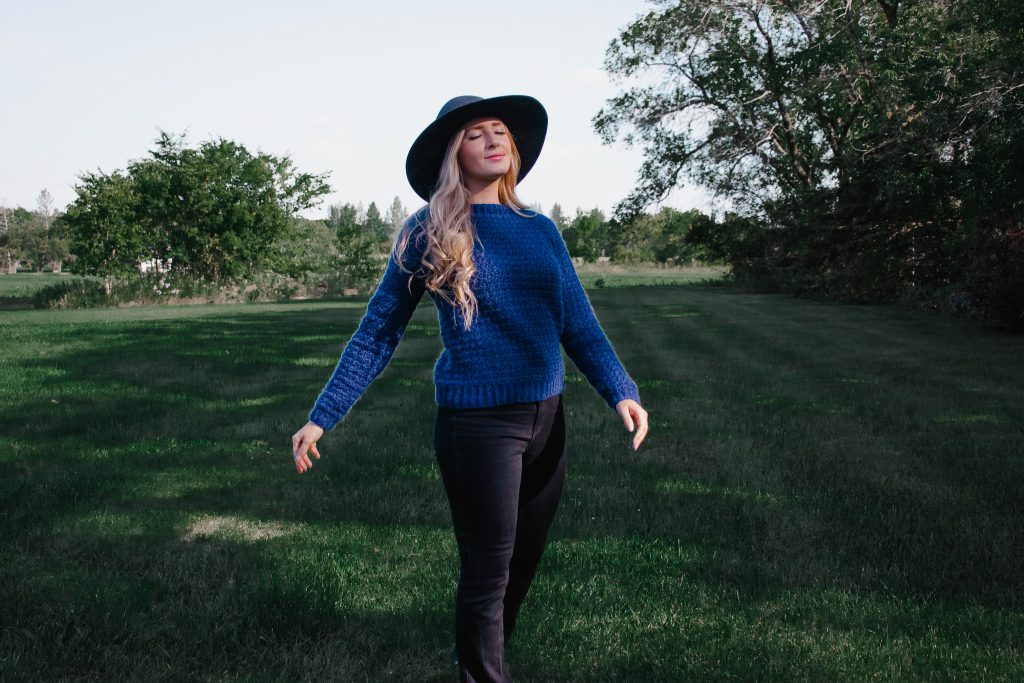
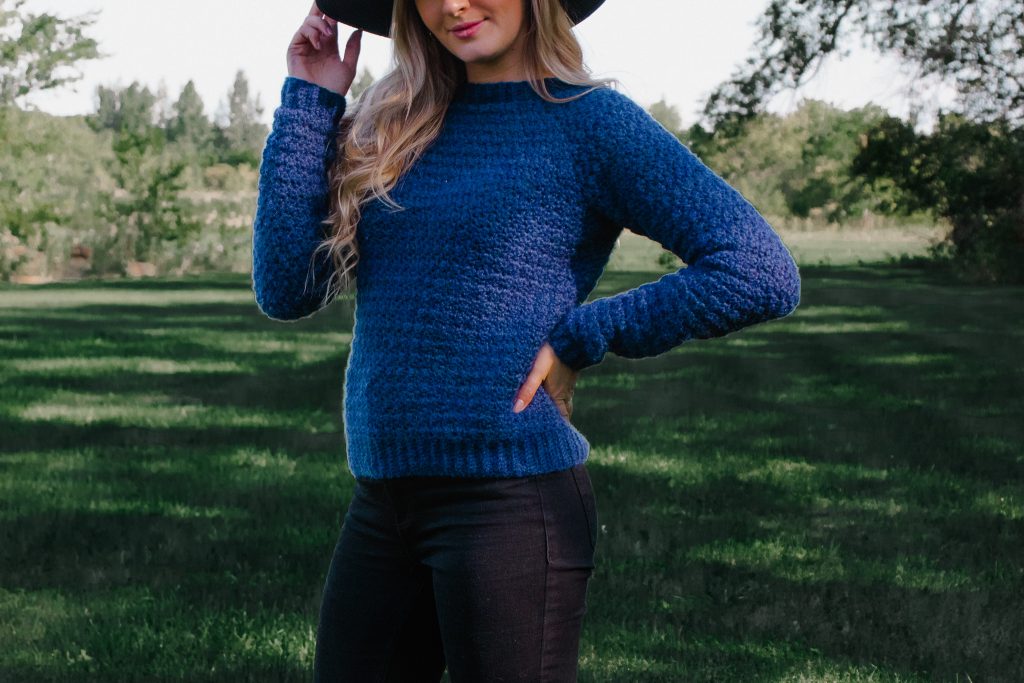
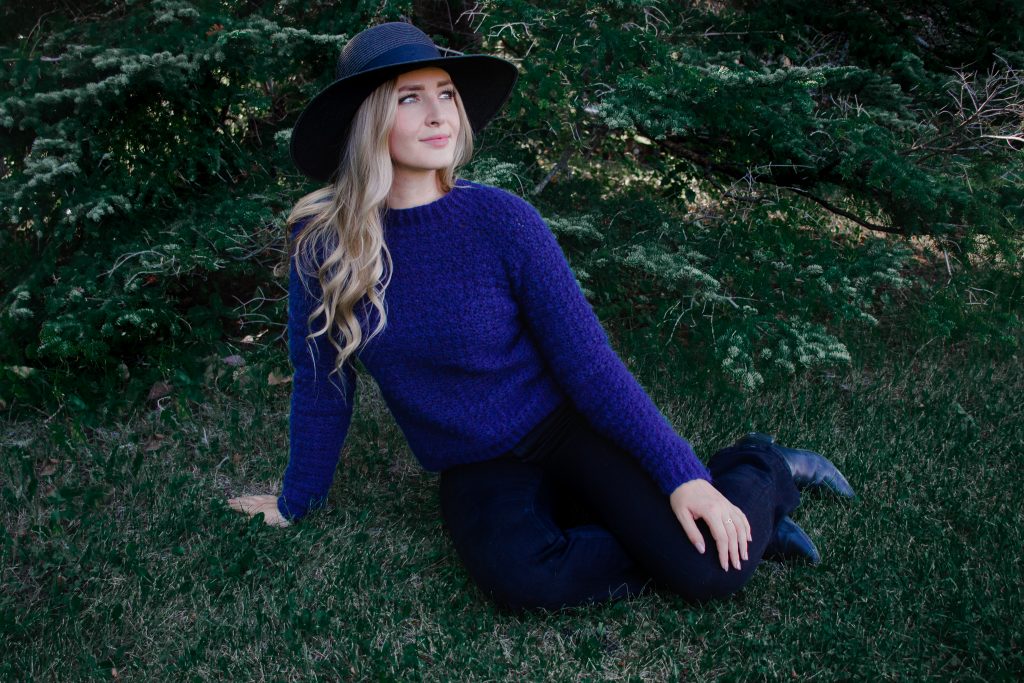
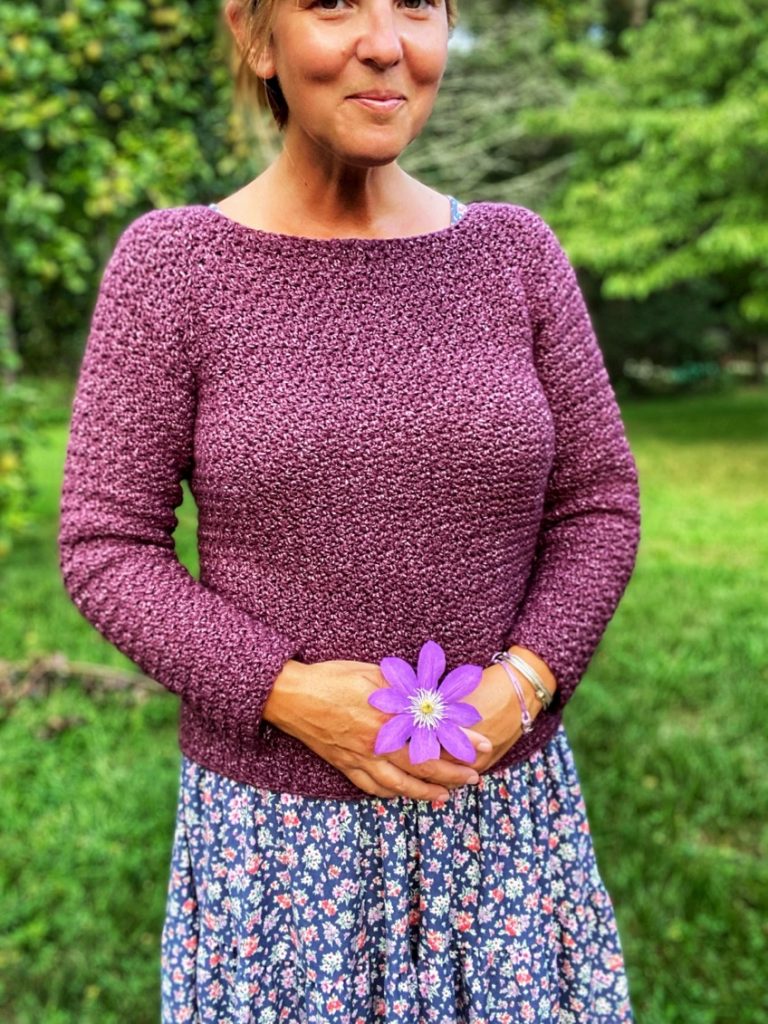
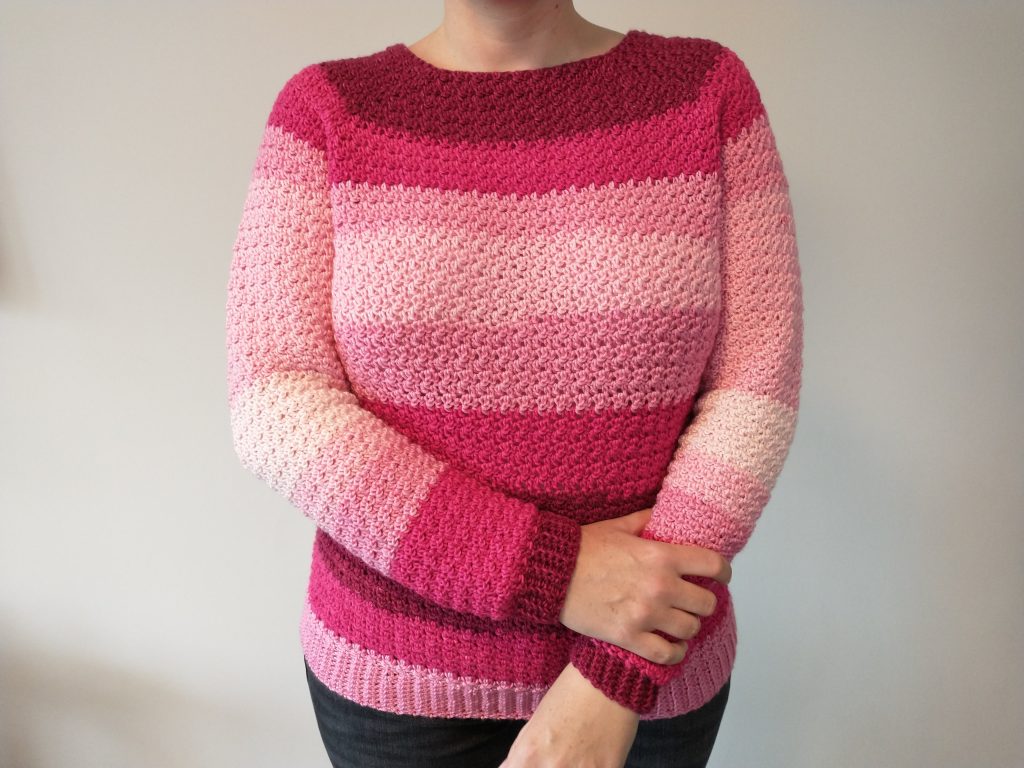
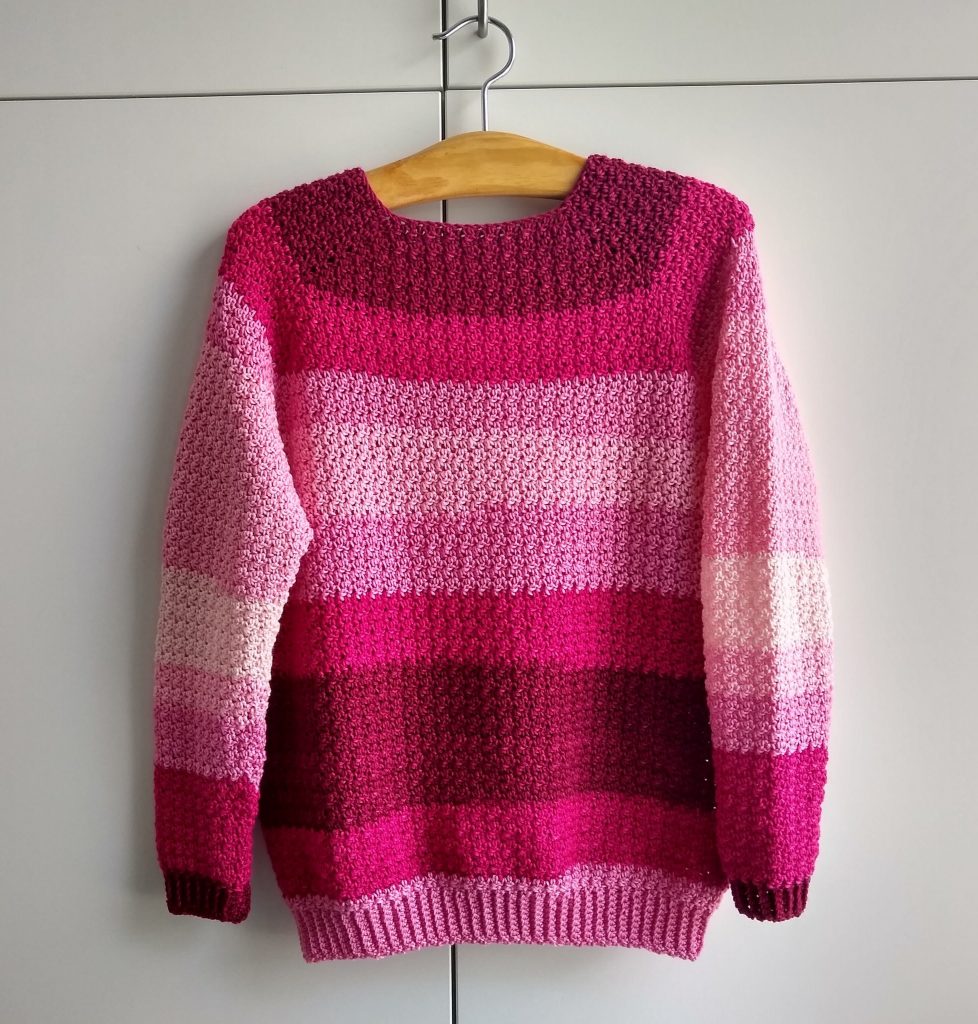
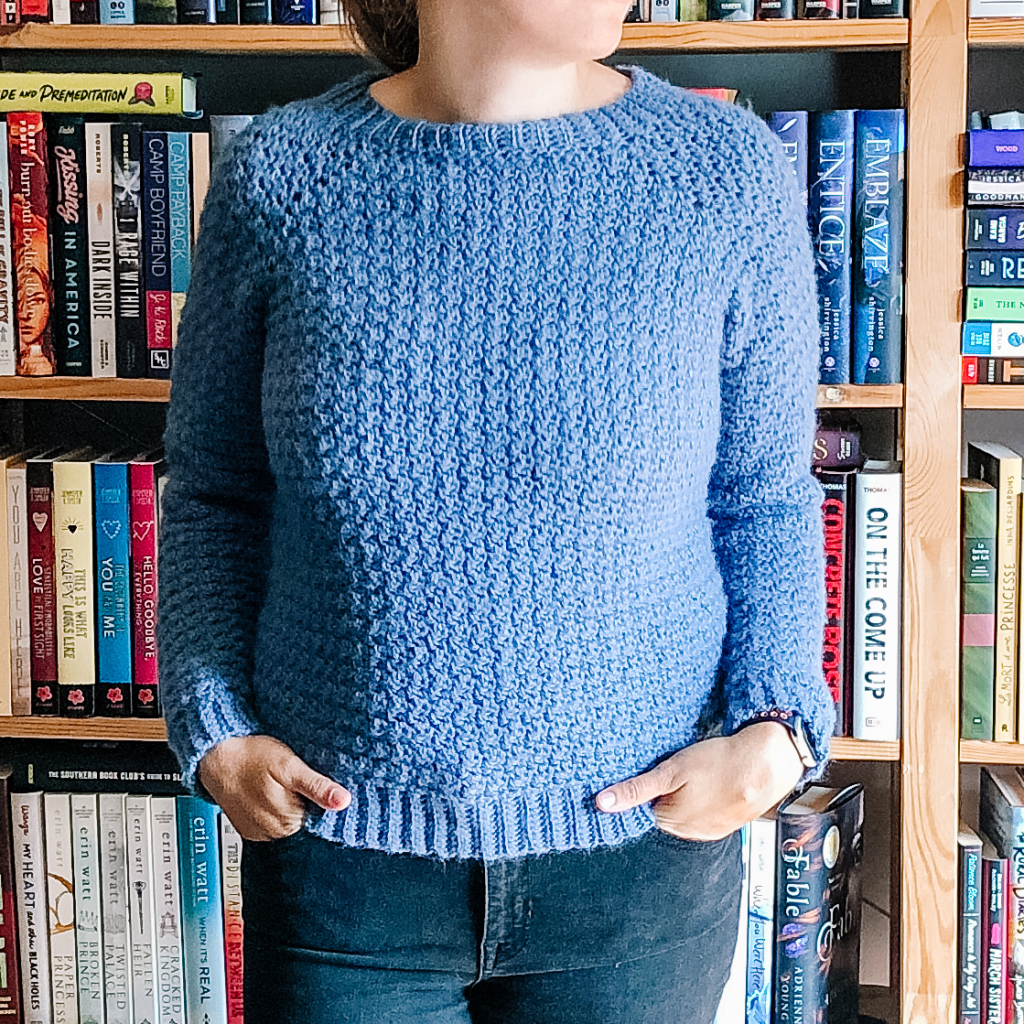
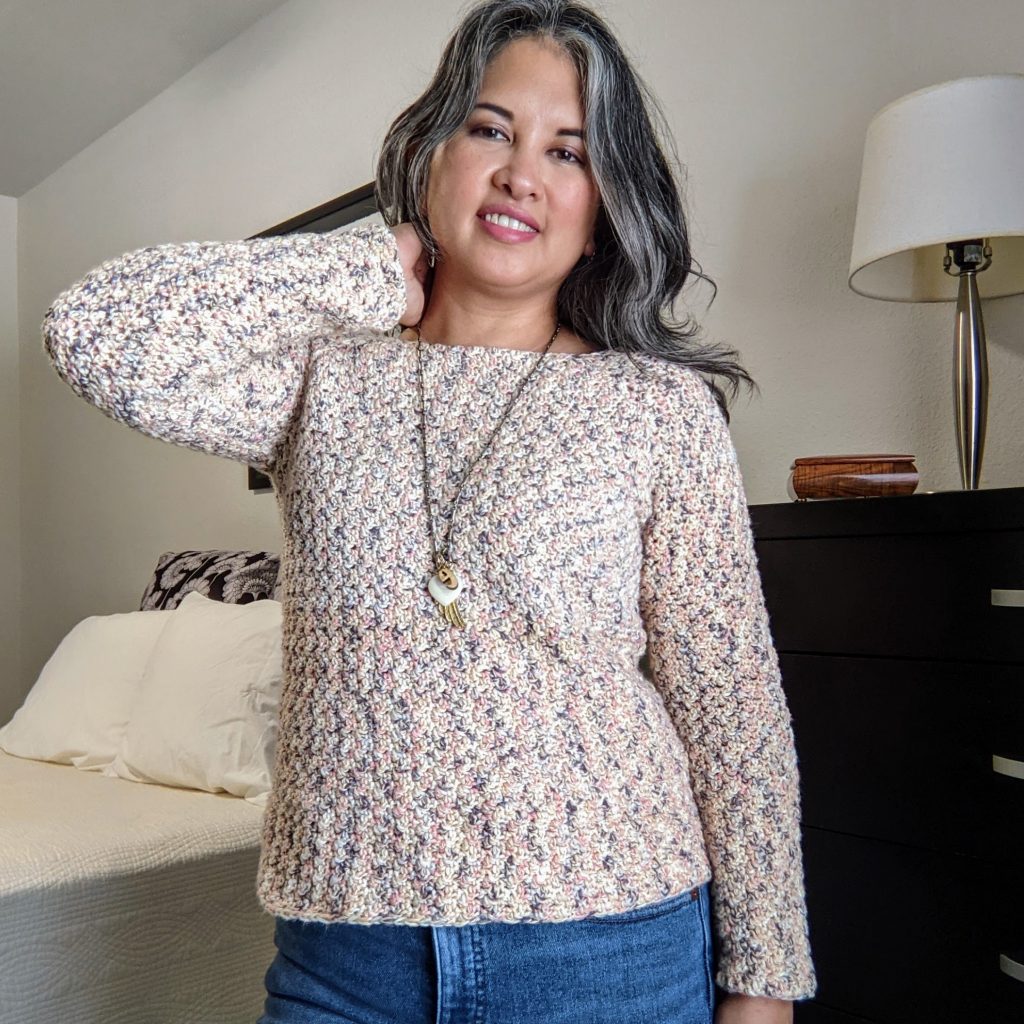
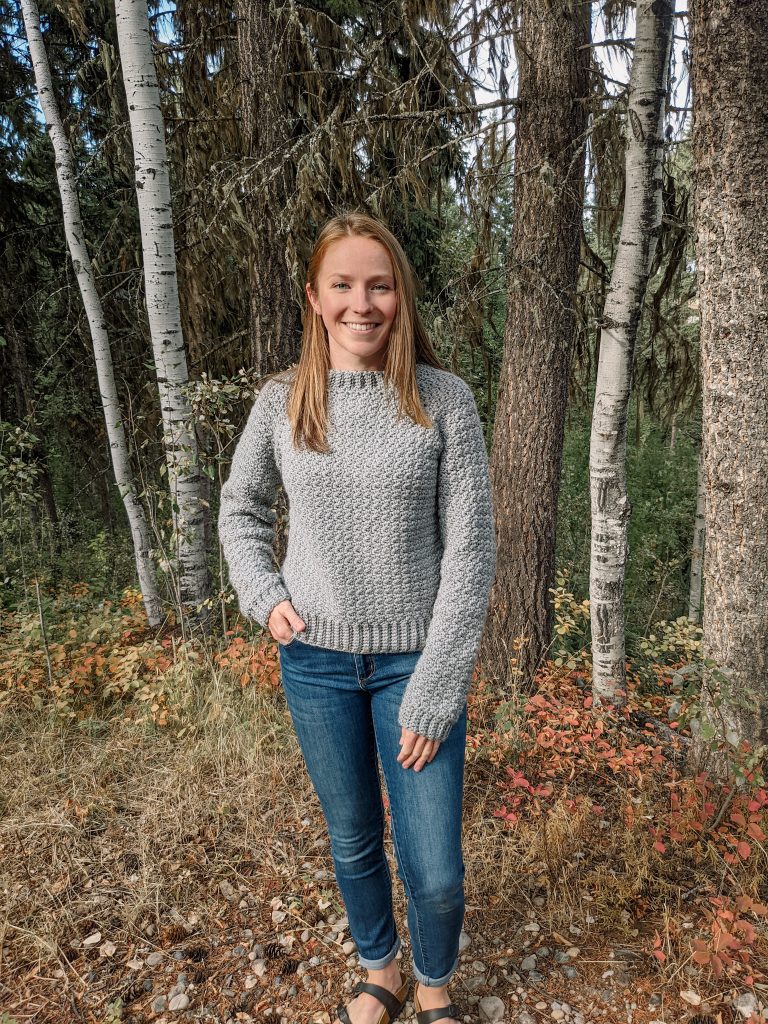
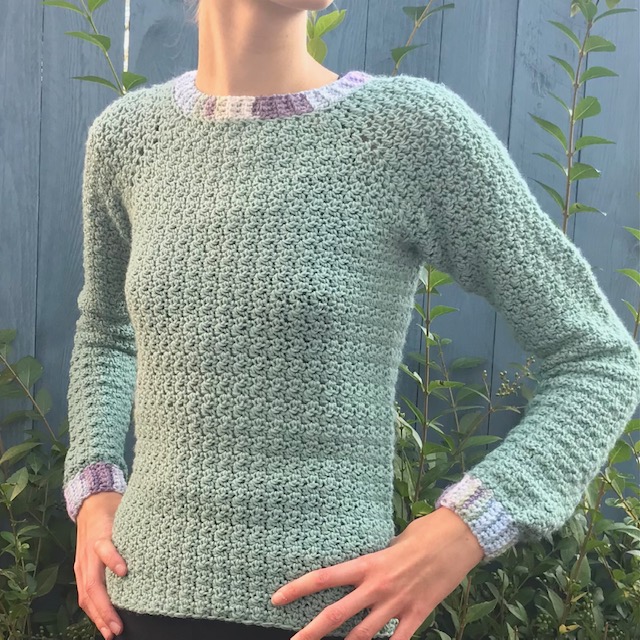
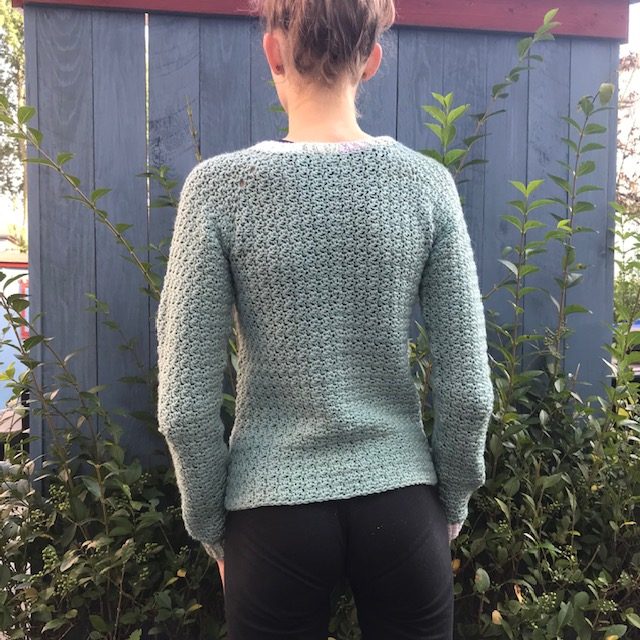
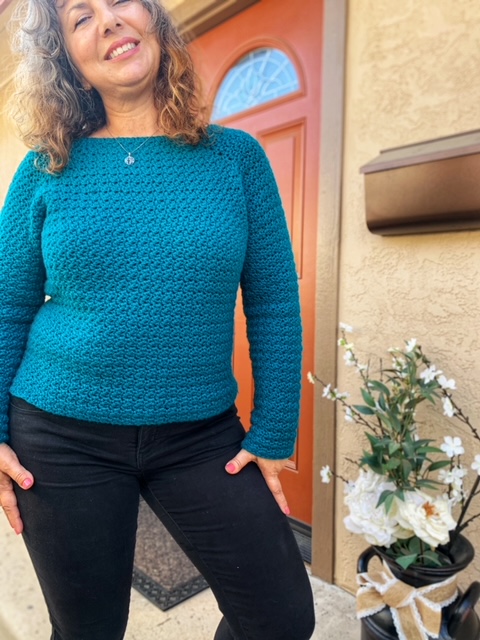
The Rosebud Raglan is a classic pullover sweater with raglan shaping and a sophisticated fit. Designed for everyday wear, the Rosebud Raglan is crocheted in a simple stitch pattern to create an opaque, textured fabric that can be worn on its own without being see-through. The delicate stitch pattern lends a beautiful drape to the fabric for a refined, store-bought look that can be hard to find in crocheted garments. This pattern will produce a wonderfully warm sweater that provides full coverage without feeling bulky or heavy.
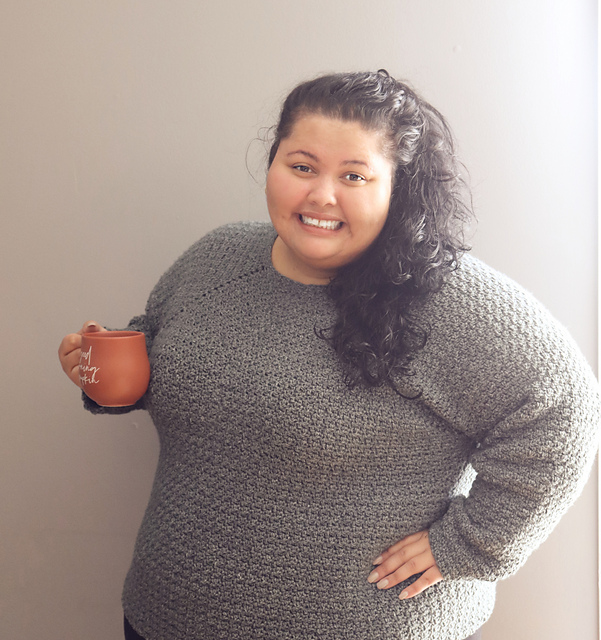
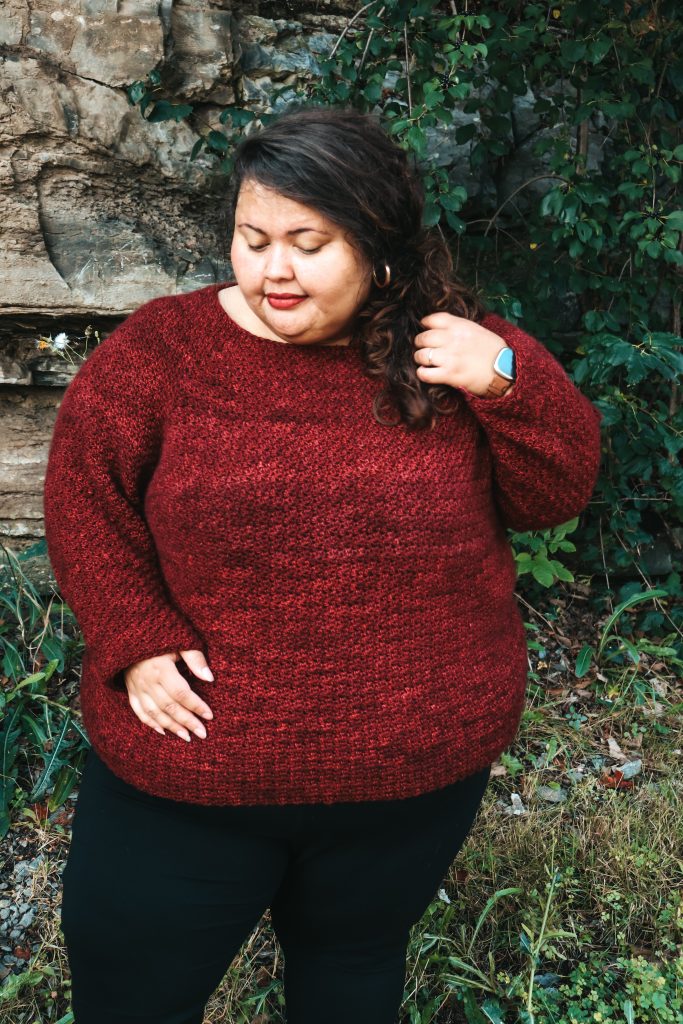
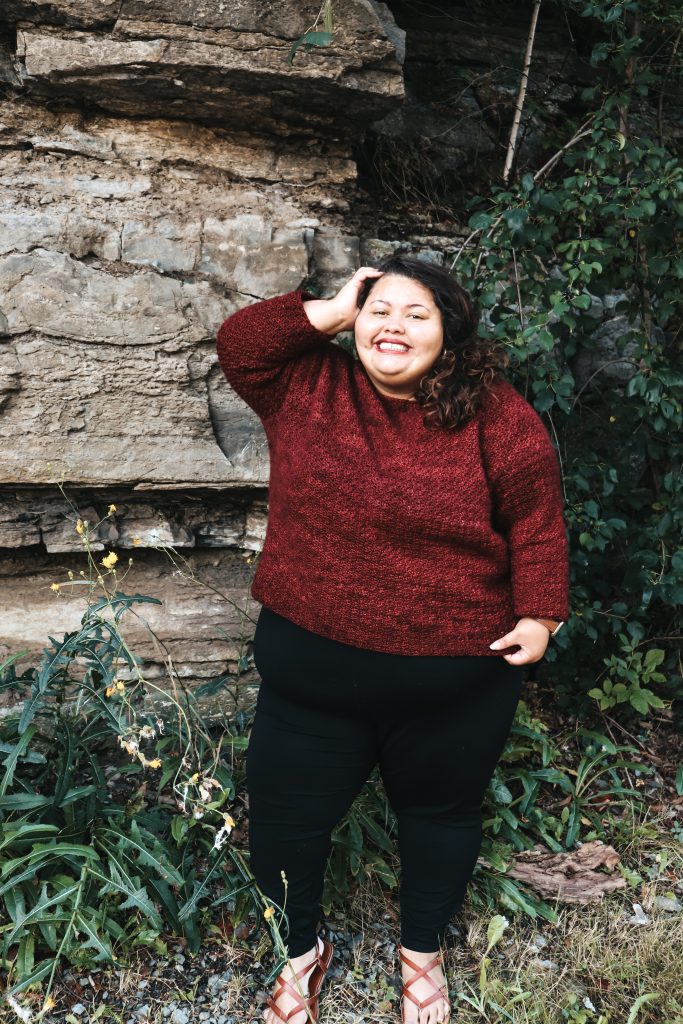
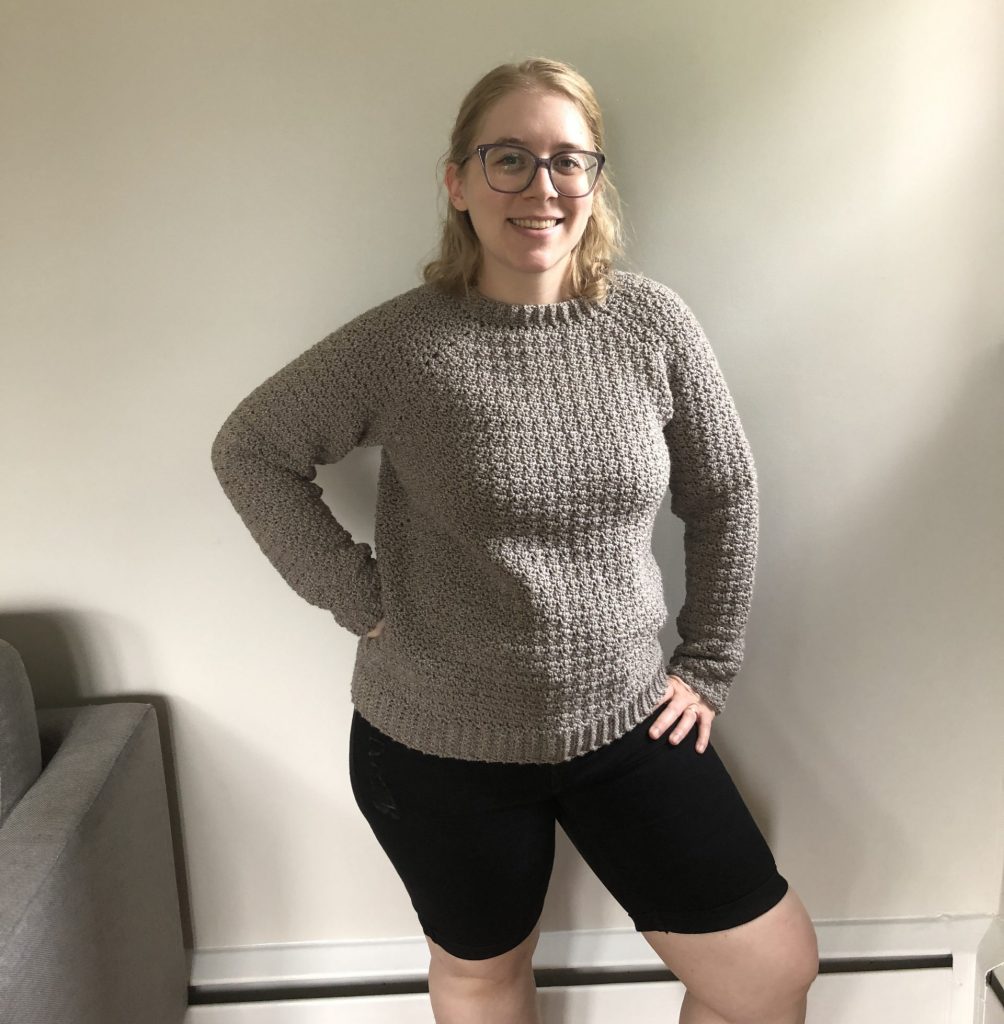
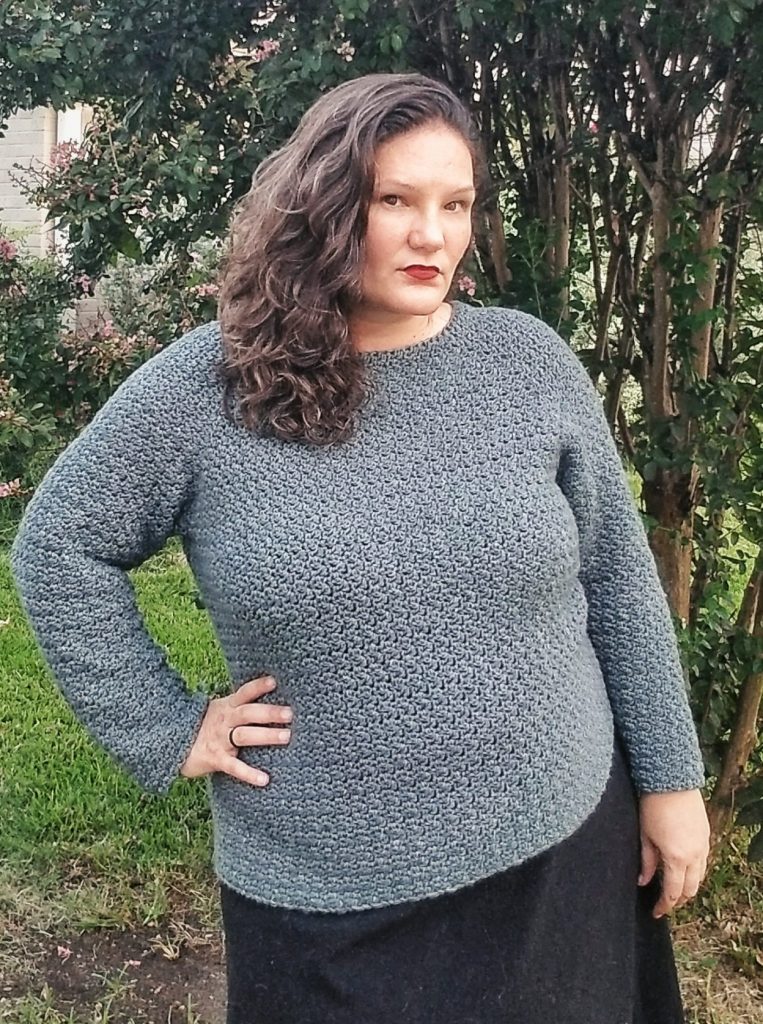
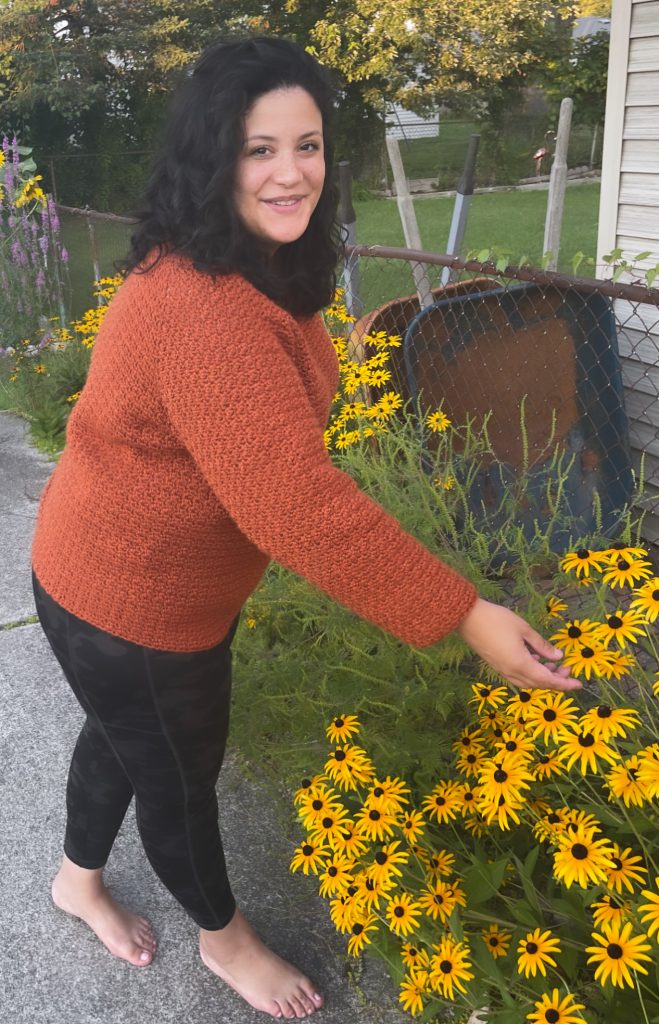
The Rosebud Raglan has been my most popular design since its debut in 2019. It was my first size-inclusive pattern written from XS to 5X and was designed to make every crocheter feel like it was written just for them. Within this pattern, you’ll find plenty of customization tips and tricks to help ensure you achieve the perfect fit for your unique measurements. For photos of the sweater being worn on bodies of all shapes and sizes, scroll down to the bottom of this page!
I wrote an entire blog post back in 2019 on the process behind designing this sweater, so feel free to take a read if you like to hear the background story behind designs!
Keep an eye out for the Rosebud Cardigan, a sister pattern to the Rosebud Raglan which will be in my book Modern Crochet Sweaters that releases in November 2021. The Rosebud Cardigan will be available independently as well on all my usual pattern-selling platforms!
Here are some testimonials that I received from my testers during this process:
“This design is amazing!!! Seriously as a plus size crocheter, thank you from the bottom of my heart for designing something that fits my body!!! You have no idea what it means.”
“You have really perfected size inclusivity – I always get nervous committing to big projects not knowing if the pattern is going to be “true to size” and yours have been bang on! Thank you so much!!”
“The pattern was incredibly easy to follow and I truly believe that it is beginner friendly. I can’t speak highly enough about the fact that you are inclusive to all sizes. That is such an incredible aspect to this pattern. I love the fit of this sweater and plan on wearing it all fall and winter!”
Read more about why I think size-inclusive design is important here.
Rosebud Raglan: Construction
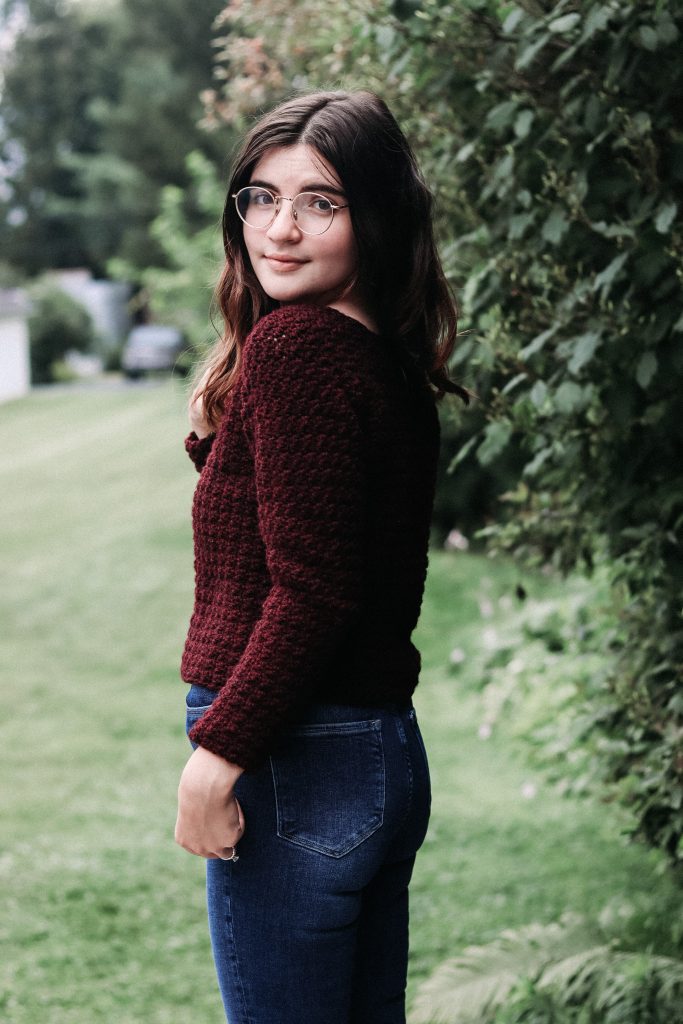
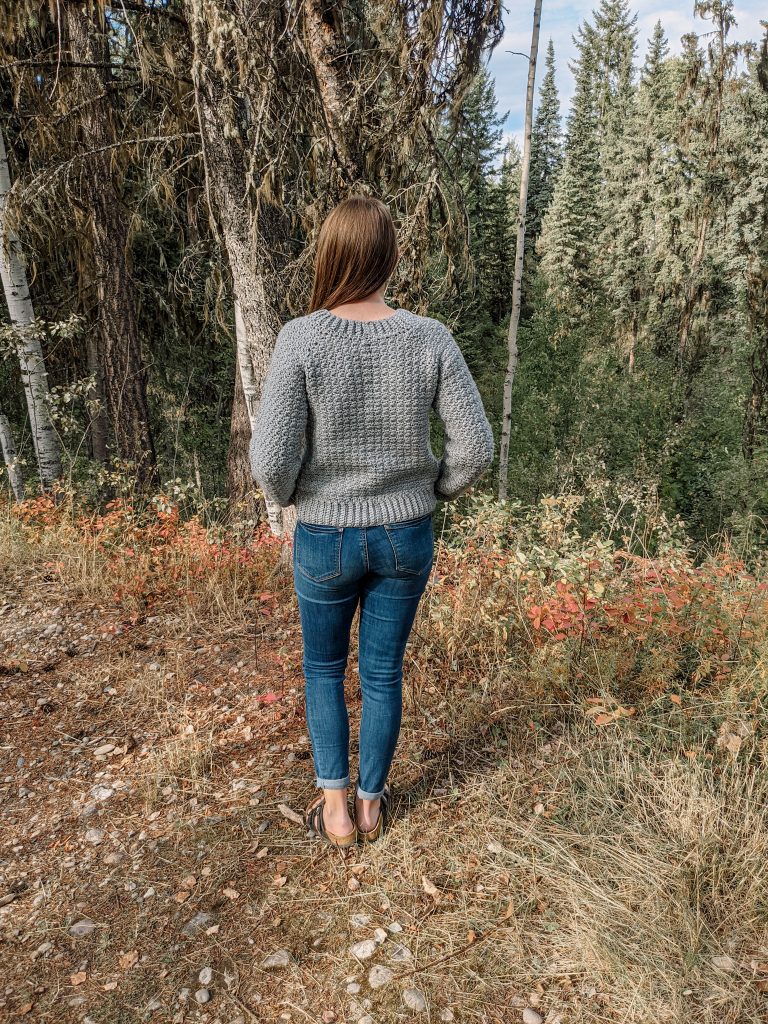
The Rosebud Raglan is worked seamlessly from the top down with raglan shaping, meaning you will work four points of increase that run diagonally from the neckline to the underarms. After completing the yoke increases, the yoke is then separated to create space for the body and the sleeves. The body is worked next, and the sleeves are worked last.
It may sound a little confusing at first if you’ve never worked a sweater like this before, but I promise, it is so simple. I have given you the most detailed instructions combined with a full stitch count chart that breaks down each section of your yoke so that you can be confident you’re on the right track! With my stitch charts, it’s nearly impossible to miss a stitch or make a mistake without realizing.
Getting Started: the Rosebud Raglan
Here’s what you’ll need to begin –
Yarn: Worsted—Lion Brand Jeans in Top Stitch
- 100% acrylic
- 246 yds [225 m] per 3.5-oz [100-g] skein
- Find this yarn on lionbrand.com or visit yarnsub.com to find comparable substitutes.
- Substitute Lion Brand Jeans with any worsted weight, category #4 yarn that matches gauge. Using an acrylic fiber is not necessary; any fiber should work out fine. Jeans is one of my favorite budget-friendly yarns because it has a softness that can be hard to find in acrylics within this price range.
- For an airy, summer-friendly version, try substituting with a cotton blend or matching gauge with a DK weight (category #3 yarn).
Some other great substitutions include (some affiliate links): Caron Simply Soft, Lion Brand Wool-Ease, Lion Brand Heartland, Lion Brand Vanna’s Choice, Loops & Threads Impeccable, Patons Canadiana, Scheepjes Colour Crafter, WeCrochet Brava Worsted, WeCrochet Wool of the Andes Worsted, Hobbii Divina.
Yardage: 4 (5, 6, 6, 7) (8, 9, 9, 10) skeins or 910 (1050, 1245, 1425, 1565) (1780, 1970, 2175, 2345) yds [833 (961, 1139, 1304, 1432) (1628, 1802, 1989, 2145) m]
Hook: Size U.S. I/9 (5.5 mm) or size needed to obtain gauge
+ Size U.S. H/8 (5 mm) or hook that is at least 0.5 mm smaller than your main gauge hook; used for ribbing only (ribbing is optional)
Notions: Tapestry needle, 4 locking stitch markers to keep track of the yoke increases
Gauge: 6 x 6″ [15 x 15 cm] = 19 sts and 18 rows in stitch pattern using main gauge hook (see instructions below)
I wanted to include the gauge swatch instructions below so that you could practice swatching with your chosen yarn to ensure you have a yarn that will work with this pattern before purchasing the book or the pattern individually. This way, you can see if you have something in your stash that will work before ordering new yarn.
For swatch:
Using main gauge hook, ch 23.
Row 1: Sc in 2nd ch from hook, dc in next ch, *sc in next ch, dc in next ch; rep from * to end of row, turn. [22 sts]
Row 2: Ch 1, sc in first dc, dc in next sc, *sc in next dc, dc in next sc; rep from * to end of row, turn.
Rep Row 2 until you have at least 22 rows worked.
Block your swatch the same way you would your finished sweater. Measure the inner 6″ [15 cm] of your blocked swatch to get the most accurate measurement.
Getting Started: Knowing Your Measurements
This pattern uses the Craft Yarn Council (CYC) to determine sizing. The CYC is the industry standard when it comes to knit and crochet sizing. While you will be able to produce a beautiful sweater by following the written patterns, I also like to include customization tips throughout each pattern so that you can adjust based on your unique body measurements. For example, shortening or lengthening a sleeve, or adjusting for a larger upper arm than written for your size. This way, you can modify the pattern with confidence, if needed. For me personally, I usually need to shorten garments because I have a short torso. My hips also fall under a different size than my bust – not everyone fits perfectly into these sizing standards; they are simply averages, not set-in-stone numbers.
Understanding how your body deviates from the CYC standard measurements gives you the ability to tailor a sweater to perfectly fit you, rather than feel disappointed that your body doesn’t fit into the sizing standards. I recommend that you measure the largest part of your bust and then refer to the CYC website (click here) to find out which size you would fall under. Then, look at the other measurements that are included for your size, and see which of these measurements deviate from your actual body measurements. Knowledge is power, and once you understand how your body deviates from the CYC standards, you will be able to anticipate this deviation and assume it translates through most patterns. For example, if your upper arm circumference is slightly larger than the CYC sizing chart reads, then you can expect you may have to ignore a few decrease rows when working the sleeves of your next sweater, or even follow the sleeve instructions for the next size up, if possible.
Getting Started: Which Size Should I Make?
See the schematic and accompanying sizing chart below to determine which size would best fit your body.
Note: This schematic and sizing chart is also included in the PDF pattern on pages 4 and 5, respectively.
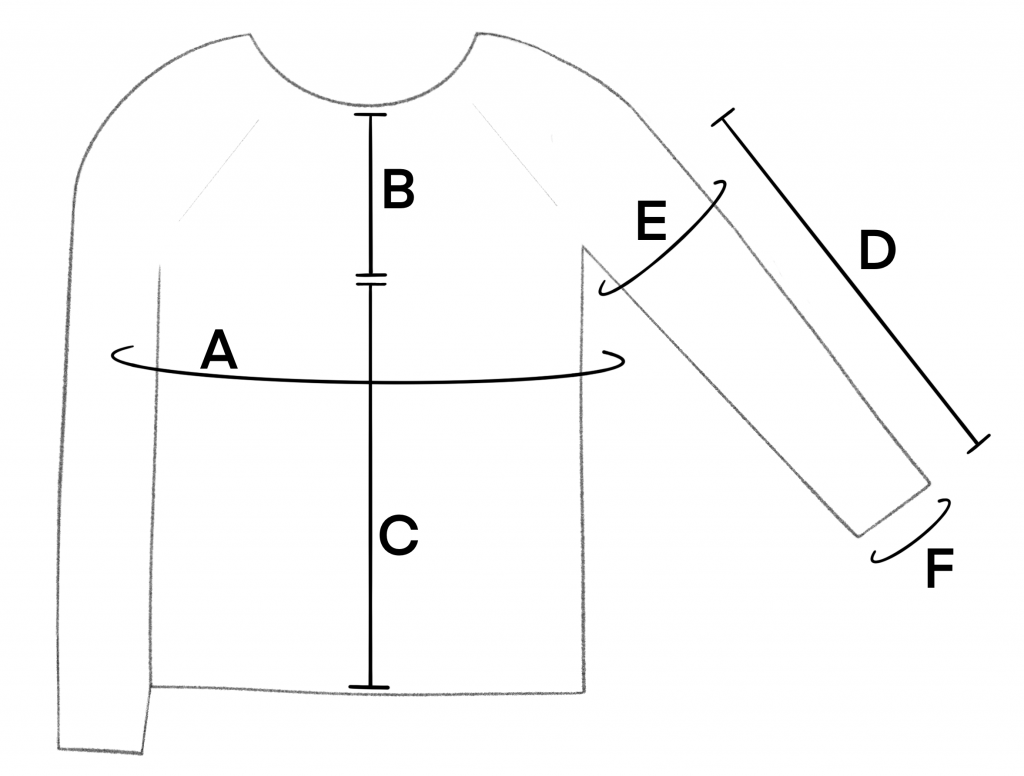
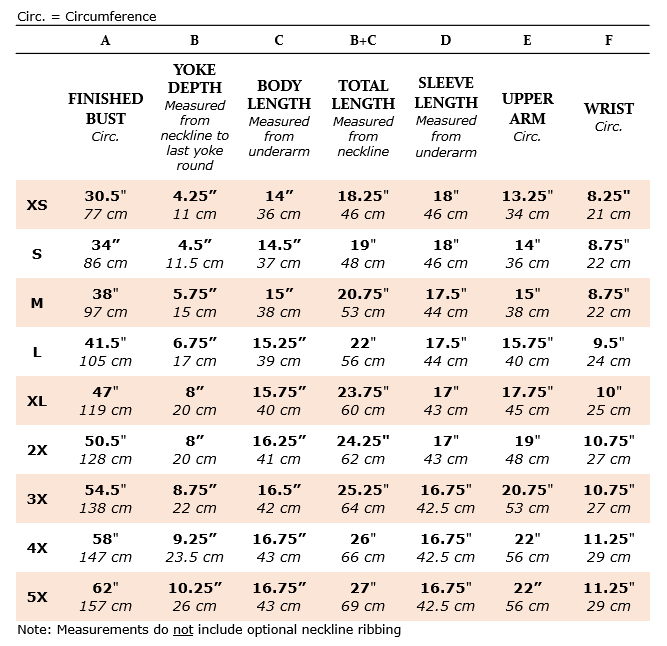
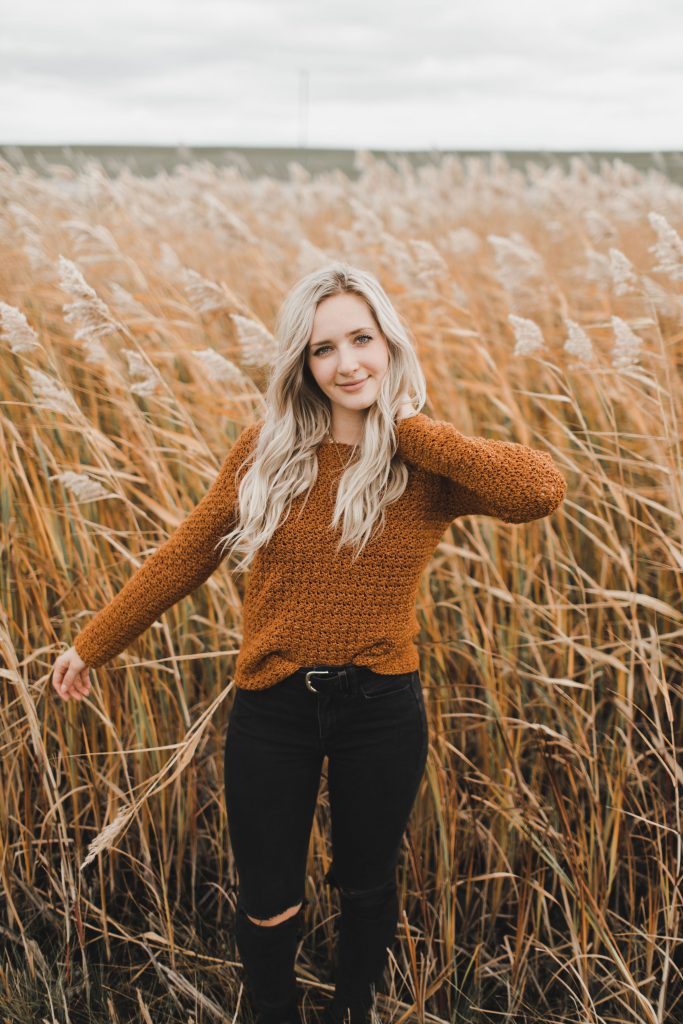
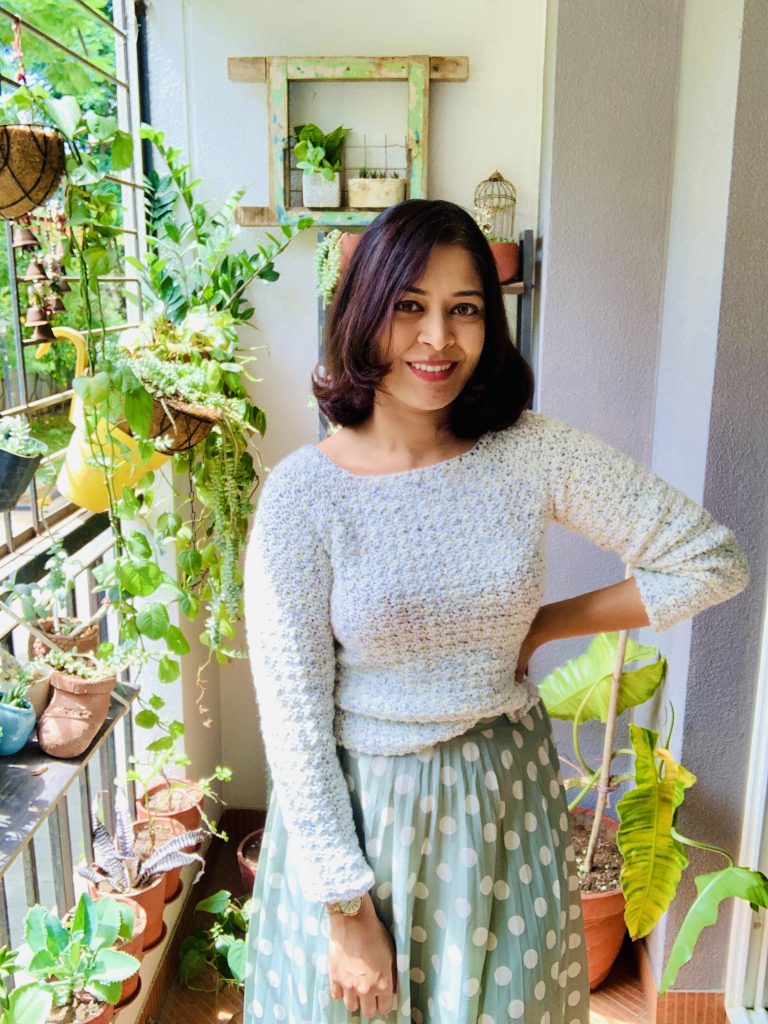
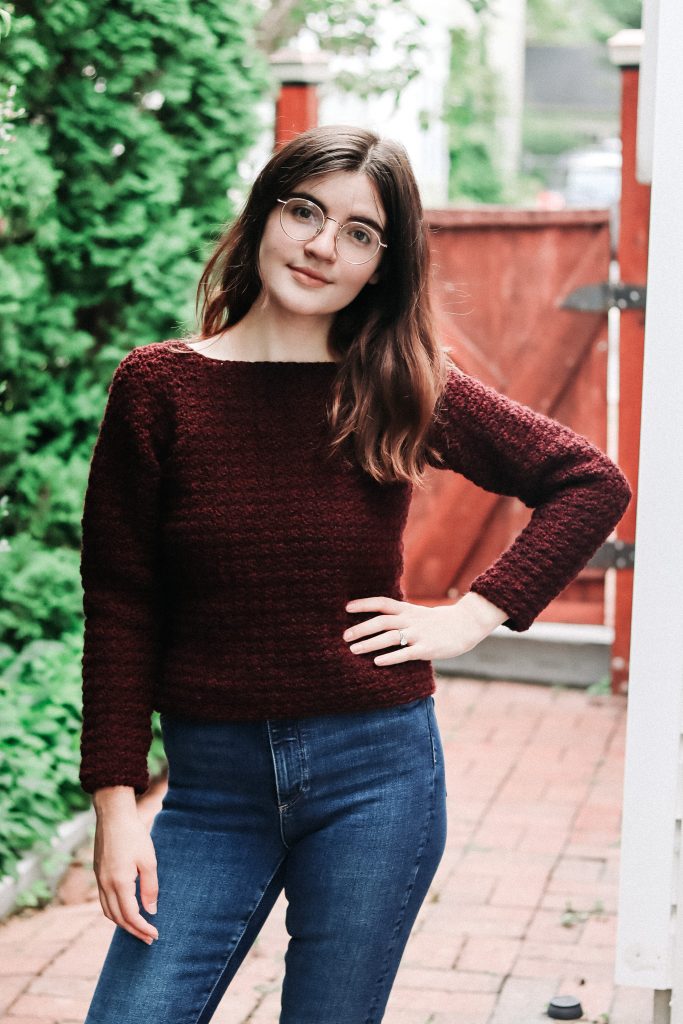
This chart shows the finished garment measurements. This sweater is designed to be worn with approximately 0 to 2 inches [0–5 cm] of positive ease. Find the finished bust measurement in this chart and choose a size that is 0 to 2 inches [0-5 cm] larger than your actual bust measurement. For reference, the model has a 34-inch [86-cm] bust and is wearing a size small with a finished garment bust measurement of 34 inches [86 cm] and 0 inches [0 cm] of positive ease, or no ease. If you are in between sizes, size down.
Tips + Customization Ideas When Crocheting This Sweater
Tips
- Sizing: This sweater is written in nine sizes as follows: XS (S, M, L, XL) (2X, 3X, 4X, 5X). Make sure to follow the numbers for your size only.
- Stitch Counts: Stitch counts are listed after each rnd. If no stitch count is given, there has been no change since the previous rnd. If only one number is provided, it applies to all sizes.
- Reversible: There is no right side or wrong side to this fabric; both sides are identical. You choose which side to wear as the “right side.”
- Turning Chain: The ch-1 turning chain does not count as a stitch. You will notice that the turning chain is a ch-1 throughout the pattern, even when a double crochet is the first stitch. This is intentional to mimic the height of a single crochet and makes the seam from the back-join less noticeable.
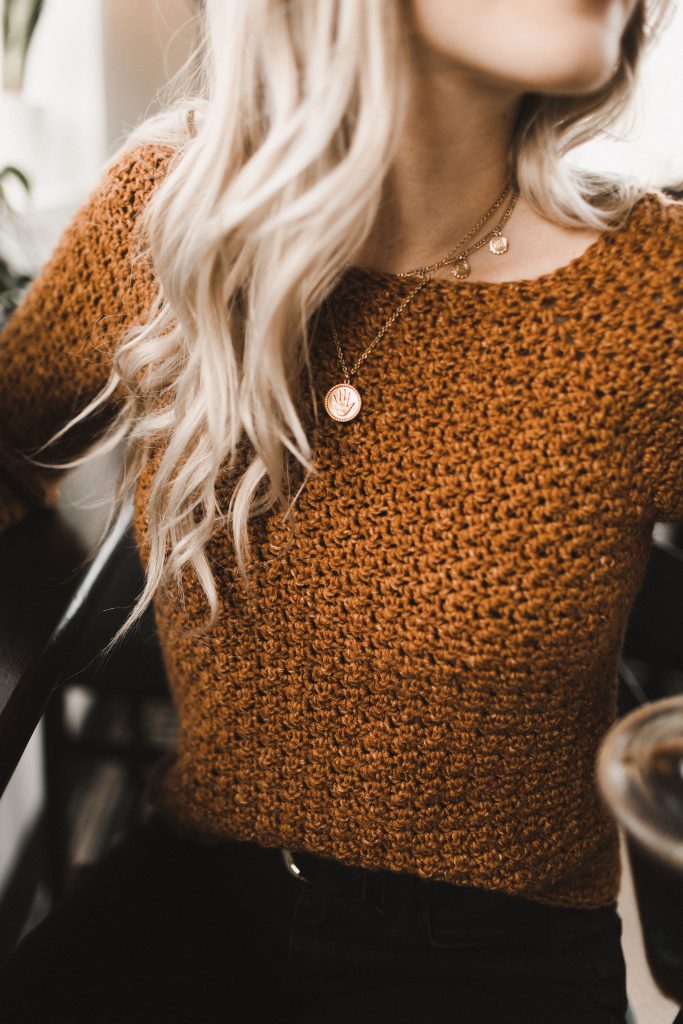
- Stitch Pattern: This stitch pattern uses alternating single crochets and double crochets. When instructed to “cont in patt”, you will always work each stitch into the opposite stitch: You will single crochet into each double crochet, and similarly, you will double crochet into each single crochet. At no point should you ever place a single crochet into a single crochet, or a double crochet into a double crochet. If you ever find yourself in this situation, you have made a mistake; rip back to the last point in which you were working the correct stitch pattern.
- This stitch pattern is often referred to as the Griddle Stitch or Lemon Peel Stitch.
- Stitch Count Charts (pages 12-18 of the PDF pattern): As you work through the yoke, be sure find the stitch count chart for your size and check it periodically to ensure you have not made a mistake. These charts break down exactly how many stitches you should have on each side of your yoke for each round. This way, if you ever find that you have made a mistake, you can find exactly where you went wrong.
Customization Ideas
- To make a sweater of any length: To adjust the length, simply repeat Round 2 of the Body section until your body measures your desired length. Fasten off or proceed to page 11 to add a ribbed bottom hem.
- For a lighter, summer version: Try matching gauge with a DK weight yarn instead of a worsted weight yarn. the resulting sweater will have the same measurements, but will be much more airy and lightweight.
- To add ribbing to your sweater: Follow the instructions on Page 11 of the PDF pattern. This will outline exactly how to work a ribbed neckline, a ribbed sleeve cuff, and a ribbed bottom hem.
- For taller ribbing, work a longer beginning chain when starting your ribbing.
- For shorter ribbing, work a shorter beginning chain when starting your ribbing.
- To turn your sweater into a short-sleeve top: Follow the pattern as-written up to the sleeve section. Work Rnd 1 as-written, and then work a few rounds in your established stitch pattern until reaching your desired length. If you want your sleeves to be tighter, work the decrease sequence as many times as desired. Keep note of any modifications you make to your first sleeve so that you can easily make the same modification to your second sleeve. Fasten off or proceed to page 11 for sleeve cuff ribbing instructions if desired!
- For tighter (looser) sleeves: If you need tighter or looser sleeves than written for your size, simply add (or eliminate) decrease rounds as you see fit! The exact round numbers are written out for you, but you can adjust these as desired. Keep track of any modifications you make to your first sleeve so that you can easily make the same modification to your second sleeve.
- For longer (or shorter) sleeves: For longer or shorter sleeve than written for your size, simply add or subtract non-decrease rnds as you see fit. Keep track of any modifications you make to your first sleeve so that you can easily make the same modification to your second sleeve.
- If your sweater is too wide at the bottom: try adding bottom ribbing, but use a hook that is at significantly smaller than the suggested ribbing gauge hook. This will help pull in the bottom of your sweater, tightening it to your hips.
- To work a 2-tone version of this sweater, using a contrasting colour for the ribbing: Work the pattern as it’s written in your main colour. Work all ribbing in contrasting colour. If you find that the colour blocking is not a solid enough of a line, then, before working the bottom ribbing, change to your new contrasting colour and sc evenly around the bottom edge. Then work the bottom ribbing into this last row. This row of single crochet will give the bottom edge a nice clean row onto which you can work the ribbing.
- To turn your sweater into a sweater-dress: Try working the length until your desired dress length, and then create belt loops and a long tie consisting of single crochets as instructed here.
- To add a tie and belt loops:
- For tie – leaving tail long enough to seam belt loop to cardigan, work a regular chain that is long enough to wrap around your body and tie together. Sc in 2nd ch from hook and in each ch across, working into the back-bumps of your chain, turn. Ch 1, sc into each st across, turn. Repeat this last row until reaching your desired tie thickness
- For belt loops – work a chain that measures long enough to accommodate the thickness of the tie you have created. Sc in 2nd ch from hook and in each ch across, turn. Ch 1, sc in each st across, turn. Repeat this last row until desired belt loop thickness. Fasten off, leaving a tail long enough to seam your belt loop to your sweater dress. Seam in desired placement, probably along the sides below your underarms. Use the other tail from the beginning of your belt loop to seam the opposite end of the belt loop to your sweater.
- To add a tie and belt loops:
- For wider, puffier, balloon-sleeves: work the sleeves without any decreases. Then, work multiple sc2tog (single crochet 2 stitches together) until reaching your desired wrist circumference. Then, work the ribbing instructions on page 11 of the PDF pattern.
- To turn your neckline ribbing into a cowl-neck/turtleneck: Use your main gauge hook to work the neckline ribbing. Instead of chaining only 7, work a chain long enough to fold over on itself like a turtleneck. Then, work the ribbing as-written.
Yarn Substitutions
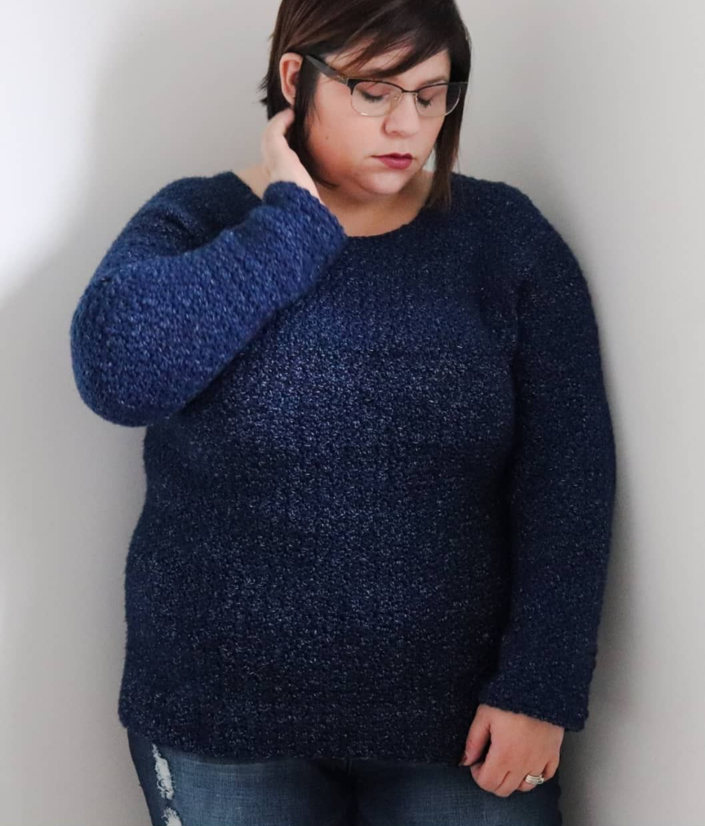
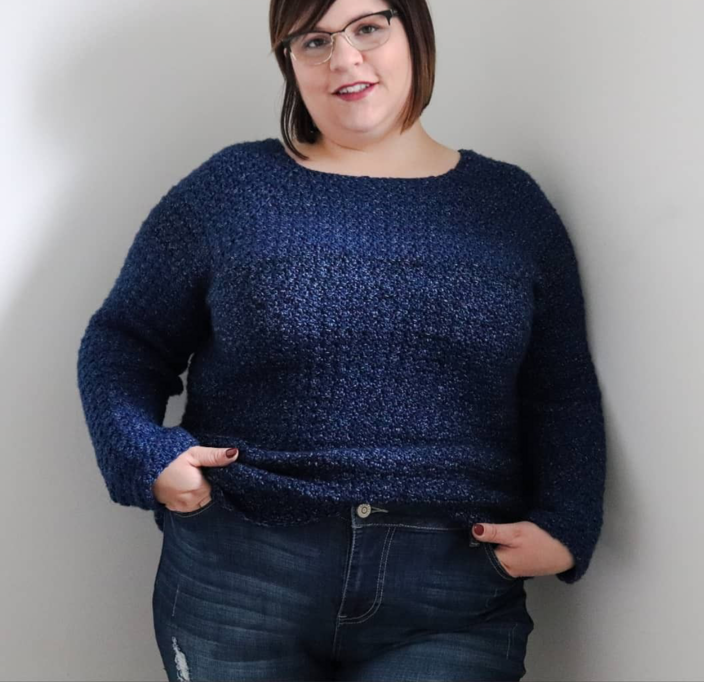
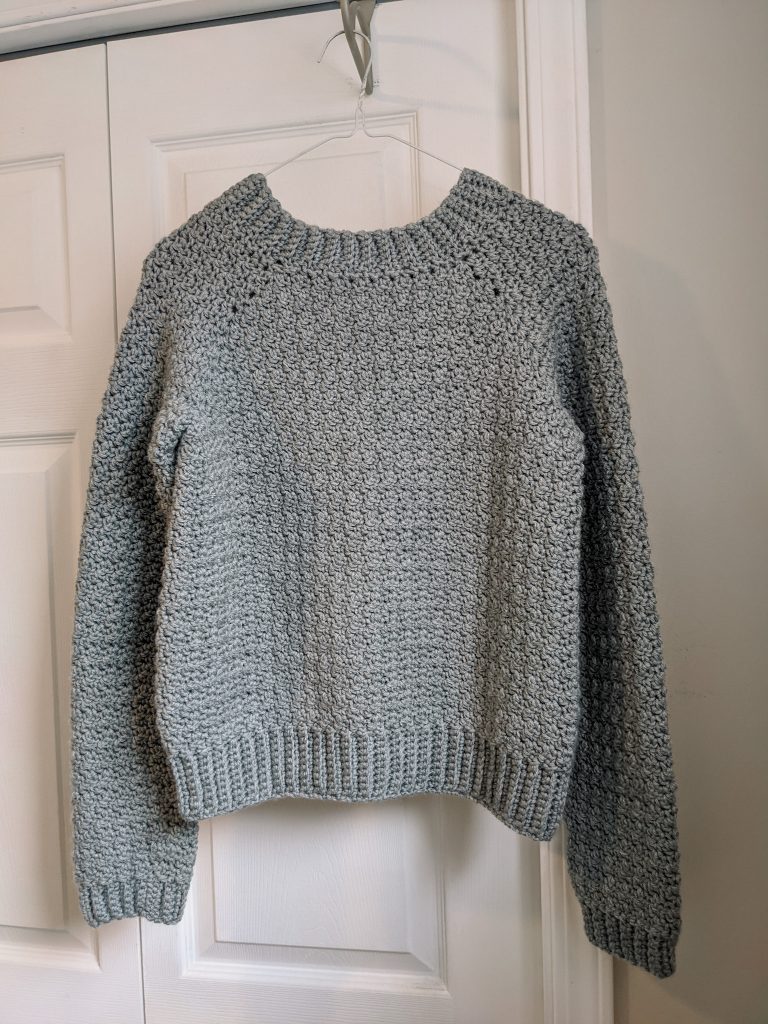
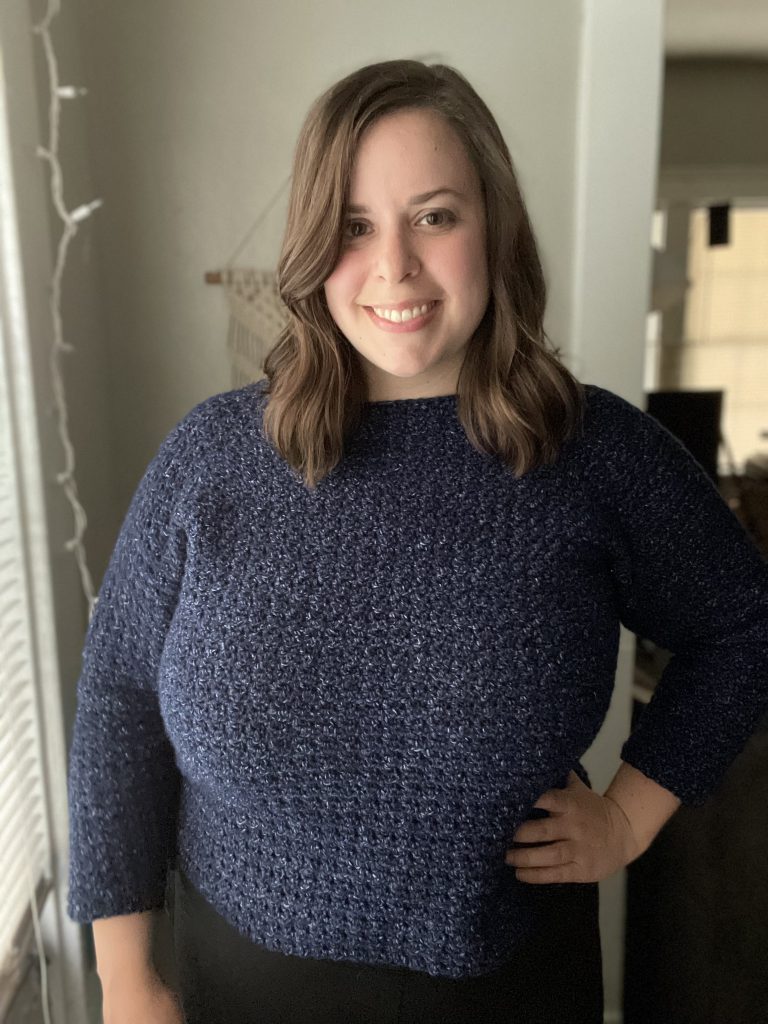
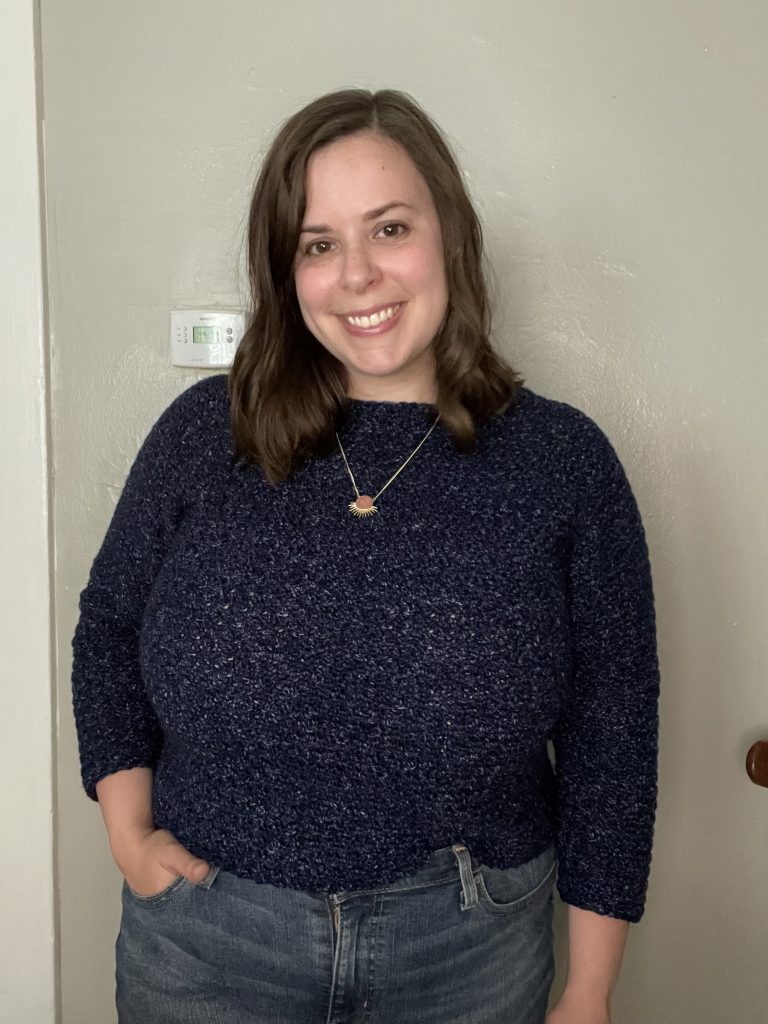
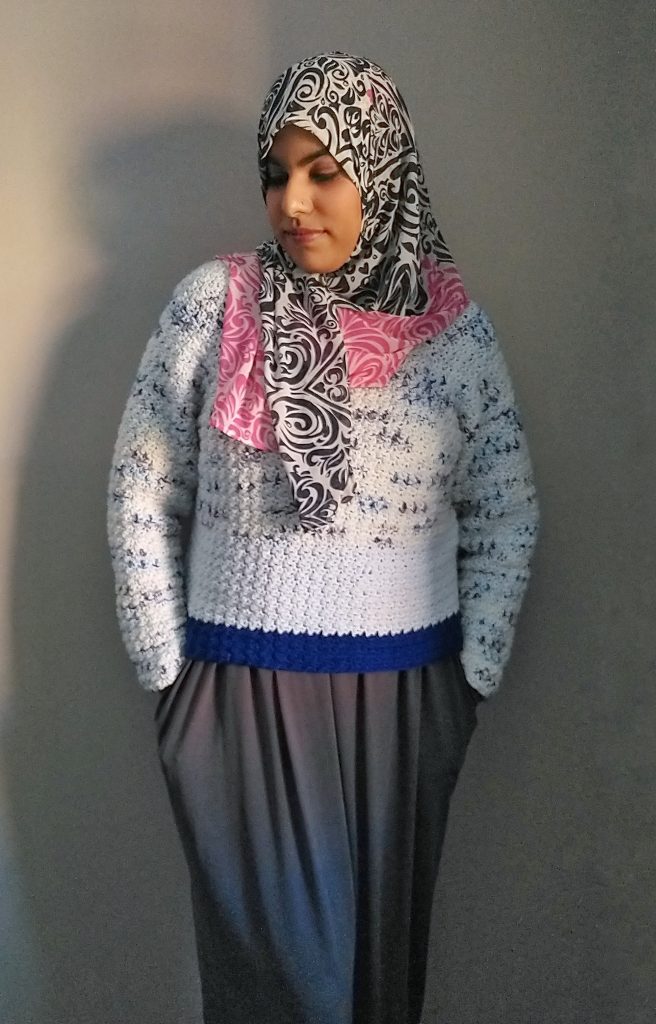
The yarn used in my sample is a 100% acrylic, however you are free to use any fiber content that you like for your own sweater! I also made a second sample (the blue sample) using Hobbii Divina, a blown, chainette style yarn with a fiber composition of 65% alpaca, 25% polyamide and 10% wool. Testers also used cotton yarns, or even jumped down to a DK weight to give a more airy, lightweight, summer-friendly version. If you live in a warm climate, you might want to try matching gauge with your favourite summer yarn to turn this fall sweater into a year-round garment! Whatever you choose, remember to always swatch before beginning so you can be sure your chosen yarn creates a fabric you love (and matches the appropriate gauge measurements)! Listed below you will see a variety of yarns that were used by testers (and others who have made this pattern) that can be used in place of Lion Brand Jeans, so long as you match gauge!
The only thing I recommend you avoid using is a self-striping yarn as this will create a distinct jog at the back of your sweater since this piece is constructed in joined, turned rounds, not in a spiral.
Note: Using an acrylic fiber is not necessary; any fiber should work out fine. I chose Jeans for the original sample because it is one of my favorite budget-friendly yarns with a softness that can be hard to find in acrylics within this price range.
For an airy, summer-friendly version, try substituting with a cotton blend or matching gauge with a DK weight (category #3 yarn).
Lion Brand Basic Stitch Anti-Pilling
Lion Brand LB Collection Chainette
Lion Brand Cobblestone (discontinued)
Loops & Threads Impeccable (Michaels Brand)
Knit Picks/WeCrochet Comfy Color Mist
Knit Picks/WeCrochet Comfy Worsted
Knit Picks/WeCrochet Brava Worsted
Knit Picks/WeCrochet Simply Wool Worsted
Knit Picks/WeCrochet Mighty Stitch
Knit Picks/WeCrochet Wool of the Andes Worsted
Knit Picks/WeCrochet Snuggle Puff
Knit Picks/WeCrochet Wonderfluff
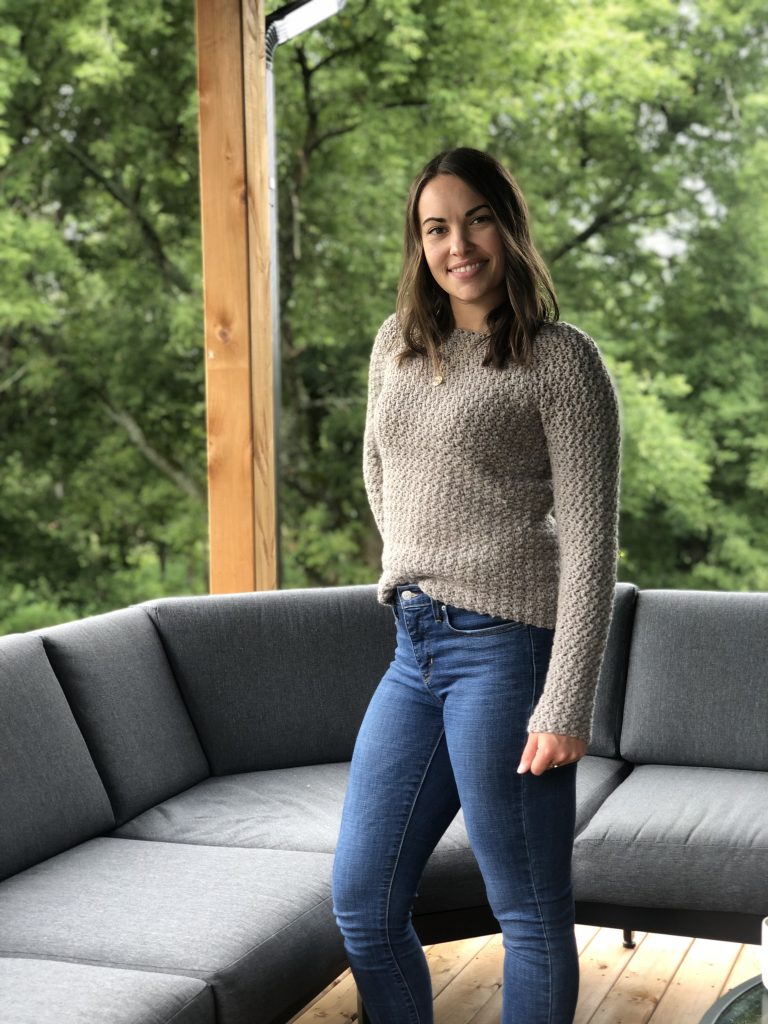
Pattern Tester Photos
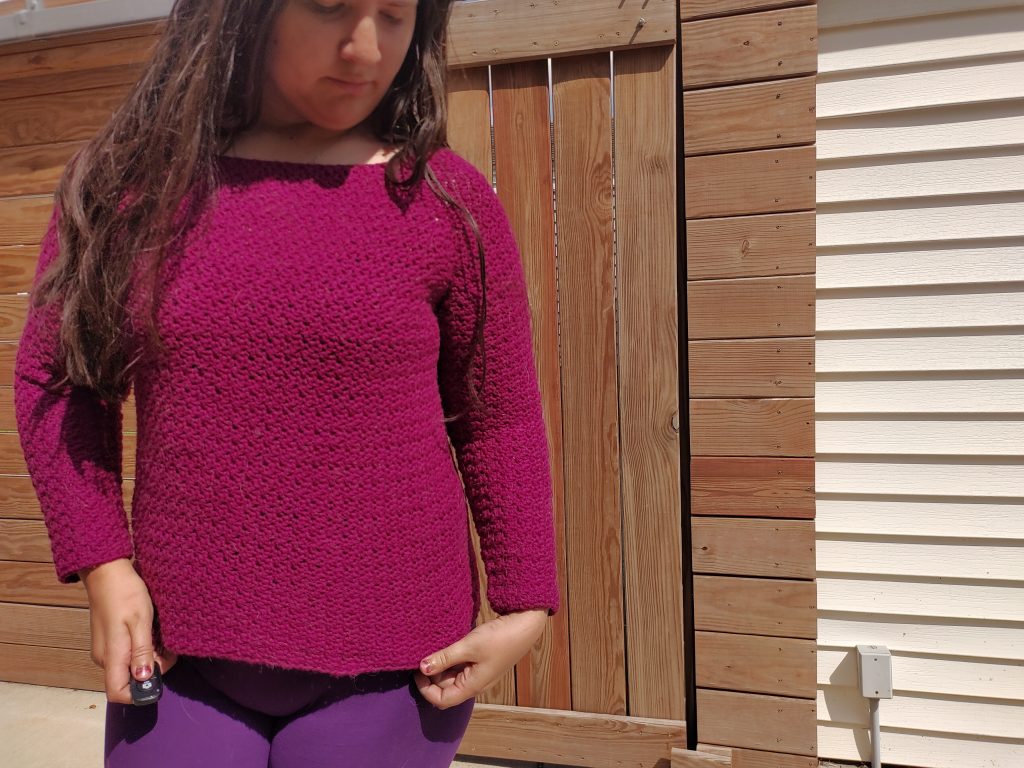
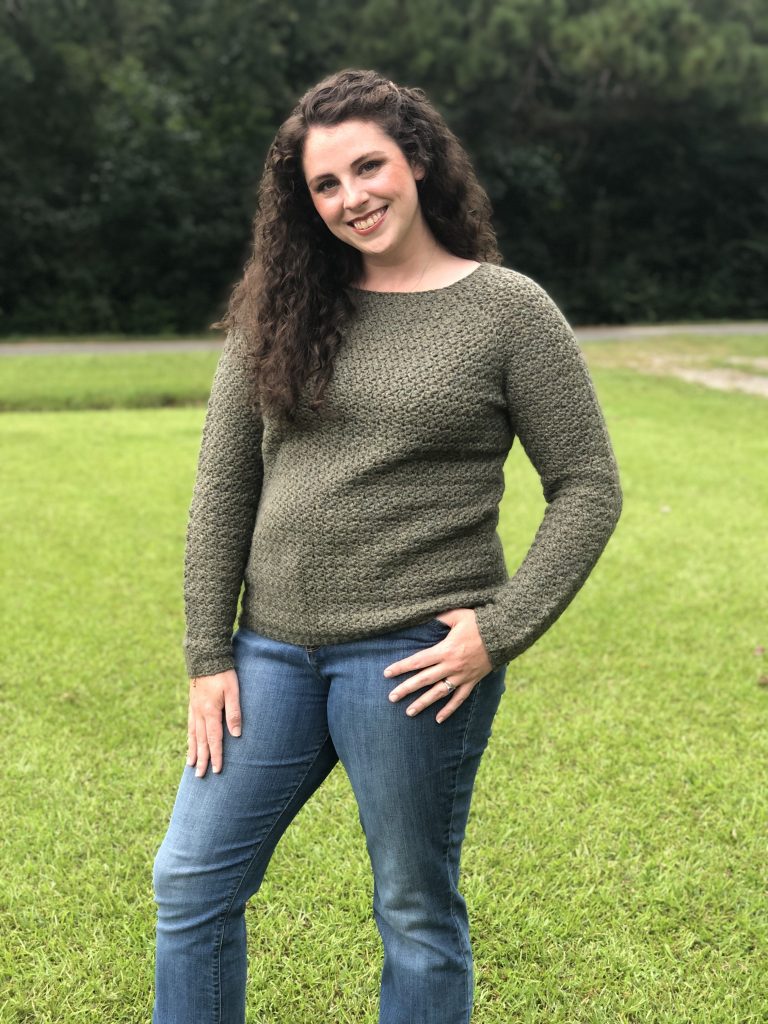
I am so honoured to have so many lovely testers to help make this pattern the best it can be! Pattern testers are so valuable to any design – they use their own yarn, their time, and their own resources to make this sweater and provide me with their honest feedback. I appreciate each person so much!! Check out their work below – they did such an amazing job! I included their Instagram handles, the yarn they used, and any modifications they made to their sweaters to help give you inspiration to make your own!


You can find the pattern in these places:
On my website here.
On Ravelry here.
On Etsy here.
As a crochet kit here.
(Use the code “PATTERN10” for 10% off all patterns)
Preorder my book – Modern Crochet Sweaters: 20 Chic Designs for Everyday Wear – here!
Here are some other patterns you might like: the Chainette Turtleneck, the Cobra Crop, the Body Language Cardigan, the Chasing Summer Tank!
I can’t wait to see your WIPs! Make sure to tag me @knitsnknotswpg and use the pattern hashtag #RosebudRaglan so that everyone can see your projects!
Happy crocheting,
x
Janine
You May Also Like