
Hi everyone!
I just finished designing my first crochet raglan, so I wanted to share a bit about what that process was like – from figuring out sizing, to learning how to actually construct a well-fitting raglan sweater.
Update: This pattern is now the Rosebud Raglan (my most popular pattern of all time!) and has even been updated to be the most clear, concise, and well-fitting sweater pattern I’ve designed yet.
Preorder my book – Modern Crochet Sweaters: 20 Chic Designs for Everyday Wear – here!
If you want to be notified of all new pattern releases (and get exclusive discounts on all new paid patterns), sign up below!
This post contains affiliate links. This means, should you make a purchase, I will receive a small portion of the sale at no extra cost to you. All opinions are my own. View my Privacy + Disclosures Policy here.
The main reason I wanted to turn this new (to me) experience into a blog post is because I learned a lot and I thought it would be fun to document the learning process + design process.
First, let me say that in 2019, there were NOT very many resources for designing crochet raglan sweaters. I asked you on Instagram for any pattern suggestions and you gave me a some really great designers! Here are the designers you suggested (both paid and free patterns) to me on Instagram:
- Hooked Hazel
- Joy of Motion Crochet
- Stephanie Erin
- Two Brothers Blankets
- Whistle and Wool
- Evolve Crochet
- Kt and the Squid
- Maria’s Blue Crayon
- Sewrella
Pucker Pullover
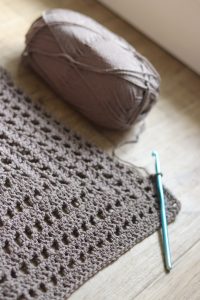
When I had the idea to learn to crochet a raglan sweater, I looked online for some free resources. I just wanted to make one complete raglan sweater first so that I could understand the construction before attempting to design one. I found Sewrella’s Pucker Pullover designed by Ashleigh Kiser and thought this would be a great place to start because not only would I learn where the increases are placed, but I would learn how to incorporate eyelets since this sweater alternates solid rows with eyelet rows. Ashleigh used Lion Brand’s ZZ-Twist yarn and I actually had the exact amount on hand in the colour I wanted – taupe. Don’t you just love when that happens?! It’s like it was meant to be.
The first thing I learned was that this specific yoke is crocheted in a flat square. That space in the middle becomes the hole for your head to go through, and the top of this square becomes the back (the side with the seam/join), the bottom becomes the front, and the two adjacent sides become two sleeves.
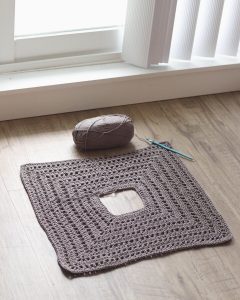
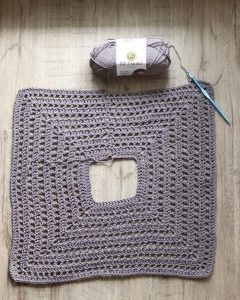
This photo may give you a better understanding of how each part of the square becomes a separate part of the sweater:
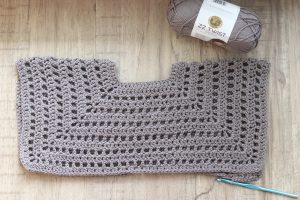
See? Now that it’s folded in half, it actually looks like it has the potential to become a sweater, right? You can see the raglan increases running from the neckline down to each corner of the square. The entire bottom edge shown here and the entire bottom edge behind it become the body of the sweater. The sleeves are worked onto the sides and decrease to shape for arms.
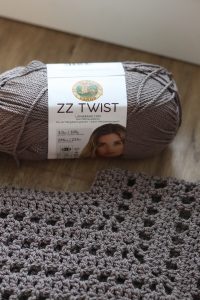
This turned out amazingly and I honestly wear it all the time! I posted a few stories last weekend showing my outfit and I wore my Pucker Pullover on both Friday and Saturday with high-waisted ripped jeans! (Chronic outfit repeater over here.) I also wanted to mention the fact that I love ZZ twist (unfortunately now discontinued). This yarn has a Z-twist opposed to the usual S-twist which means that your hook is less likely to split the yarn – it’s made with crocheters in mind. It’s great for making garments that feel smooth without that fuzzy feel.
Lessons
What I learned from making this first raglan was that where the sizes different was in the row at which the yoke was folded and joined to form the body and sleeves. The smaller sizes had a smaller “square” and the larger sizes just had additional rows worked to create a larger “square”. Note that you don’t always have to increase much in the neckline for larger sizes – a little bit, but not too much. Head sizes and neck sizes don’t vary as much as a bust circumference would, for example. So make sure that your 5X doesn’t have a massive head opening and your XS has a tiny one. Of course, this is a beginner pattern, so more shaping could be done on more advanced patterns. This is just how this specific pattern worked. I love the increase lines that the 4 equal sides created. It’s really flattering!
I also learned that the seam is visible along the back. It was almost invisible on the eyelet rows because I used the turning chain as one of the stitches, but for the double crochet rows, it is visible. Apparently this is one of the downfalls of crochet sweaters. The seam is not worth it to me! Especially because it’s down the center of the back, where seams should not be. For this sweater though, it was pretty much the only option because of the alternating rows. Spiraling wouldn’t work. Anyways, I still love it and will wear it all the time. It was just an interesting thing to learn!
To avoid this seam, you could try placing your beginning-of-round at one of the raglan increases, although this makes designing a little more difficult. You could also use standing crochet stitches rather than chaining 2 and double crocheting into your first stitch.
Designing My Own Raglan
I wanted to create my own sweater without following a pattern.
I used Lion Brand Jeans because I had a ton in my stash and it was exactly the yarn weight I wanted. You could make this entire sweater for like $20 and some Michael’s coupons. You can find the crochet kit on Lion Brand here!
So, what I did first was figure out how many stitches I wanted in my neckline. I worked a long foundation chain and held it around my neck until reaching the measurement I thought would be most comfortable. Each size in the pattern has a slightly different starting chain. Next, I realized that not all sizes could increase at an even rate. The smaller ones could, but the larger ones could not. If I increased at an even rate, the larger sizes would have massive arms compared to the bust. So, I had to work a few rounds where the bust increased, but the sleeve edges did not. And let me tell you, this took an insane amount of Excel spreadsheets and stitch charting to figure out how many stitches would fit into each round, especially at the point where you separate for the body/sleeves. I wanted to work appropriate underarm chains for each size (I usually multiply the bust circumference in inches by 0.08 and this gives me my desired underarm space), while also remaining in my stitch pattern of alternating single and double crochets. This extra work was so worth it in the long run, because the resulting fit was impeccable. I think this type of design was technically called an S-curve since the increase rates change throughout the raglan shaping section.
There was as specific reason for choosing a 2-stitch pattern repeat. Since learning that the seam from joining rounds is quite visible if you use a basic stitch. I chose to use a textured stitch pattern because now you can’t see the seams! Yay! It makes for a MUCH neater-looking sweater. It also nicely hides the increases created by the chain-1 spaces, which I think is a nice bonus.
This pattern ended up becoming my most popular pattern – the Rosebud Raglan. I just want to add that the fact that I used this stitch makes it so easy to be certain you are doing it right. Each double crochet is made into a single crochet and each single crochet is made into a double crochet. Sometimes I have to take a second and count my stitches to figure out if I have made the last stitch of the row or if I still have one more stitch to make. I still mess this up all the time. This takes alllll the guesswork out, ok? You’re going to love it. If you realize you have a single crochet in a single crochet, you know that you made a mistake on the last row. You won’t have to rip out rows and rows, just the last row. It makes it so much fun to crochet because you know you’re getting every stitch right. I also included a yoke stitch count chart to help you check your work.
And it’s written in 9 sizes for a truly size-inclusive crochet sweater pattern.
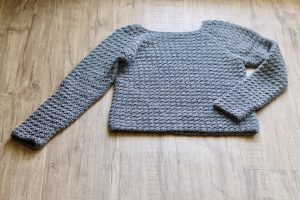
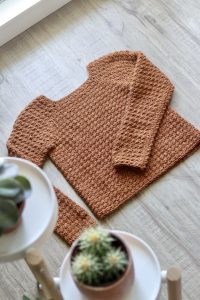
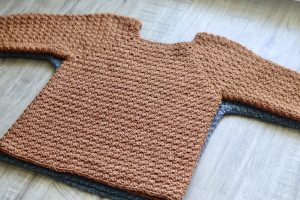
This is what I ended up with on my first shot. The one thing I did wrong was make the yoke too big for my body size. The bust/body size was perfect, but the underarms had all this loose fabric that bunched up when I put my arms at my sides. To be honest, it’s fine enough for me to wear, but I knew I wanted to write this into a sweater pattern so I had to make some improvements for a perfect fit!
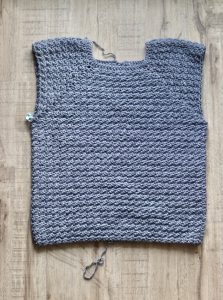
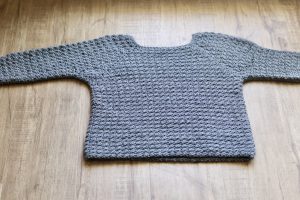
So this is what the final first version looked like! It’s pretty cute minus the underarm puckering, which you can see below. This is because there is too much fabric at the underarm, and the sleeve needed to be smaller. If you ever see this in a top-down pattern, that’s why that is happening. That’s why I used a more tailored method of increasing in the final pattern.
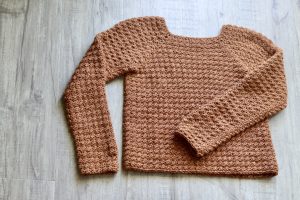
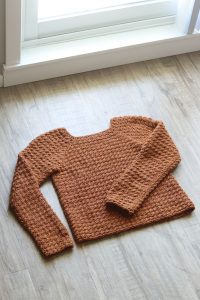
Version 2
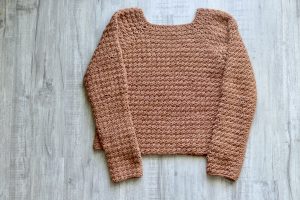
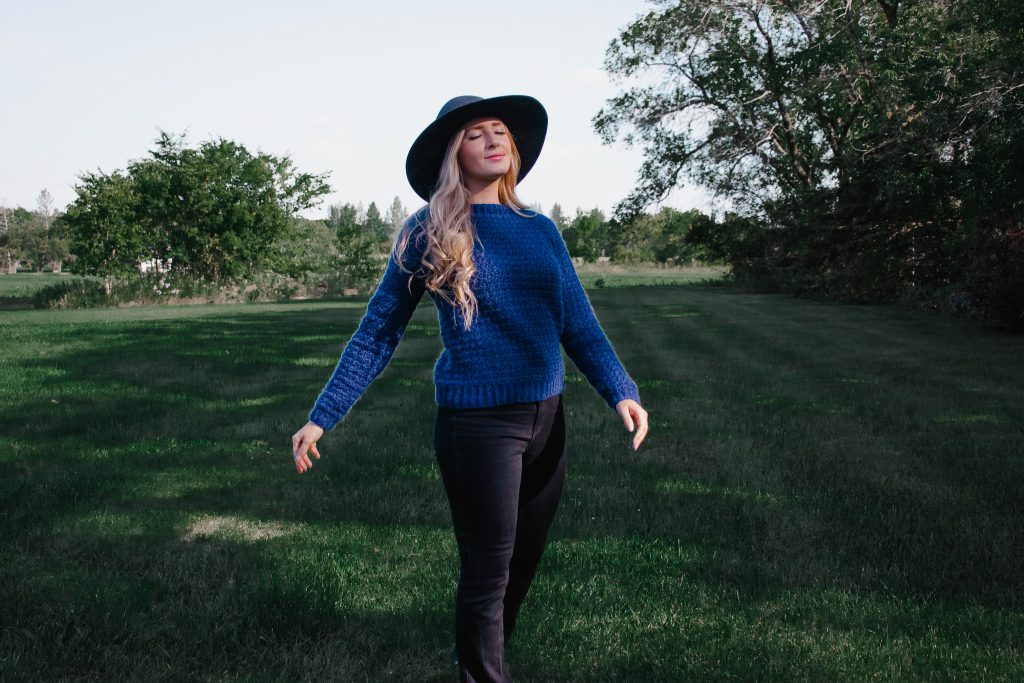
This second version, made with “topstitch” in Jeans Yarn actually ended up being even easier to make because it just so happened that the number of stitches I was left with at the sleeves was the perfect number for even decreases. Small victories! I decreased to have the same number of stitches on the sleeves for a similar fit compared to the grey version. I also added stitches to the underarm area so that I would have an identical bust/body measurement as the grey one as well. These small changes made all the difference and this orange sweater fits like a dream!
Update: I did however learn upon grading this sweater that this increase rate did not work perfectly for all sizes. I worked some bust-increases right after the foundation chain in order to achieve a perfect fit on all sizes.
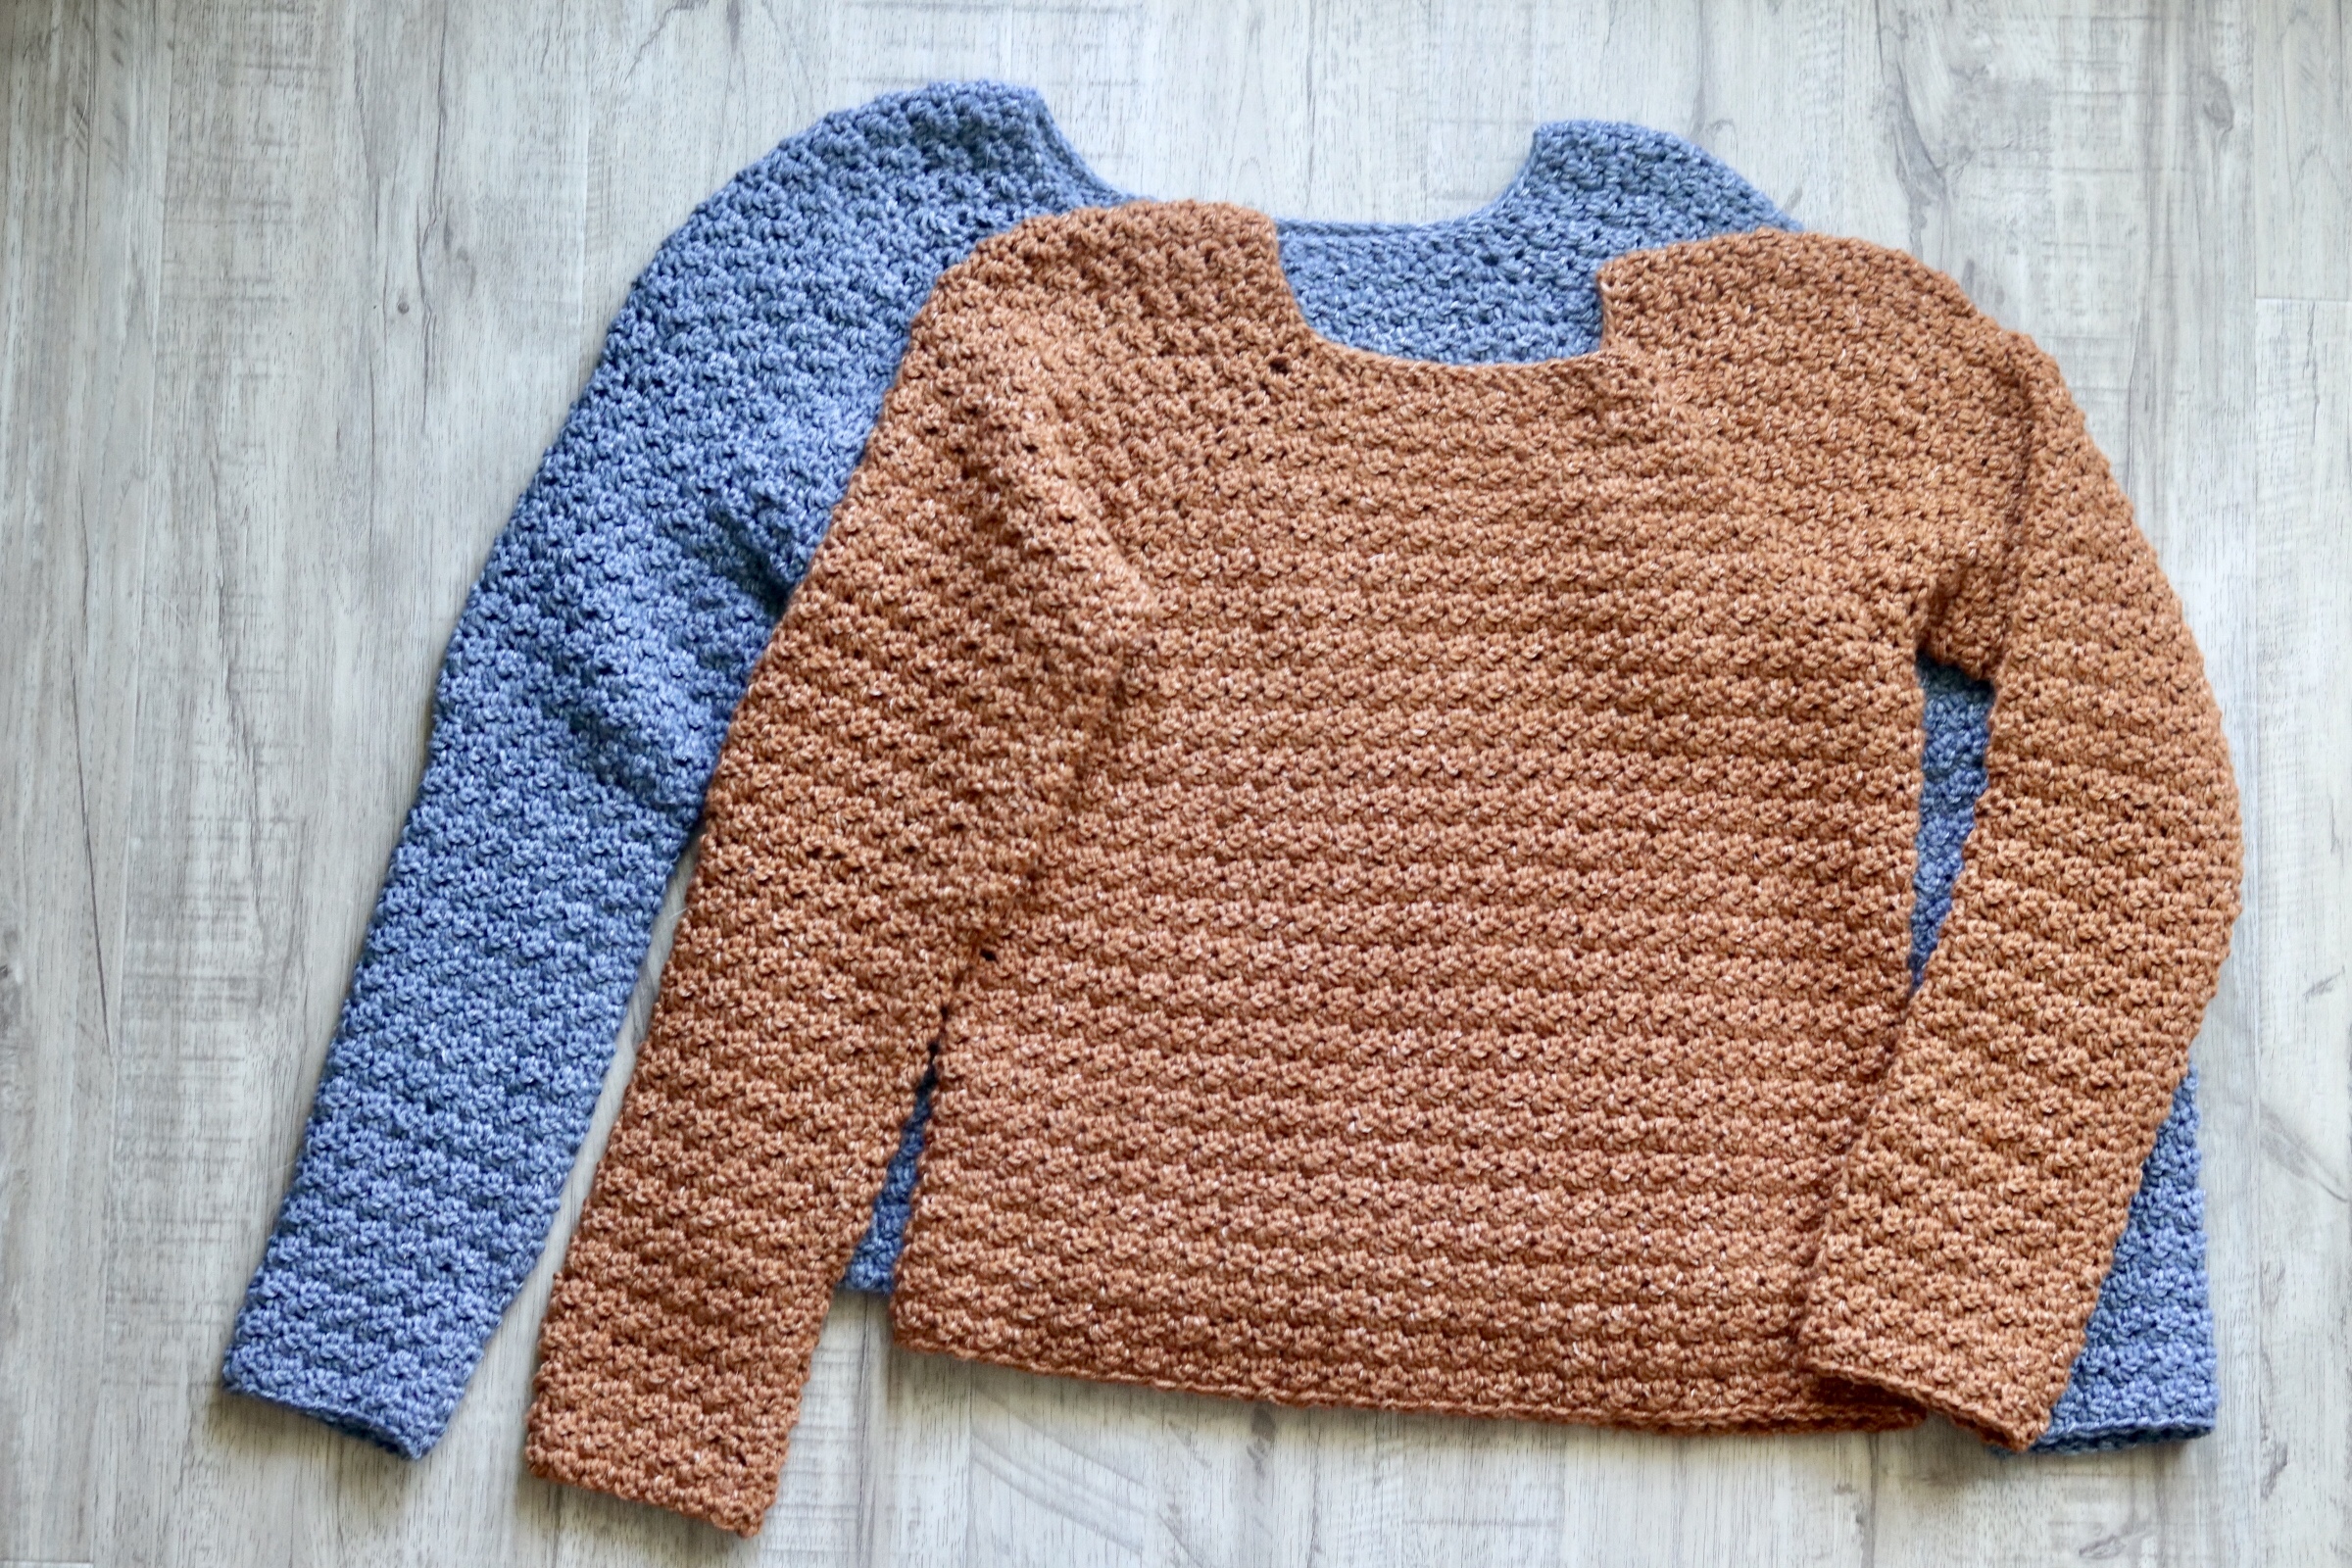
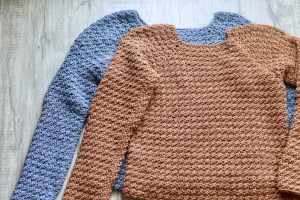
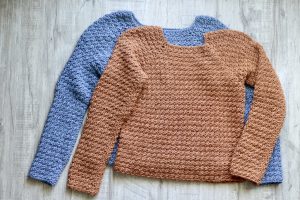
Comparison
The last thing I wanted to show you is the comparison. They honestly look identical without laying them on top of one another. As you can see, the grey one has an underarm that extends past the orange one. This is the small detail that made all the difference!

To see more Rosebud Raglans, make sure to visit this post and scroll down to see all of my testers’ versions!
Thanks so much for reading!
It has been so much fun to learn a new technique and I know that many of you are looking forward to making your first crochet raglan. 🙂
This pattern had a major overhaul in fall of 2021 – so make sure to check out the updated Rosebud Raglan here! I know you’re gonna love it!
Pre-order my book Modern Crochet Sweaters here!
x
Janine
You May Also Like


