

Hi friends!
This post includes everything you need to know about my new Coastal Retreat Throw, a free beginner-friendly granny square blanket featuring two-tone squares that will keep you engaged until the end – no two squares are the same!
The free pattern is fully written out in this blog post. Scroll down to the section entitled “PATTERN”.
Get the Lion Brand Crochet Kit here (in your desired colourway)!
Before we begin, here are some quick links for you:
- Find the PDF version on Ravelry, Etsy, and my website.
- Add your finished project to Ravelry here!
- Shop the recommended yarns, Lion Brand Basic Stitch, here, and Heartland, here!
- Shop the full Lion Brand crochet kit here (comes with all yarn required for your chosen size + a FREE copy of the PDF pattern)!
- For any questions about this pattern, please email knitsnknotswpg@gmail.com and I’ll get back to you asap!
Shop my first book – Modern Crochet Sweaters: 20 Chic Designs for Everyday Wear – here!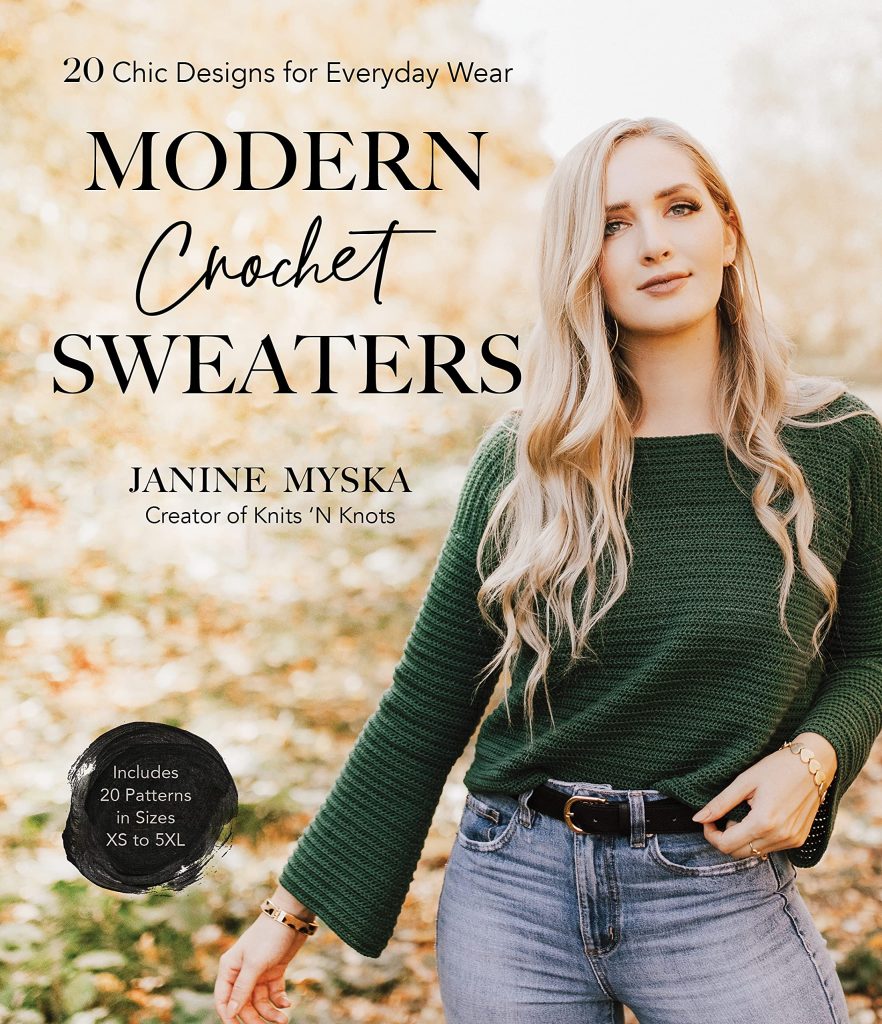
If you want to be notified of all new pattern releases (and get exclusive discounts on all new paid patterns), sign up below!
This post contains affiliate links. This means, should you make a purchase, I will receive a small portion of the sale at no extra cost to you. All opinions are my own. View my Privacy + Disclosures Policy here.


About
These beginner-friendly granny squares are meditative to crochet, yet the two-tone color scheme will keep you engaged until the end. No two squares are the same! A soft, beach-inspired color scheme was the inspiration for this playful throw.
Two Lion Brand yarn lines are used in this project: Basic Stitch and Heartland. I was going to use only Basic Stitch for this blanket, but I needed to expand into another yarn line to get the colors I was imagining in my head! The yarn thickness of Heartland feels almost identical to Basic Stitch, making it the perfect choice!
Grab your crochet kit here + choose your own colors!
Materials
Worsted—Basic Stitch® Anti Pilling™ Yarn in 4 colorways: Ecru (Main Color), Sage, Baby Pink, and Cedarwood
- 100% Acrylic
- 185 yds (170 m) per 3.5 oz (100 g) skein
- Find this yarn on lionbrand.com or visit yarnsub.com to find comparable substitutes available in your region.
- Grab your crochet kit here + choose your own colors!
Worsted—Lion Brand Heartland in 3 colorways: Channel Islands, North Cascades, and Congaree
- 100% Acrylic
- 251 yds (230 m) per 5 oz (142 g) skein
- Find this yarn on lionbrand.com or visit yarnsub.com to find comparable substitutes available in your region.
Yardage Required:
- 6 skeins or 990 yds (905 m) of MC
- 1 skein or 165 yds (151 m) of each CC
Yarn Substitution: Substitute Basic Stitch® Anti Pilling™ Yarn or Lion Brand Heartland with any similar worsted weight (category #4) yarn that matches gauge.
Hook: Size U.S. 7 (4.5 mm) or size needed to obtain gauge
Notions: Tapestry needle, scissors


Finished Measurements
Finished blanket measures approximately 43.5” (110 cm) wide and 57.5” (146 cm) long, blocked.
Each square measures approximately 14” (36 cm) square, blocked.


Color Pattern for Your 12 Squares
- You will need to crochet 12 squares, each with a different color scheme.
- Each square uses two colors: an inner color and an outer color.
- For the first six squares, each will begin with MC as the inner color, then a different CC for the outer color.
- Each of the next six squares will begin with a different CC as the inner color, then MC for the outer color.
- In the sample shown, MC = Ecru (the off-white colorway). It does not matter which contrasting colors you assign to the CC1, CC2, etc. labels, since each contrasting color is only used one time per square type; once as the inner color and once as the outer color.

Gauge
4 x 4” (10 x 10 cm) = approximately 13.5 dc and 7 rows, blocked.
Terms + Abbreviations Used
Written in U.S. Crochet Terms
- CC: contrasting color
- ch(s): chain(s)
- ch-sp: chain space
- dc: double crochet
- hdc: half double crochet
- MC: main color (shown in Ecru)
- rep: repeat
- rnd(s): round(s)
- sc: single crochet
- sl st: slip stitch
- st(s): stitch(es)
- tch: turning chain
PATTERN
SQUARE (MAKE 12)
Notes Before Beginning:
- Be sure to follow the color pattern outlined on previous page for each of your squares.
- Scroll down to see stitch chart for granny square.
- Scroll down to see full Stitch Count Chart to help check your work.
Begin with your inner color.
Make a magic ring. See magic ring photo tutorial below.
Rnd 1: Ch 3 (counts as 1 dc here and throughout pattern), work 2 dc into ring, [ch 2, work 3 dc into ring] 3 times, hdc into top of tch to join rnd, turn. [12 dc]
The hdc join acts as a replacement for a ch-2 corner. The space created from the hdc will be referred to as a ch2-sp for simplicity.
Rnd 2: Ch 3, dc into first ch2-sp, dc in each dc to next ch2-sp, *(2 dc, ch 2, 2 dc) in next ch2-sp, dc in each dc to next ch2-sp; rep from * to last ch2-sp, work 2 dc in ch2-sp, hdc into top of tch to join rnd, turn. [28 dc; 7 dc per side]
Rep Rnd 2 until you have completed a total of 5 rnds using your inner color.
Switch to outer color.
As you complete your very last st in your final round using your inner color, change colors as you close the st so that your outer color is now on your hook. Cut your inner color, leaving a tail long enough to weave in.
Rep Rnd 2 until you have worked a total of 7 rnds using your outer color (12 rnds in total). Join your final rnd using a ch 2 and a sl st instead of a hdc to help make joining your squares a bit easier.
The side of your square facing you as you crochet the final rnd is considered the “right side”. The v’s from your final rnd of sts will be facing you.
Fasten off, weave in ends.
Block each square to approximately 14” (36 cm) square before proceeding to Joining Your Squares.
Stitch Count Chart


Arranging Your Squares
To prepare to join your blocked squares, arrange them with the right sides facing up in your desired color pattern so that each square alternates MC and CC as the outer color. (See photo.)
Arrange the squares so that the top six squares have one square of each of color, and the bottom six squares have one square of each color. This is an easy way to have your colors look evenly distributed.
Tip: You may want to take a photo of your chosen arrangement to reference while you work your seams.

Joining Your Squares
- Your squares will be joined using your crochet hook and a series of sl sts to create a Flat Slip Stitch Join.
- You will work a total of five seams: two long seams that run the length of your blanket (vertically), and three seams that will run widthwise (horizontally).
- This technique is explained below.
- You may also find this video tutorial helpful.
Vertical Seams
First, you will begin with the two long, vertical seams. You can start from the top of your blanket or the bottom, it does not matter. All slip stitch seams use your MC with the RS of your squares facing up.

Line up your first two squares stitch-for-stitch as best you can. Beginning with the square on the right, insert your hook from top-to-bottom through the back loop of the ch closest to your neighbouring square (Photo A). (There are 2 chs in this bottom corner; you will be working only into the first ch that is closest to the square on the left.) Then, insert your hook from top-to bottom through the back loop of the mirroring ch on the other square (Photo B). Yarn over using new yarn (Photo C), then pull through all loops to complete the first sl st (Photo D).

Always beginning with the square on the right, insert your hook from top-to-bottom through the back loop of the next dc (Photo E). Then, insert your hook from top-to-bottom through the back loop of the mirroring dc on the other square (Photo F), making sure to keep your working yarn to the back of the work, in between your two squares, as shown. Next, yarn over and loosely pull through all loops to complete your next sl st (Photo G). Avoid pulling too tightly.
Rep these steps, loosely slip stitching your squares together until you reach the next ch2-sp. You will rep these instructions for the first ch that you encounter, then you are ready to attach the next set of two squares.
Begin the next set of squares in the same way, working only one of the chs in this first ch2-sp; the one closest to its neighboring square that you are seaming together. Rep this sl st seam all the way to the top of your blanket. Fasten off, weave in ends.
Rep all instructions for second vertical seam. All squares should now be joined to at least one other square.
Horizontal Seams
Next, you will crochet the three horizontal seams. You can start from either side of your blanket. Make sure to have the right side facing you as you work all sl st seams. When you encounter an intersection of four squares, crochet over top of your existing vertical seams. Rep until all squares are seamed together.
Border
Once your blanket squares are all joined together, you will crochet a simple border around the perimeter of your blanket.
Using your MC and with the right side facing you, join new yarn with a sl st to any corner ch2-sp of your blanket.
Rnd 1 (Set-Up Rnd): Ch 1 (does not count as a st), sc in corner ch2-sp, sc into each st across the edge of your blanket until reaching the next corner ch2-sp, *work (sc, ch 2, sc) in corner ch2-sp, sc into each st across the edge of your blanket until reaching the next corner ch2-sp; rep from * to end of rnd, sc in last ch2-sp (same ch2-sp as your beginning st), hdc into first sc to join rnd, turn.
Tip: When you encounter an intersection between squares, you may want to place anywhere from 2-4 sc within this space (see photo below). The exact number of sts worked here does not matter; what matters is that your work looks clean, and you are happy with the appearance.

Rnd 2: Ch 1 (does not count as a st), sc in corner ch2-sp, sc into each st across to next ch2-sp, *work (sc, ch 2, sc) in ch2-sp, sc into each st across to next ch2-sp; rep from * to end of rnd, sc in last ch2-sp (same ch2-sp as your beginning st), hdc into first sc to join rnd, turn.
Rnd 3: Rep Rnd 2.
For thicker border, rep Rnd 2 as many times as desired.
Fasten off, weave in any remaining ends.
Blocking
Block your finished blanket to the proper dimensions to smooth out any wonky fabric and eliminate any curling of the corners.
Stitch Chart + Legend — Granny Square

Photo Tutorial — Magic Ring
There are a few methods for making a magic ring. Here’s how I do it:
Step 1: Wrap your yarn around the hook as shown in the photo.
Step 2: Yarn over with the working yarn (the strand connected to the skein).
Step 3: Pull through the loop on your hook.
You have now created an adjustable ring into which you can crochet as many stitches as the pattern indicates.
Once you are done working into this ring, you can cinch it closed by pulling on the tail end.


#CoastalRetreatThrow
Thanks so much for reading!
Shop the full Coastal Retreat Throw crochet kit here (comes with all yarn required in your chosen colorways + FREE copy of the PDF pattern)!
Find the pattern PDF in these places:
On Ravelry
On Etsy
On My website
For free in the Coastal Retreat Throw crochet kit here!
x
Janine
You can find my full print book, Modern Crochet Sweaters: 20 Chic Designs For Everyday Wear on the shelves of all major retailers or see purchasing options here!
For exclusive discounts on all new patterns, join the Knits ‘N Knots newsletter list here!
You May Also Like


