Hi all!
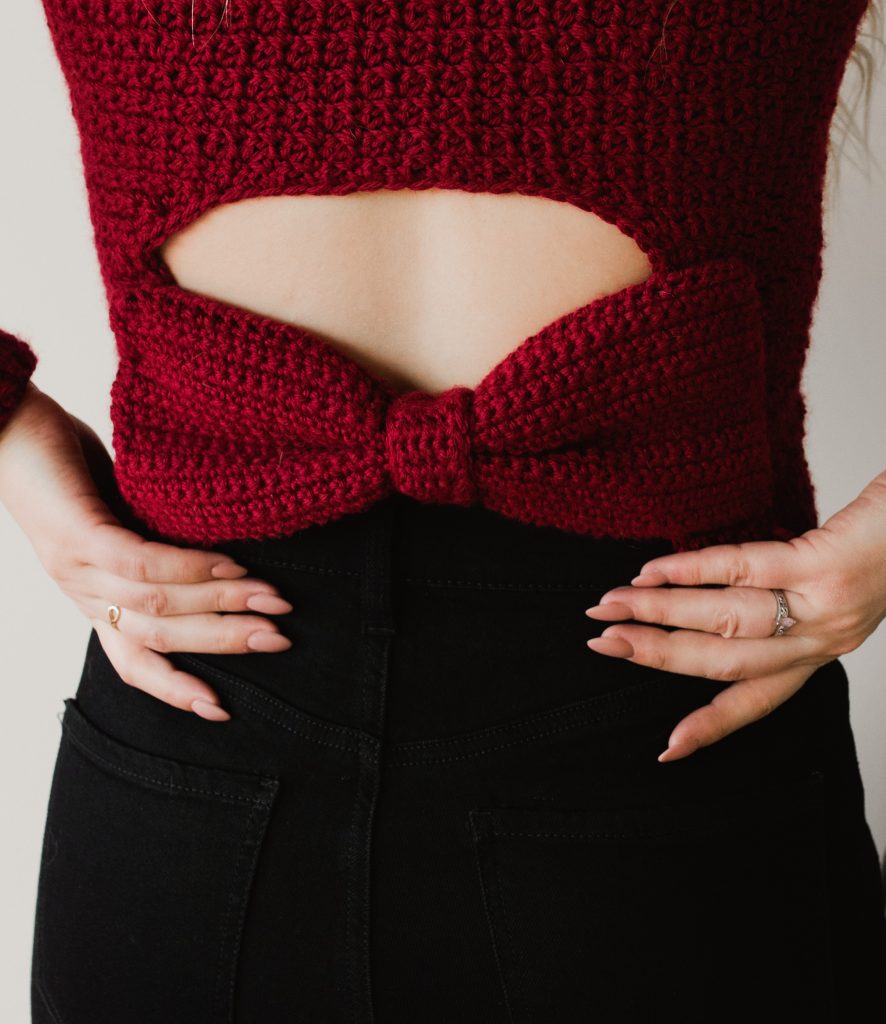
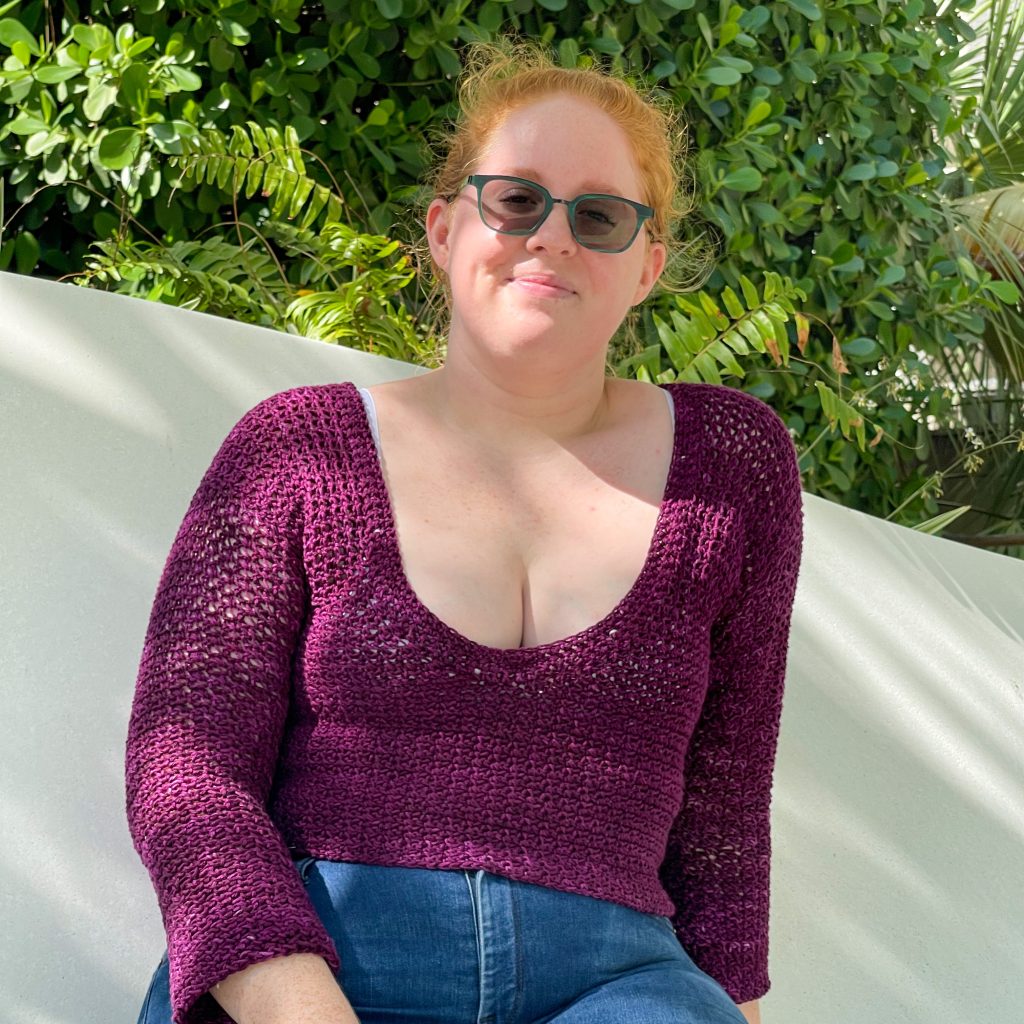
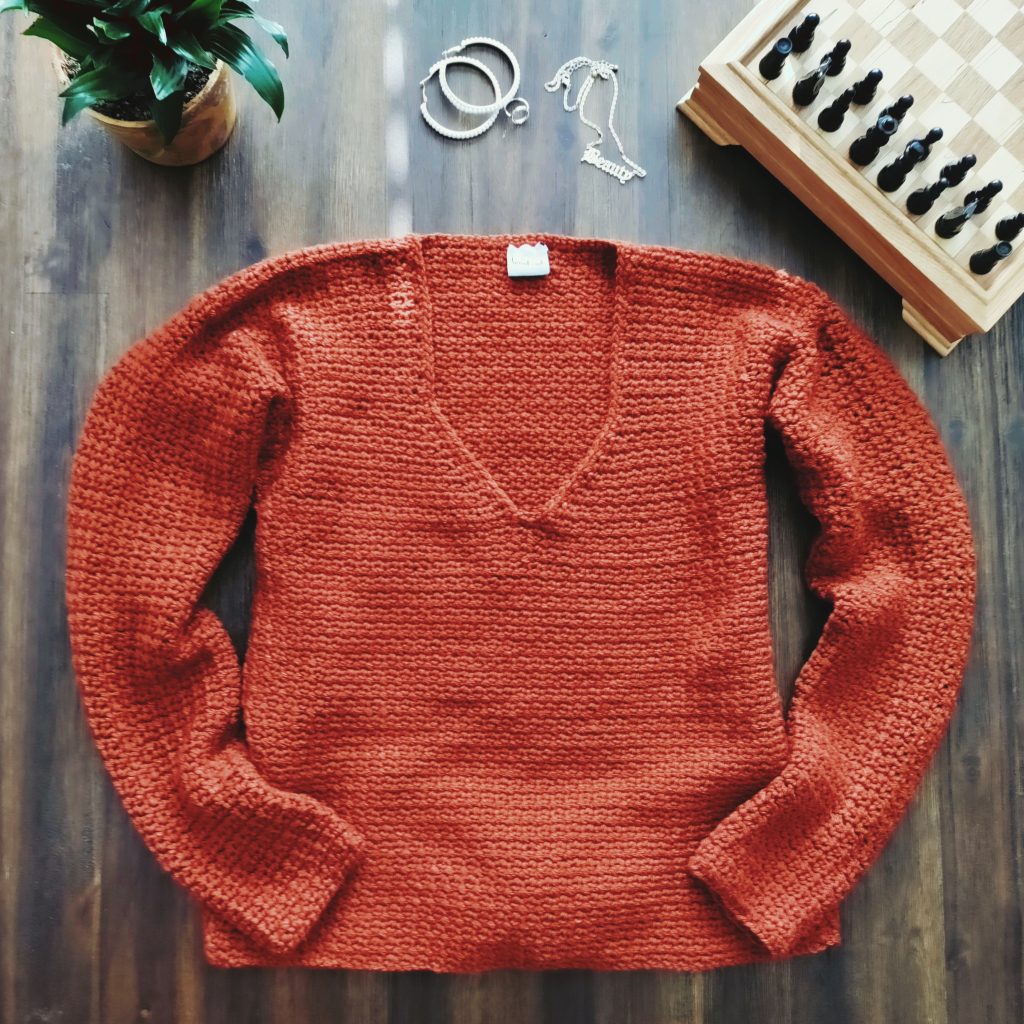
This post includes everything you need to know about the Burning Embers Sweater, a size-inclusive crochet sweater pattern featuring a statement bow closure over a modern, peek-a-boo cutout on the lower back.

The Burning Embers sweater is from my book Modern Crochet Sweaters: 20 Chic Designs for Everyday Wear. This book includes 20 size-inclusive sweater patterns using a variety of techniques and construction methods to ensure there is something of value for every skill level. Each pattern is written in 9 sizes from XS to 5XL and each size has been thoroughly tested! We had over 500+ crochet pattern testers for this book to make sure that each size fits its intended wearer in a way that makes them feel beautiful. You can buy this book with confidence, knowing that each pattern was written for you and your unique body measurements.
Before we begin, here are some quick links for you:
- Find the PDF version on Ravelry here, on Etsy here, and on my website here.
- Add your finished project and view other completed projects on Ravelry here.
- Use the pattern hashtag #BurningEmbersSweater on Instagram to show off your makes! Be sure to check out the book hashtag, #ModernCrochetSweaters, too!
- Shop the suggested yarn, Red Heart Soft, here! (Be sure to scroll down to see other great yarn substitutes!)
- Shop my book on Amazon (US) here.
- Shop my book on Amazon (CA) here.
- Shop my book on other platforms outside of North America here.
- Read about my experience getting a book deal here!
- For any questions about this pattern, please email knitsnknotswpg@gmail.com and I’ll get back to you asap!
Order my book – Modern Crochet Sweaters: 20 Chic Designs for Everyday Wear – here!
If you want to be notified of all new pattern releases (and get exclusive discounts on all new paid patterns), sign up below!
This post contains affiliate links. This means, should you make a purchase, I will receive a small portion of the sale at no extra cost to you. All opinions are my own. View my Privacy + Disclosures Policy here.
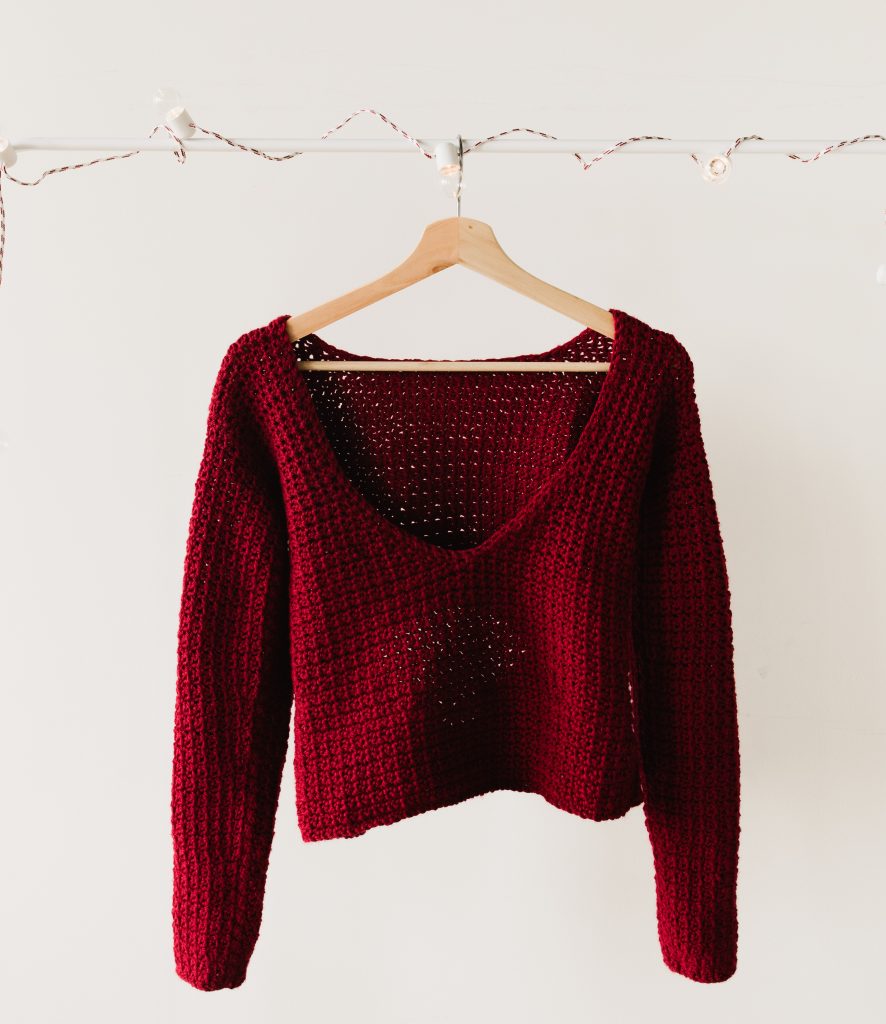

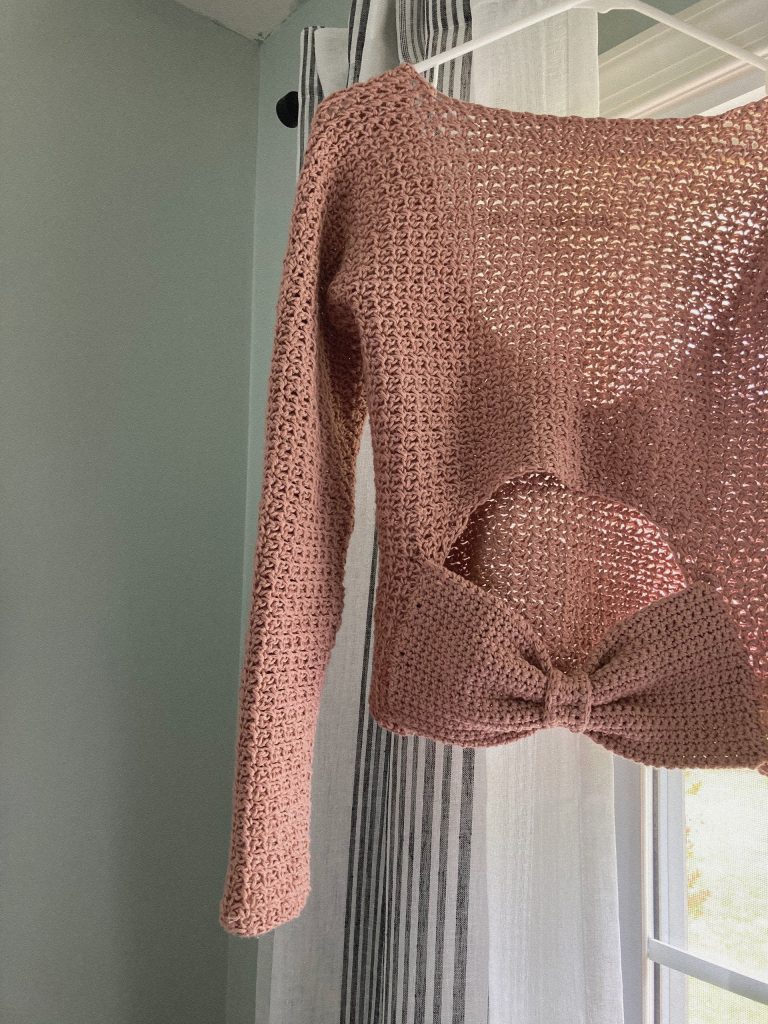
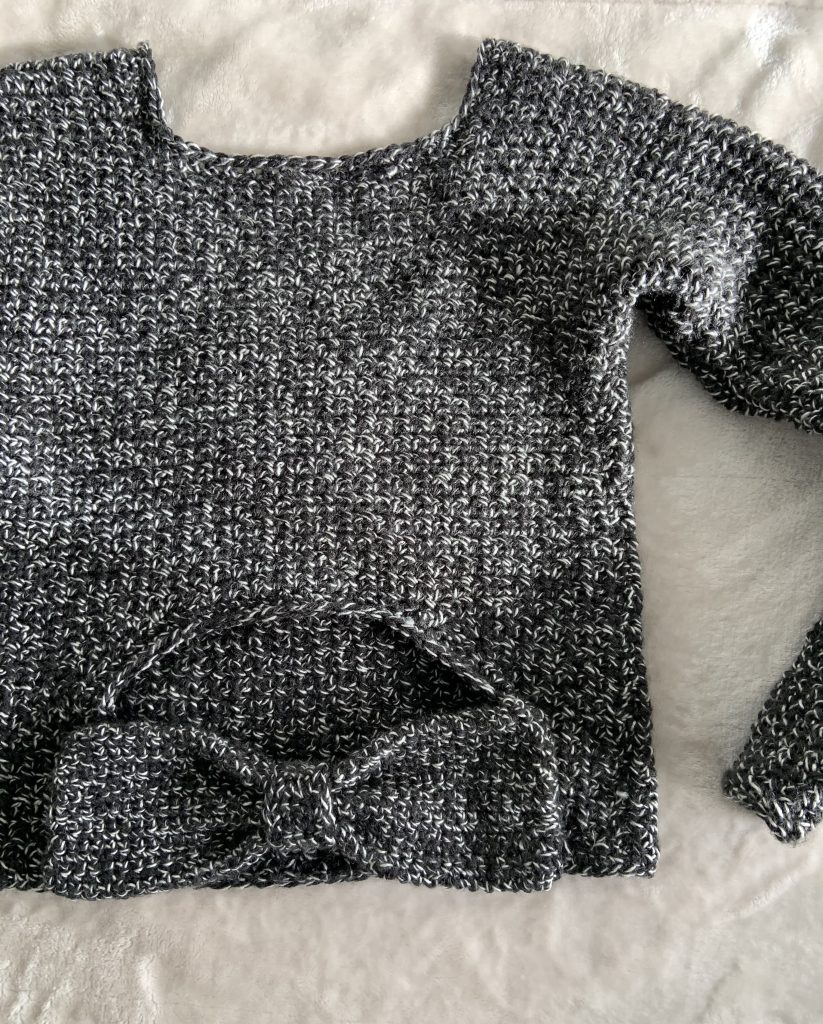
About Burning Embers
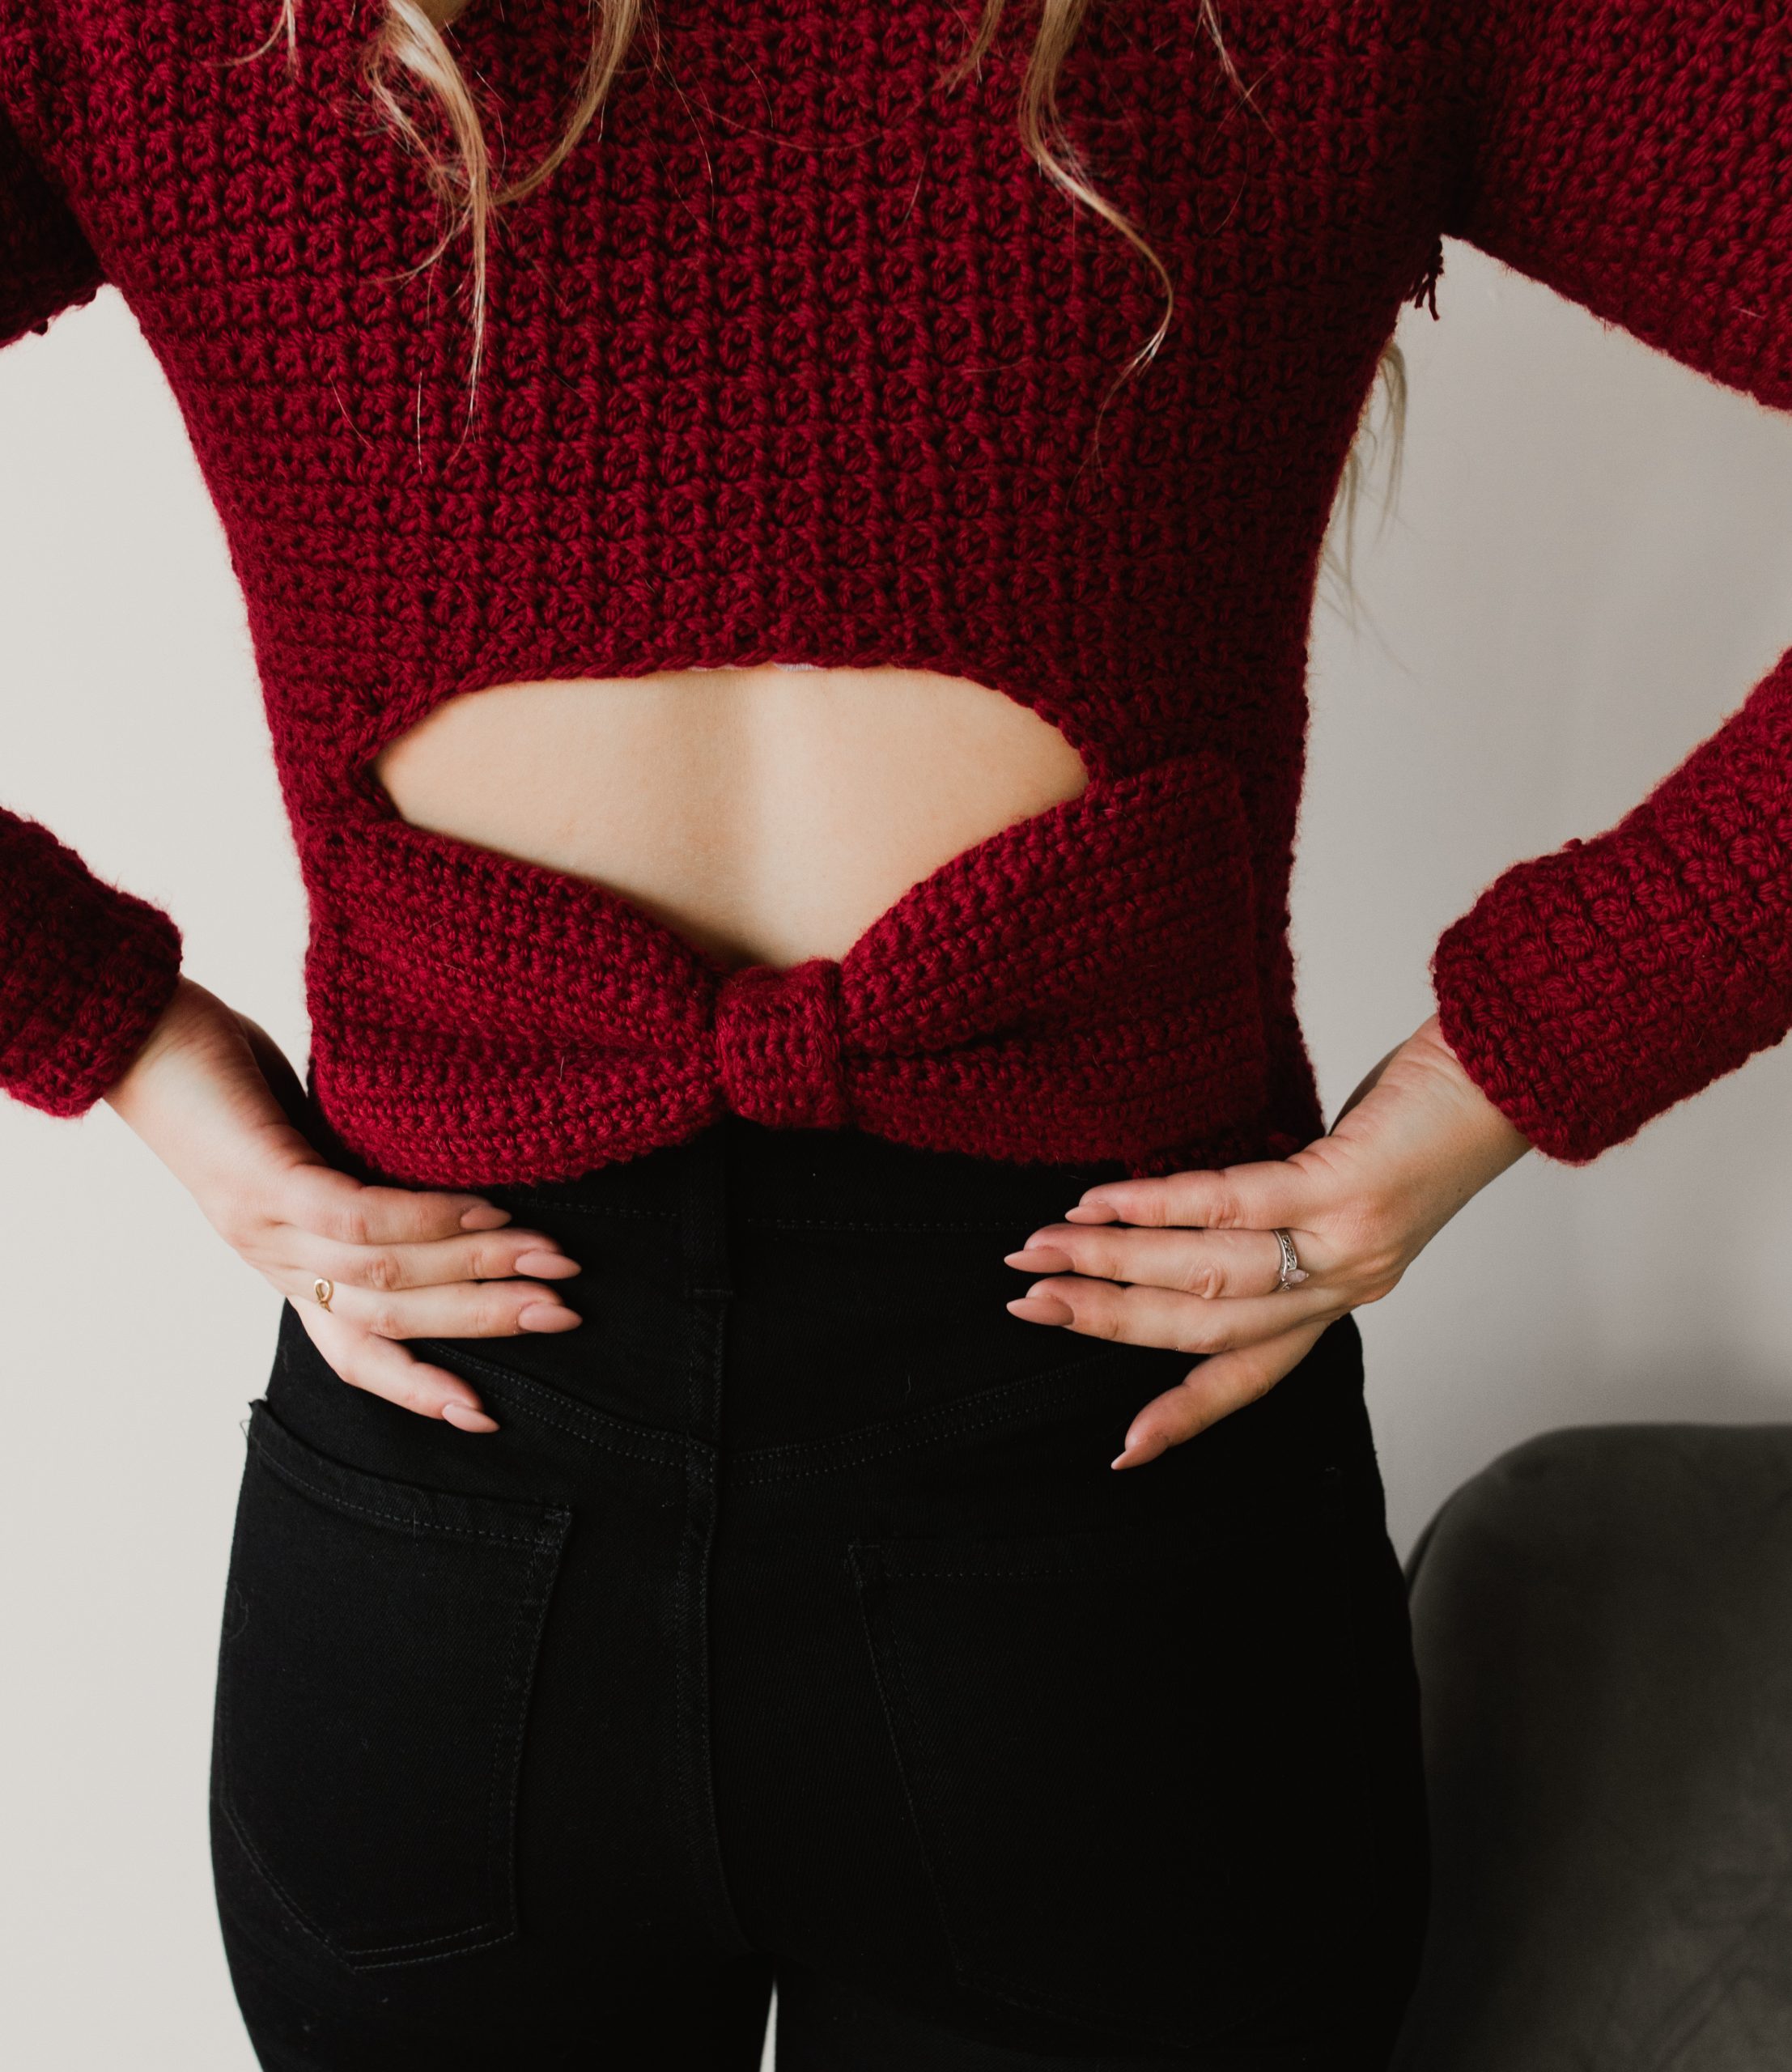
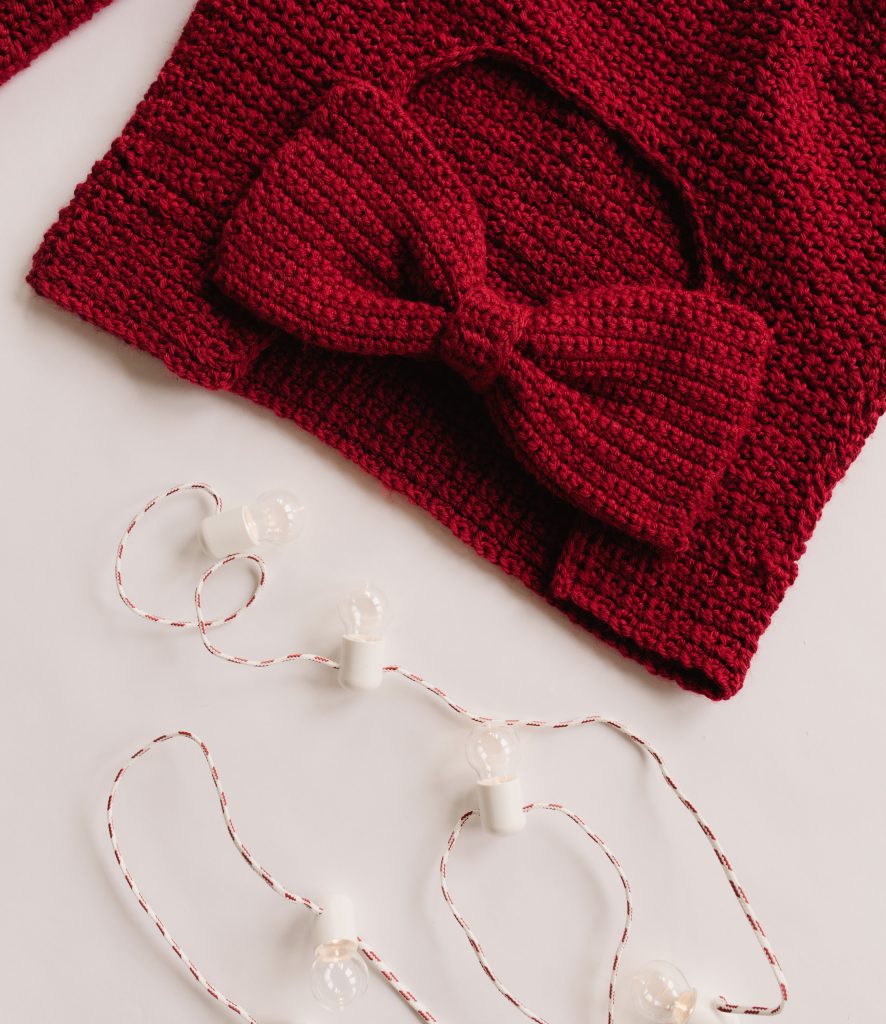
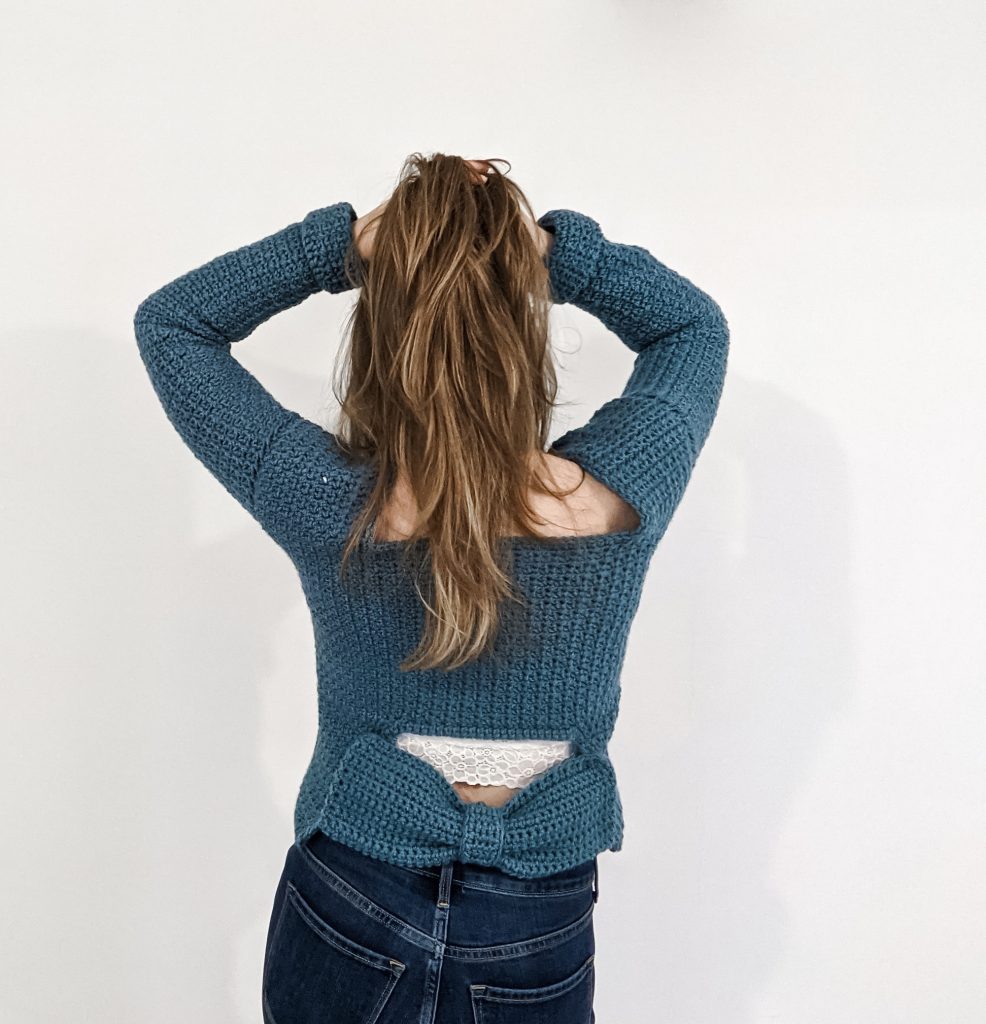
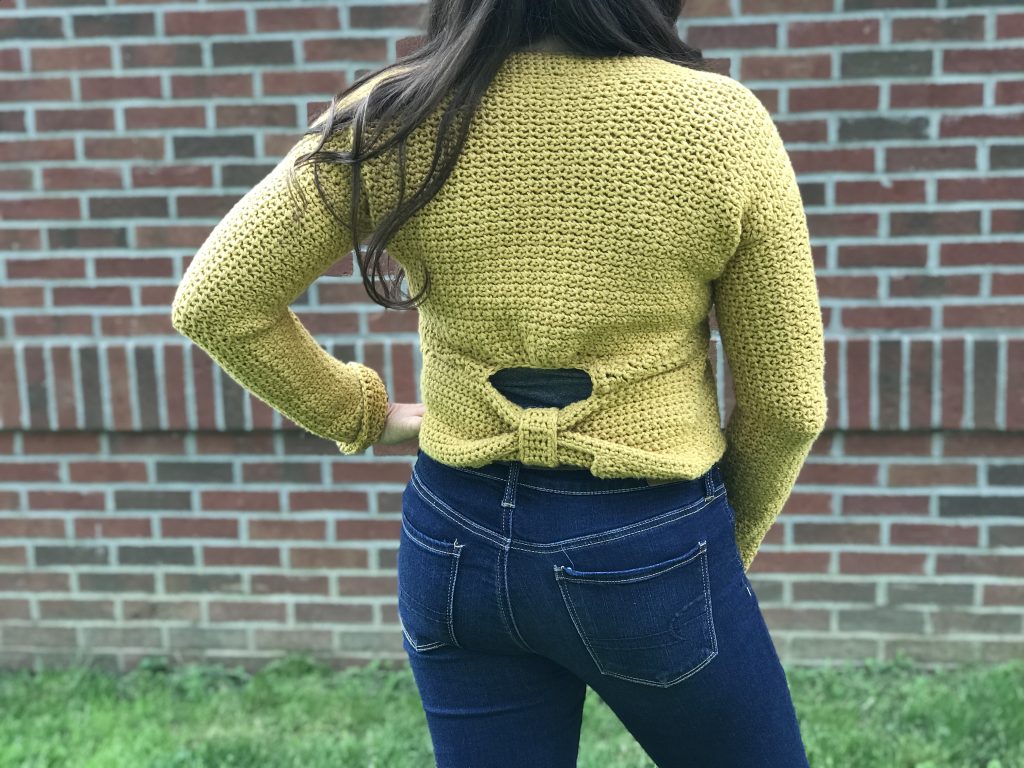
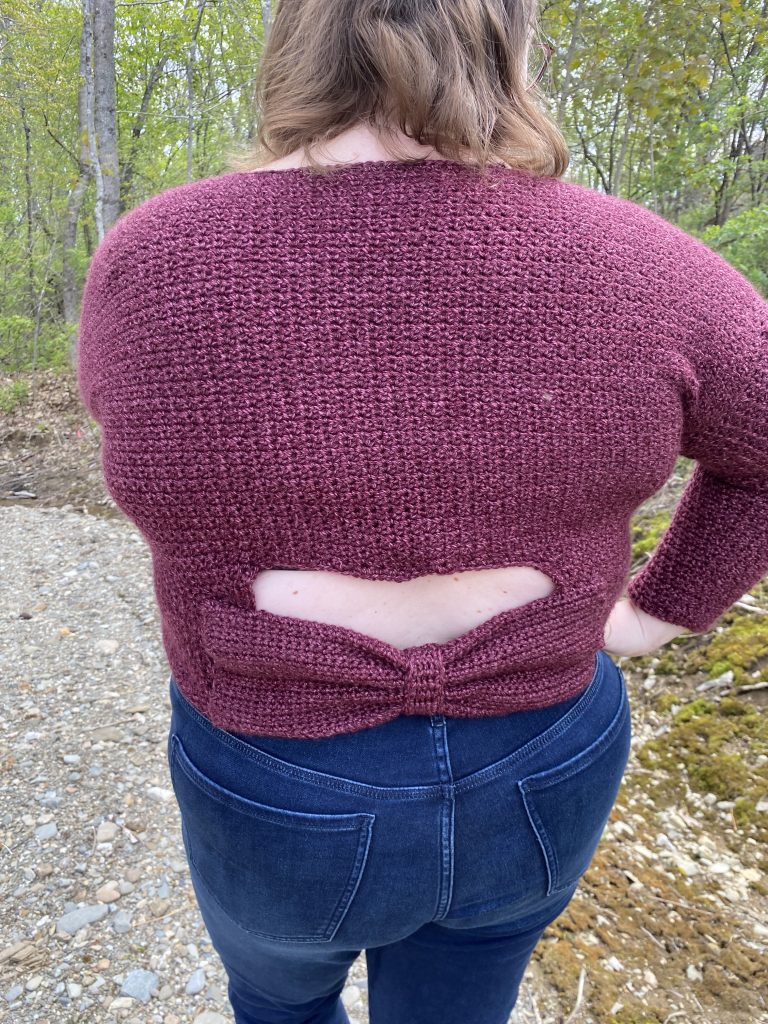
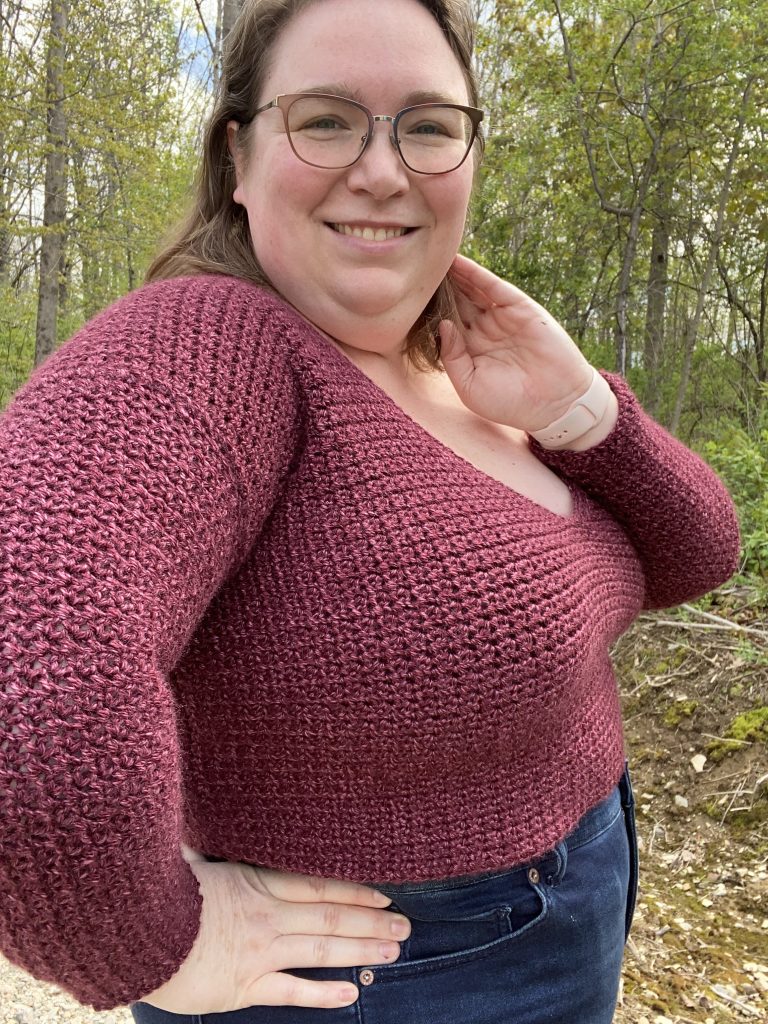
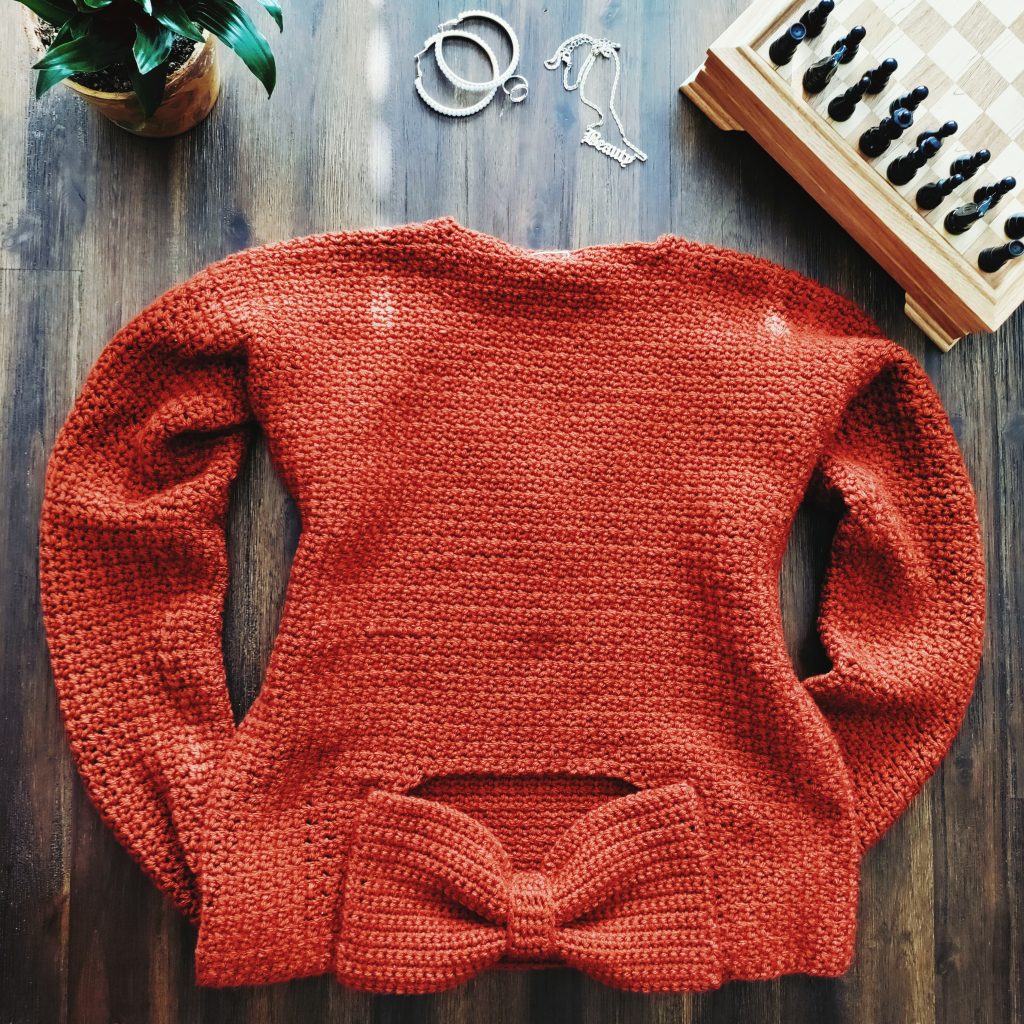
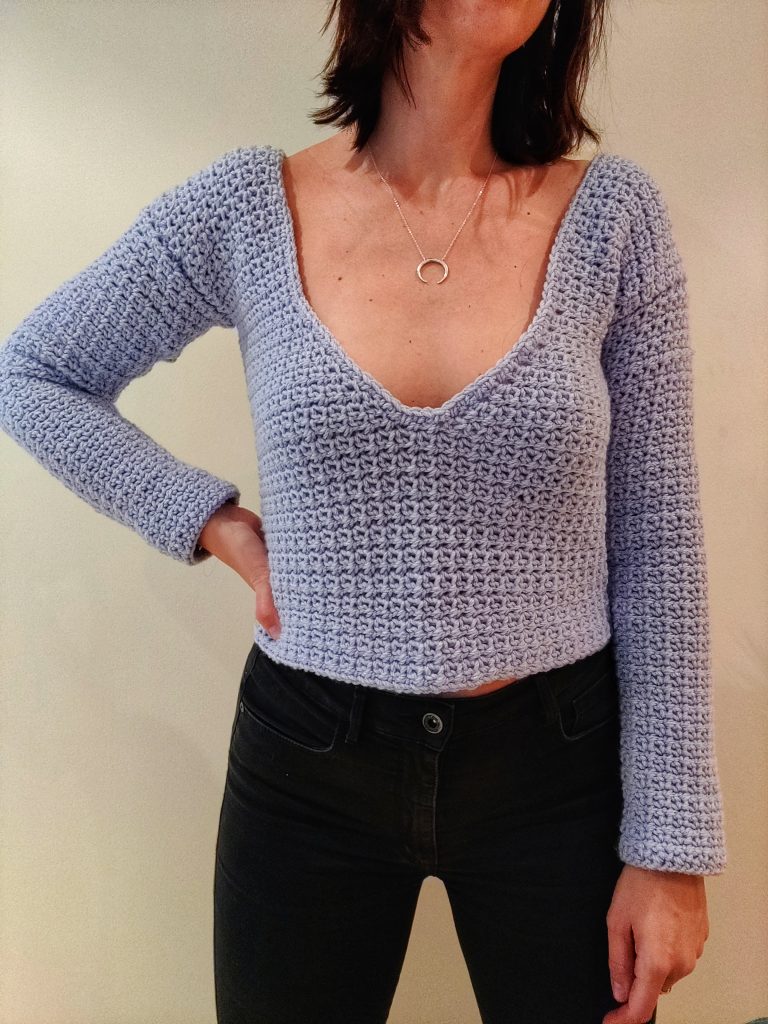
A playful twist on a holiday sweater, Burning Embers features a statement bow closure over a modern, peek-a-boo cutout on the lower back. The festive, oversized bow is not only a striking detail, but serves an important function: a way to incorporate simple waist shaping to hug your natural waistline. This cropped sweater is designed to be close fitting, especially at the waist, so that the bow will stay taut against your back.
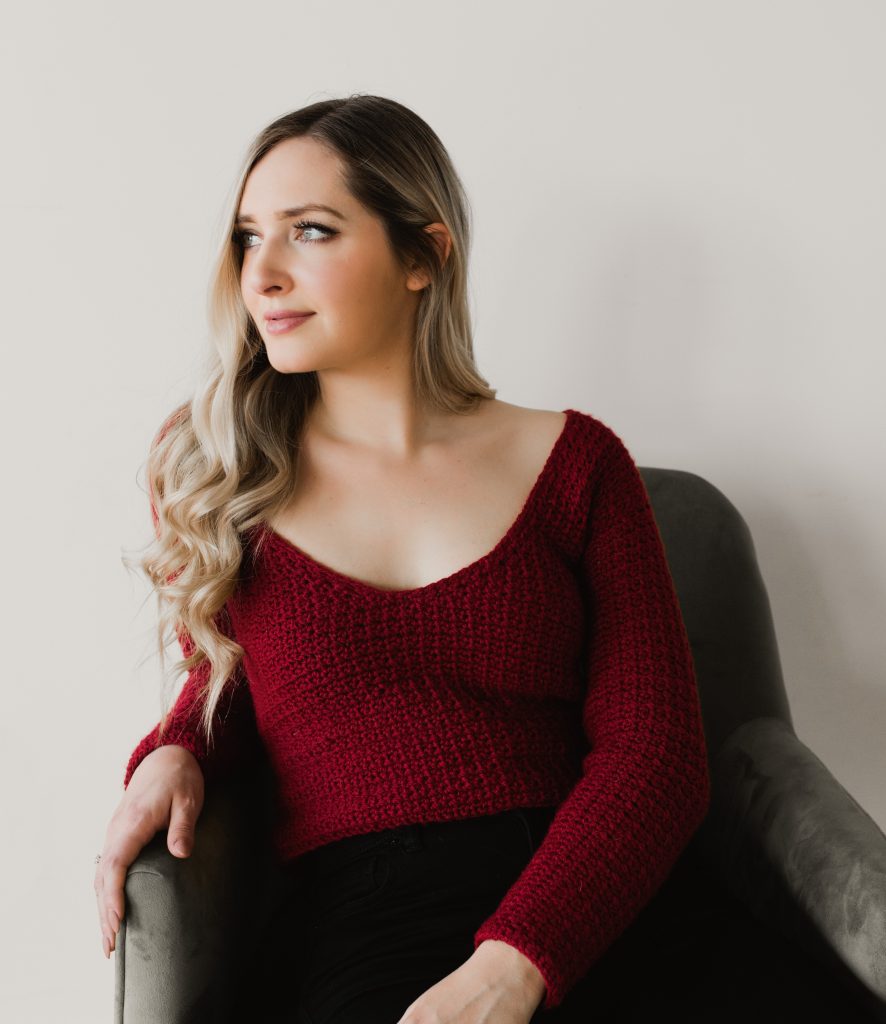
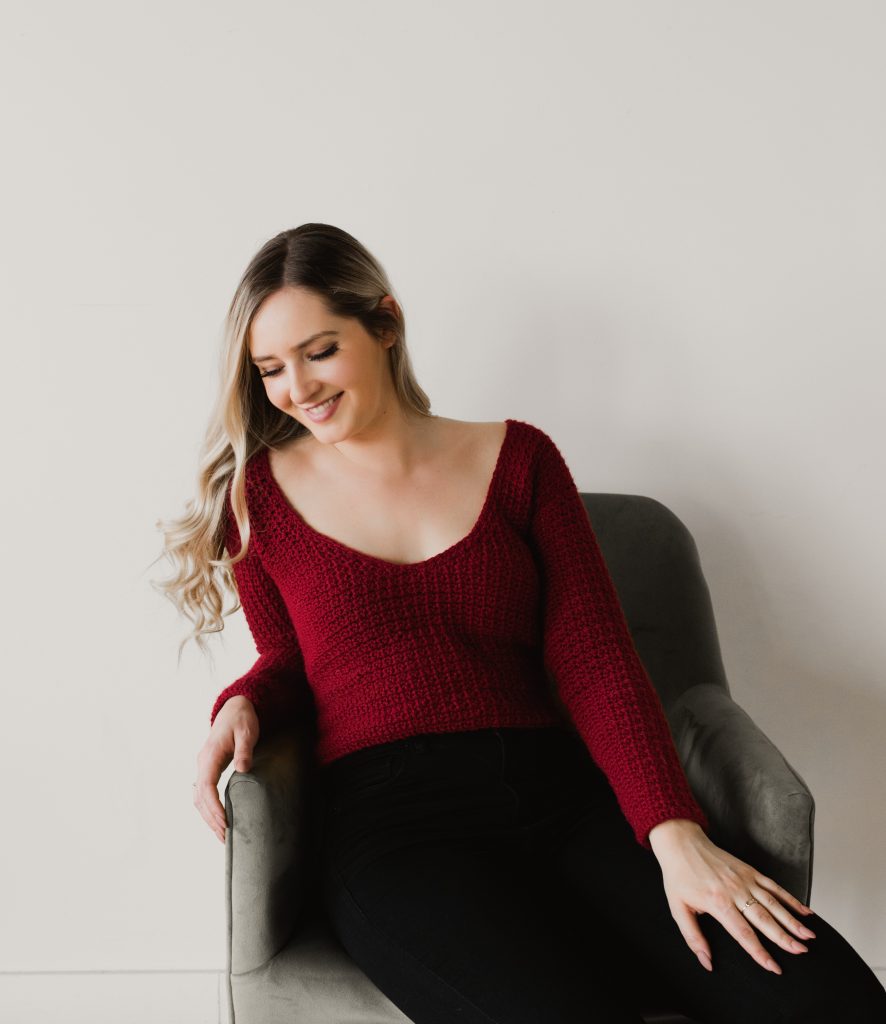
This pattern is part of the chapter Dressed to Impress—In Your Holiday Best; and while the other patterns in this chapter infer a celebratory theme in more ambiguous, subtle ways, this design undeniably captures the essence of the holiday season. This sweater was designed for parties, date night and anything in between. Once the holidays pass, camouflage it seamlessly into your everyday wardrobe by making one in your favorite color and wear it year-round.
Getting Started: Knowing Your Measurements
This book uses the Craft Yarn Council (CYC) to determine sizing. The CYC is the industry standard when it comes to knit and crochet sizing. While you will be able to produce a beautiful sweater by following the written patterns, I also like to include customization tips throughout each pattern so that you can adjust based on your unique body measurements; for example, shortening or lengthening a sleeve, or adjusting for a larger upper arm than written for your size. This way, you can modify the pattern with confidence, if needed. When making garments for myself, I usually need to shorten tops or sweaters because I have a short torso. My hips also fall under a different size than my bust. Not everyone fits perfectly into these sizing standards; they are simply averages, not set-in-stone numbers.
Understanding how your body deviates from the CYC standard measurements gives you the ability to tailor a sweater to perfectly fit you, rather than feel disappointed that your body doesn’t fit into the sizing standards. I recommend that you measure the largest part of your bust and then refer to the CYC website (click here) to find out which size you would fall under. Then, look at the other measurements that are included for your size, and see which of these measurements deviate from your actual body measurements. Knowledge is power, and once you understand how your body deviates from the CYC standards, you will be able to anticipate this deviation and assume it translates through most patterns. For example, if your upper arm circumference is slightly larger than the CYC sizing chart reads, then you can expect you may have to ignore a few decrease rows when working the sleeves of your next sweater, or even follow the sleeve instructions for the next size up, if possible.
Getting Started: Burning Embers
Yarn: Worsted—Red Heart Soft in Wine
- 100% acrylic
- 256 yds [234 m] per 5-oz [141-g] skein
- Find this yarn on yarnspirations.com, LoveCrafts, or visit yarnsub.com to find comparable substitutes.
Substitute Red Heart Soft for any worsted weight, category #4 yarn that matches gauge. Any fiber you choose should produce a beautiful sweater.
Yardage*: 4 (4, 4, 5, 5) (5, 6, 6, 6) skeins of Red Heart Soft, or
- 850 (925, 1000, 1075, 1150) (1250, 1325, 1400, 1500) yds
- 778 (846, 915, 983, 1052) (1143, 1212, 1281, 1372) m
Note on Yardage: *Note that different colorways of Red Heart Soft have varying yardage. Make sure to check the yardage listed on the label of your desired colorway to ensure you have enough yarn before beginning.
Yardage listed here is based on the length provided for your size in the chart on page 5. If you would like a longer sweater than written for your size, additional yardage will be required.
Hook: Size U.S. H/8 (5 mm) or size needed to obtain gauge
Notions: Tapestry needle, several locking stitch markers
Gauge
Gauge: 4 x 4″ [10 x 10 cm] = 16 sts and 16 rows in stitch pattern, where each sc counts as a stitch and each ch counts as a stitch (see swatch instructions below)
I wanted to include the gauge swatch instructions below so that you could practice swatching with your chosen yarn to ensure you have a yarn that will work with this pattern ahead of time. This way, you can see if you have something in your stash that will work before ordering new yarn.
For Swatch:
Ch 20.
Row 1: Sc in 2nd ch from hook, *ch 1, sk next ch, sc in next ch; rep from * to end of row, turn. [10 sc; 9 ch-sp]
Row 2: Ch 1, sc in first sc, *ch 1, sk next ch-sp, sc in next sc; rep from * to end of row, turn.
Rep Row 2 until you have at least 18 rows worked.
Block your swatch. Measure the inner 4″ [10 cm] of your blocked swatch to get the most accurate measurement. Within this 4” [10 cm], you should have 8 sc and 8 ch, or 16 sts total.
Customization Ideas + Tips When Crocheting This Sweater
Tips
- Sizing: This sweater is written in nine sizes as follows: XS (S, M, L, XL) (2X, 3X, 4X, 5X). Make sure to follow the numbers for your size only. All sizing info can be found in the book or on Page 5 of the PDF pattern.
- If between sizes, size down.
- Stitch Counts: Stitch counts are listed after each row/rnd. If no stitch count is given, there has been no change since the previous row/rnd. If only one number is provided, it applies to all sizes.
- Reversible: There is no right side or wrong side; both sides are identical. You choose which side to wear as the “right side.”
- Seaming: When seaming your garment, make sure to keep all seams loose and do not pull tight in order to maintain some stretch, otherwise this seam will pucker during wear.
- Turning Chain: The turning chain does not count as a stitch.
- Stitch Pattern: This stitch pattern uses alternating single crochets and chains, where you will always sc into each sc, and ch 1 and skip over every ch-sp.
- Join + Turn the Sleeves: Remember the sleeves are worked in joined, turned rounds. Turn your work after completing each round to begin crocheting in the opposite direction.
- Construction: First, two separate back pieces are worked and then joined to create the back cut-out. The rest of the back panel is worked in back-and-forth rows until reaching your desired sweater length. Then, the work splits into two symmetrical sections to create the V-neck, and these two sections are joined at the base of the V-neck to work the rest of the front side of the sweater to the same length as the back panel. The body is folded at the shoulders, and seamed at the sides, leaving space for armholes. The sleeves are worked from the bottom-up in joined rounds and then seamed onto the body. The bow is worked last and is sewn across the cut-out on the lower back.
Customization Tips:
- To adjust the length of this sweater: For a shorter (or longer) sweater, work fewer (or additional) Row 24 repeats before splitting for the front.
- For a more modest V-neck: In the Front section, under the heading V-Neck Side 1, simply work your desired number of rows rather than 26 as indicated in the pattern, then follow the pattern as written. This will create the same V-neck shaped neckline, however it will lay higher up on your body depending on how many rows you eliminated from the original 26 rows. Make same adjustment to V-Neck Side 2. After joining your V-neck, work the front length until it matches the length of the back.
- For a more modest V-neck after completing the entire front: If you feel that your V-neck is too deep after completing your front panel, you can try working additional rows to your front panel. This will add some length to your sweater but will help to raise your neckline without having to rip back and re-do it.
- You can also work additional finishing rounds on the neckline once your sweater is assembled to help provide more coverage if desired.
- Follow any sleeve size: If you think the measurements of a different size would better suit your arm measurements, you can follow the instructions for any sleeve size; you don’t necessarily have to stick with the same size you have been working up to this point if you think another size will give you a better fit. See the Upper Arm circumference column in the sizing chart for all sleeve sizes.
- For tighter (or looser) sleeves: Simply omit (or add) increase rounds as you see fit. Work these rounds as regular rounds in your usual stitch pattern.
- To adjust the sleeve length: For longer (or shorter) sleeves than measurements provided in the sizing chart on page 5, simply add or omit non-increase rounds as you see fit. In other words, if you eliminate any rounds, eliminate the regular straight rounds, and not the increase rounds.
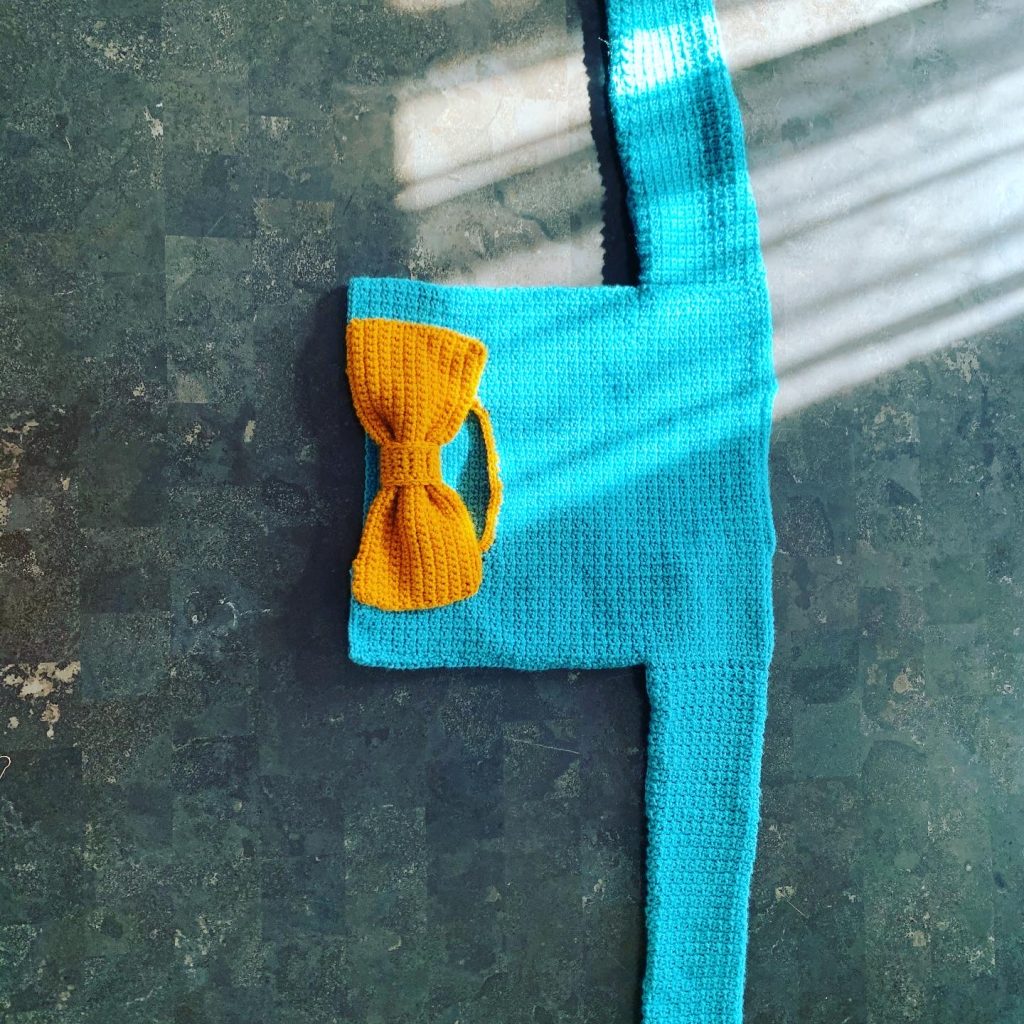
Making the Bow
The bow is made of two separate rectangles: one large rectangle for the main bow piece, and one small rectangle to pinch the center of the bow.
![]()
Large Rectangle
Customization Tip: For wider bow than shown in the sample, add chs until reaching your desired width.
With new yarn, ch 38 (38, 38, 38, 42) (42, 46, 50, 50), leaving a 24” [61 cm] tail for seaming.
Row 2: Sc in 2nd ch and each ch across, turn. [37 (37, 37, 37, 41) (41, 45, 49, 49) sc]
Row 3: Ch 1, sc in each sc across, turn.
Rep Row 3 until work measures 10″ [25 cm].
Fasten off, leaving another 24” [61 cm] tail for seaming.
Fold work in half so that the first and last rows are aligned.
Using the two tail ends, seam the three edges of the bow closed with a tapestry needle so that your rectangle is completely closed. Weave in ends.
![]()
Small Rectangle
Ch 5.
Row 1: Sc in 2nd ch from hook and in each ch across, turn. [4 sc]
Row 2–13: Ch 1, sc in each sc across, turn.
Border: Ch 1, sc around all 4 edges of this rectangle while working a ch-1 in each corner.
Fasten off, leaving a 16” [41 cm] for seaming.
Use this small rectangle to wrap around the center of the larger rectangle you just created and gather it in the center to create the bow shape. (See Fig. 1 below) Stretch the smaller rectangle around the larger one until the two short ends meet. Use the tail to seam the short ends of the smaller rectangle together with a tapestry needle. (See Fig. 2 below) Secure the smaller rectangle to the larger one by working your tapestry needle through both rectangle layers a few times to fasten them together. Fasten off, weave in ends.
Attaching the Bow
Try on your sweater and place the bow at the bottom opening on the back of your sweater. Use stitch markers or scrap yarn to help mark your desired placement, centering it as best you can.
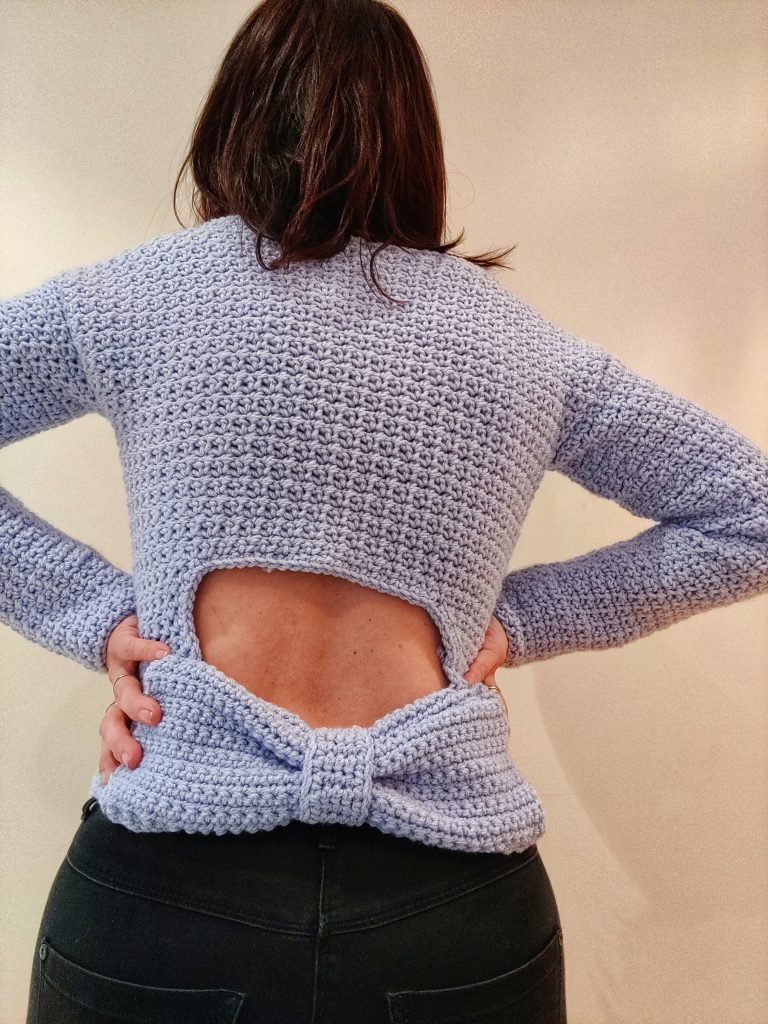
With new yarn and a tapestry needle, seam the bow in place by stitching the perimeter of the bow to your sweater. There is approximately 6 to 8 inches [15–20 cm] of open space in the back of your sweater due to the back cutout. The bow will close this gap when secured across this opening. For some simple waist shaping, you can strategically pull in your sweater to hug your waist by pulling the two pieces from your back cutout (that were previously called Side 1 and Side 2) closer together, making the gap smaller, and seam your bow in place, securing your desired fit.
Weave in any remaining ends, and block sweater to dimensions in chart in the book or on page 5 of the PDF pattern.
![]()
Yarn Substitutions
The yarn used in my sample (Red Heart Soft) is an inexpensive, 100% acrylic yarn, however you are free to use any fiber content that you like for your own cardigan! Listed below you will see a variety of yarns that will work just fine in place of Red Heart Soft, so long as you match gauge!
Since Red Heart Soft may not be easily accessible in every country, visit www.yarnsub.com and type “Red Heart Soft” into the search box to find a suitable alternative. You will find hundreds of yarns with similar properties and you are bound to find a brand that is accessible to you. The YarnSub website is an incredible resource that I use regularly to find appropriate yarn substitutes.
The following yarns can be used in this pattern and will produce a lovely finished sweater:
- Basic Stitch Anti-Pilling
- Basic Stitch Premium
- Chainette
- Heartland
- Jeans
- Touch of Alpaca
- Pound of Love
- Vanna’s Choice
- Wool-Ease
- Brava Worsted
- Chroma Worsted
- City Tweed
- Comfy Color Mist (cotton)
- Comfy Worsted (cotton)
- Muse Hand Painted
- Preciosa Tonal
- Shine Worsted
- Snuggle Puff
- Swish Worsted
- Wonderfluff (labelled as bulky, feels like worsted)
- Wonderfluff Ombré
- Woodland Tweed
- Wool of the Andes Superwash
- Wool of the Andes Tweed
- Wool of the Andes Worsted
LoveCrafts Yarns (UK based; ships worldwide)
- Berroco Vintage (55 colourways)
- Caron One Pound
- Caron Simply Soft
- Cascade 220 (111 colourways)
- Cascade 220 Superwash Aran (25 colourways)
- Cascade Pacific Worsted
- Malabrigo Worsted (59 colourways)
- Plymouth Yarn Encore Worsted (62 colourways)
- Red Heart Comfort
- Red Heart Soft (25 colourways)
- Red Heart With Love
- Scheepjes Colour Crafter (38 colourways)
- plus so many more here!
Other Sources:
- Yarn Bee Warm & Cozy
- Yarn Bee Breathe Deep
- Yarn Bee Soft & Sleek
- Craft Smart Value
- Loops & Threads Impeccable
- Drops Paris
- Hobbii Divina
- Hobbii Amigo XL
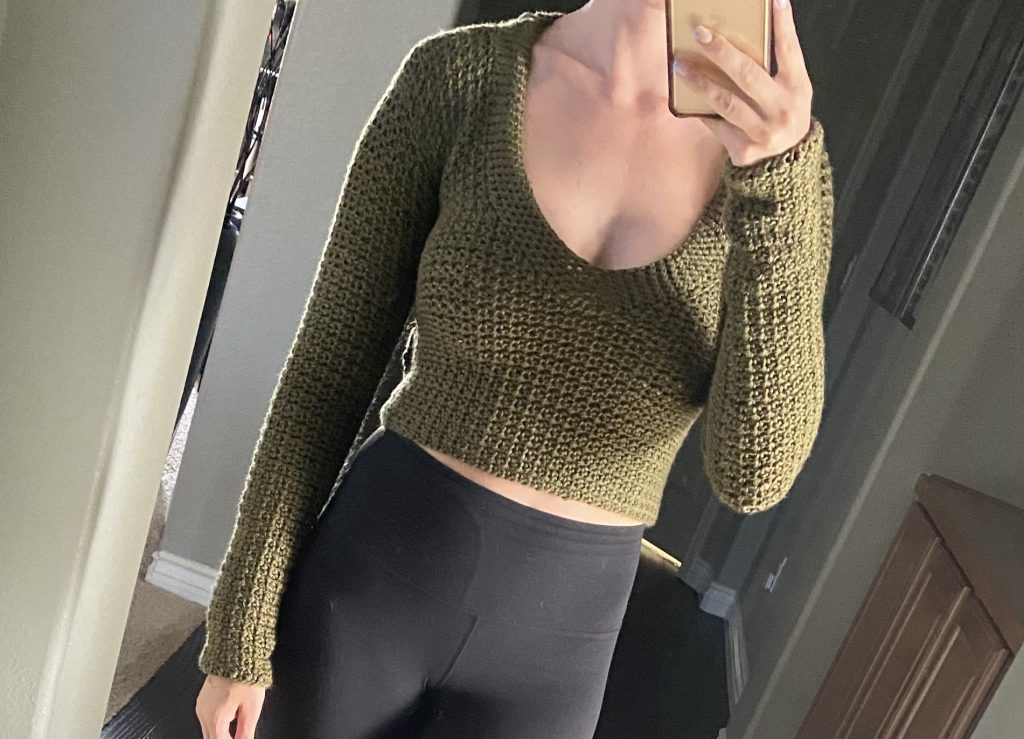
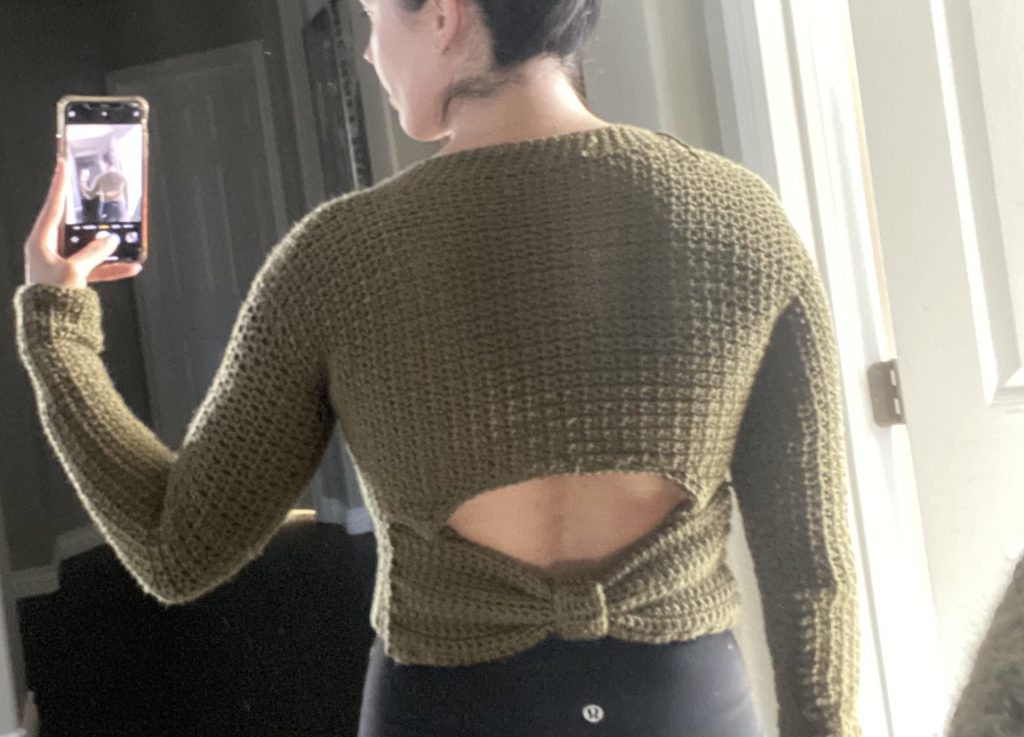
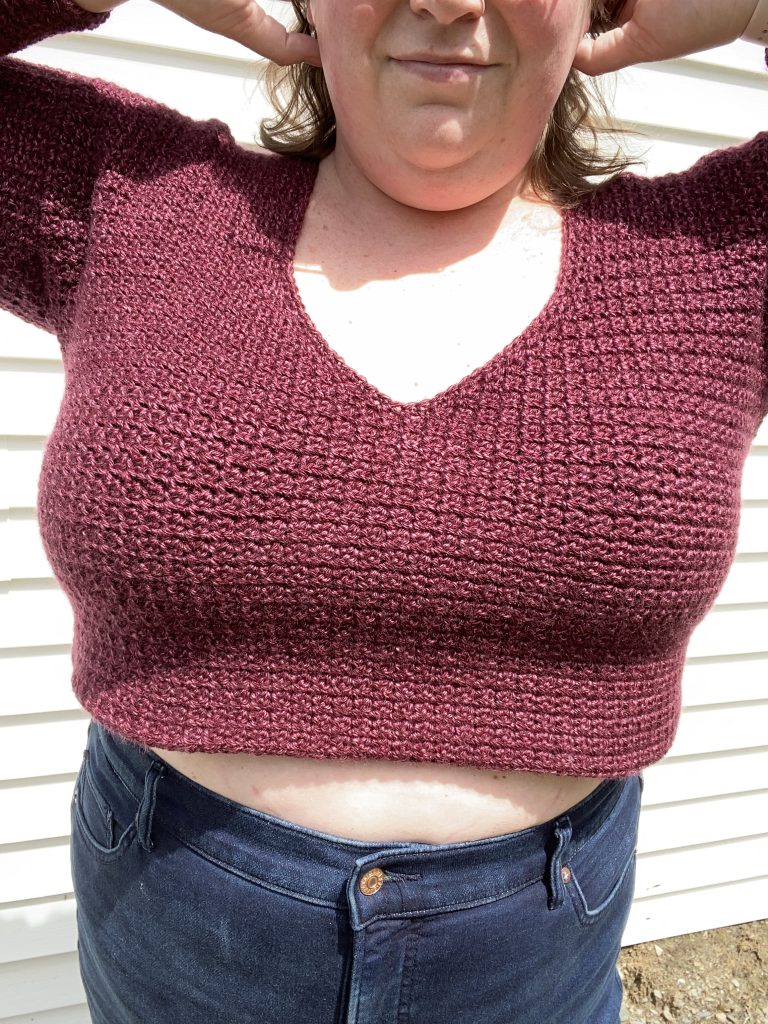
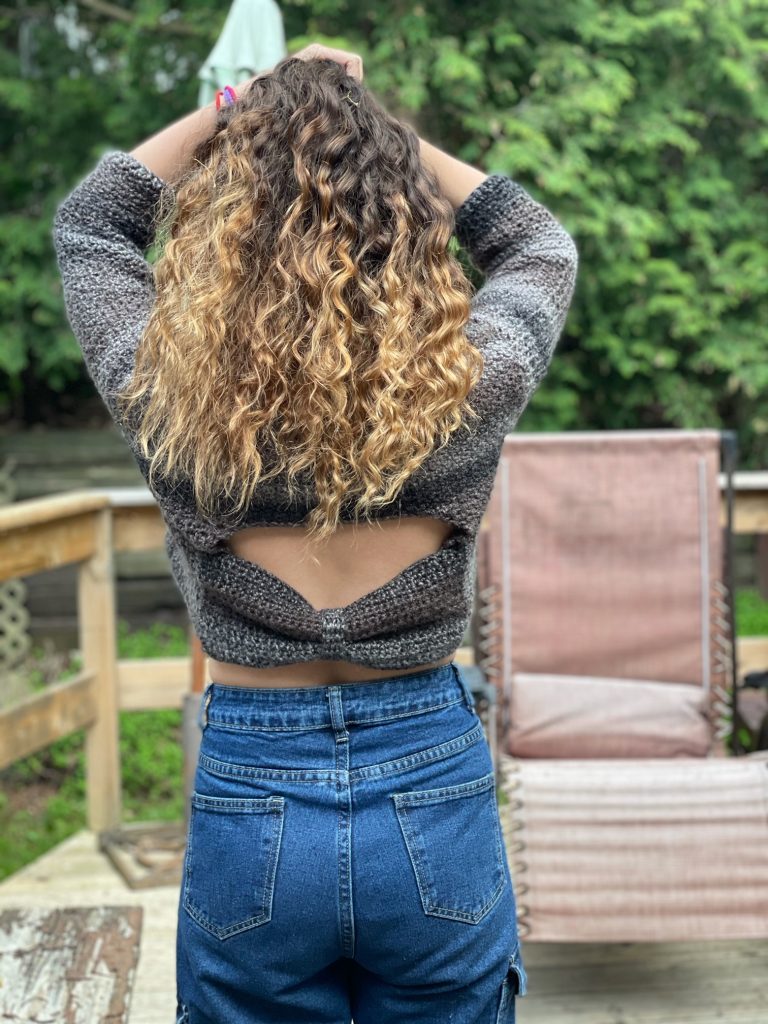
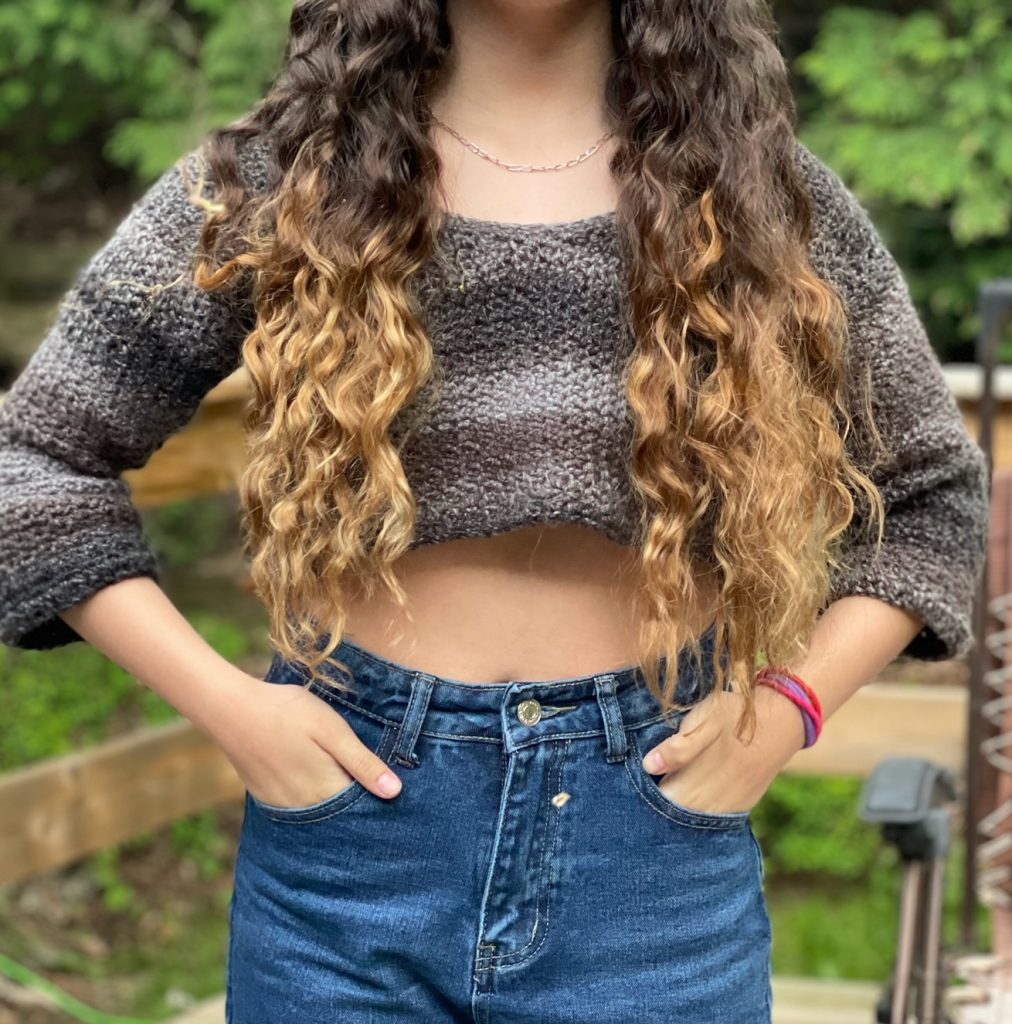
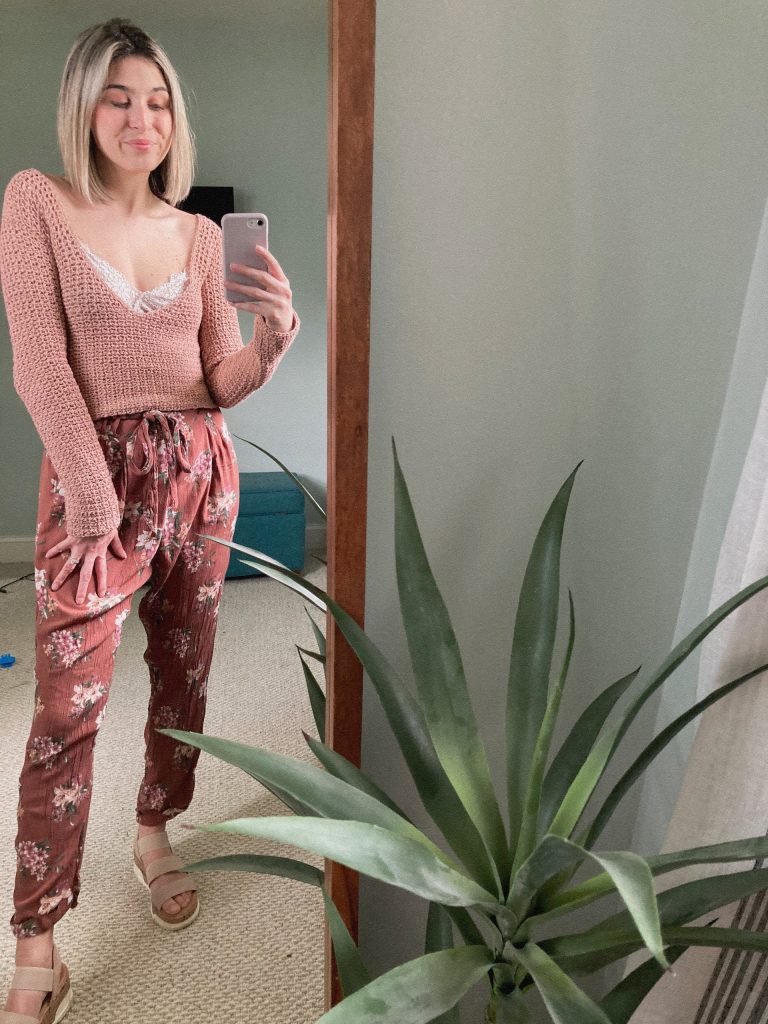
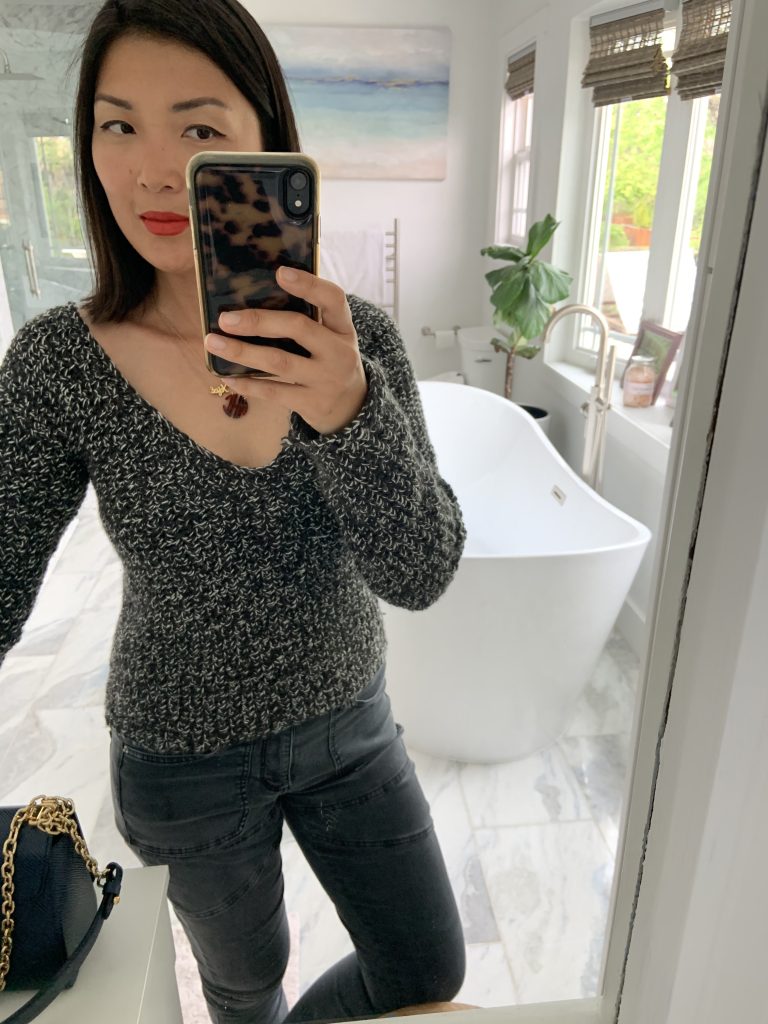
Pattern Tester Photos
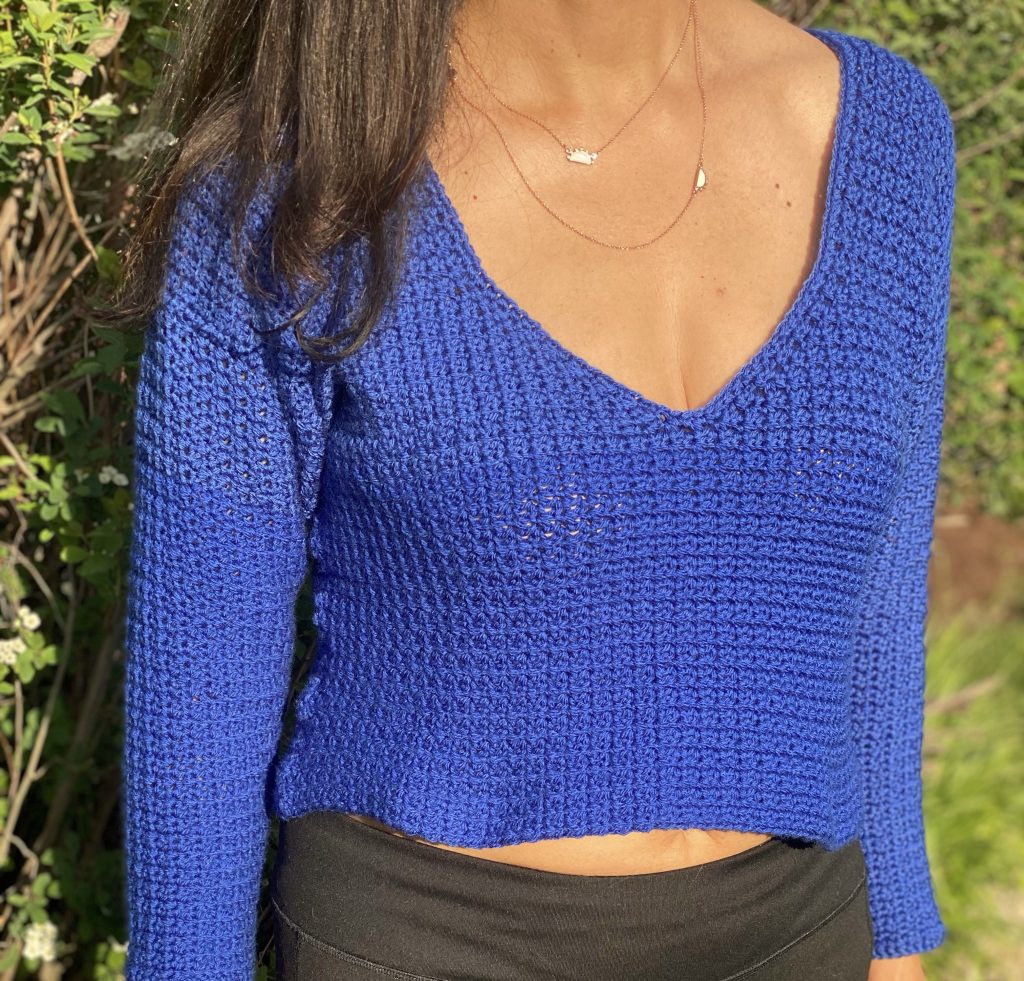
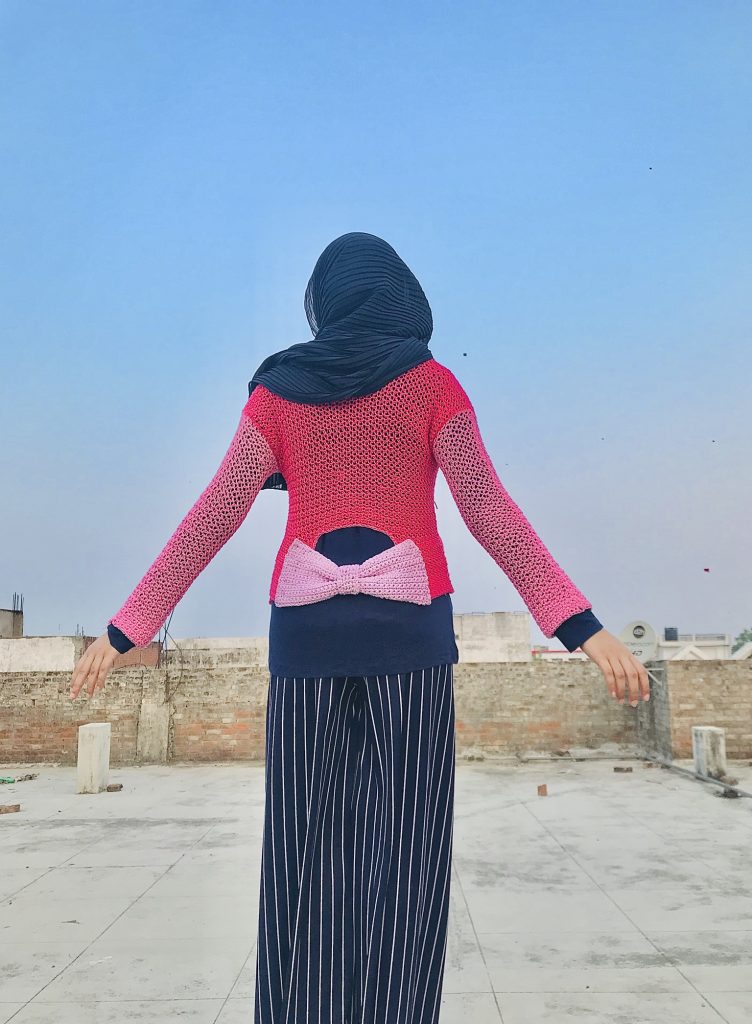
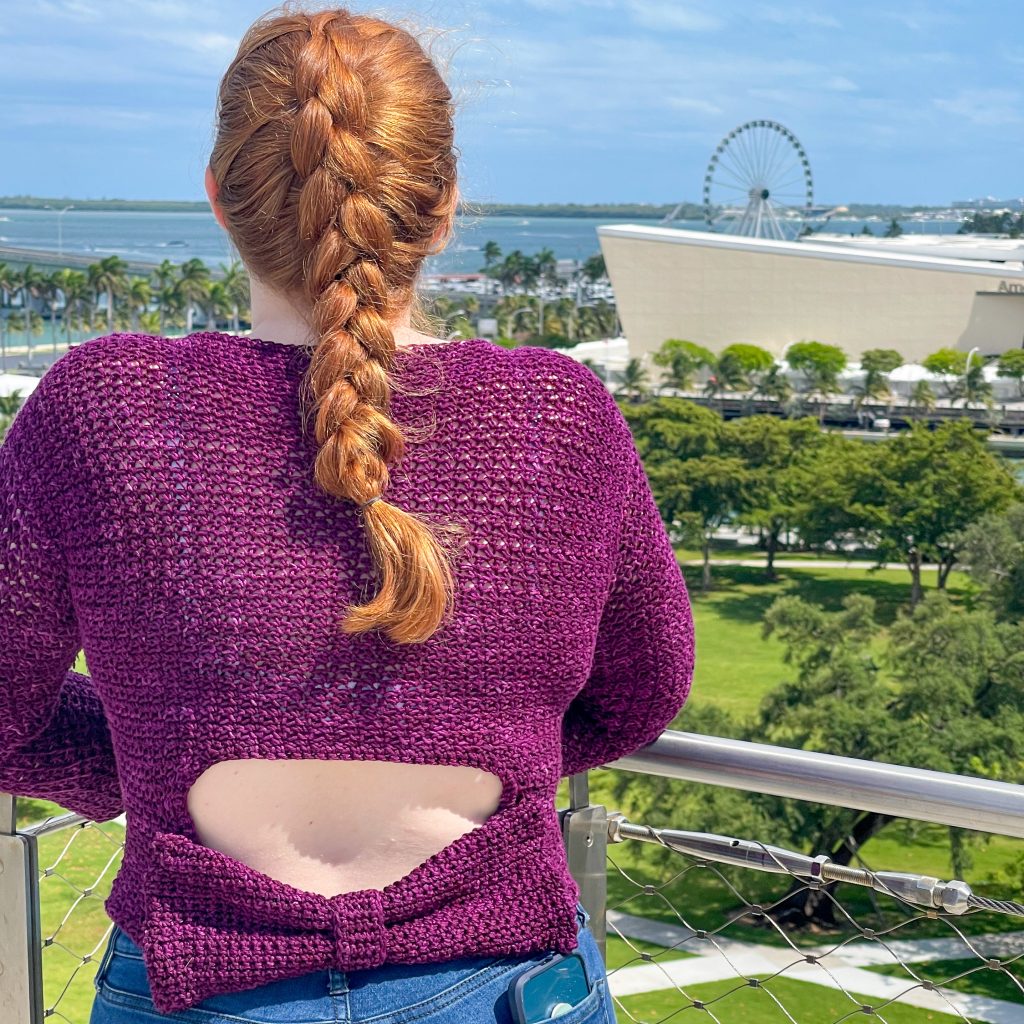
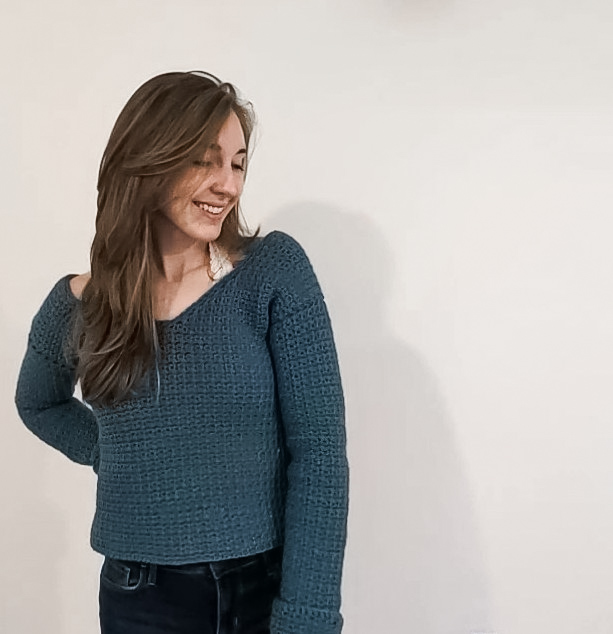
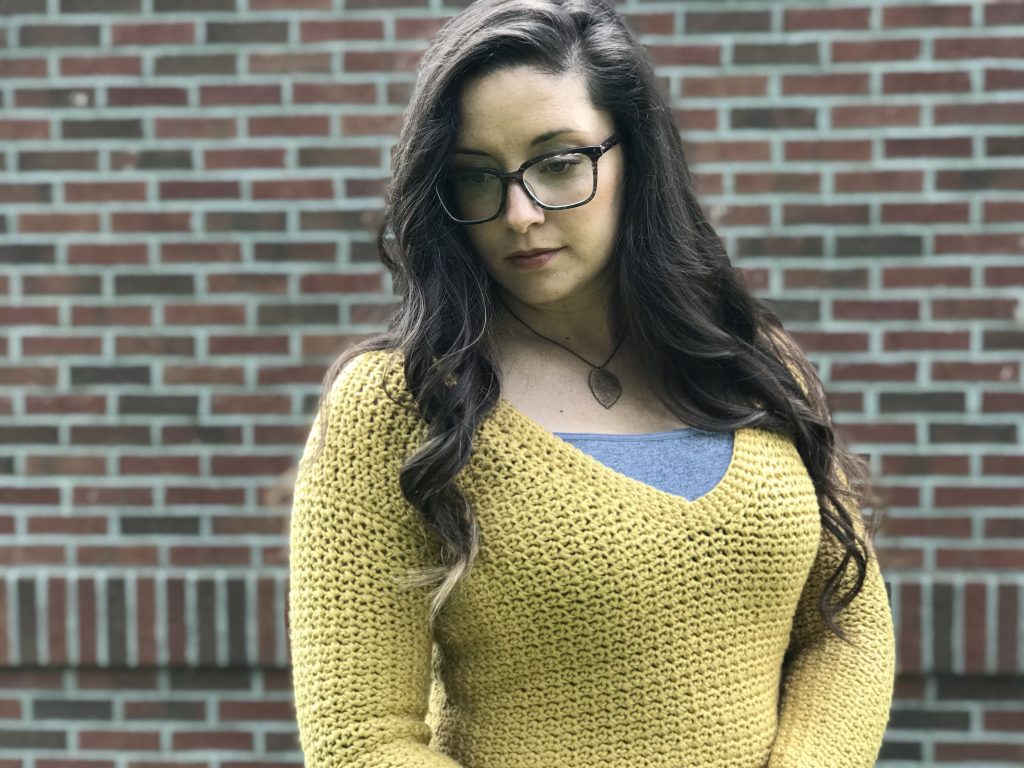
There were 500+ pattern testers for this book because I wanted to ensure all sizes are satisfied with the pattern and fit! Below you can see photos from the testing process to see how the sweater looks on different bodies with different modifications made using a variety of yarns.


![]()
#ModernCrochetSweaters
#BurningEmbersSweater
Thanks so much for reading!
You can find my full print book, Modern Crochet Sweaters: 20 Chic Designs For Everyday Wear on the shelves of all major retailers or see purchasing options here!
To shop this Burning Embers crochet pattern, find it on Ravelry, Etsy, or my website!
Shop Red Heart Soft yarn here.
x
Janine
For exclusive discounts on all new patterns, join the Knits ‘N Knots newsletter list here!
You May Also Like