
Hey guys!
Today is a double pattern release day! This post is all about the Autumn Stripes raglan sweater, and make sure to check out the Fuzzy Raglan as well!
PS. You can use the code “DOUBLE” to save $4 when you put both of these patterns in your Ravelry cart! Today only <3
As usual, click here to go straight to the pattern or continue reading for more info + a pattern coupon code!
This post contains affiliate links. All opinions are my own. Any purchases made will help support Knits ‘N Knots blog content.
About
I’ve mentioned it before, but I’m working on a little collection of patterns that I’m calling “Double Crochet All Day”. Until this year, I thought that top-down sweaters and raglan sweaters were too advanced for me, and I stuck to beginner-type crochet projects. But once I tried them for myself, I realized that these new-to-me kinds of constructions were actually just as easy as what I was used to, and I learned that you can make all kinds of sweaters using just simple stitches. So here I am to show you that you can make some really cool things using just the double crochet stitch and you don’t have to limit yourself to seamed sweaters. This collection will showcase a little bit of everything – raglan sweaters, circular yoke sweaters, raglan cardigans, and use only the double crochet stitch (with the exception of the odd turtleneck made from single crochets!).
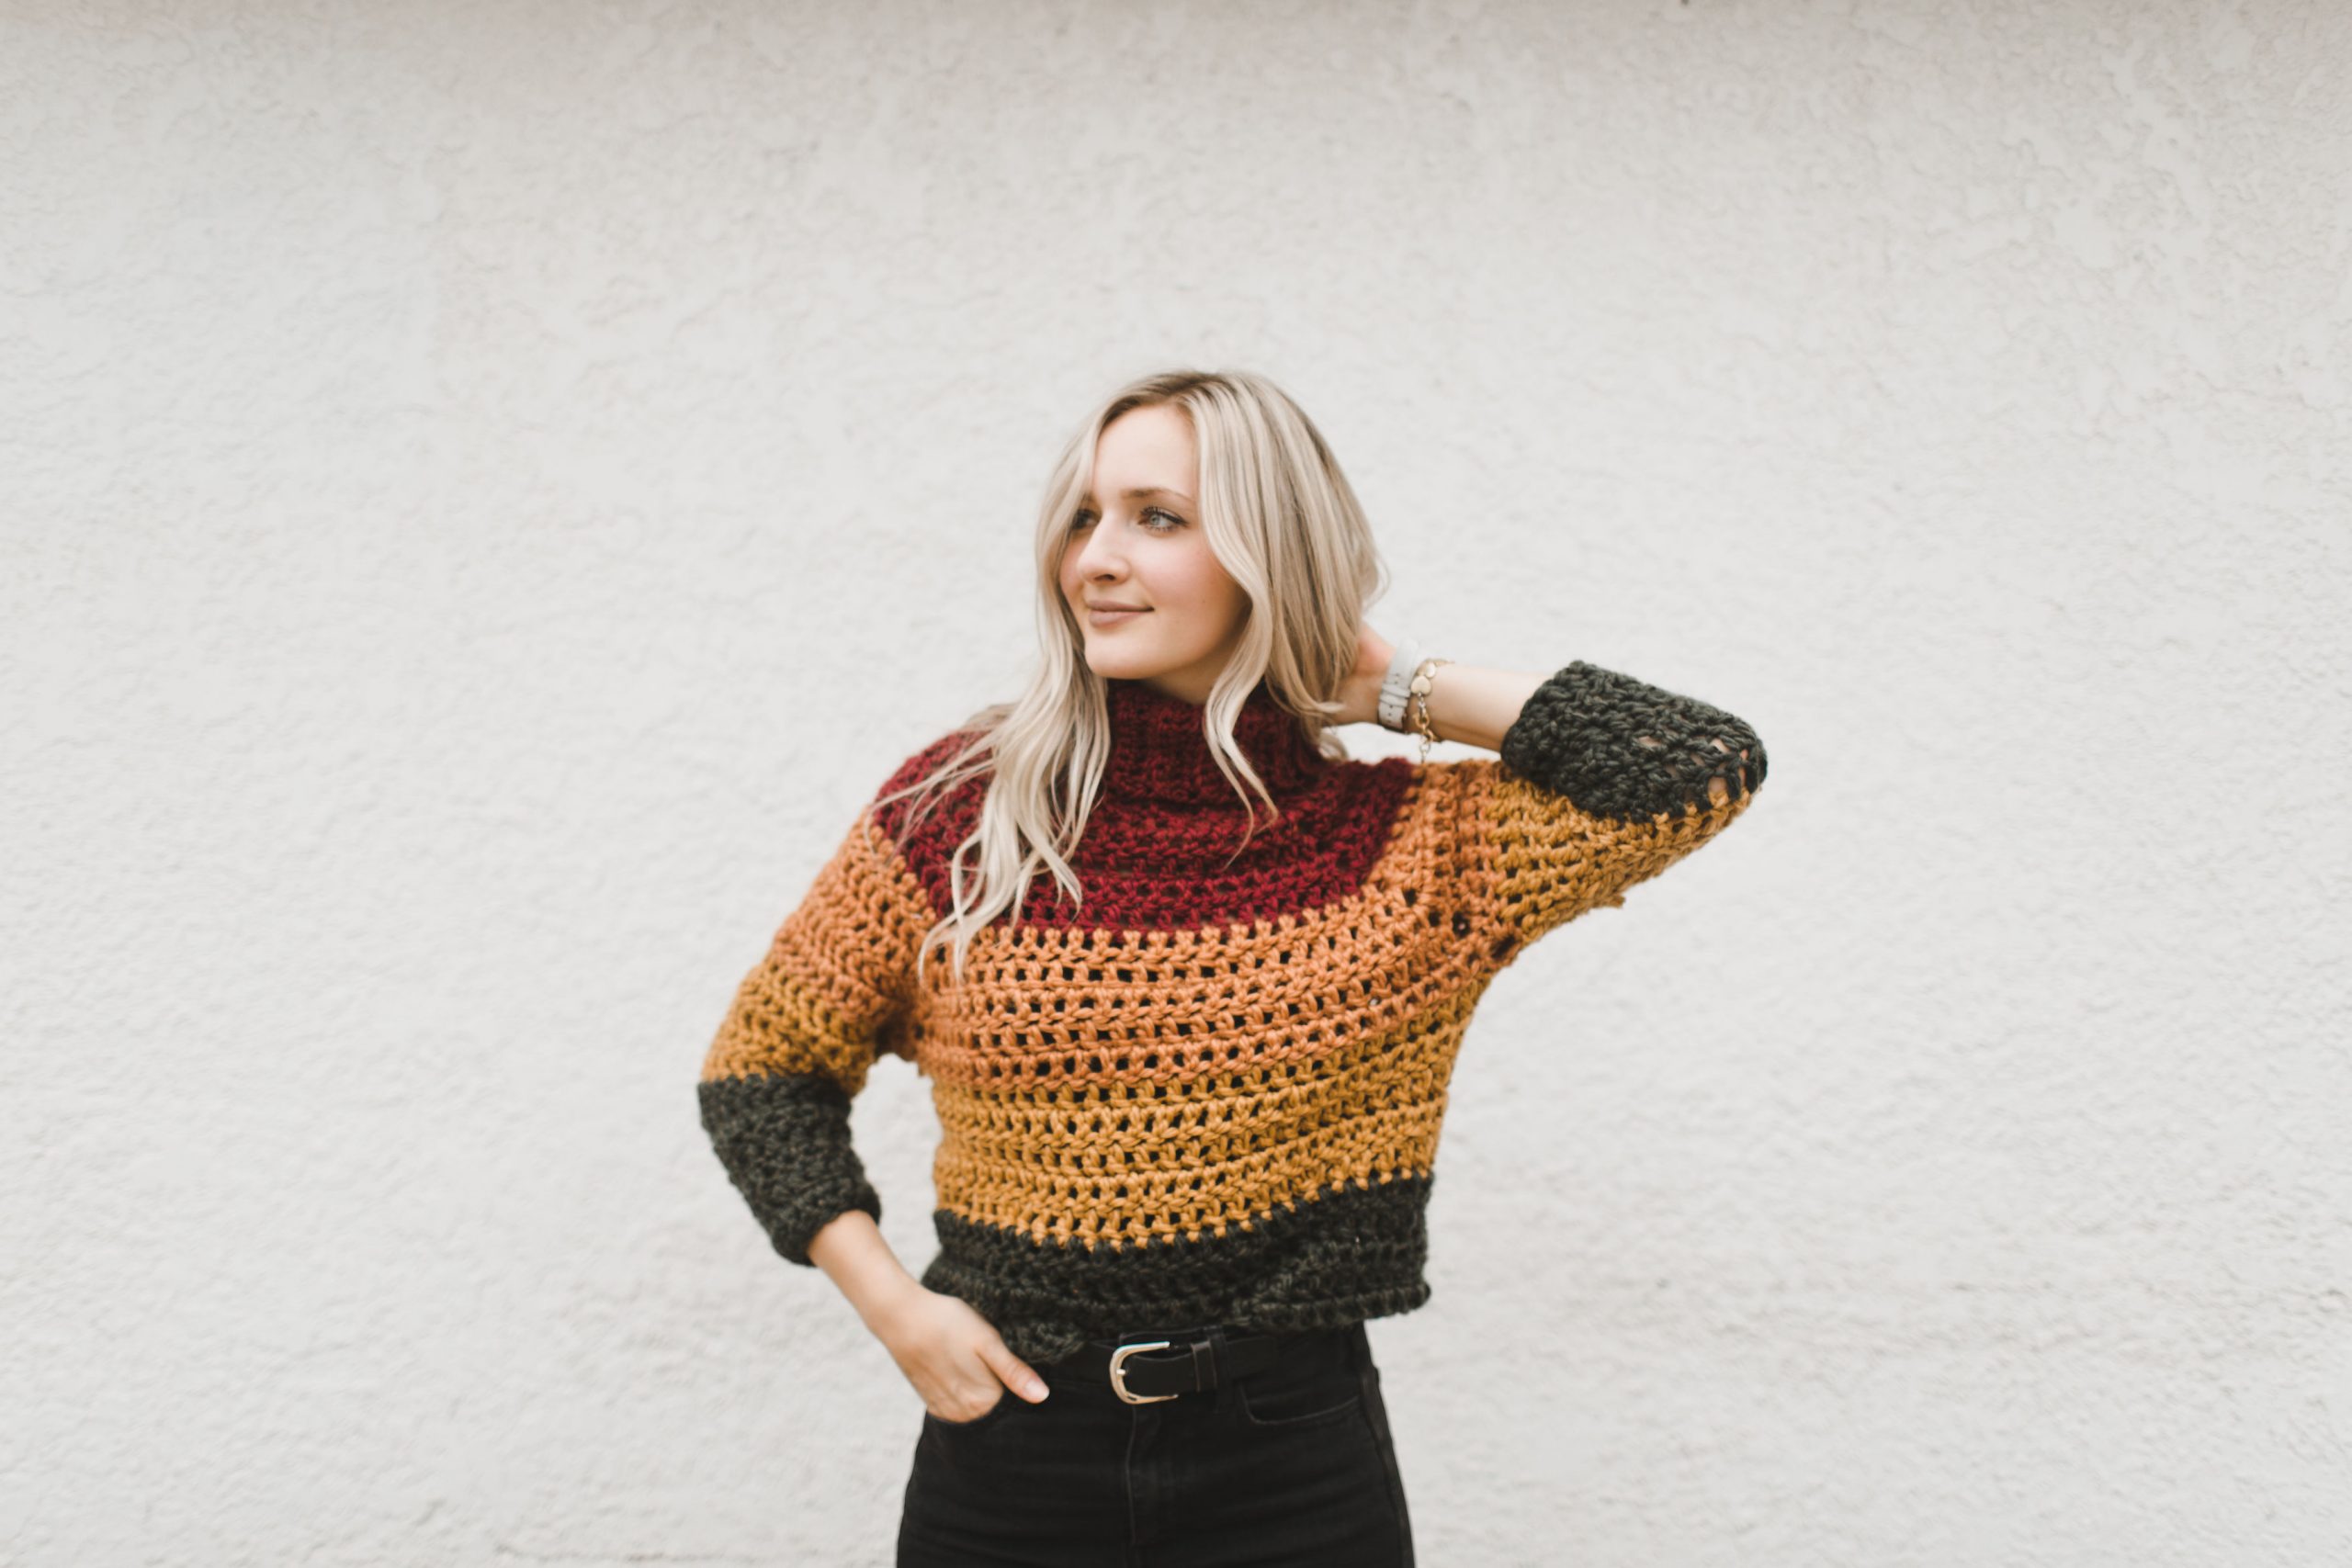
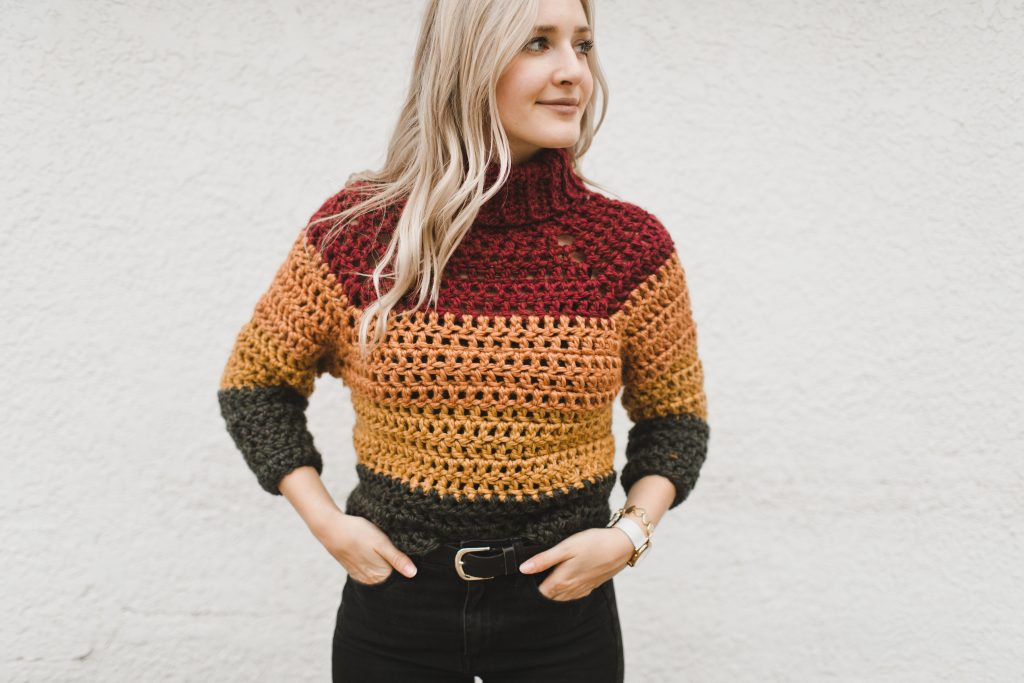
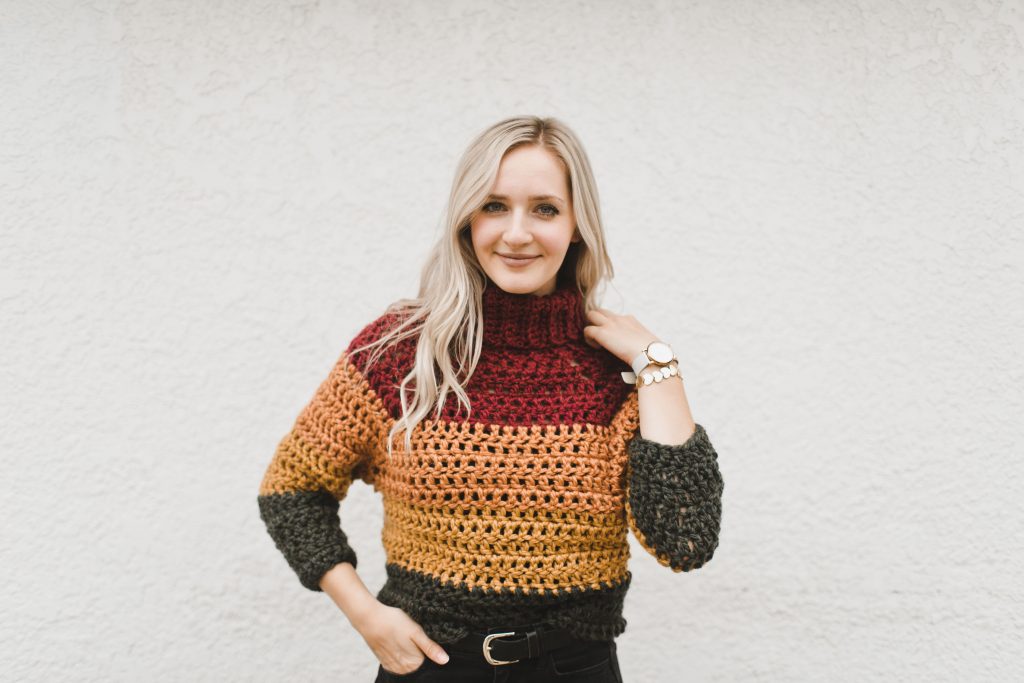
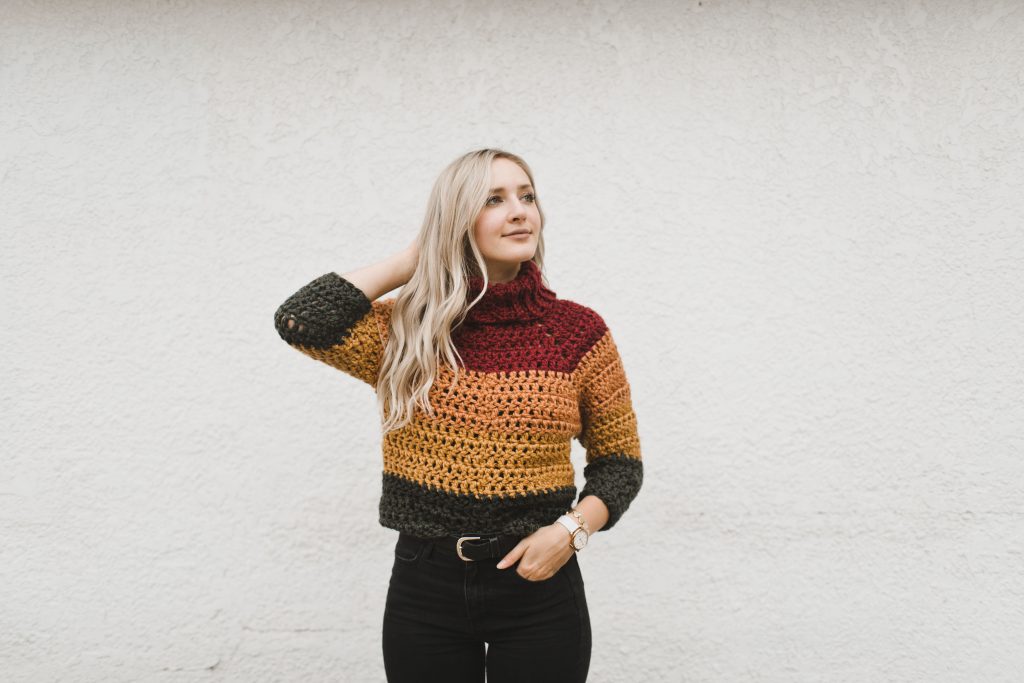
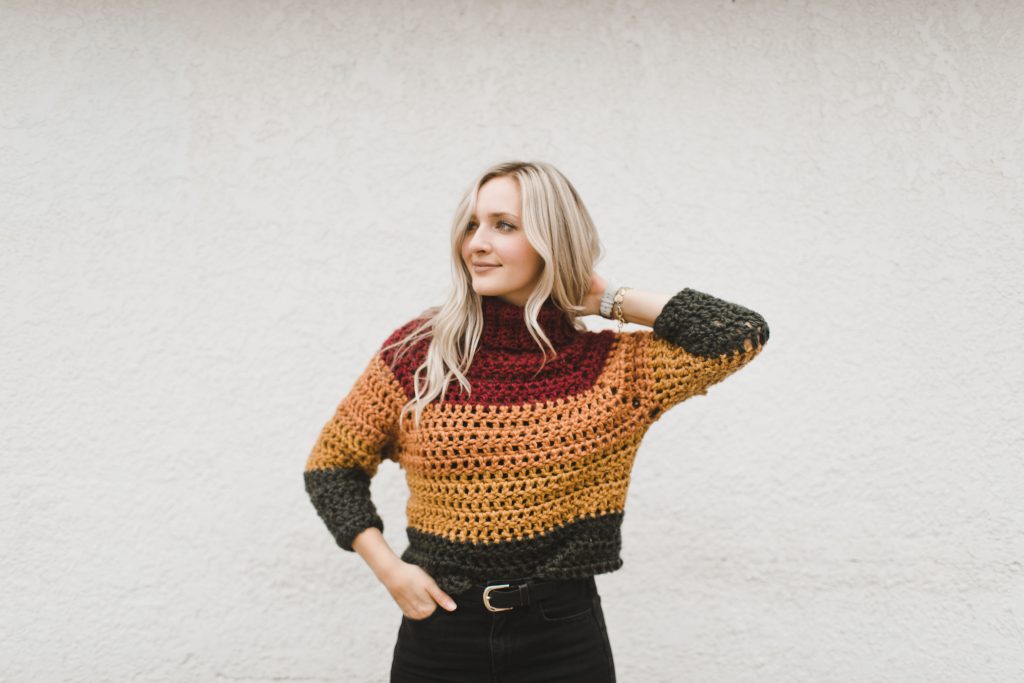
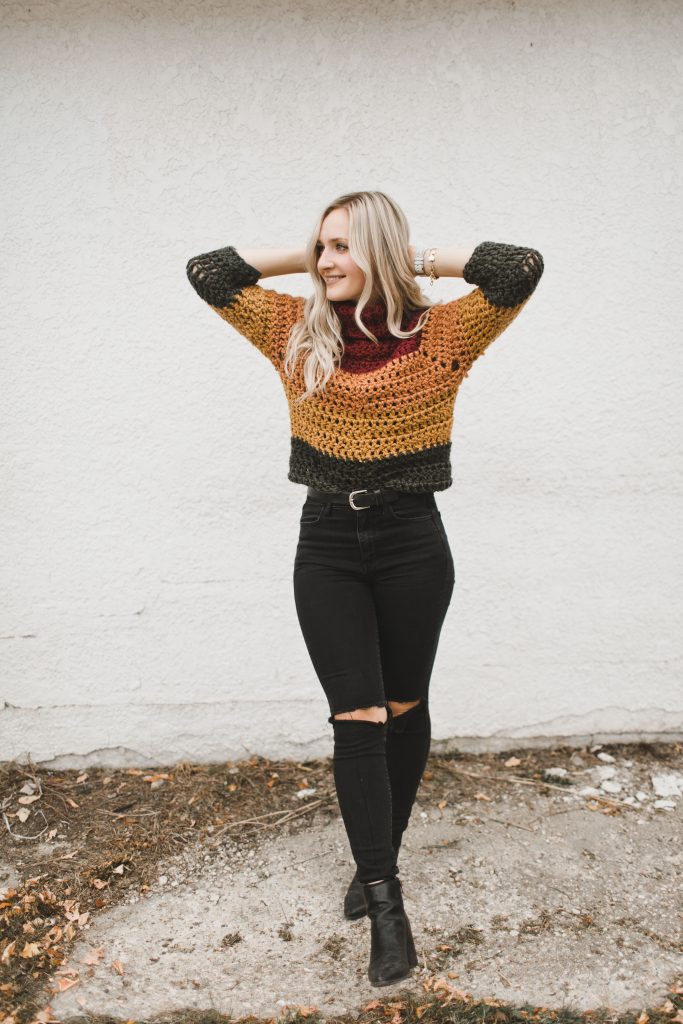
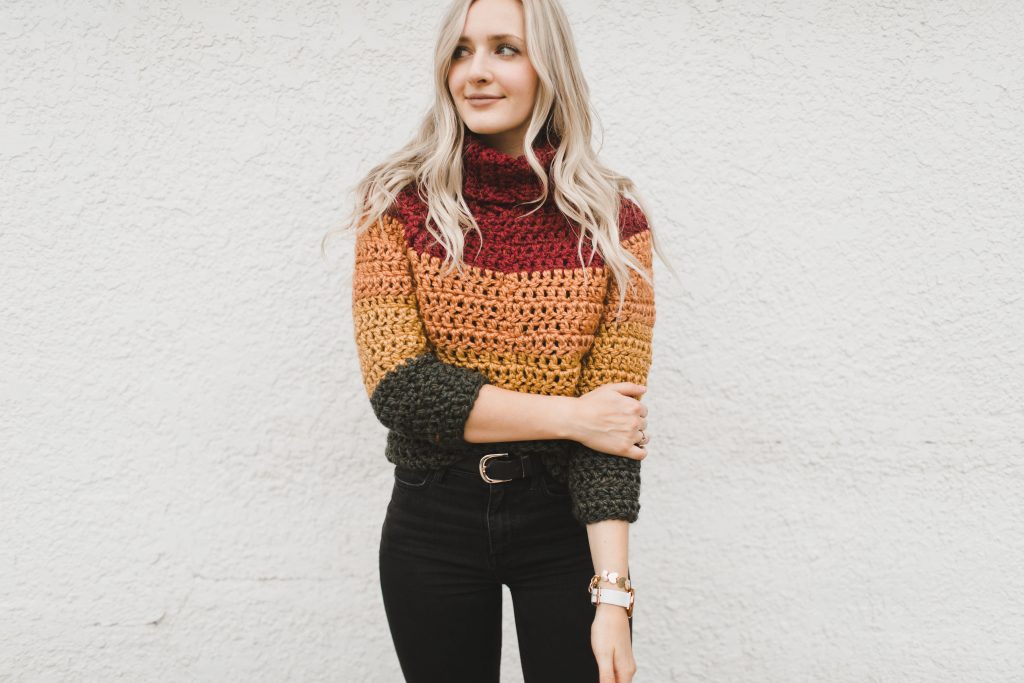
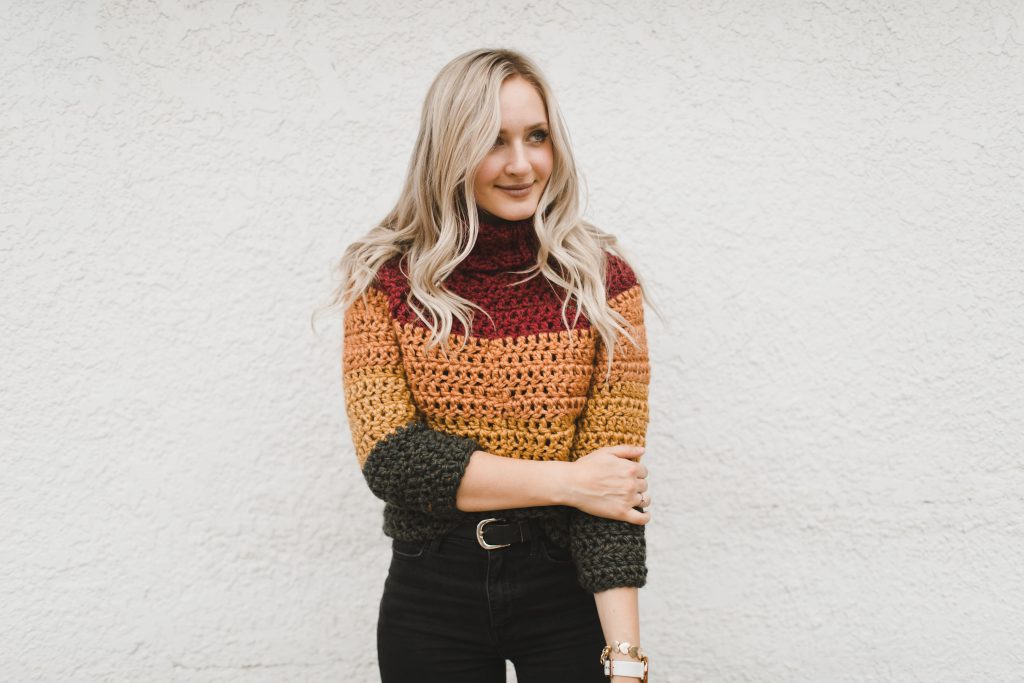
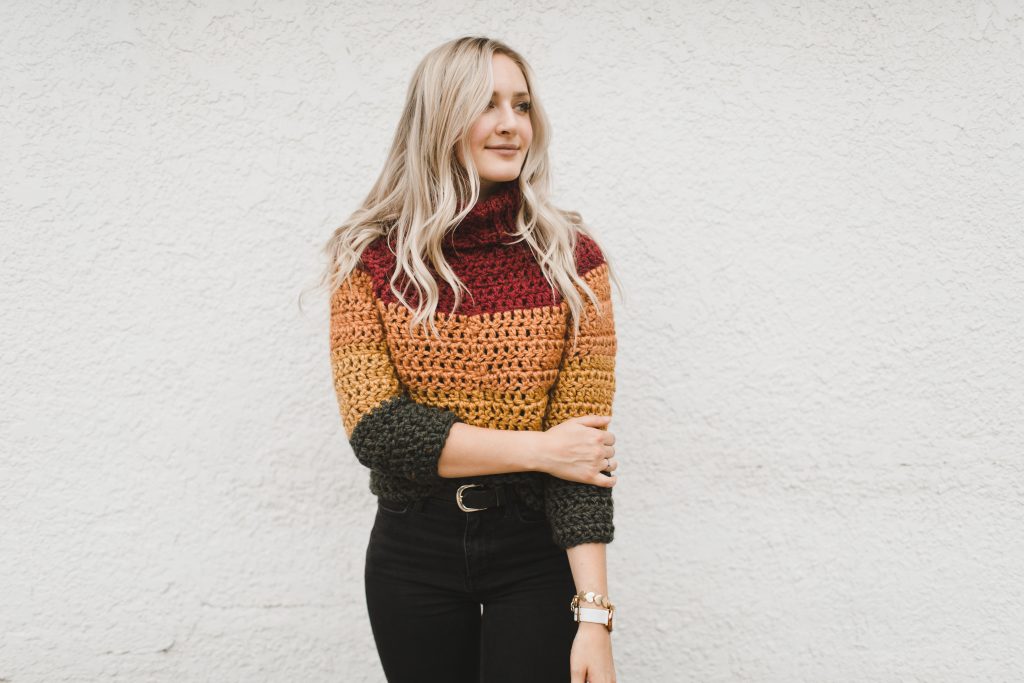
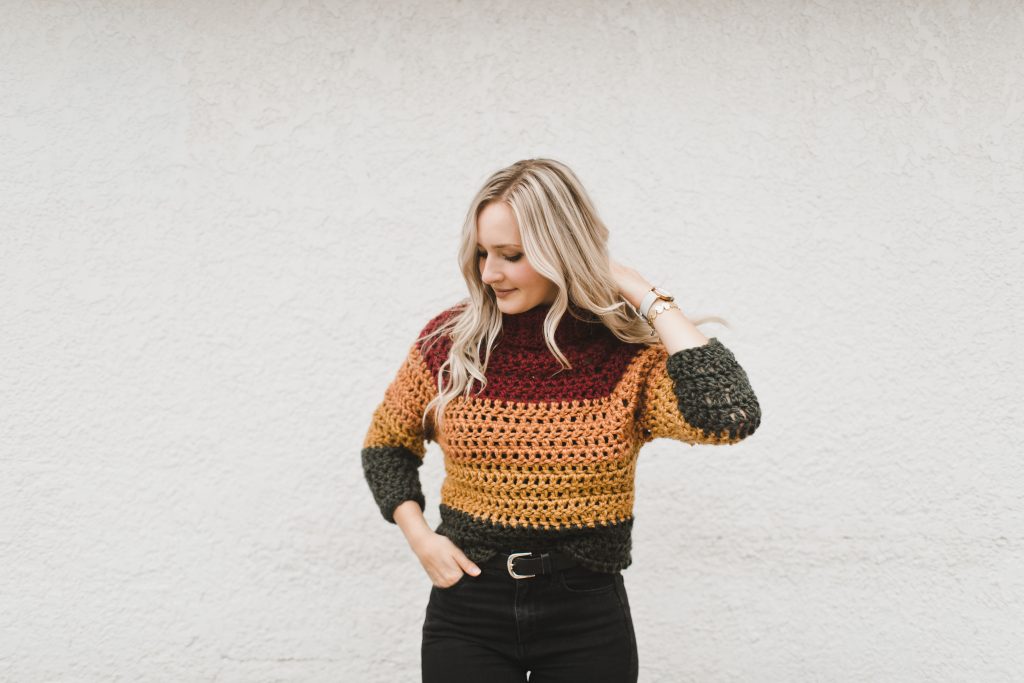
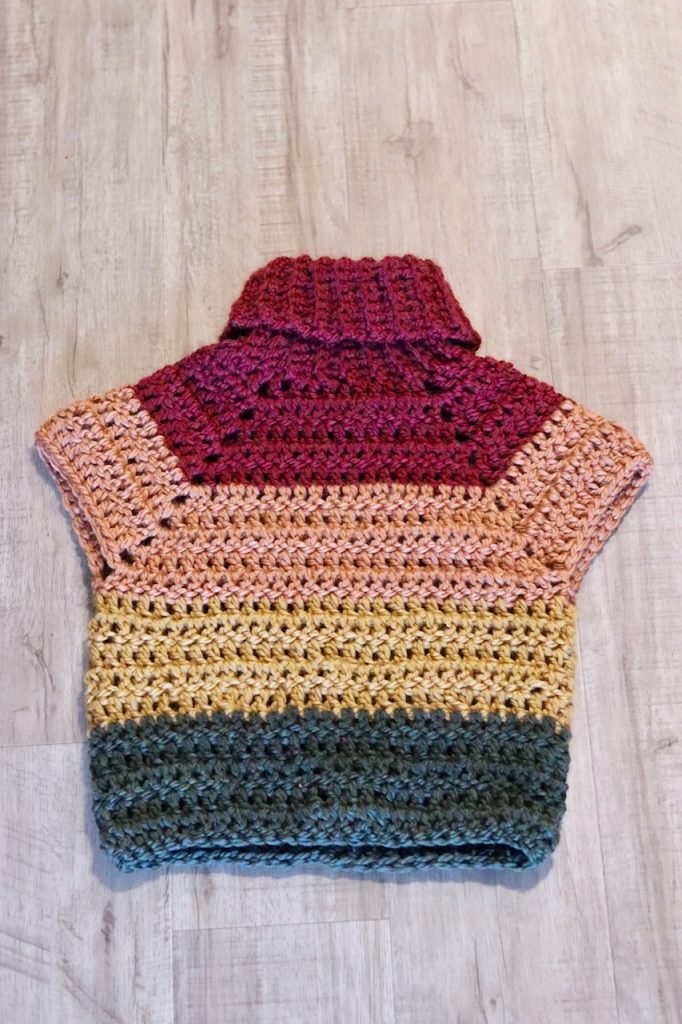
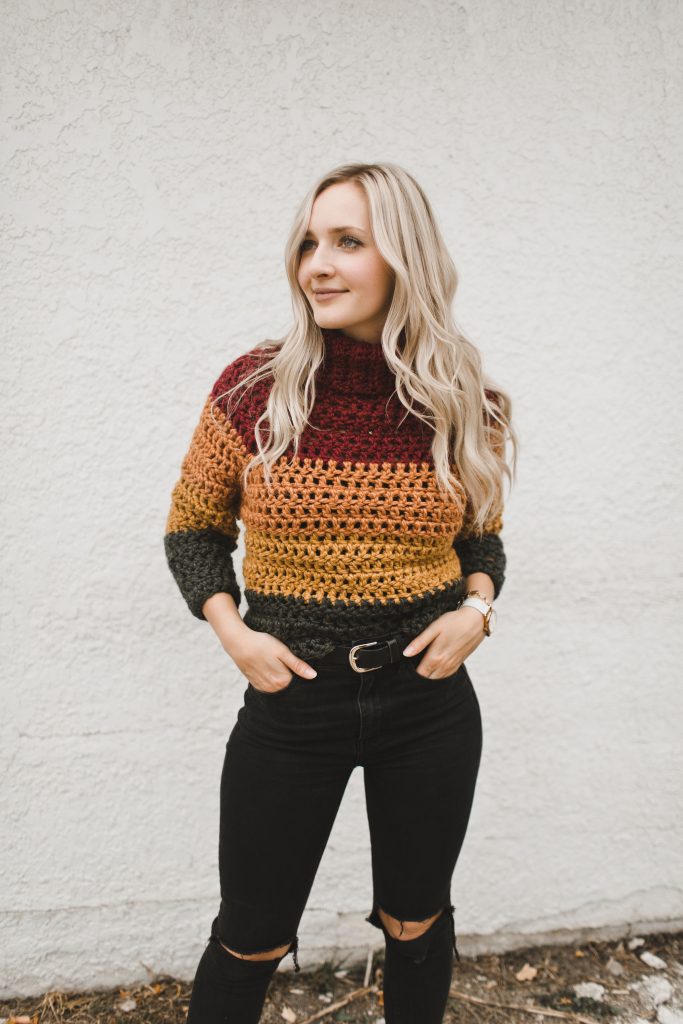
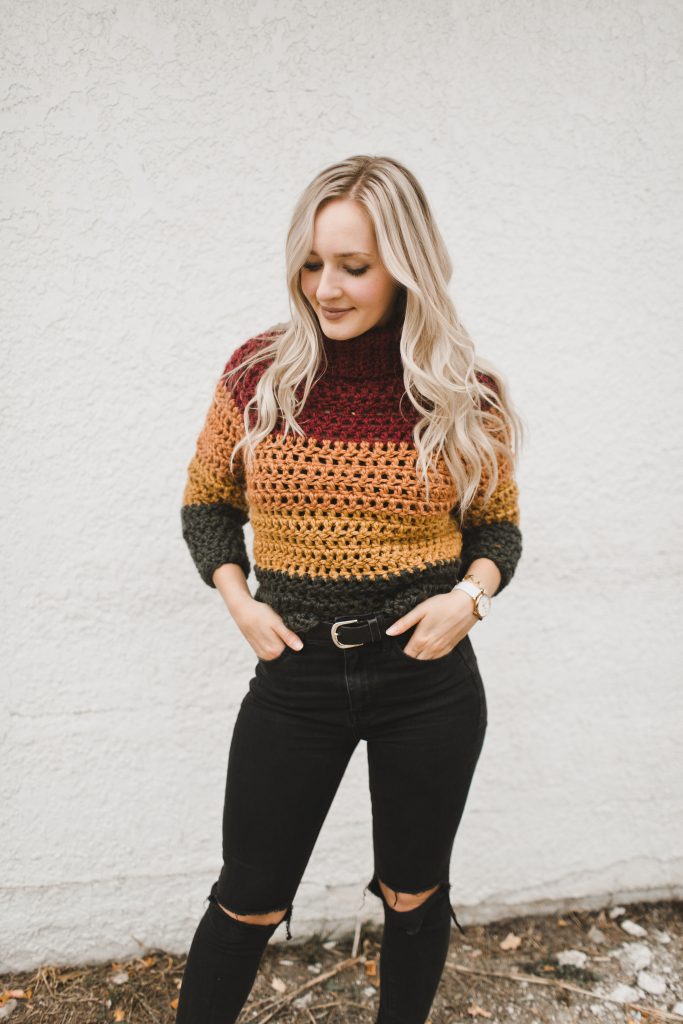
I love this piece because it’s one of my first ever colour-block projects and the first time I used some colours that were outside of my comfort zone. I usually avoid colour but I thought I would use up some of the brights in my stash. I named it the Autumn Stripes raglan for obvious reasons! I wear mine with high-waisted jeans and a chunky belt so that it doesn’t look like you’re wearing a potato sack. It’s more fitted and when it’s worn cropped like this, it helps define your waist to make it have more of a flattering fit. I used Michael’s Cozy Wool yarn, however you could sub in Wool-Ease Thick & Quick – just note that you may have to use a smaller hook since Wool-Ease Thick & Quick is slightly thicker than Cozy Wool. (Continue below to Yarn section for more info on yarn subs!) You could finish this entire sweater in a weekend, and it’s a really satisfying project to make since you see such instant results.
If you’re into this sweater, make sure to check out the Double Crochet All Day Raglan, using Wool-Ease Thick & Quick. It’s a similar design but with much deeper raglan increases and a longer body with a more relaxed fit.
Construction
I’m going to show you some of the photos that are included in the pattern so that you can get a really clear idea of how to construct this sweater!
First of all, it’s written for 9 different sizes, ranging from a 30″ finished bust to a 62.5″ finished bust! It’s meant to be worn with 1-2″ of positive ease, which means it fits bust sizes from approx. 28-60″ bust.
I include instructions on which rows to change colours, in case you want to make it identical to mine; however, you can make this sweater in any colours you want and in any variety of striping, if you choose to do striping!
This sweater is a really simple top-down construction with raglan shaping, meaning it’s totally seamless. No seaming panels together.. it’s made all in one piece! Another bonus of this type of construction is that the only ends you’ll have to weave are the ones from your first and last stitch as always, and wherever you choose to change the colours! If you’ve never made a top-down sweater before, I promise you – it’s even easier than seamed sweaters! I didn’t believe it myself until I tried it. Now, top-down is my go-to.
The only stitches you need to know are single crochet (for the cowl) and double crochet for the remainder of the sweater.
A lot of my testers had never made a top-down sweater before, and some had never even made a sweater of any type before! None of them had any questions at all for me during testing and they all ended up with really lovely sweaters. I find that a silent test is *sometimes* the best type of test because it means nobody’s having issues :p The only messages I received were photos with their progress posted on Instagram and everybody seemed to work their sweaters up really easily without any issues. It was perfect.
I made my version slightly cropped, but of course you could make this sweater any length you like. You will just have to account for the fact that this may throw off the striping sequence, giving you a larger colour block as the bottom colour. If you know you want to add X inches to your sweater, use the gauge to figure out how many extra rows this would be, and then split it up evenly over all of your colours.
Let’s go through the entire sweater, bit by bit:
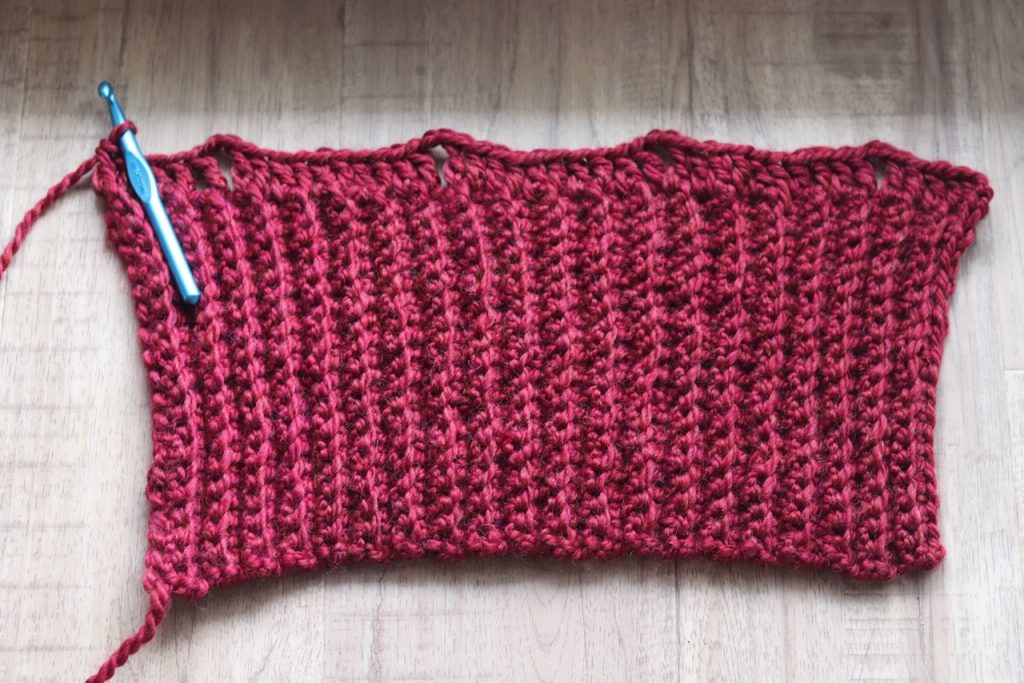
First, we work very simple back-and-forth rows until we reach our proper cowl length, then we turn it 90 degrees to work 1 row into the edge stitches as shown below. We add 4 chain spaces at equal distances apart to this row which will become the raglan increase lines that you see going from the neckline to the underarm.
Let’s see what the next step is!
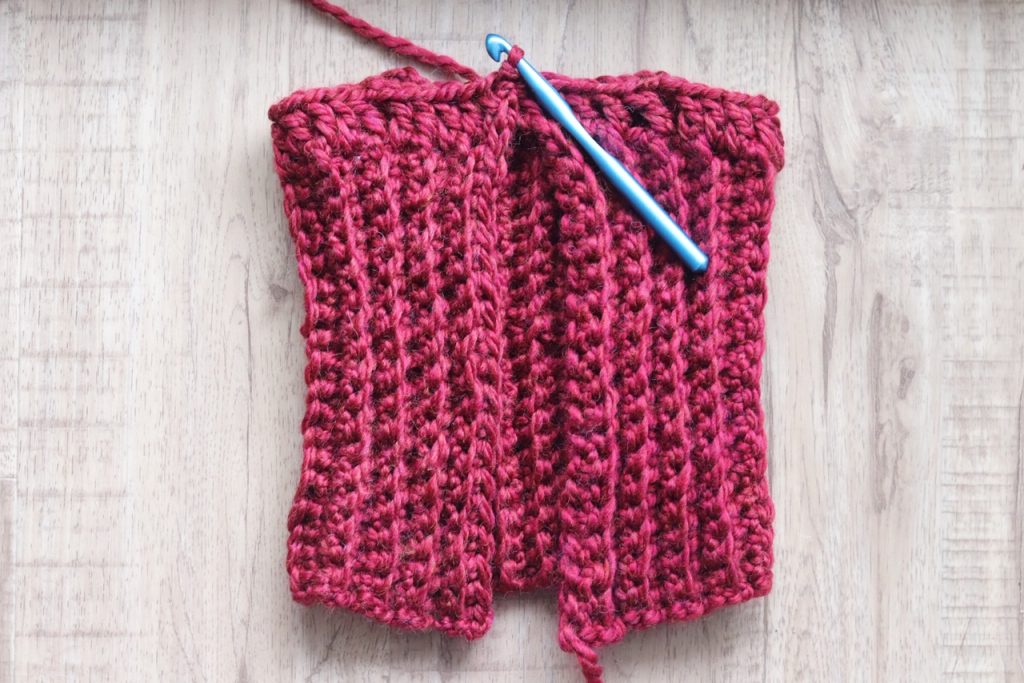
Still easy-peasy – all we do here is connect our work with a slip stitch so we can start working in the round, and then we seam up the cowl using the tail from the beginning chain.
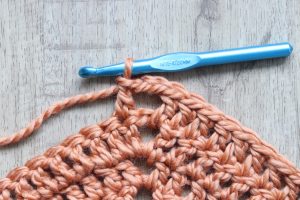
Next, we just keep increasing in each corner, and it works out to look like this:
We continue this until we have reached the proper number of sleeve stitches. The next step is to increase only on the front and back, and not on the sleeves anymore. We do this by only working one stitch into the chain-space instead of 2, as shown below.

Work will look like this once we’ve finished the yoke! The next step is to skip all of the sleeve stitches to make sleeve openings.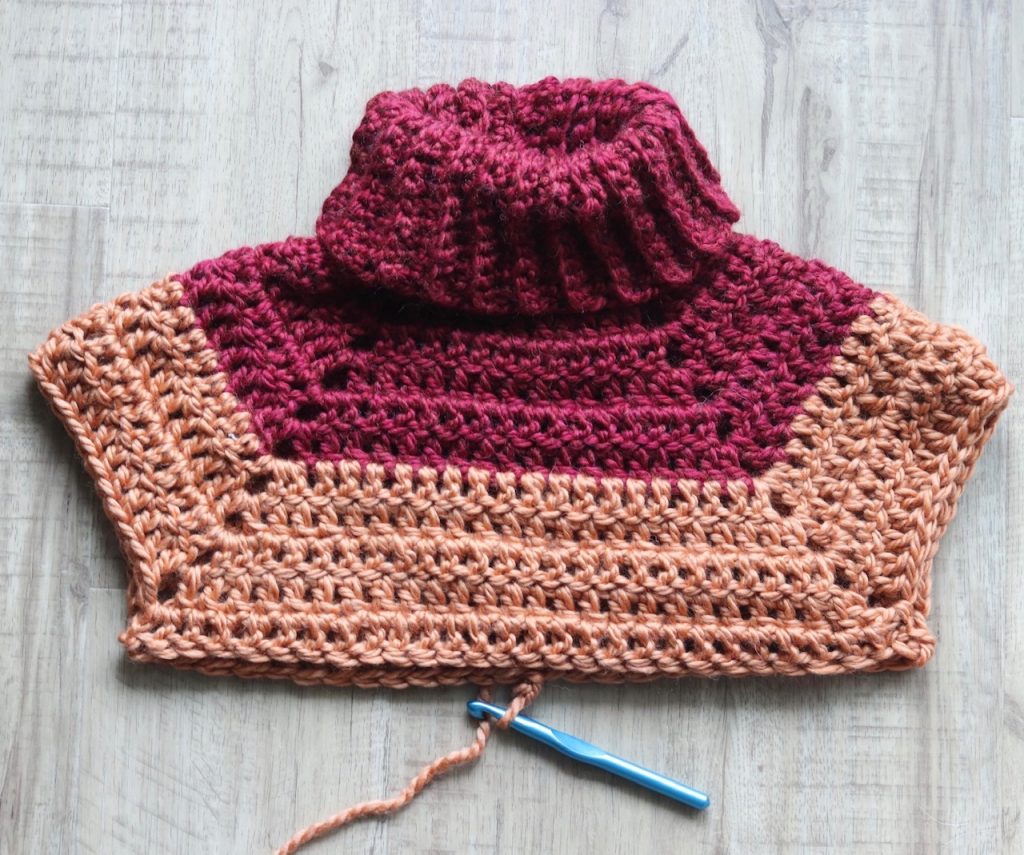
This is what it looks like when you skip the sleeve edge: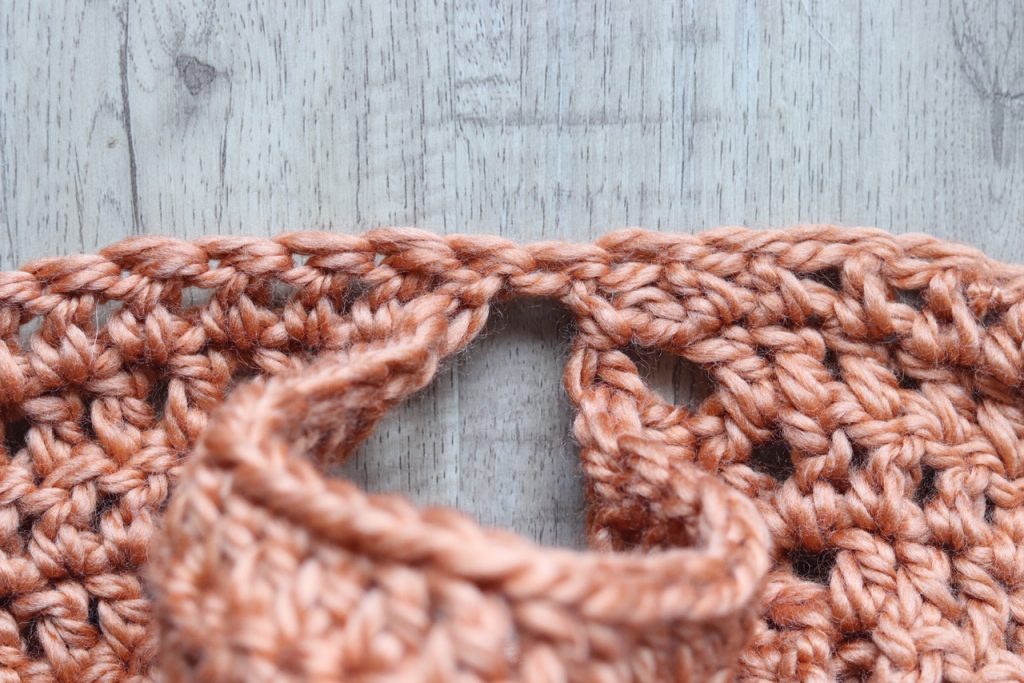 I ended up changing my colour right after the join.
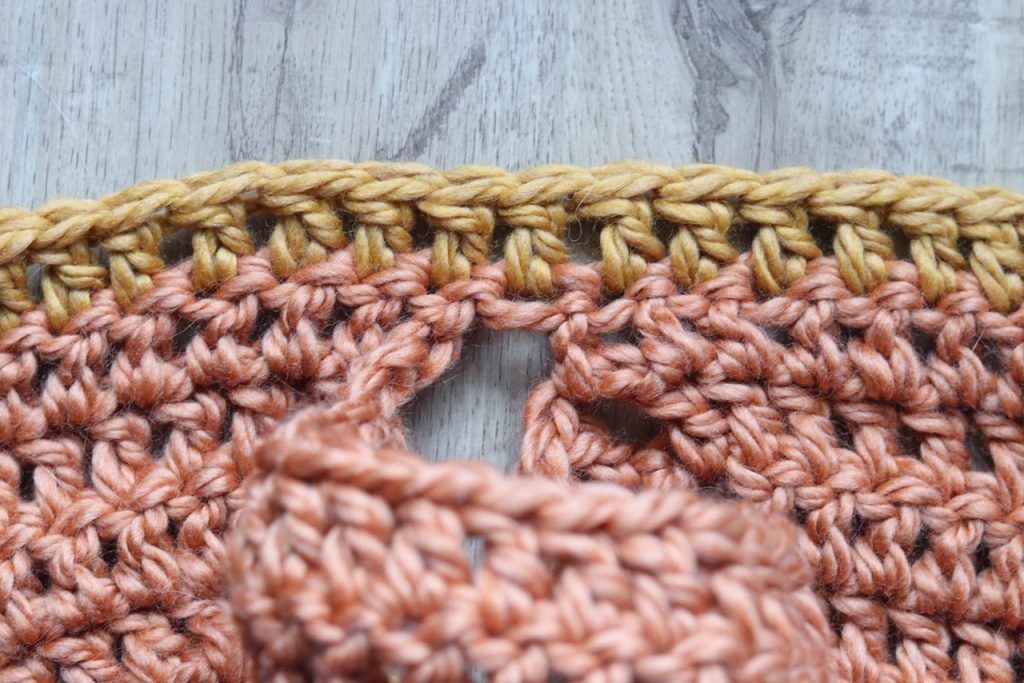
This is what the yoke + body looks like:
After this, we work into the stitches around the sleeves and make a few decreases until we get to the wrist!
That’s it!
Yarn
I used Cozy Wool from Michael’s for this project. I know this yarn isn’t available everywhere, and if you don’t have a Michael’s near-by then it will likely be hard to find! Don’t worry though, you can use any bulky weight yarn. Just make sure you match gauge and you should be good to go!
For this sweater, I chose these 4 colours: Merlot, Harvest, Goldenrod, Moss Green.
Yardage for sizes XS (S, M, L, XL) (2X, 3X, 4X, 5X)
C1: Merlot – Top Colour (Including Cowl) – 95 (150, 150, 150, 165) (165, 215, 235, 235) yds
C2: Harvest – 65 (105, 130, 130, 170) (170, 185, 195, 195) yds
C3: Goldenrod – 80 (110, 145, 160, 200) (225, 245, 295, 305) yds
C4: Moss Green – Bottom Colour – 125 (115, 135, 170, 185) (225, 245, 295, 305) yds
For 1-colour sweater, total yardage is: 365 (480, 560, 610, 720) (775, 880, 980, 995)
Or similar category 6, super bulky weight (50% acrylic/50% wool) yarn that matches gauge.
This yarn is 50% acrylic and 50% wool, which is a great fiber composition because the acrylic provides durability and smoothness, and the wool provides warmth.
Like I said, you can use Wool-Ease Thick & Quick, but you will likely have to go down a hook size to accommodate this thicker fiber. Some of my testers used Wool-Ease Thick & Quick, some used worsted weight yarn that they held double, and both of these modifications seemed to work out great for them.
You can find the pattern in these places:
On my website here.
On Ravelry here.
On Etsy here.
(Use the code “PATTERN10” for 10% off all patterns)
I can’t wait to see your WIPs! Make sure to tag me @knitsnknotswpg and use the pattern hashtag #AutumnStripesRaglan so that everyone can see your projects!
Happy crocheting,
Janine xo
You May Also Like


